Everything posted by Jero Prieto
-
Hey Ben, Thanks for taking the time to read and reply to my post—I really appreciate it, and thanks for suggesting I share it here. I totally agree on Canon’s in‑camera color—it isn’t billboard‑accurate, but it’s the most pleasing out of the box. I hadn’t realized major productions still use in‑housing filters on Nauticam housings to tame their color cast; I’ll look into that. In our tests, my friend operating the camera set a manual white balance on the Kelvin scale—I’ll confirm the exact value. It feels a bit retro to stack glass in front of a modern sensor. I did the same with my Sony rigs from 2005 to 2009, but in 2025 it seems counter‑intuitive. Regarding BBC‑style saturation (Ocean, Blue Planets), I believe much of that punch comes from shooting on RED sensors with their extended latitude and then aggressively grading in post. I have no issue with their surface shots—those baitball colors are superb. However, at depth they’re effectively “bringing back” reds filtered out by water, and I don’t see how this can be done effectively on a RED setup, especially after working with the files from our recent dives in Cabo Pulmo. I’m a big fan of vibrant color and dramatic chiaroscuro underwater—nothing beats a rich, directional key light against inky shadows. To avoid a forced look, I rely heavily on the scopes in DaVinci Resolve. For example, here’s how I use the vectorscope’s 2× zoom to nail saturation without clipping: Using the Vectorscope 2× Zoom in DaVinci Resolve Open the Scopes panel (Workspace → Scopes). Click the Vectorscope icon, then click the magnifier twice to engage 2× zoom. This enlarges the color plot so you can see individual saturation vectors more clearly. Enable the “Skin Tone Line” overlay (right‑click the vectorscope → Show Skin Tone Line). While adjusting the Hue vs. Hue and Hue vs. Sat curves, watch that your color points stay within the broadcast‑legal circle and align with the skin‑tone line when balancing midtones. Use the zoomed‑in boundary as a visual “fence” to prevent oversaturation—if your vectors push past the circle, dial back your curves or lower the Chroma Gain.
-
Hey Davide, Thanks for reviewing my inital findings and making such precise and accurate observations. Much appreciated. Custom white balance at depth Yes—I slate with an white balance card every time, nothing fancy. I’ve also bought a neutral‑grey slate (N8) and will test whether it gives more accurate midtones versus pure white. Noise on the R5 II I shot S‑RAW in C‑Log 2 at ISO 800 but unfrotunatley underexposed by about 1-2 stops, which amplified grain. Applying ETTR (Expose To The Right) by overexposing log footage by ~+1.5 stops cuts noise dramatically. My exterior tests confirm this aligns with Canon’s and third‑party tutorials on noise management in log. RED color science I didn’t use any RED LUTs. Instead, in DaVinci Resolve I applied a Color Space Transform (Log3G10 → Rec.709), then eyeballed contrast and white balance to match Canon’s C‑Log2 Rec.709. 1DX II codec robustness The 1DX II’s Motion JPEG intra‑frame codec (8‑bit) remains surprisingly forgiving if exposed correctly. I’ve run it since 2016 as a reliable B‑cam for quick 4K workflows. The R5 M2’s 4K Fine (C‑Log 2) image feels very similar, though it tops out at 30 fps in 4K rather than 60 fps. Anyway, for me, color has become the most important factor when choosing a setup, especially for dives below 10 meters. Above that depth, most setups will do the job, the differences are minimal. But once you go deeper, color becomes the biggest challenge—at least for me—and as you said, it's very subjective (should we present the subjects in their real color or the color your eyes see at that depth?). That said, color is now my primary tool for creating drama or drawing focus within a shot. I’ve always dreamed of expressing underwater scenes using the chiaroscuro approach to color and light, inspired by artists like Rembrandt, Vermeer, Velazquez and Caravaggio. I don’t know if I’ll ever fully achieve that level of expression with underwater footage, but that artistic ambition keeps pushing me to experiment, learn, and refine every dive/edit. Let me know if you’d like any deeper dives on these topics.
-
Many thanks!!
-
I’m thrilled to join this collaborative, creative, and deeply talented community. Since 2008, I’ve been working as an underwater videographer and PADI-certified dive instructor, capturing vibrant marine ecosystems. Alongside my filmmaking, I’ve volunteered my time and skills with Pelagic Life, helping to document—and ultimately protect—pelagic species and their habitats in Mexico. My experience ranges from multi-day liveaboard expeditions and scientific survey dives to training new divers. I’m passionate about combining storytelling and education to inspire others to value and conserve our oceans, and I can’t wait to learn from—and contribute to—this remarkable group. https://www.pelagiclife.org/
-
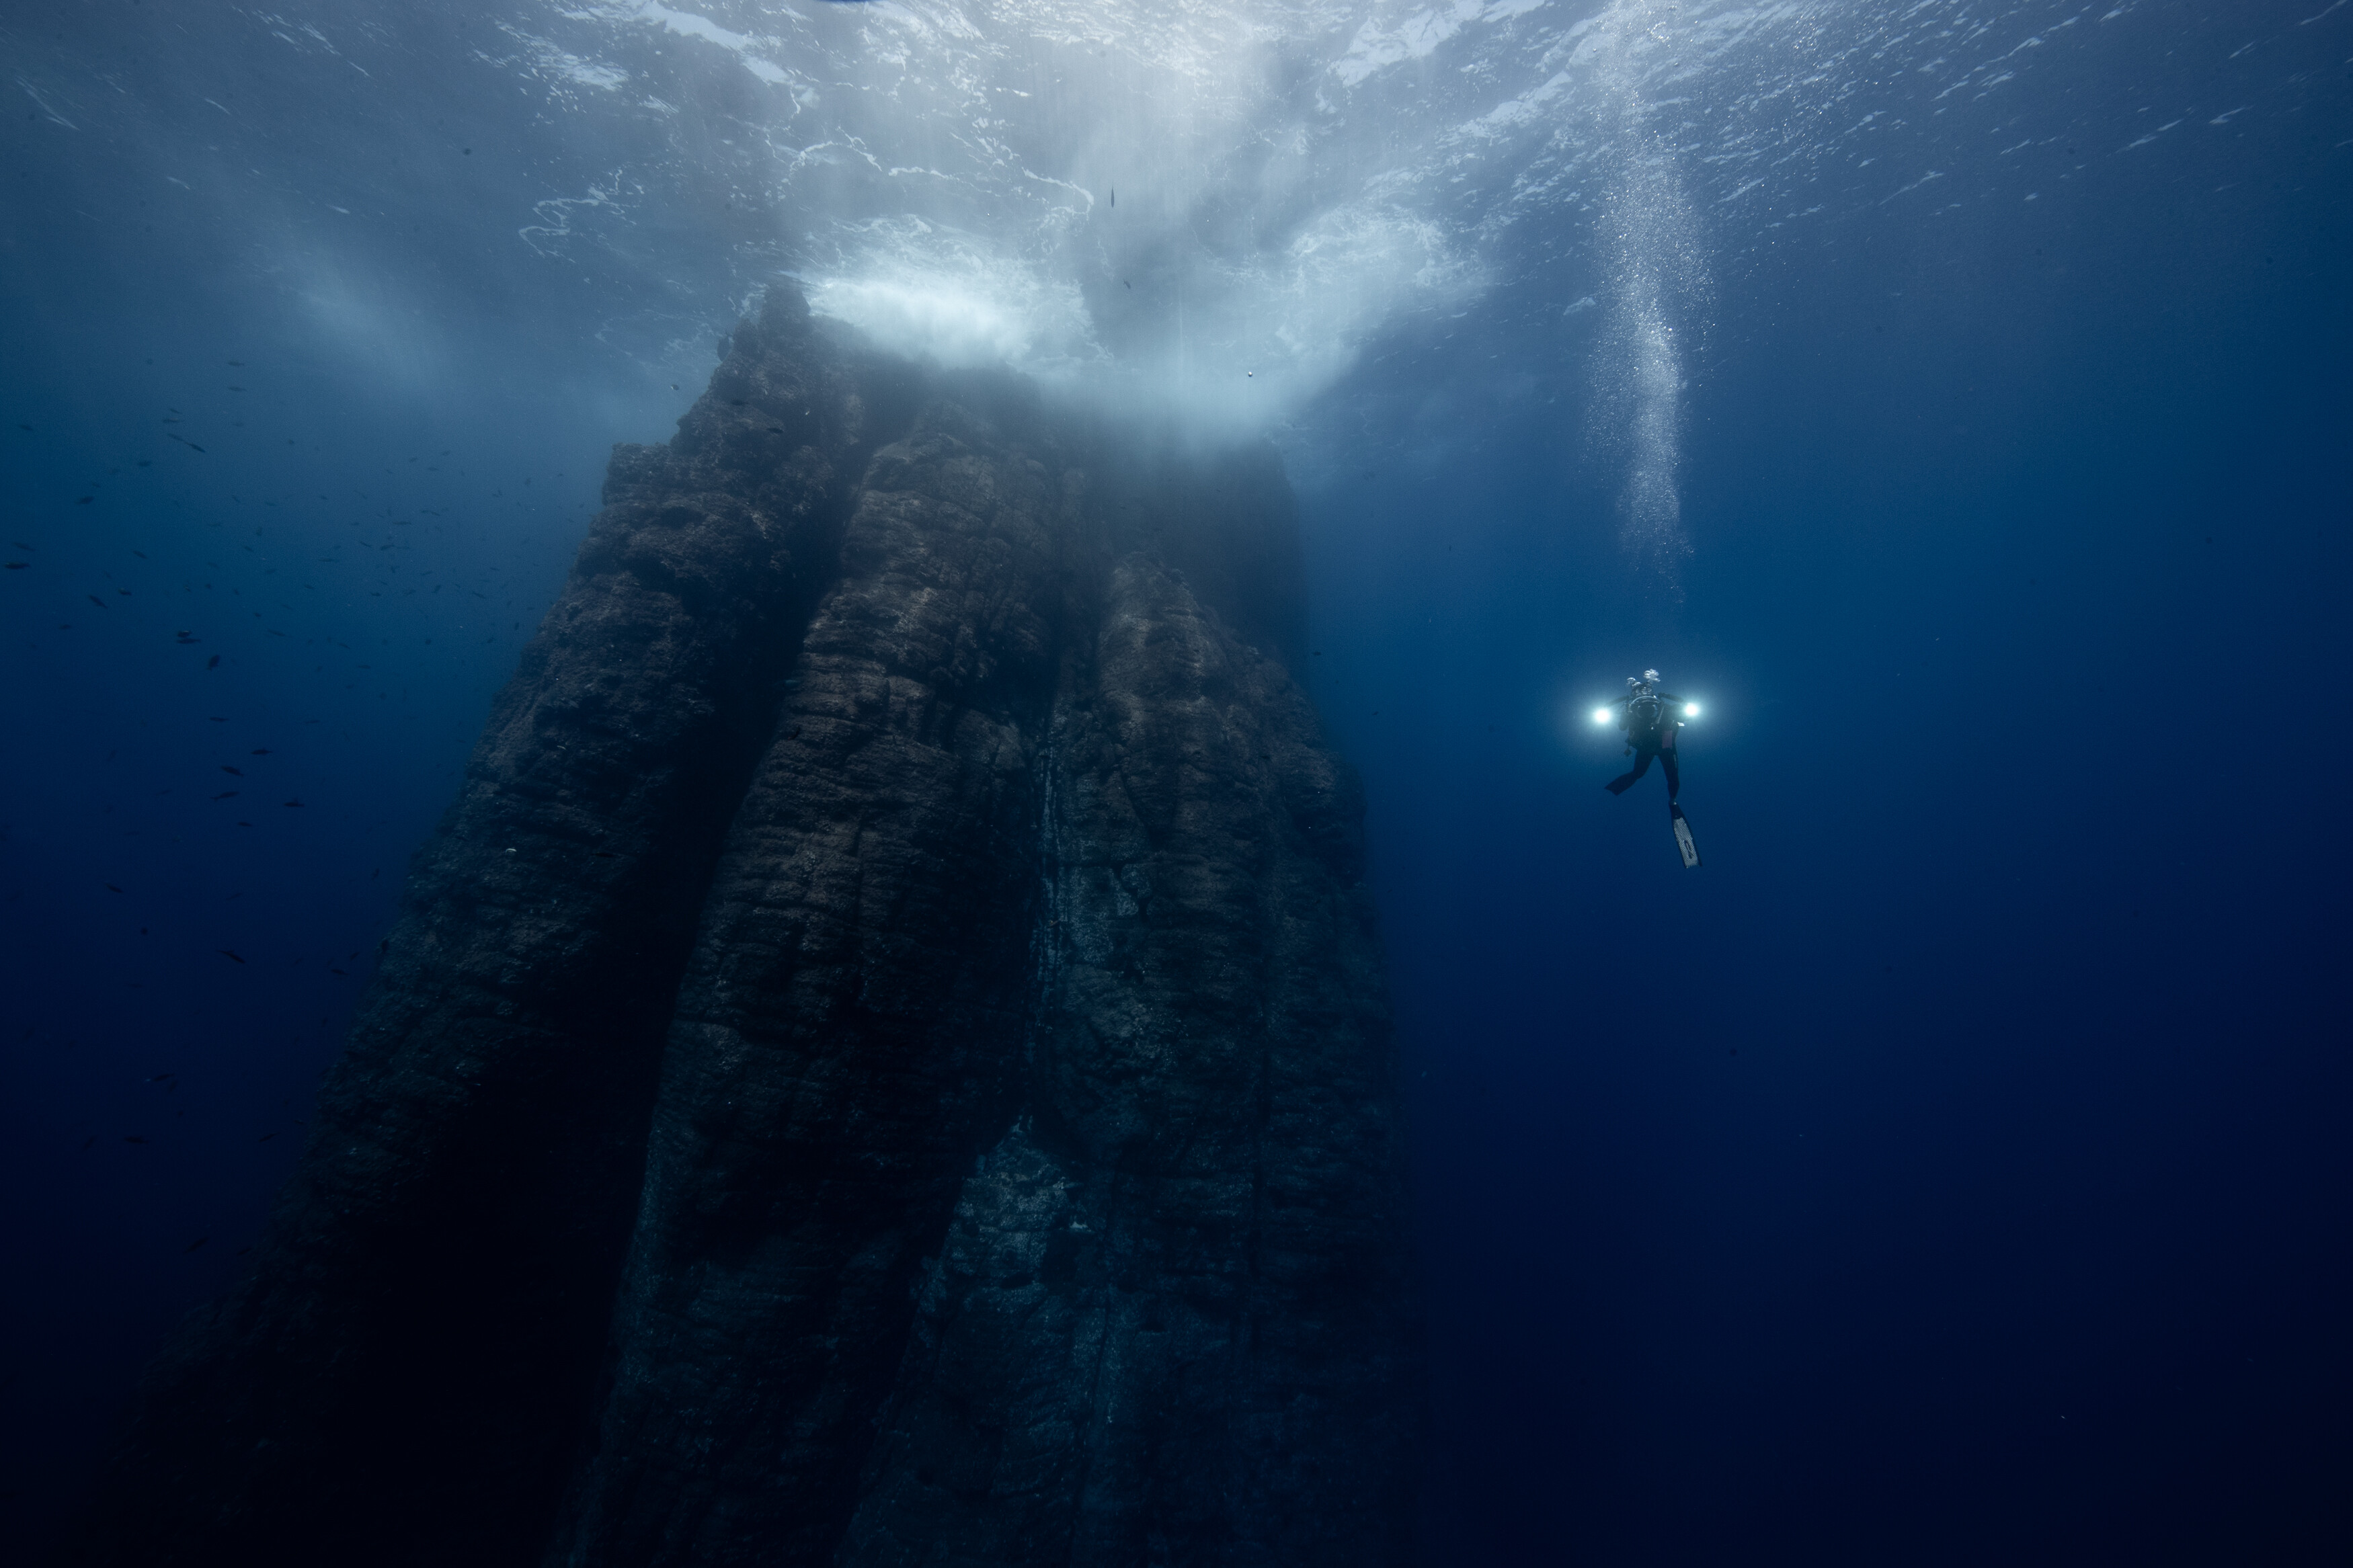
Underwater Camera Systems: A Comparative (in the Field) Performance Review This was a weekend project, and it surely has some flaws and biases. Just giving our perspective on what we saw with these results. Objective: Evaluate and compare three underwater video systems RED Helium (7K RAW, 60 fps, Log; ISO 800; Canon 16–35 mm) Canon R5 Mark II (4K sRAW, 60 fps, Log 2; ISO 800; Canon 10–20 mm) Canon 1D X Mark II (4K Fine, 60 fps; ISO 800; Canon 24-70 mm) all housed in Nauticam, with post production in DaVinci Resolve 20. Locations & Conditions • La Reina (Cerralvo Island, Mexico): Depth 2-5 m; visibility 25 m; open ocean blue; strong sunlight; friendly giant manta. • El Vencedor (Cabo Pulmo, Mexico): Depth 14 m; visibility 10 m; turbid, greenish blue; high activity (8+ bull sharks). Methodology 1. Standard Settings: All systems at ISO 800, auto (or custom) white balance, Log profiles (except Canon 1D X without Log). Focal length varied per dive. 2. Shot Pairing: Captured simultaneous or near simultaneous clips from two systems per scene; matched framing, distance, angle, and light as closely as possible. 3. Post Processing: DaVinci Resolve 20; primary correction (balance, contrast), secondary grading (hue/saturation), spatial denoise as needed. Test Sequences 1. Giant Manta (Surface): Canon R5 II, RED: https://vimeo.com/1102366224 2. Manta + Diver: RED, Canon R5 II: https://vimeo.com/1102366387 3. Bullsharks: RED, Canon R5 II, Canon 1DX MII: https://vimeo.com/1102366448 Metrics & Rankings (for us) 1. Dynamic Range 1st: RED Helium — Exceptional latitude in harsh shadows/highlights; range ≈16 stops. 2nd: Canon R5 II — Robust performance in direct sunlight; range ≈14 stops. 3rd: Canon 1D X II — Limited by Rec.709 gamut; range ≈11 stops. 2. Sharpness (300 % zoom) 1st: RED Helium — Highest resolving power; artifacts negligible at 4K output. 2nd: Canon R5 II — Slightly softer than RED; no perceptible difference at normal viewing distances at 4K output. 3rd: Canon 1D X II — Lowest micro detail; adequate for 4K playback. 3.Color Science 1st: Canon R5 II — Accurate warm tone recovery with custom WB; maximum color grading latitude 2nd: Canon 1D X II — Natural skin tone palette; log less workflow simplified but limited latitude. 3rd: RED Helium — Neutral baseline; struggled with warm hues in turbid water; requires masking or advanced secondary curves especially in deeper dives. 4 .Noise 1st: RED Helium — Cleanest under low light; minimal spatial denoise applied. 2nd: Canon 1D X II — Moderate noise; less than R5 II in underexposed areas. 3rd: Canon R5 II — Most noise at base ISO 800; resolved via spatial denoise, recommended exposure +1 stop. 5. Ergonomics & Cost 1st: Canon 1D X II — Mid-weight/affordable (used market ~$5-7KUSD); ideal entry level. 2nd: Canon R5 II — Most compact; moderate cost ($~12KUSD); superior stabilization. 3rd: RED Helium — Highest cost (~$45K USD) and bulk; professional grade stabilization. Conclusions •RED Helium: Choose for maximal dynamic range and detail (e.g., commercial cinematography). Budget and weight are significant factors. Color grading will have to be taken care by a profesional. •Canon R5 II: Best balance of image quality, color fidelity, and handling. Recommended for independent filmmakers and enthusiasts. •Canon 1D X II: Cost effective entry to 4K underwater; ideal for novices or secondary camera. After all those dives and countless shots from this weekend, it really comes down to being in the right place at the right time. No matter which camera you choose, if you’re closer, steady, and nail your angle and exposure, you’ll walk away with an amazing image. It’s recommended to prioritize positioning, timing, and stability—these elements often contribute more to a standout underwater image than the choice of camera, especially when viewing on a 4K display. Technical Note: Camera and codec choice is usually dictated by the SVOD or broadcaster, based on how well the camera’s image pipeline and recording format hold up under their platform’s compression. It’s not just about the look of the footage on set—it’s about how it survives multiple layers of encoding and streaming at lower bitrates. Platforms like Netflix, Apple TV+, and Disney+ often require primary cameras to capture at least 4K RAW or 10-bit 4:2:2 (RED Helium and R5 Mark II both have these codecs) with wide dynamic range and robust color depth, and favour intra-frame codecs (ProRes, XOCN, REDCODE) over Long GOP or 8‑bit 4:2:0. Ultimately, technical approval depends less on aesthetic appeal and more on how reliably an image holds up across global delivery systems.