Skip to content

Lights, Strobes, and Lighting Technique / Archived topic

My Ikelite Strobe battery rebuild

Started by K9Shadow ·

  • 18Posts
  • 18Replies

Read-only discussion

My Ikelite Strobe battery rebuild

18 posts
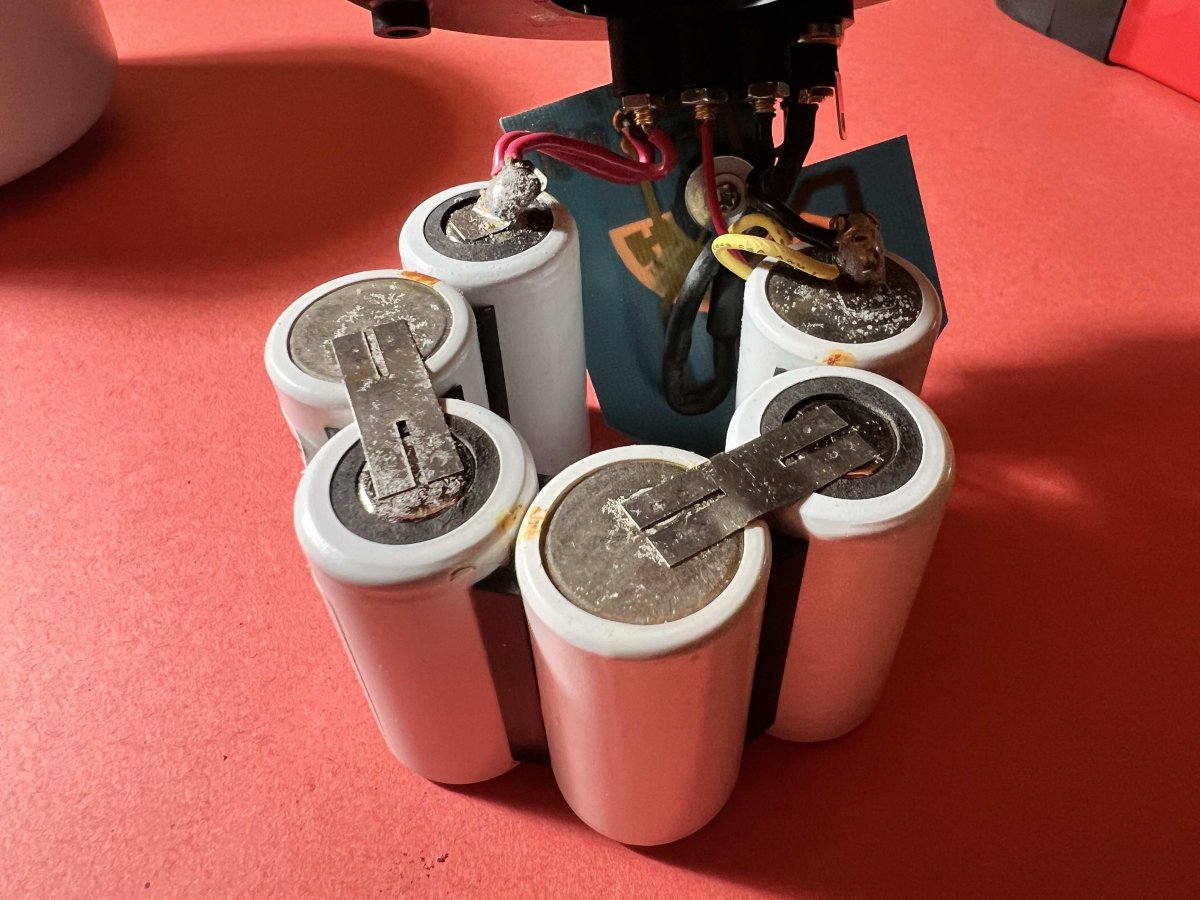
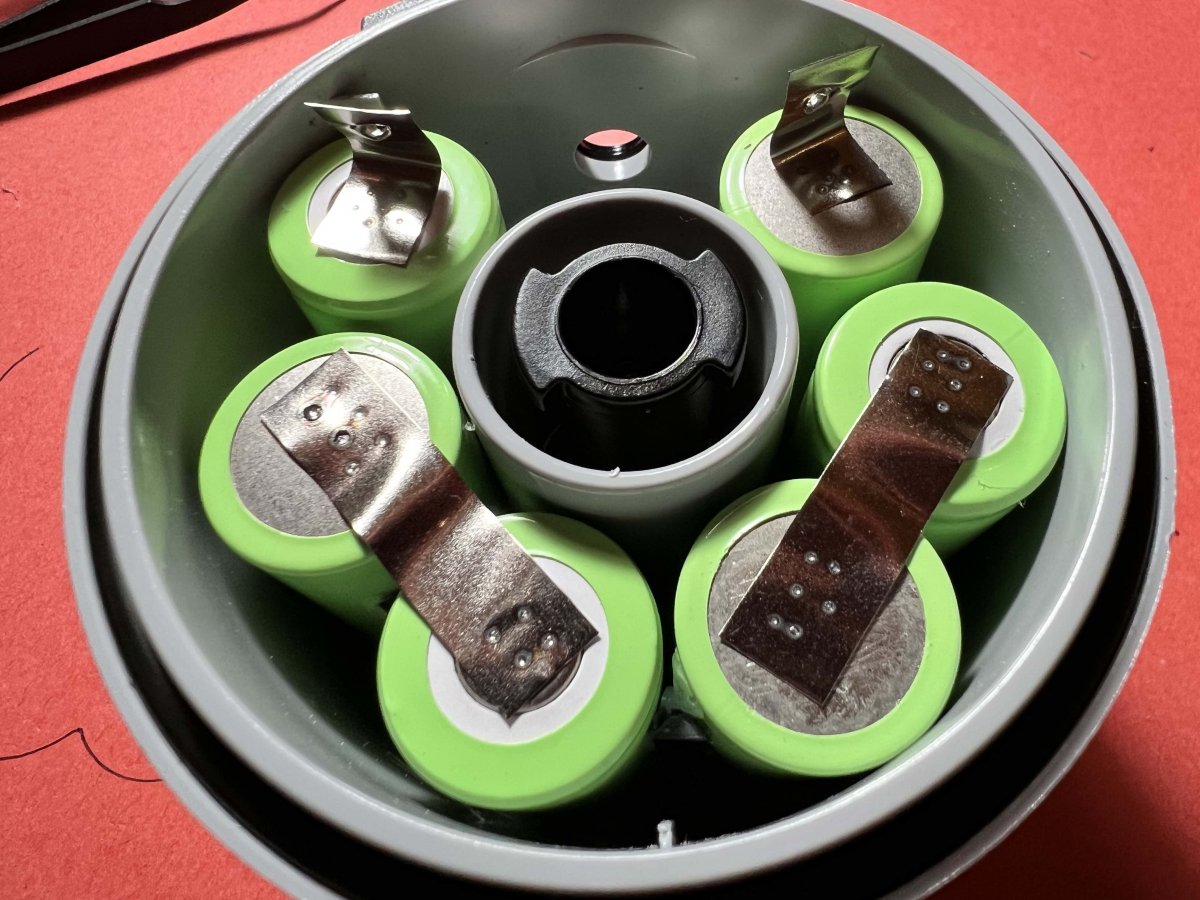
  1. I am getting all of my gear in fighting shape as I hope to get back to shooting underwater. I recently picked up a housing for my R5 and I pulled the strobes out to get them going. I have two DS125s and the battery packs are from 2007. Although they seemed to take a charge they didn't seem to be holding well. I also noticed a little deterioration on one of them which turned out to be the cells leaking a little. Luckily none of the electronics were damaged. Ikelite does not rebuild these anymore but is happy to sell you a new one for $250.


    I pulled them all apart to find 6 SAFT 3200 sub C 3000 mAh batteries. Searching high and low I struggled to find those exact cells, at least for anything less than $15 a cell. I believe these are now made by ARTS Energy. These are made in France. 
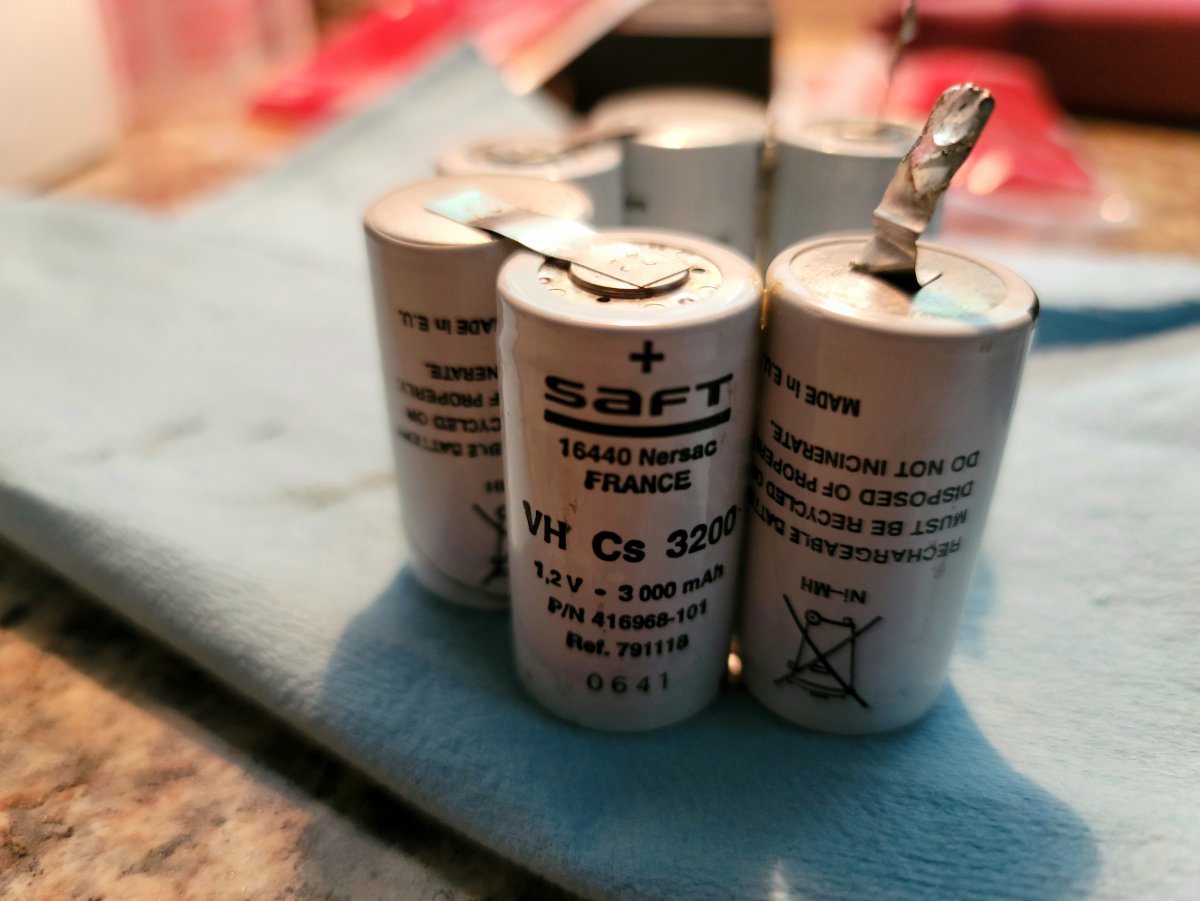
    20220911_150018.thumb.jpg.1e11b9b5011d7e6deb42e73d19074a38.jpg


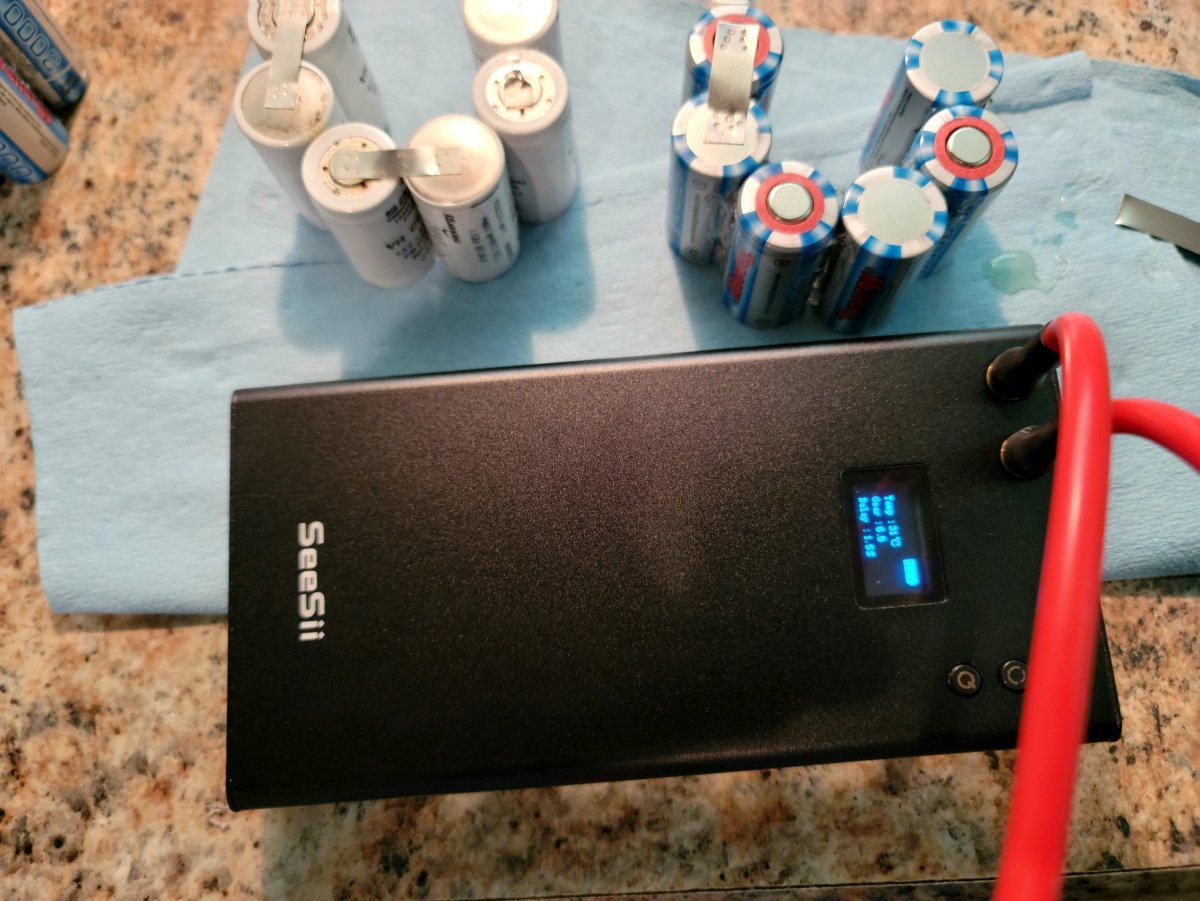
    I ended up choosing cells from Tenergy. These are "made in China" which I was hoping to avoid but I have experience with Tenergy through other hobbies like RC boats and airsoft. I was able to get 15 of the 3000mAh cells from Amazon for $38. 
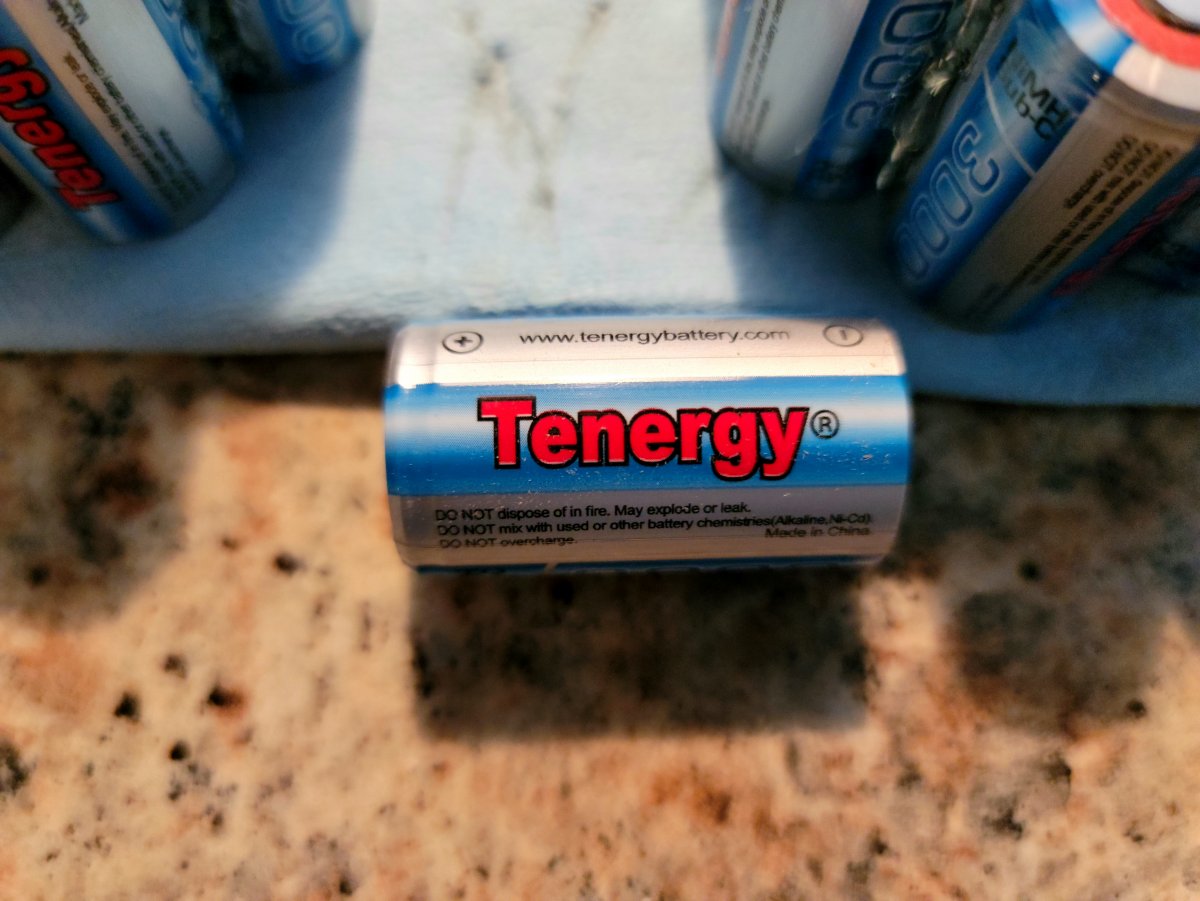
    20220911_152634.thumb.jpg.7f2a578f44170d9ab3b67e01cb7bd900.jpg

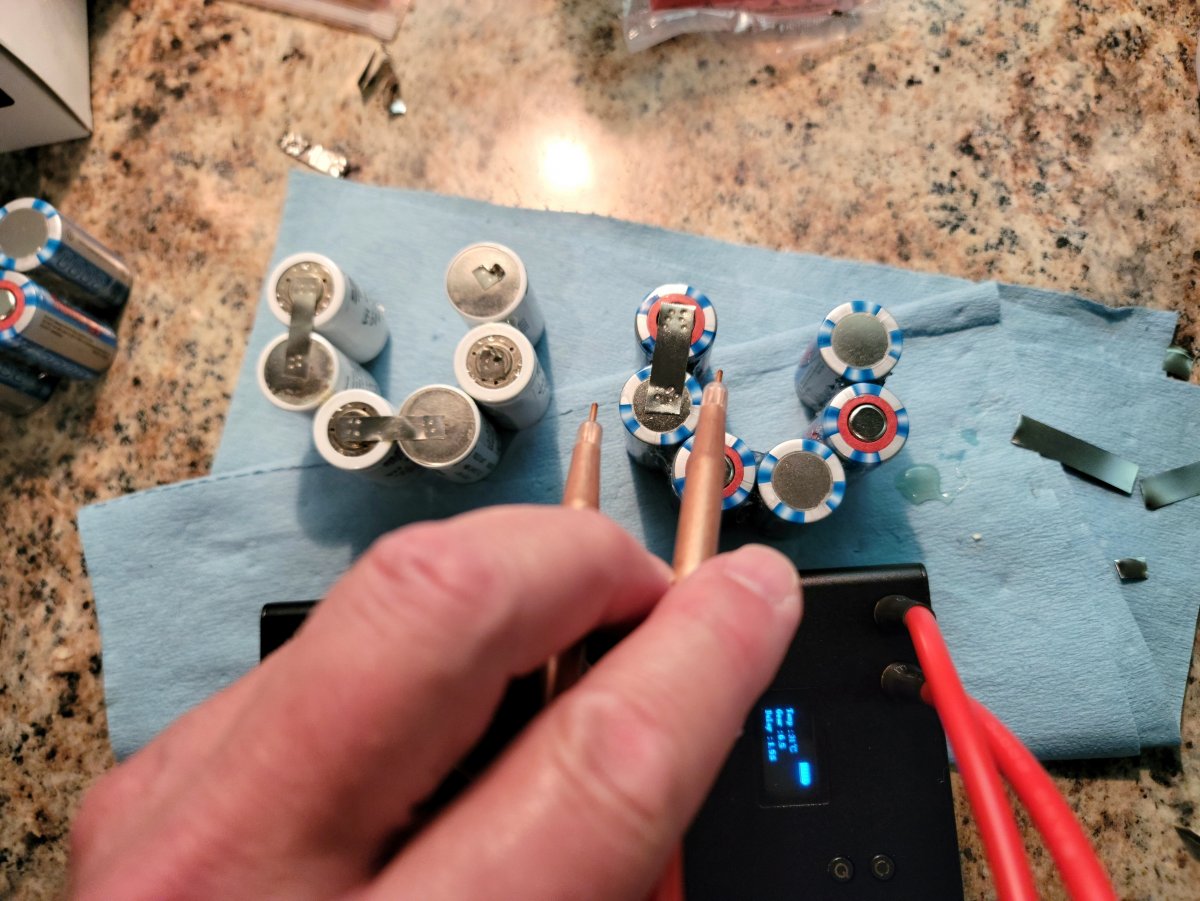
    i used regular hot melt glue to hold the packs together for assembly. I believe the packs will be mostly held together by the housing once installed. I also bought a spot welder from Amazon for about $60 to attach the tabs. I bought the one from SeeSii based on reviews. It worked really well and went very quickly. 
    20220911_154539.thumb.jpg.7eb116143d116683b66e6ac53cb81397.jpg

    20220911_154530.thumb.jpg.c96a7cf870ae703fabe276188f61435b.jpg


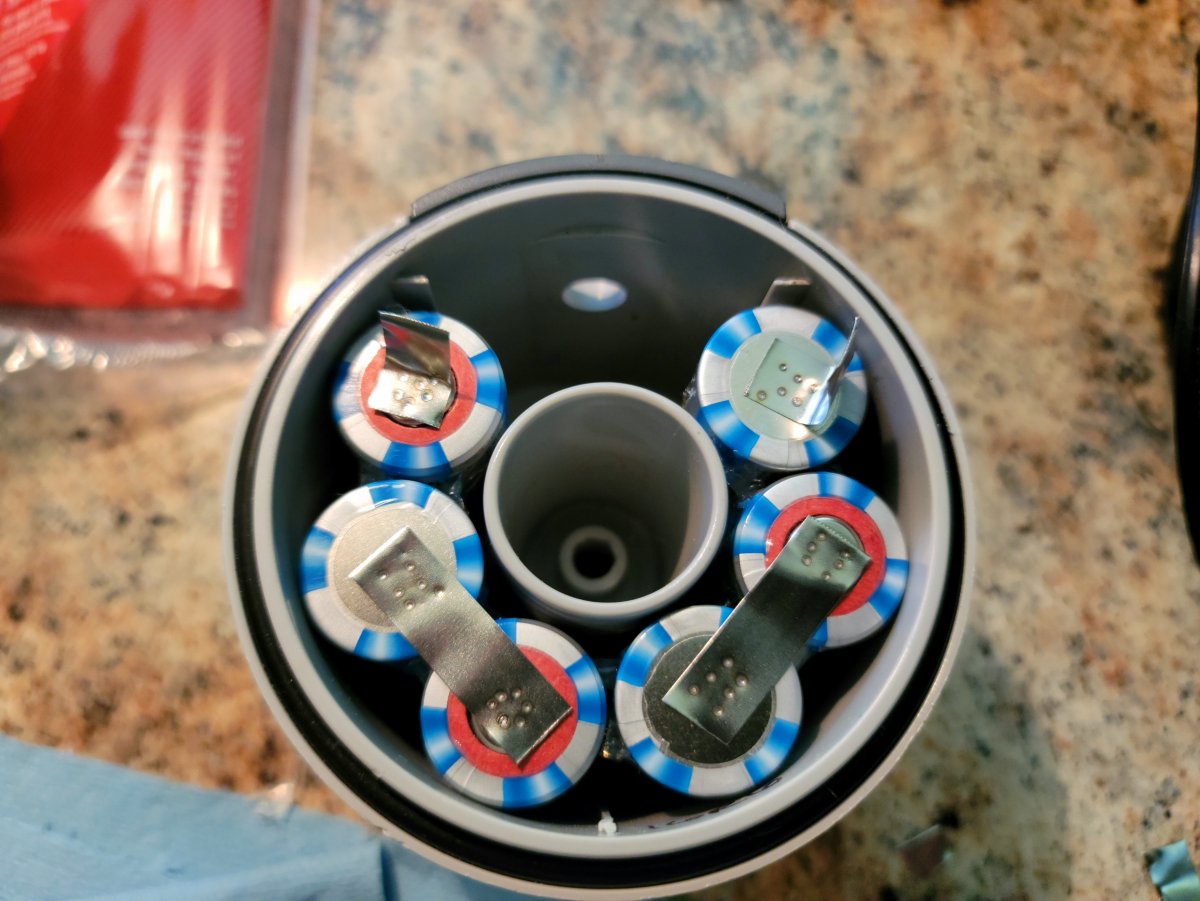
    I used the nickel tabs that came with the spot welder. They are a little thinner than the original but wider so hopefully it won't affect the current requirements. I tried to research as best I could and I believe the original cells are rated to 40 amp discharge and the Tenergy are either 30 or 38. It has both values listed on the website. I suspect the strobe won't use anywhere near that to charge up. 
    20220911_155731.thumb.jpg.e0ae9f6fa7ddb3937641a89715f54add.jpg

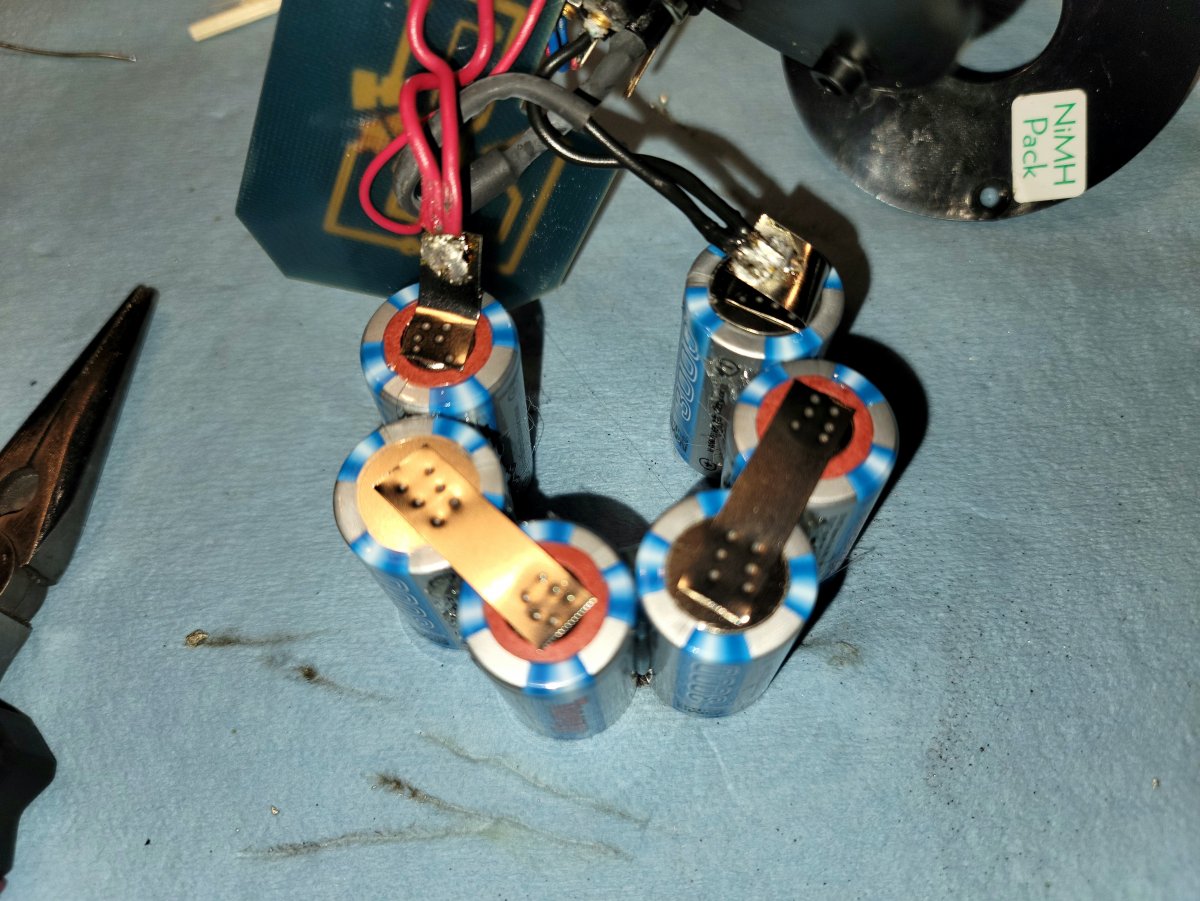
    Once I had the tabs installed and checked the fit it was time to solder the electronics to the batteries. 
    20220911_162202.thumb.jpg.3845911faaa7835beaf627bb567a0cf6.jpg

    I took these pictures with my cell phone and the quality of some are not great so I apologize. 

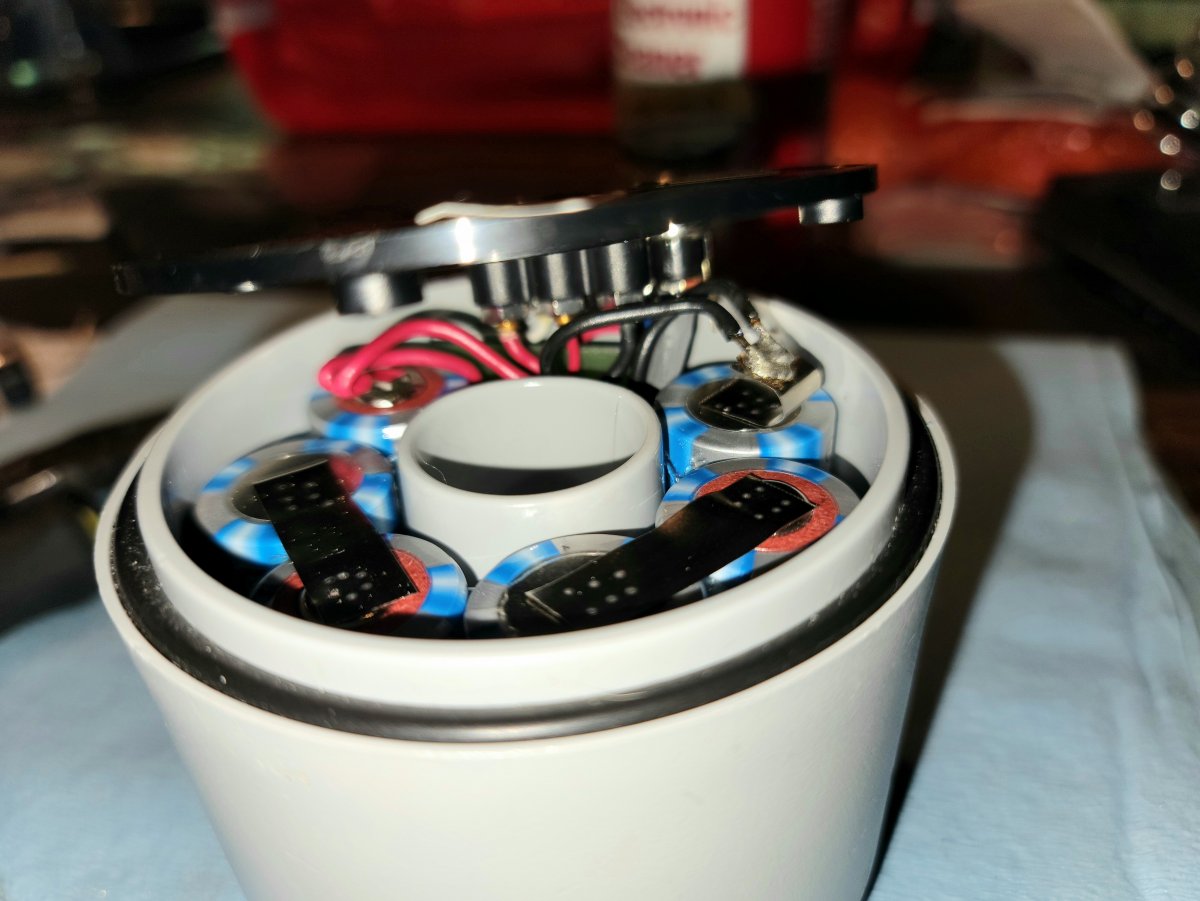
    I then fit it all back into the case and screwed it back together. 
    20220911_163319.thumb.jpg.cfd7db8530f0148b8637400accd5112f.jpg

    i am waiting on O-rings from Ikelite for the switch and the toggle. I charged them up and have them sitting with the focus lights on to drain them down. I tried the strobe function and they seem to charge at least as fast if not a little faster. At 1/2 power they kept up with low speed continuous shutter on the R5. 

    I will add the final assembly details and photos probably next weekend once I get those O-Rings. So far I am about $115 in to both strobes including purchasing the spot welder. A savings of almost $400 over buying new packs. 

  2. Guys like you make guys like me look bad. :P

    Seriously though, good for you! Saves some $$ and keeps another hunk of garbage out of the landfill. I hope it works as you expect!


  3. So, here is the follow up to my post. 


    I was able to get the required O-Rings from Ikelite for the battery packs. 

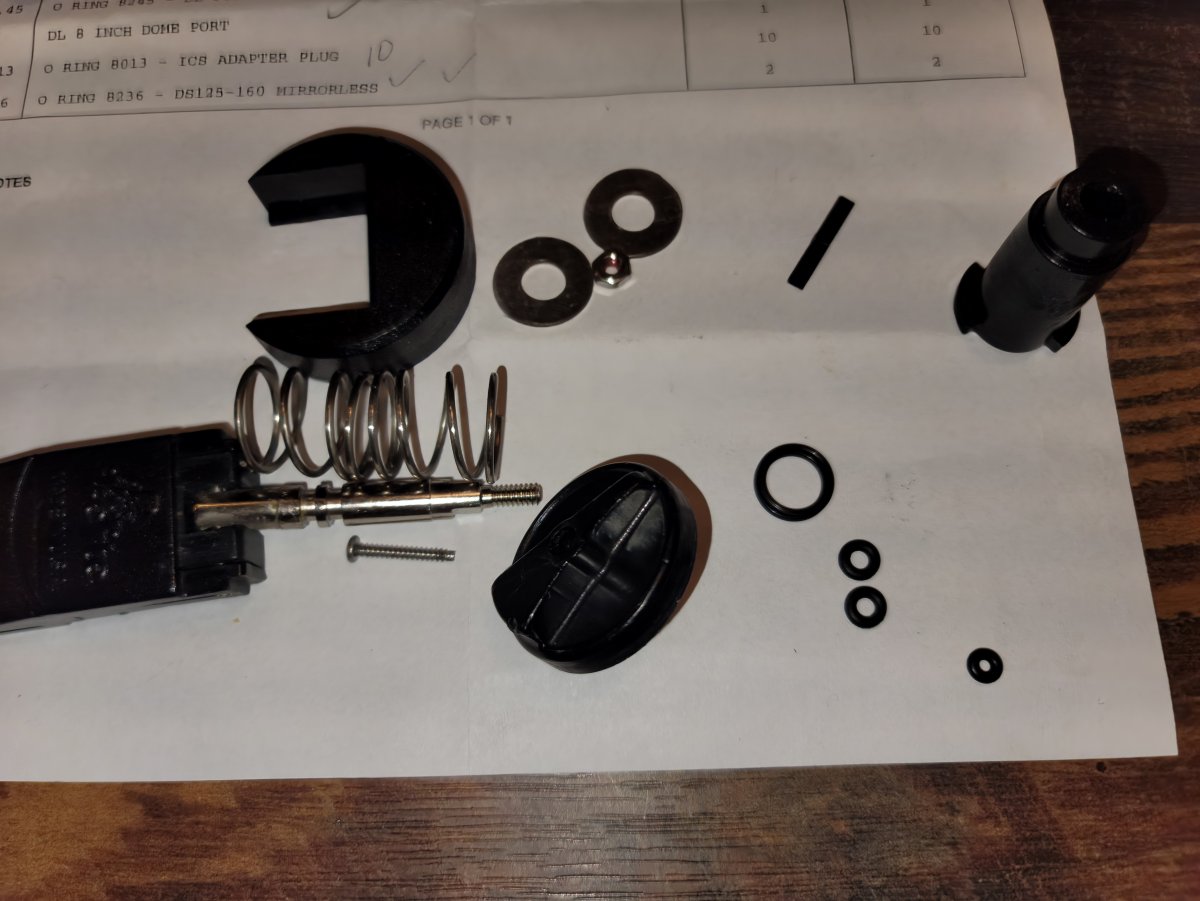
    0114 is the 2 on the toggle shaft

    0128 is the larger one behind the switch

    0136.04 is the very small one that goes behind the switch screw.

    Using some silicone grease I lubricated the O-Ring that goes behind the switch. They call this an X-Ring as it isn't round but has ridges to it like a gland. 

    20220917_170738.thumb.jpg.dd49dc0fccb56b2c17fd856bc66c2efd.jpg

    20220917_170819.thumb.jpg.1b16d74aab63270ae145b0a8d7c1aeca.jpg

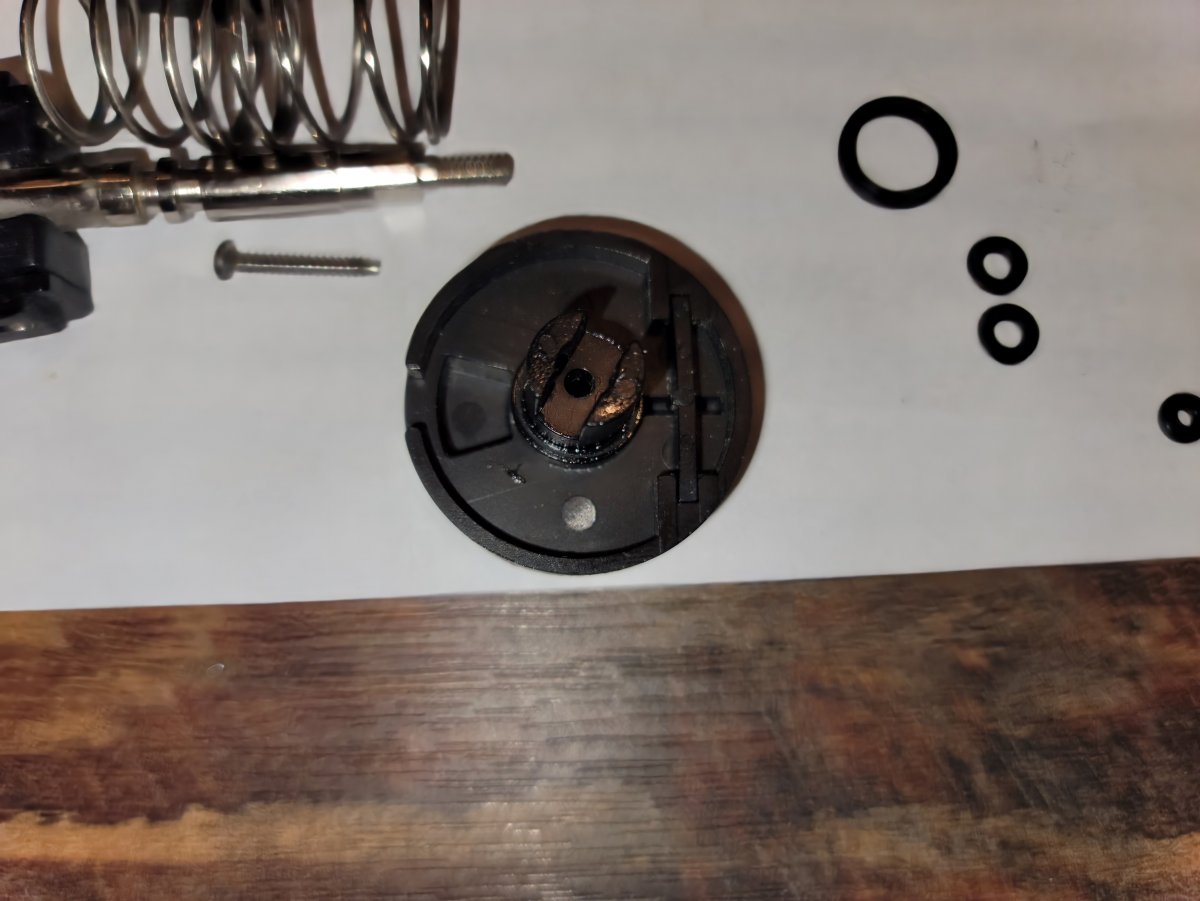
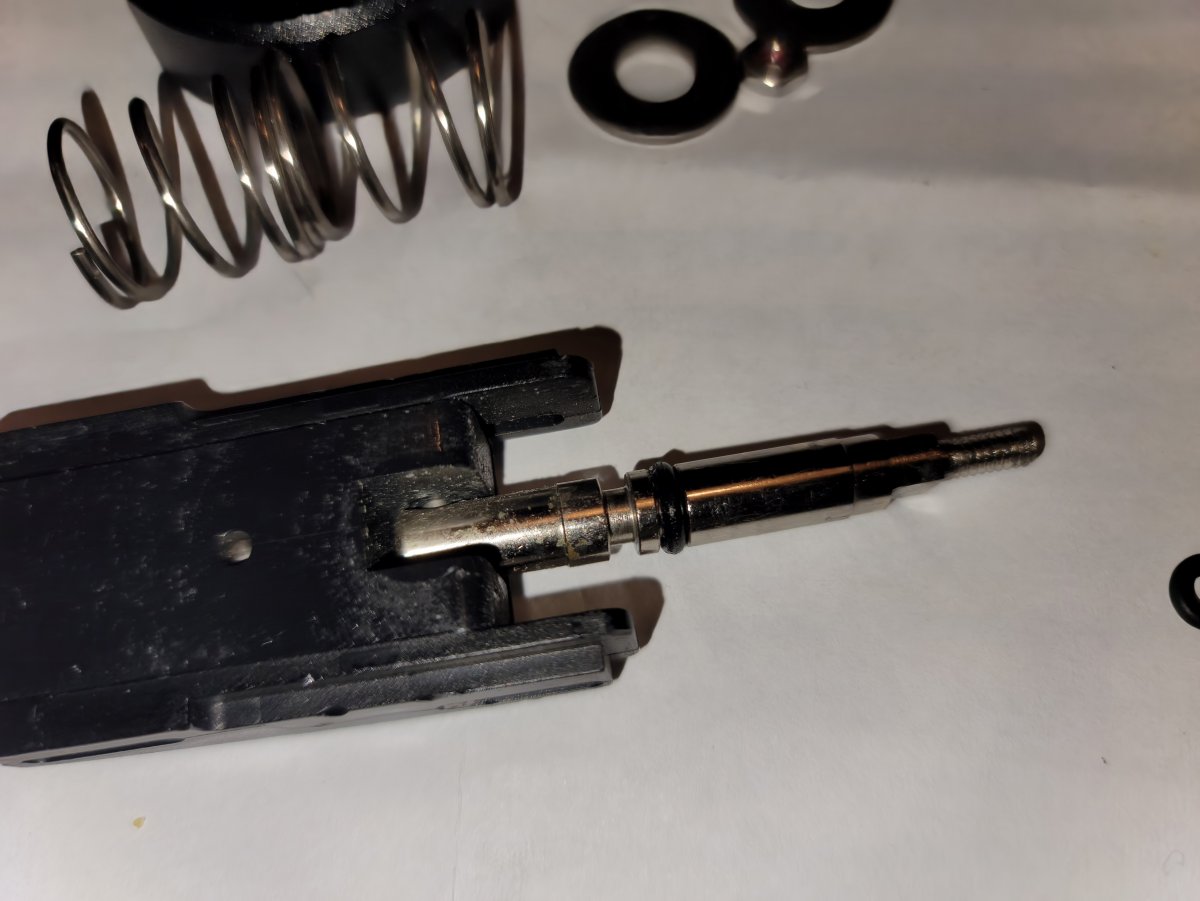
    It is hard to see in the picture but you have to install the small plastic bar that engages the notches and makes for the clicks as you turn the switch. There is a little nub on it that should face in towards the shaft. Getting this to stay in while you install the knob can test your patience. One this was installed I rotated the switch a number of times to be sure I seated the X-Ring into position. 

    20220917_170751.thumb.jpg.d299f42efbb894e3a0bba5b640131ca0.jpg

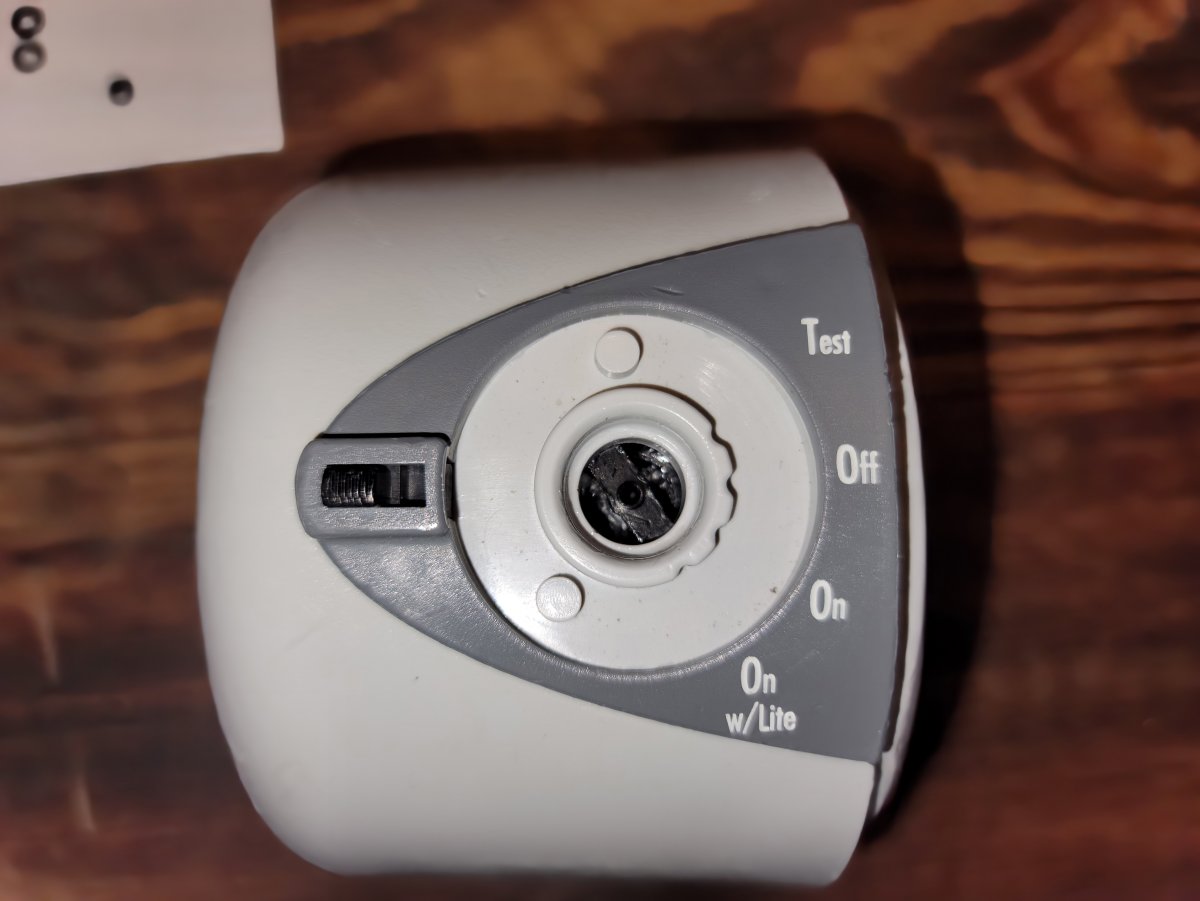
    Next up is the small O-ring that goes behind the screw that holds the knob on. This one was tricky and required a few tries. Once I would tighten the screw and look down in the hole I would see the O-ring had squeezed out around the screw head. It took a couple tries but I was able to get it all seated. 

    Next up was installing new O-Rings onto the toggle lever shaft. Not too tricky. 

    20220917_171354.thumb.jpg.5136892ebdd28e922a6eabb3257a2b7a.jpg

    The final install requires you to put the cover plate over the back and then install the toggle. The cover plate needs to go on so that the toggle can still twist counter-clockwise. It will only fit one way. You then place the first spring on in the recess, followed by the first washer and then the second spring and second washer. The locking lugs go on last and you have to wiggle them around until it sits down over the keyed end of the toggle. Then the 1/4 nut goes on the end. You just have to work at this until it gets started and you can thread it on. 

    Everything is all together and I just have to test them out in the water. You could do a test in a bucket of water but you would have to remove the plate to see if any water got in. Not sure if I will do this or just jump in the water and see how they do. 

    If you have any questions feel free to ask. I'm no expert in this but I thought this might inspire someone who was on the fence. 

    Edited by K9Shadow
  4. appreciate your writeup as i am about to embark on this process myself.

    instead of a welder, can you solder to attach the tabs?

  5. You can solder the tabs on, but it is not very pretty, at least when I did it. I rebuilt 3 or 4 batteries years ago, and if I knew about availability of spot welders, I would have bought one. The soldered battery packs worked just fine, no issues with them for the couple of years I used them.

    Edited by davehicks
  6. 10 hours ago, dvm said:

    appreciate your writeup as i am about to embark on this process myself.

    instead of a welder, can you solder to attach the tabs?

    If you want to solder I would suggest buying the batteries with the tabs already attached. That way you solder the tabs and not the batteries. Heating the batteries enough to get a good solder connection can damage them. I believe Amazon sells the same batteries I used with the tabs already attached. 

  7. On 9/24/2022 at 8:41 AM, dvm said:

    appreciate your writeup as i am about to embark on this process myself.

    instead of a welder, can you solder to attach the tabs?

    If you have a Batteries+Bulbs in your area, they will spot weld the battery tabs for a very reasonable cost (and sell you the batteries also)

  8. Wow!  This is amazing DIY. Thanks for posting with the pics.  It's a great reference and so interesting to see what is inside of those battery packs.  I need to replace mine battery, but I don't think I have the confidence try this.

  9. @K9Shadow Thanks so much for the detailed DIY instructions. This will come in very handy for me as I have a DS160 battery pack that is about 12 years old and no longer holds a charge well. 

    In shopping for the rebuild job, I found batteries on Amazon that are rated higher than the original 3,000 mAh. Do you think I could safely use higher-capacity batteries of the same size? Amazon sells 3,800 mAh and 5,000 mAh batteries that look as if they will fit the case. What do you think?

  10. Don't buy the higher capacity batteries. They are likely a mm or so wider in diameter and may not fit as a result.

    Edited by davehicks
  11. 29 minutes ago, davehicks said:

    Don't buy the higher capacity batteries. They are likely a mm or so wider in diameter and may not fit as a result.

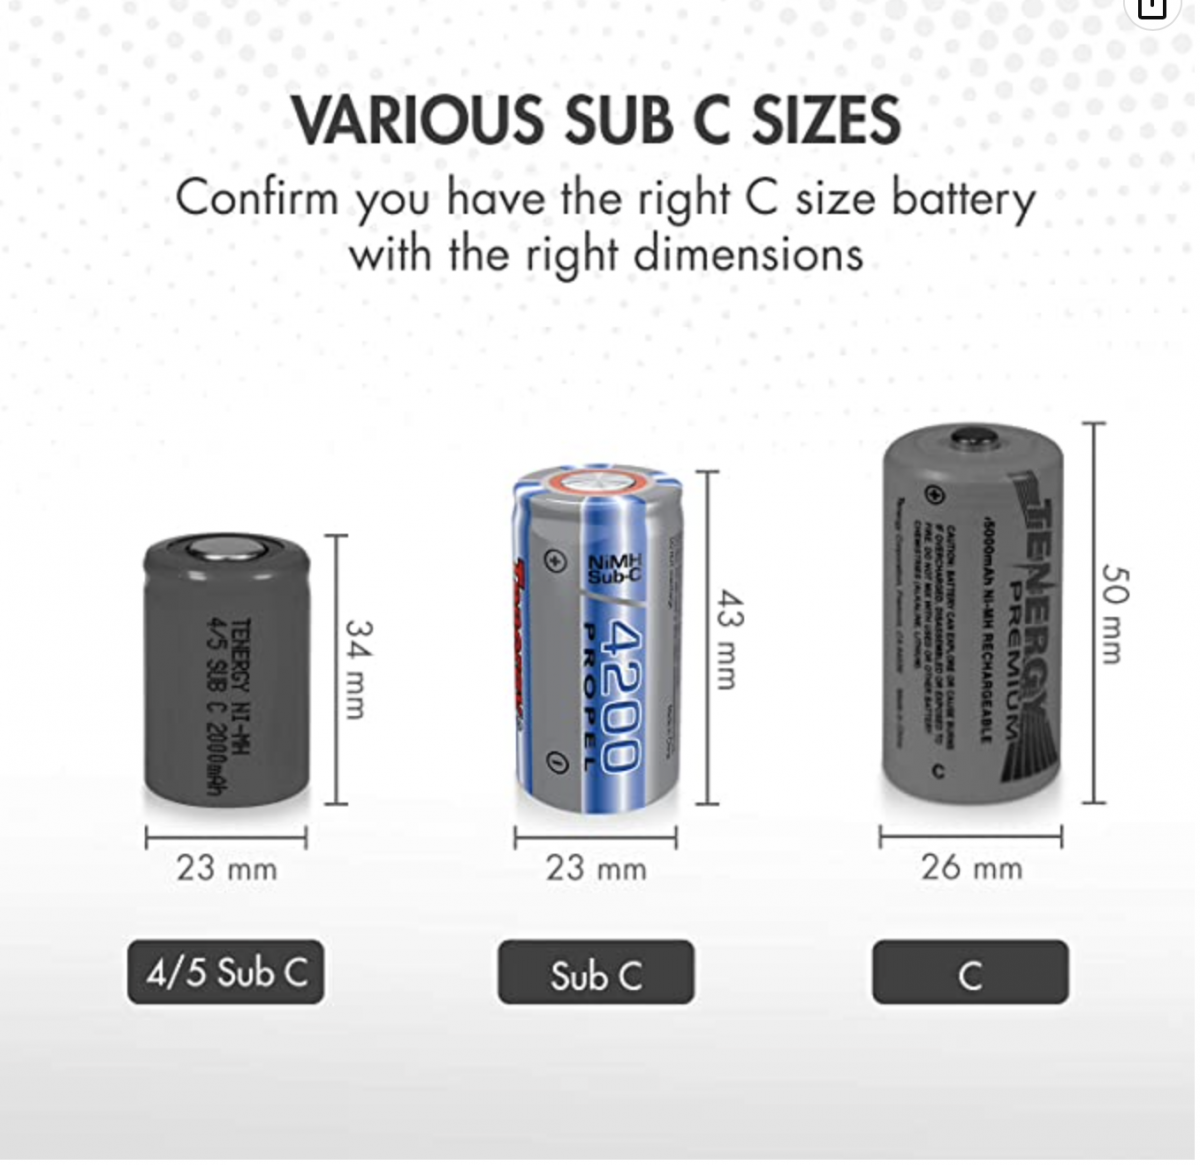
    SubC batteries all seem to be the same size, regardless of capacity: 23mm wide by 43mm tall.


    Screen Shot 2022-12-30 at 6.02.49 PM.png

    Edited by ridgebackpilot
  12. 2 hours ago, ridgebackpilot said:

    SubC batteries all seem to be the same size, regardless of capacity: 23mm wide by 43mm tall.


    Screen Shot 2022-12-30 at 6.02.49 PM.png

    In theory they should all be the same, however in practice apparently some manufacturers will vary a little in diameter, I recall a thread on here some time back where the sub -C batteries purchased  were slightly larger and assembly was difficult as a result.

    Also some for some no-name batteries the capacity printed in the battery is only a general guideline bordering on being works of fiction, better to use ones that others report work OK.

  13. I speak from experience, not spec sheets. Stick with the lower capacity cells, unless you like to buy things twice. ;)

    You have to put 5? of the cells together in a circle, and a small increase in diameter gets multiplied until they won't fit in the casing.

    Edited by davehicks
  14. On 9/23/2022 at 4:04 AM, K9Shadow said:

    Everything is all together and I just have to test them out in the water. You could do a test in a bucket of water but you would have to remove the plate to see if any water got in. Not sure if I will do this or just jump in the water and see how they do. 

    Hi K9Shadow.

    Thanks for the detailed guide for restoring this battery pack.

    Regarding your doubts on the testing, I would suggest you to try it in a bucket first with deionized water. If there is a leak, it reduces the chance to damage the eletronics.

    Do not test it at salt water. Go for salt water only after testing it with plain water.

    Edited by pbalves
  15. In shopping for this project I did quite a bit of research for the batteries. I really wanted to use the Saft cells that were the same as the originals but they just are not available. I reviewed the spec sheets of several manufacturers and found a difference of sometimes a couple mm's. This doesn't seem significant but it will add up. I was actually a little more worried about the height of the battery as that will make fitting everything in the case very troublesome. The batteries I used actually allowed a little slack as far as the diameter goes. It did make it easier to fit all back together. I believe the originals and the Tenergy are 41mm tall.  And as mentioned, you can only fit so much capacity in this size. I am very skeptical of any battery claiming more than maybe 3300 mah. I actually believe the discharge amperage is more important for our usage than capacity. If your strobe lasts all day but takes 30 seconds to recharge each time is it really worth it. The discharge rates are something that I wasn't able to find for most of the batteries out there. And some of the Ikelite packs had something like 2400 mah cells. I still haven't gotten to test these as my trips got canceled (hurricanes) and I have only been out to photograph manatees and no strobes allowed there. 

  16. Here's a YouTube video by a guy who rebuilt his DS125 battery pack. Very similar to our DS160/DS161 battery packs and useful information!

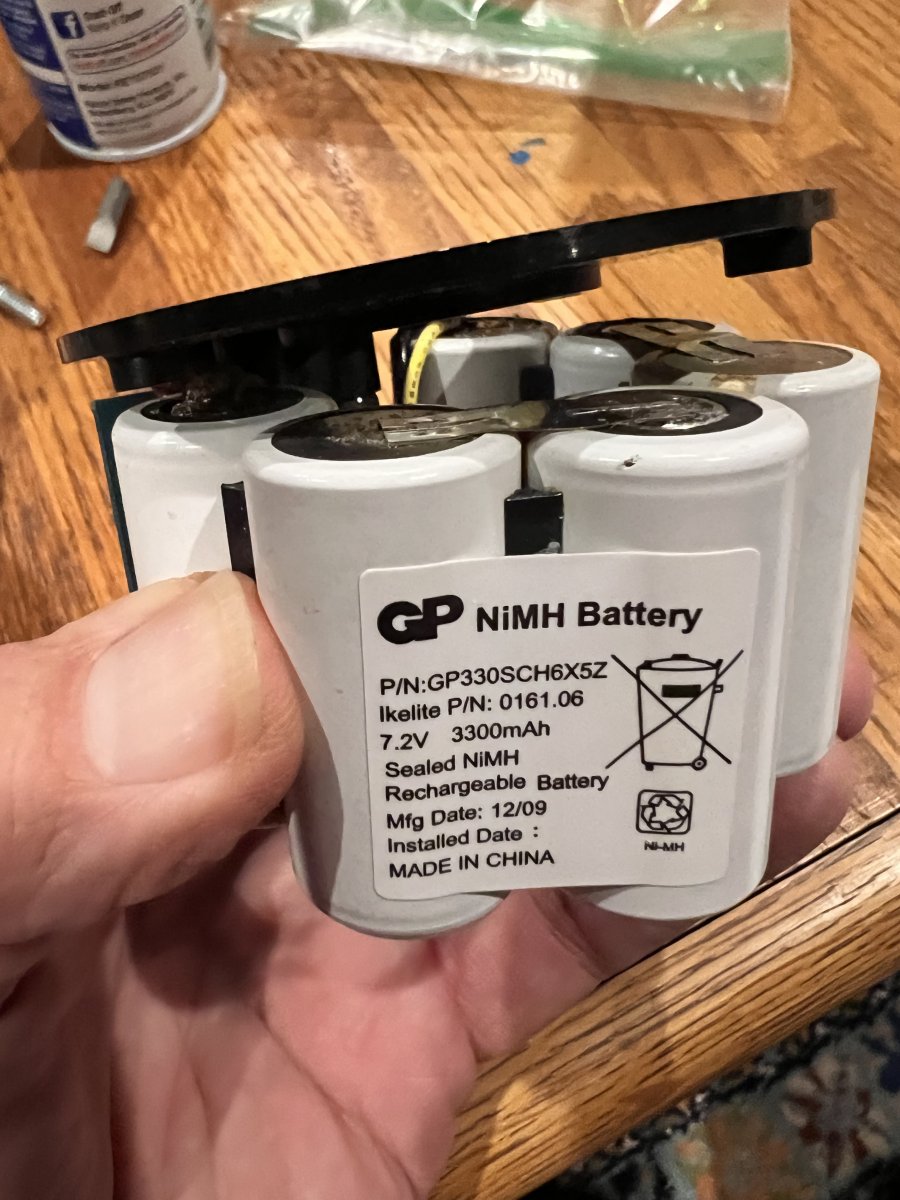
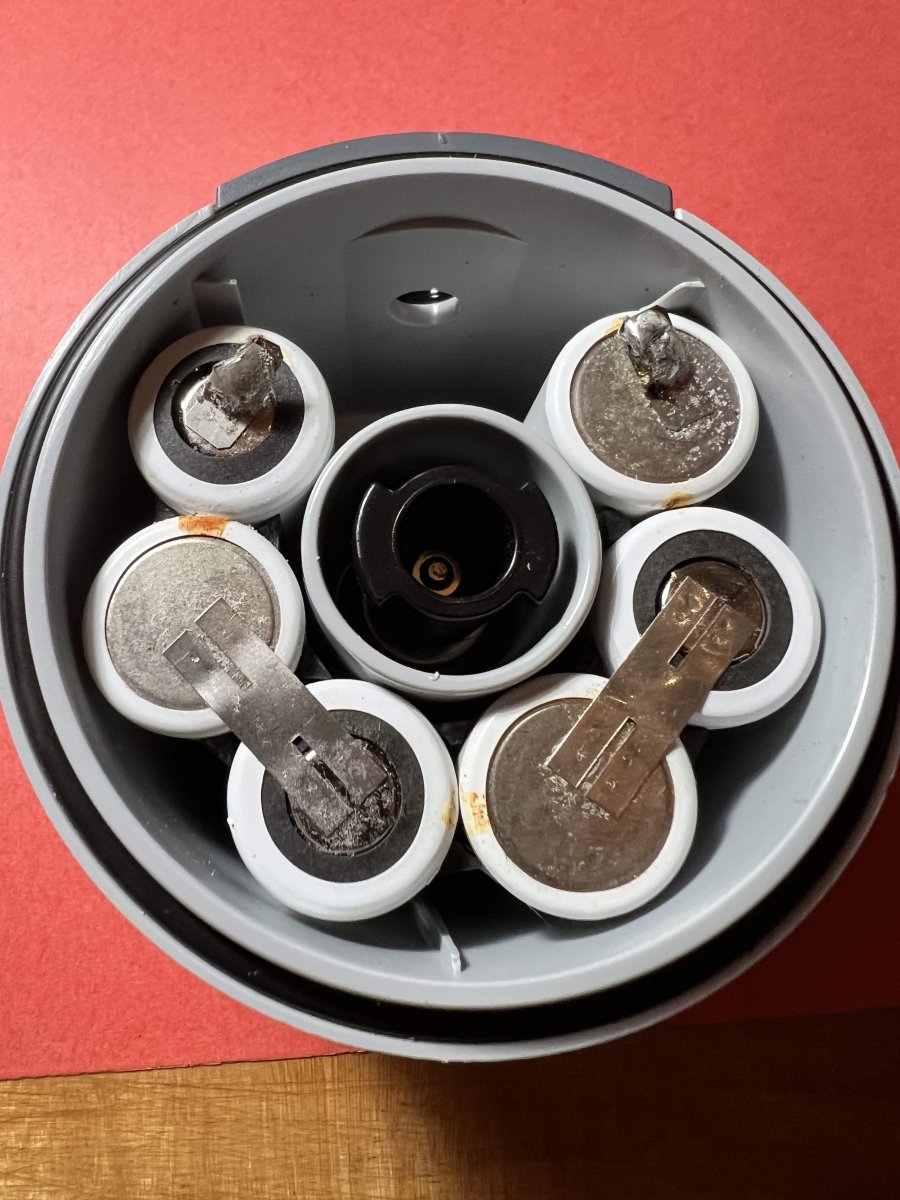
  17. @K9Shadow The plot thickens a bit. This evening I took apart my DS160 battery pack that was manufactured in 2010. Here’s what I found inside.

    Turns out I need six 3300mAh subC batteries for my pack. I was able to find lots of choices at WalMart, eBay, and batteryguy.com for around $3.50 each. I should be able to build the pack by spot welding them together. 

    CC7CC01F-7B9E-449D-A63E-6289FAD02642.jpeg

    Edited by ridgebackpilot
  18. Out with the old battery pack, in with the new!

    The 3,300 mAh NiMH batteries I purchased via the WalMart website fit in the casing perfectly.

    446154933_OldIkeliteStrobeBatteryPack.thumb.jpg.f78e5a07bd2d1966f07e6407b0e13a2c.jpg1782265041_OldIkeliteBatteryPackRemoved.thumb.jpg.781c76913463ddfe62fa6098156500d8.jpg943045517_NewIkeliteStrobeBatteryPack.thumb.jpg.d35e4233ade3fa5634a1f18c2e11c78c.jpg

    Edited by ridgebackpilot
Isotta

Account

Navigation

Search

Search

Configure browser push notifications

Chrome (Android)
  1. Tap the lock icon next to the address bar.
  2. Tap Permissions → Notifications.
  3. Adjust your preference.
Chrome (Desktop)
  1. Click the padlock icon in the address bar.
  2. Select Site settings.
  3. Find Notifications and adjust your preference.