


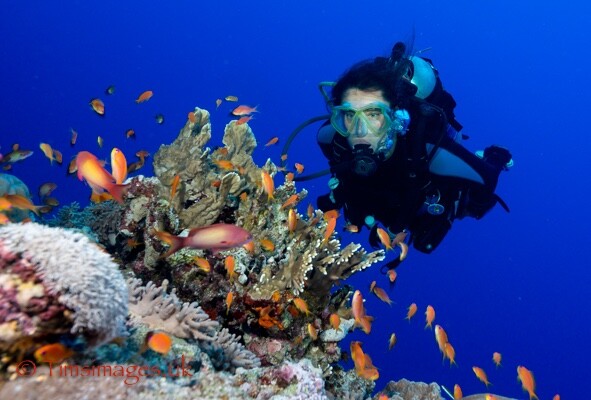
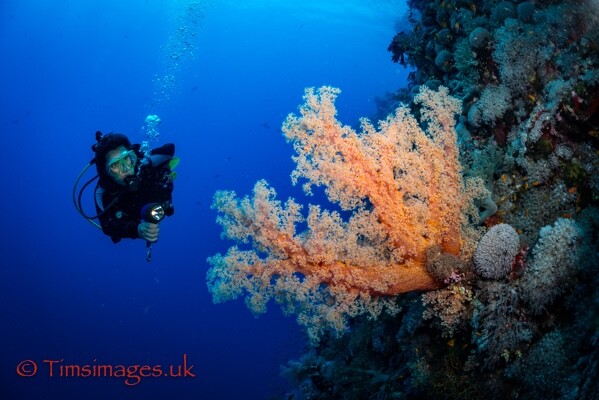
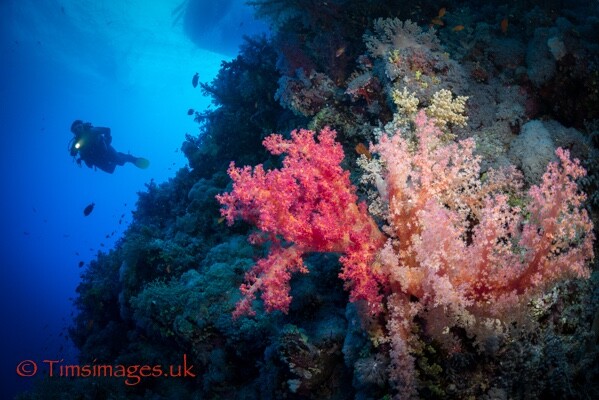
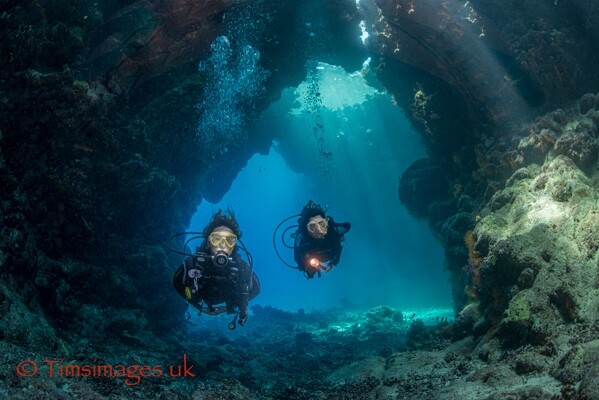
A wide-angle image of a reef, a wreck, a school of fish or pelagic can look pretty spectacular. Adding a diver is even better for that Telling-A-Story type shot The diver often gives an idea of scale, usually confirms the scene is underwater, and makes the picture one to which non-divers can generally relate.
The problem can often be, however, “the diver”. Viewed dispassionately, the diver may sometimes actually detract from the image. Legs and fins splayed all over the place, dangling gear, eyes closed, bubbles over the diver’s face, weird positions….
How to get over this? The more underwater photographers develop their skills, the more they realise that time, planning and effort are rewarded with better results. Of course you can go out, shoot away and get lucky. We’ve all been there. But to create a high quality image regularly takes patience and effort.
So, the diver in the shot? Same approach: patience and effort. For starters, getting the right diver as a model: comfortable in the water, excellent buoyancy skills, patient, calm…. unflappable, willing to persevere. Sad to say, but generally good-looking and reasonable physique might be considerations too. Then, unless you are shooting radical chic or the 1960s look (love those oval masks!), wetsuits that don’t have holes, gear that looks like it was probably bought in the 21st century.
Brief the diver: how you plan to shoot, the type of image you are hoping to achieve and against what background. It helps, of course, if you have dived the site before. Even better if the model has too. Do you want the model as background: just helping put the scene into a context? Perhaps in the background exploring the wreck/reef, pointing a torch to highlight a feature? Or a more close-up portrait-type shot?
Agree some basic signals: up, down, left, right, blow bubbles with long, slow exhales, smile (honestly!), repeat, repeat again, stop, slow, go backwards, get close, get further away. I’m sure you can think of others. My partner is excellent at various other signals with which she likes to respond. These normally involve fingers - often a raised middle finger.
And so to the water. Buddy check of course. Ripping currents and serious drop-off walls are reasons for extra caution. The safety of you and the model are paramount. So if either of you are struggling or uncomfortable, there’s always another time, another place and another dive.
But assuming all is well, find the type of location that you have agreed and let the fun begin. Indicate to your model how you’d like them positioned against the backdrop; the direction of travel; carrying a torch which is switched on; and what point do you want them to stop or is it a swim-by? Which way do you want them to look - at the camera (hmmm, maybe not), at the reef. Maybe though you want to be able to see their eyes which might require some vague contortionist movement. Slow exhaled bubbles add drama and context.
No doubt it will take several attempts. Fins in horrible positions, eyes closed, bubbles in front of the mask, pesky fish in front of the eyes, wrong angle…. (see why patience and perseverance come in?). So back off the reef or wreck a little, review what you have with your model, give them a welcome breather - and, probably, do over again. And again. And, probably again. When you get the images home and on screen, you will see just how many are not quuuuuite right.
But with luck and effort, you should come home with some images that work. And, fingers crossed, that your model likes too - especially if you want to use their services again. Do give them copies. If it’s been an especially successful or challenging day why not print and frame a copy of a significant image as a thank you? If you’d like to try and sell the images, ask the model if they’d sign a model release which then makes commercial sales feasible.
Adding a model to an underwater image helps tell the story of what you are seeing. But it needs careful planning, execution, patience and lots of signals. Even if they are a single middle finger.
Top Tips for models:
- breathe with a slightly tilted head so bubbles move away from the mask
- straightish legs with one leg slightly bend at the knee. This creates length and elegance.
- tuck away gear so nothing is dangling
- big logos/brand names home create intellectual property issues in trying to sell the images
- de-fog mask
- exhale slowly - a long bubble stream looks good
- tuck away long hair to avoid weird ocean-created hair arrangements or hair in front of of the mask
-
 9
9

Recommended Comments