Skip to content

Lights, Strobes, and Lighting Technique / Archived topic

3D Printed Optical Cable Connectors

Started by davehicks ·

  • 12Posts
  • 12Replies

Read-only discussion

3D Printed Optical Cable Connectors

12 posts
  1. There have been a number of threads about making DIY optical cable on this forum. One of weak points of most of these DIY's is getting the right connectors. The solutions range from buying connectors (at about $10 a pop or $20 per cable), re-using connectors from old cables (which may require drilling them out and gluing fiber) to using random bits of off the shelf hardware which may have poor fit and finish. I've tried all of these solutions.

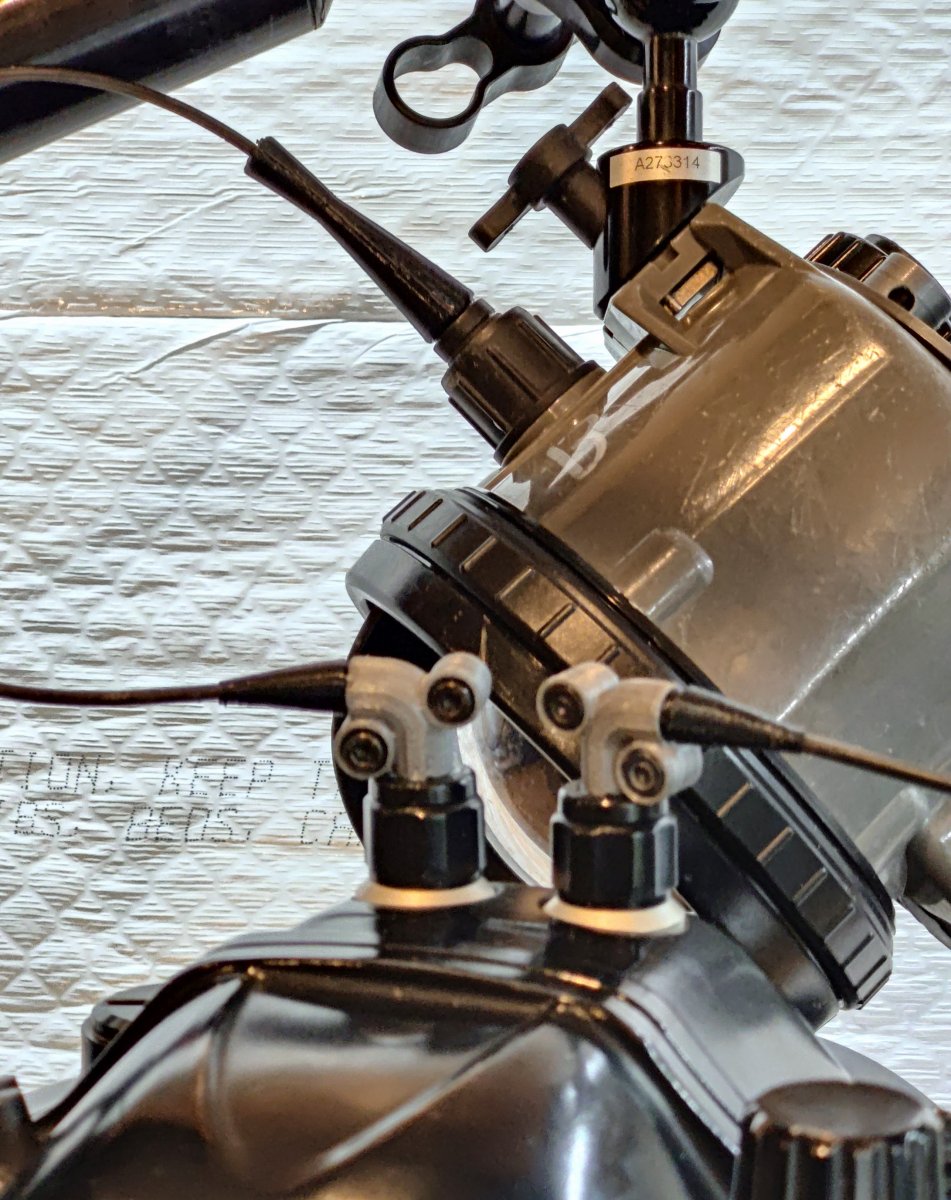
    A few months ago, I bought my first 3D Printer and have been making a bunch of Scuba/Camera related parts. My latest project is a set of custom designed connectors for Optical fiber strobe cables. I think these are at least as good as the OEM cables I've seen from Nauticam, Inon, etc. And it had the added benefit of being really fun to design, print, test, and refine. I've been testing these connectors for the last several weeks and have done a bunch of dives with good results.

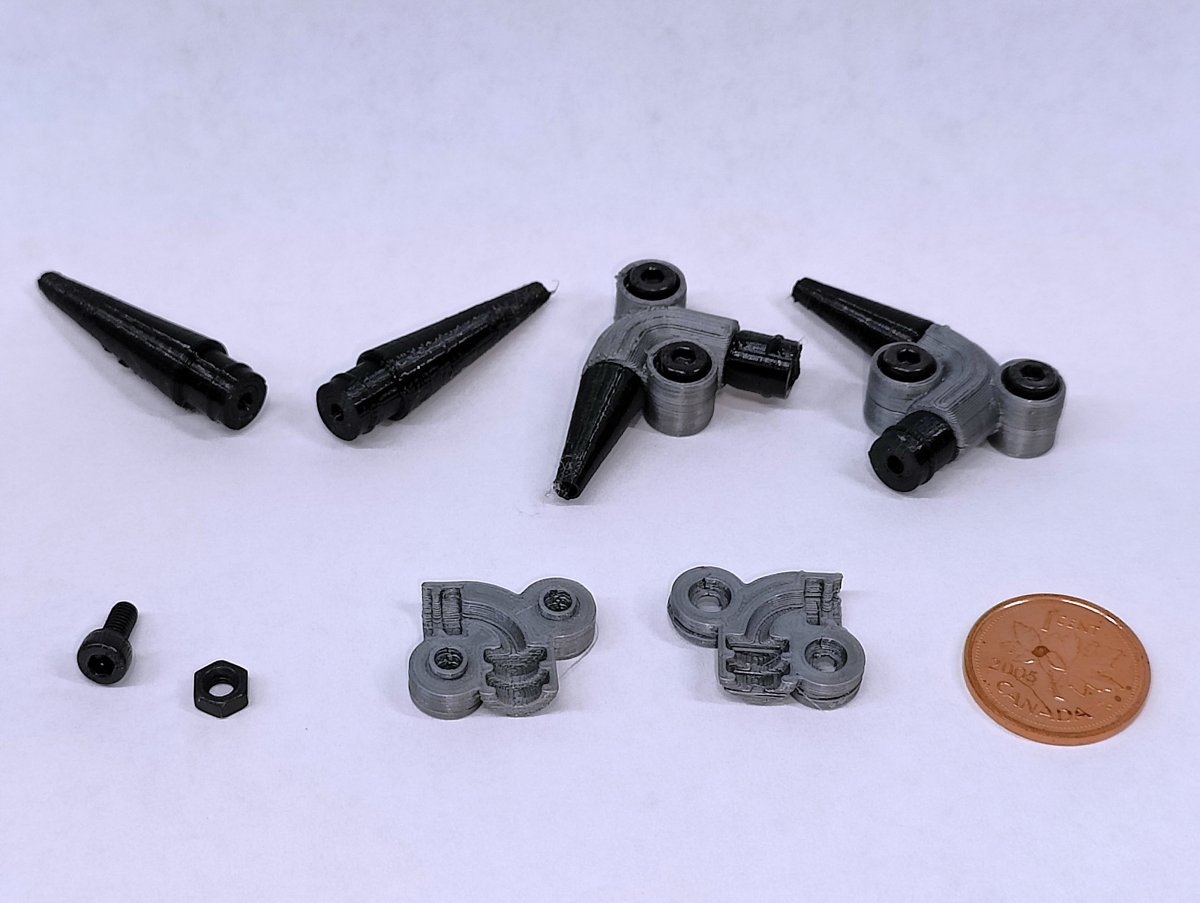
    If you have a 3D printer with some TPU and PETG or PLA material, you can print these out at a very low unit cost. You will need some M3x6mm nuts and bolts and 2mm fiber to complete. 

    I've just uploaded the design and STL print templates to the public sharing site Thingiverse:  https://www.thingiverse.com/thing:6134211 

    Thingiverse Details:

    Inon Style Optical Fiber Cable Connectors

    https://www.thingiverse.com/thing:6134211

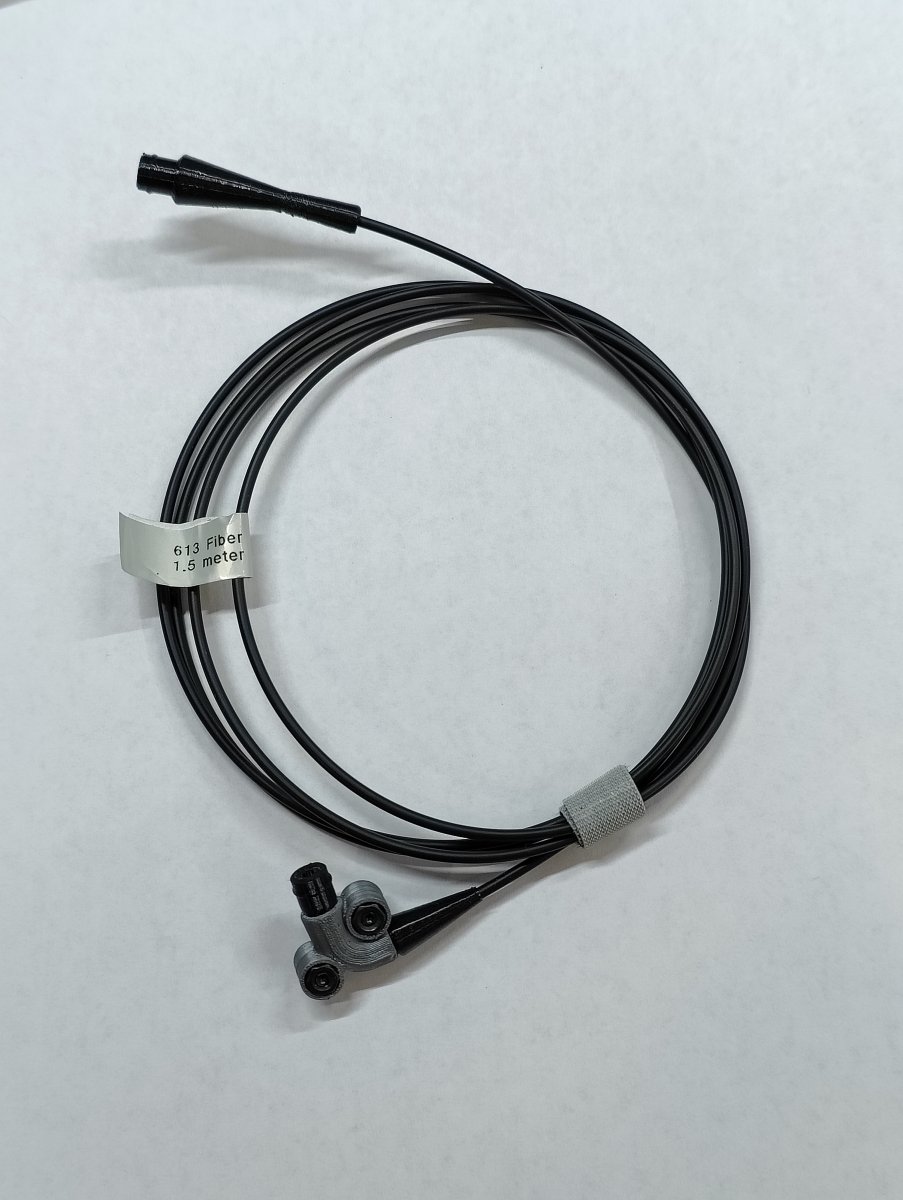
    Make your own optical fiber cables using these connectors paired with 2mm fiber. I used both 613 multi-core fiber cables and cheap TosLink cables. The design assumes 2.2mm OD for the cables.

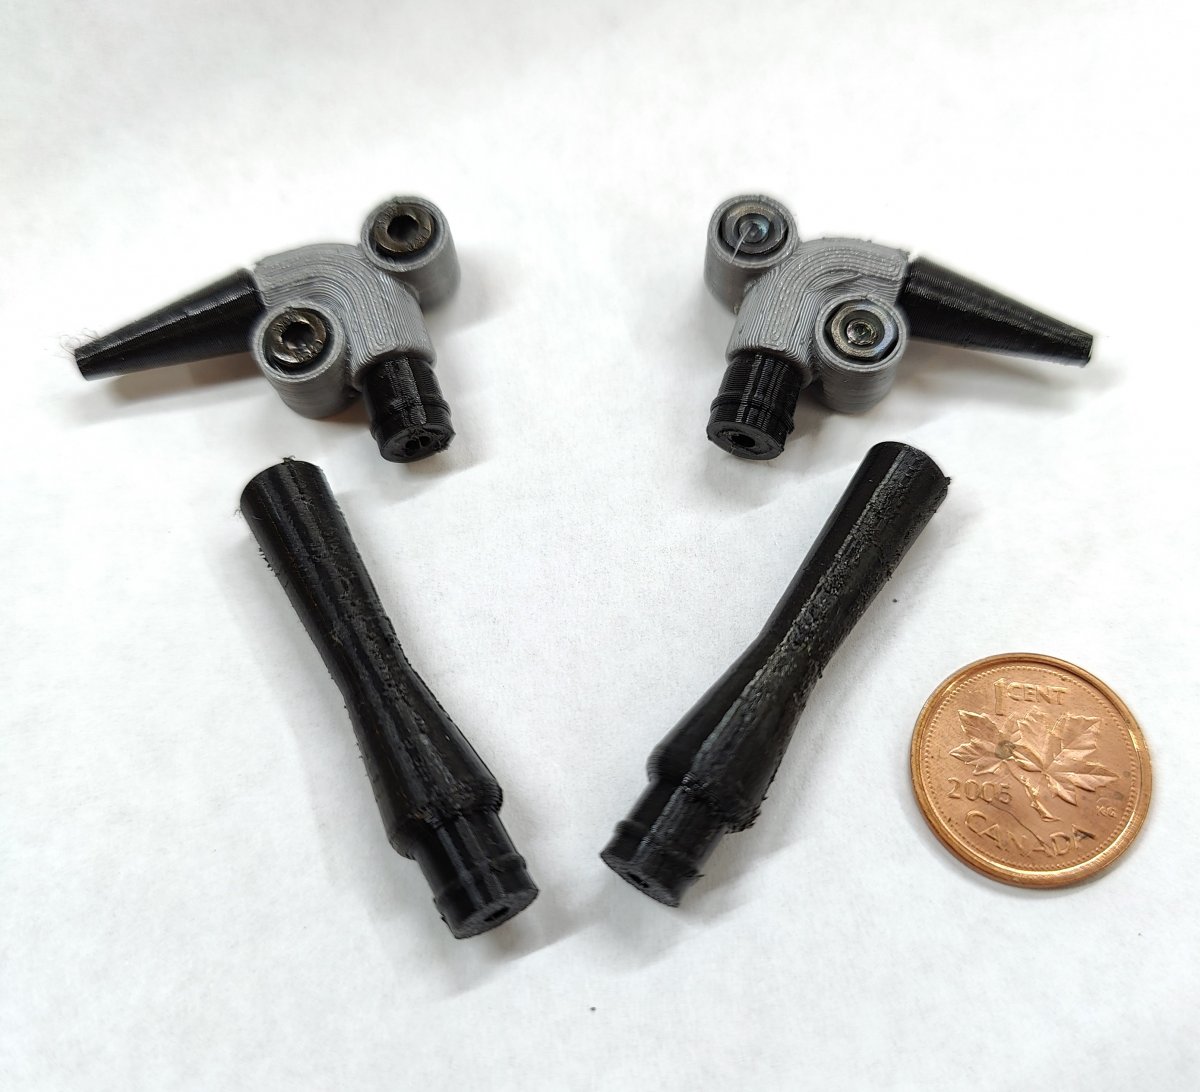
    This design contains two styles of connectors: A 90deg elbow and 180deg straight connectors. The elbow part is printed with PETG. PLA will work but may not stand up as well to the elements. The actual connector parts are printed with TPU. These parts must be soft rubber, so no material substitutes are possible.

    The 90deg Elbow part snaps together and is secured with two M3x6mm nuts/bolts. These can be purchased from many sources like Amazon. The TPU connector and strain relief parts fit in the groves of the elbow. Thread the optical fiber through the TPU parts and align them into the elbow before screwing them together.

    The TPU parts should be snug enough to hold the cable secure with no adhesive. If it is not secure, you can apply a small amount of silicone-based glue to the cable as you thread it into the TPU parts. Using glue may make it difficult to reuse the connectors should a cable get damaged.

    Use the connectors in combinations that work for your camera rig. I like a 90deg connector on the top of my Nauticam housing and a 180deg connector on an Inon or Backscatter strobe. With a Retra strobe a 90deg connector will work better.

    I have found these connectors to work well with a firm connection that is installed or removed with appropriate resistance.
    IMG20230720173523.thumb.jpg.bae093fbaf0b5d91d5ae8cffadcfaf83.jpg

    IMG20230711150717.thumb.jpg.eab027ed604b4246410c720b4ab987c7.jpg

    IMG20230720174318.thumb.jpg.21cb83507dd24119586239cc2d6e5d45.jpg

    1115928562_ElbowandStraightConnectors.thumb.jpg.4b89b1a7d306c11540ed51e34c256782.jpg

  2. Hi,

    looks great and many thanx sharing the files. I will print the connectors soon and inform you how they fit. Br from Germany Markus

  3. Yeah, do let me know how it works out.

  4. Looks really good, Dave. Nice job! And thanks for sharing this. I just need to get my hands on a 3D printer now......

  5. 11 minutes ago, TimG said:

    Looks really good, Dave. Nice job! And thanks for sharing this. I just need to get my hands on a 3D printer now......

    It takes some time, research, and practice to use a 3d printer effectively, but not much money. My printer only cost about $300 + $60 for three different print materials. The cad software is free for hobbyists. It's been a fun new set of tools to learn and create with.

  6. Amazing. I can sure imagine the time (and frustration!) necessary. Super result though. 

  7. One can also use Uxcell strain relief plugs sold by Amazon and others, as described last year in these pages (1):

    " Plugs to connect the Toslink cable with the housing at one end and strobe at the other are 7mm plug diameter Uxcell boot strain relief protectors:
    https://www.amazon.com/20pcs-27mmx7mmx4mm-Strain-Relief-Protector/dp/B00XBG5U82/ref=sr_1_34?crid=EXN55HXK7AV7&keywords=uxcell+7mm+rubber+plugs.
    20 plugs cost $7.99 + shipping.

    To assemble: Cut the cable with sharp scissors, and glue it inside the protectors with plumbers ABS cement. Once dry, use a razor to cut the end of the protector/cable to give a plug about 8 mm long.  

    The protectors plug securely into the housing and strobe cable holders, no O ring is necessary. "

    I have used these cable-terminal assemblies s on many dives with no problems.  
    =
    1. 
    https://wetpixel.com/forums/index.php?/topic/68880-trouble-shooting-ds160-strobes-using-fibre-optic-converter-to-fire/&tab=comments#comment-436188 


  8. This post describes my solution in building something that was more custom built for purpose. 

    I did try the Uxcell plugs that you described, but I found that the connection was not tight or very secure. I don't think it worked well and it looks pretty ad-hoc in my opinion. I was using recycled connectors from old cables prior my 3d printed solution.


  9. Hi Dave,

    which Optical Cable Plug Connector/Fiber Optic Connector for the Nauticam Housnig & Inon flash did you us respectively where did you buy these. Br Markus

  10. Backscatter has the female connectors. I think my strobes came with them but you can but them there.

  11. Hi,


    thanx for info. Just want to know if all of the female adaptores will fit the diameter of your prints: BR Markus

  12. Uxcell plugs have worked fine for me for several years, just use plenty of ABS cement and a sharp single edge razor.  Takes only a few minutes to make each cord and save money.

Account

Navigation

Search

Search

Configure browser push notifications

Chrome (Android)
  1. Tap the lock icon next to the address bar.
  2. Tap Permissions → Notifications.
  3. Adjust your preference.
Chrome (Desktop)
  1. Click the padlock icon in the address bar.
  2. Select Site settings.
  3. Find Notifications and adjust your preference.