Everything posted by bghazzal
-
Yes, crowded is the word, hectic and downright sketchy when speedboats from Male join in... It's one of the reasons we left quickly when we were working there in 2021-22. On the plus side you do see them diving quite often as well on certain sites, which can be a nicer experience. The're also attracted to lights of liveaboard mooring at night in the Maamigili area, and tend to hang around there.
-
Let us know how it goes. I’m in Japan as well, but as a resident I don’t get the 10% tax discounts. In my situation, buying direct from Nauticam HK, where import taxes and duties are calculated at checkout, is usually cheaper than going through Fisheye, even after shipping. But compared to European or North-American prices it will probably be worth it, especially for Japanese brands.
-
Never had an issue as well, but have heard a couple of stories over the years, mostly related to work permits (suspected undeclared professional work projects in Indonesia) more than actual imaging gear. Other than that blackwater photographer's post I reposted, looking into it I did find these AI-flavoured wise-words by Mr. Lucas White on... alibaba.com 😅 https://www.alibaba.com/product-insights/how-to-pack-a-dslr-without-looking-like-you-re-smuggling-gear-through-customs-in-bali.html But yeah, doesn't really seem like the dreaded Mexican custom extortion is spreading, luckily.
-
This will bring you up to speed on the 2023 Wetpixel drama: https://divernet.com/scuba-news/wetpixels-hanlon-denies-sitting-on-divers-cash/ https://www.deeperblue.com/wetpixel-owner-adam-hanlon-faces-accusations-of-withholding-payments-amidst-health-concerns/ https://www.undercurrent.org/UCnow/dive_magazine/2023/Wetpixel202309.html https://www.undercurrent.org/UCnow/dive_magazine/2023/WetpixelStoryClarifications202310.html
-
From what I understood the Xtar 21700 5000mAh 10A (which are the ones that came with my Backscatter MW4300) are build around a Samsung INR21700-50E cell which has the following characteristics: https://www.18650batterystore.com/products/samsung-50e The issue is that the original raw Samsung cell doesn't have a protection circuit or button top, which is what Xtar offers. It can also be tricky to source an original cell as an individual consumer. I need to buy new ones for the MW4300 (one cell died on me) and will probably go for the newer Xtar 21700 5000mAh 25A, though the higher amperage isn't that important for a video light.
-
I've also never had issues in Indonesia, but this post was from an underwater photographer - as mentioned, it was most likely a one-off customs agent trying his luck. That said, Indonesia did try to enforce strict customs rules on electronics when I was living there, and they started controlling incoming travellers (not just residents) for phones, laptops, and cameras, but backpedalled after a few days due to the chaos this caused. I think it was in 2022, IIRC. I don't really understand how Mexican import regulations can be applied to personal goods which are going to leave the country with the tourist, which is virtually unheard of as it's not generally considered an import.
-
Hello all, If anyone has a 67mm Keldan Spectrum Filter SF-2 gathering dust somewhere, or alternatively a UR-Pro CY 67mm, please let me know. Thanks! Ben
-
On a related note, this post showed up on my social media feed today: "Has anyone else had problems bringing camera gear into Bali? I’ve done it dozens of times but last night they pulled me aside jn customs and told me I was only allowed one personal camera below $500! They eventually let me go, but I’m still unclear on the rules, on what was going on, or what to do next time." Let's hope this is a one-off attempt by a greedy agent and doesn't become a pattern in Indonesia as well...
-
Hi Johan, welcome aboard. Selamat datang di forum ini! I’m sure you’ll find plenty of people here who love diving in Indonesia’s amazing waters, myself included 😄
-
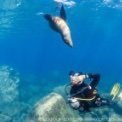
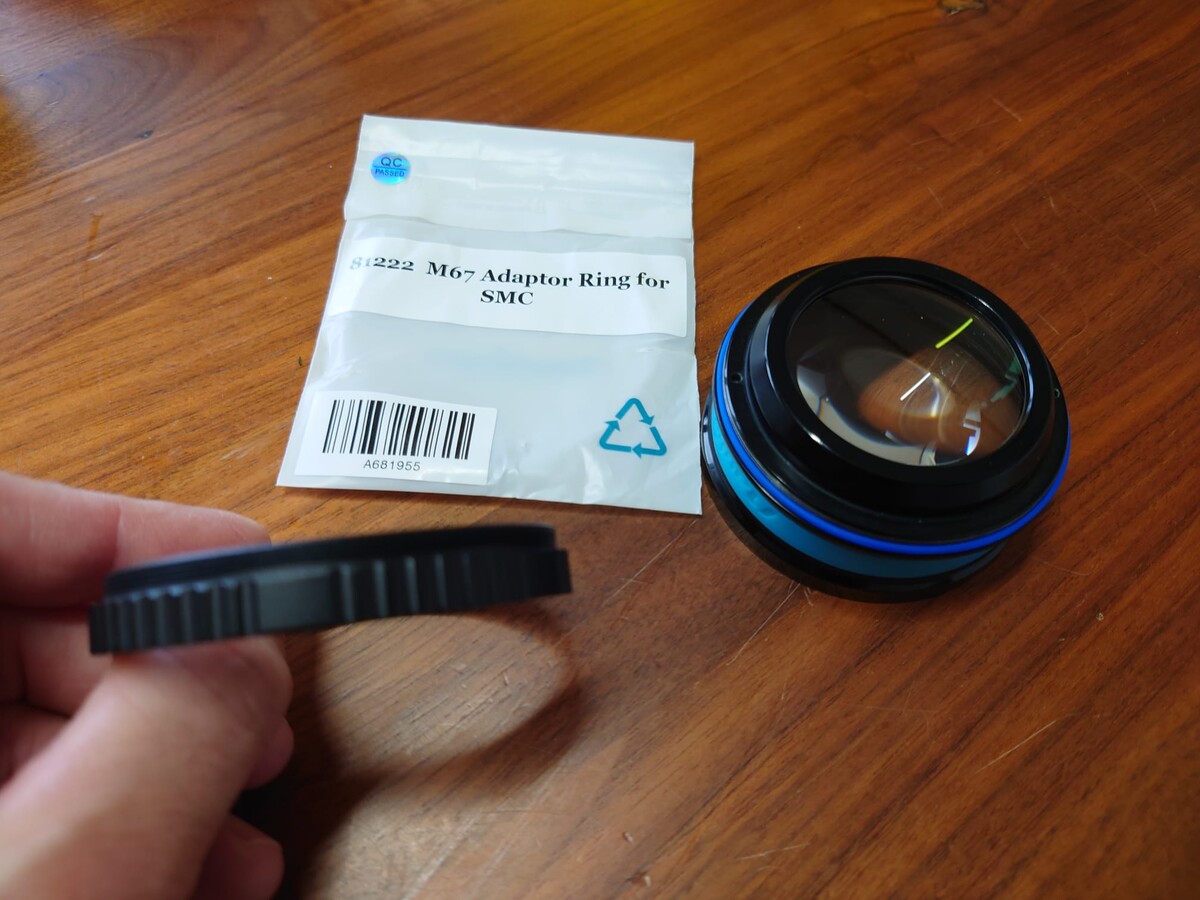
Is the 67mm adapter provided with the MFO3 like this one? (this is the one that comes with the CMC diopters and a few others) If this is the case, then it's not possible to use it with AOI flip unfortunately - the adapter can't be screwed onto the flip holder because of where its locking mechanism sits, the adapter's protruding toothed section gets in the way. It's also not possible to use Nauticam diopters with this kind of design without a 67mm adapter on the AOI fllip because the rear end sticks out too much (the flip adapter base is too shallow) - the diopter hits the port glass and this prevents the locking of the adapter when the diopter is fully screwed in. Fortunately the smaller adapter (which has to be ordered from Nauticam) works, since the toothed section doesn't protrude as much and clears the flip's locking mechanism by a few mm, like this:
.jpeg.e9a7761ed4770988e1f8586b923f94a9.jpeg)

-
I use the AOI double flip, and plan to use it with MFO3 when I get one. The AOI flip works fine (I use it with an Inon UWL-H100 wide lens + dome port, it holds the weight), but keep in mind that you need to use the small Nauticam adapter to use their wet lenses (the AOI adapter itself is not deep enough, more details here: https://waterpixels.net/forums/topic/2611-question-on-dual-flip-lens-holders/page/2/#findComment-19553 and here https://waterpixels.net/forums/topic/2611-question-on-dual-flip-lens-holders/page/2/#comment-23000 )
-
Very interesting, thanks for this. The results are very nice in terms of IQ for wider shots, but WB struggles on both, with a really strong cast. How do you WB for the A6400, and what WB settings are you on for the GoPro? The lights don't seem to be making much difference on these shots, I guess the shots are too wide for available light power. This is timely - after years of holding on to the GoPro7, a 2nd hand GoPro 13 just arrived from MapCamera this very morning, so I plan to experiment with it as well. I'm really looking forward to 10bit colour, and to testing it with filters for mixed-lighting scenarios and WA. At first it will be with the LX10, but I'm also in the process of upgrading it to an Sony A7SIII rig (bought the Nauticam housing, but assembling the full kit will take a bit of time), so I'll be able to offer A7SIII + GoPro13 tests in a few months, hopefully. My A7SIII rig will be a macro rig at first, but I will have the GoPro13 on there for WA shots, and will test mixed-lighting with both on local reefs. Mixed-lighting tests on the LX10 were very promising (I use Keldan SF -1.5 filter on the lens plus Dreifish recipe "Dreifilters" on the lights) allowing to setting the WB to ambient light and getting closeup highlights (one way to describe it like having a bit of "directional sunlight" at your disposal). Maybe it's something you could look into? Regarding mixed lighting an action cams, here's an nice example of mixed lighting with the GoPro12 (GoPro Hero 12 with lens filter 2x Kraken Solarflare 10k Video Lights with Kraken Blue Filters) : https://www.facebook.com/watch/?v=786913180869855 cheers b
-
Great pictures and report, Dave. Would you recommend having the housing near neutral or slightly more negative than usual? I’ll be swimming with whales, if we’re lucky at nature’s casino, and from what I see in the footage here, a lot is shot from above. Duck diving is forbidden here, so I'll be filming on the surface, in potentially rough conditions.
-
As what will likely be my final follow-up on this matter: I never heard back from AOI. However, after exchanging with Fantasea, they reviewed the situation, and informed me they had discussed my case with AOI and directed me back to AOI, who would try to assist in a more suitable way. My previous email to them had not received any response, but I emailed AOI again after the Fantasea update. I followed up more than once before finally receiving a reply. The response I eventually received from AOI was as follows (quoted in full for transparency): Thank you for your continued follow-up and patience regarding the UCL-50LF diopter (Serial Number: UL30012889). We appreciate your clarification that Fantasea has referred you back to AOI, and we’d like to formally align on the service framework for this product. As previously communicated, this model is exclusively distributed and supported by Fantasea’s global sales & after-sales network. While AOI does not directly provide end-user support for Fantasea-distributed products, we are willing to offer a one-time technical service as a goodwill gesture, subject to the following terms: Service Quotation & Terms Inspection & Cleaning Fee: US$120 (covers initial assessment, disassembly, and cleaning of internal fogging/traces). This fee is non-refundable, even if additional repairs are declined. Parts & Additional Repairs: If inspection reveals damaged components (e.g., seals, optics) requiring replacement, we will provide a supplementary quotation with part costs and labor fees. Spare parts are sourced exclusively for Fantasea-authorized services, and we cannot sell parts directly to end users. Shipping Responsibilities: You are responsible for all inbound shipping costs, insurance, and customs clearance to Hong Kong. We recommend using a trackable courier (e.g., DHL, FedEx) to avoid loss. Return shipping costs (to Japan) will be quoted separately upon completion of service, and must be settled before shipment. Warranty: The service includes a 3-month warranty only for the specific issue addressed (internal fogging/cleaning). It does not extend to new damages, normal wear, or unrelated component failures. Holiday Schedule: Our technical facility will be closed for the New Year holiday from next week until end of Feb. All incoming units received will be processed operation resume. Please account for this extended timeline when planning shipment. Next Steps (If You Wish to Proceed) Confirm your acceptance of the above terms via reply email by Feb 10, 2026 (to ensure we can log your request before the holiday). **** I replied that in my view, a non-refundable USD $120 inspection and cleaning fee before any parts, additional labour, return shipping, or customs fees are even considered is not a reasonable or good-faith solution, and could not really be called a goodwill gesture... Once international shipping to Hong Kong, return shipping to Japan, customs handling, VAT, and potential additional parts are included, the total cost necessarily exceeds the retail price of a new UCL-05N. In practical terms, this offer means paying more than the cost of a new lens simply to enter an open-ended repair process with no upper cost ceiling, which is economically irrational, especially since the proposed structure guarantees that repair exceeds replacement value. AOI then offered to reduce the inspection fee by US $6, from USD 120 to USD 114, with all other terms unchanged. Shipping, customs, labour and any additional parts remain excluded, and same limited three-month warranty. I explained that a USD 6 reduction does not alter the underlying economics. The repair path remains more expensive than replacement, for a lens that was designed and manufactured by AOI (references to distribution structure or co-branding do not change that). I will not proceed under these terms and consider the matter unresolved. There has been no further response from AOI. *** The practical outcome is that I am left with no viable repair option, only a process that costs more than buying a new lens. To be clear, I was not asking for free service, but for a solution that reflects basic fairness, proportionality, and an understanding of customer experience. This could have taken the form of a significantly reduced replacement cost, a refurbished unit, a capped repair fee clearly below the price of a new lens, or another concrete solution that does not place the customer in a worse position than simply discarding the product. Frankly, I do not understand how a company can consider this an acceptable way to handle a product issue. From a customer standpoint, this is not support. It is a mechanism to formally close the case without providing a viable outcome. It's a real shame because AOI has actually put out some really nice wet lenses and diopters. The current "pro" line like the UCL-09, UCL-90 and UCL-900 diopters, are genuinely strong in terms of optical quality. But lenses like the UCL-900 retail for around USD 900. Imagine running into an issue at that price point and having to deal with this kind of customer service from AOI. I imagine this extends to other products such as housings, lights and strobes... Caveat emptor, as they say. That’s definitely something to take into account, which is why I felt it was worth flagging here. Especially given that AOI supports this forum, it would be good to hear their perspective here.
-
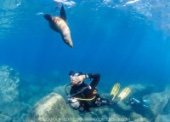
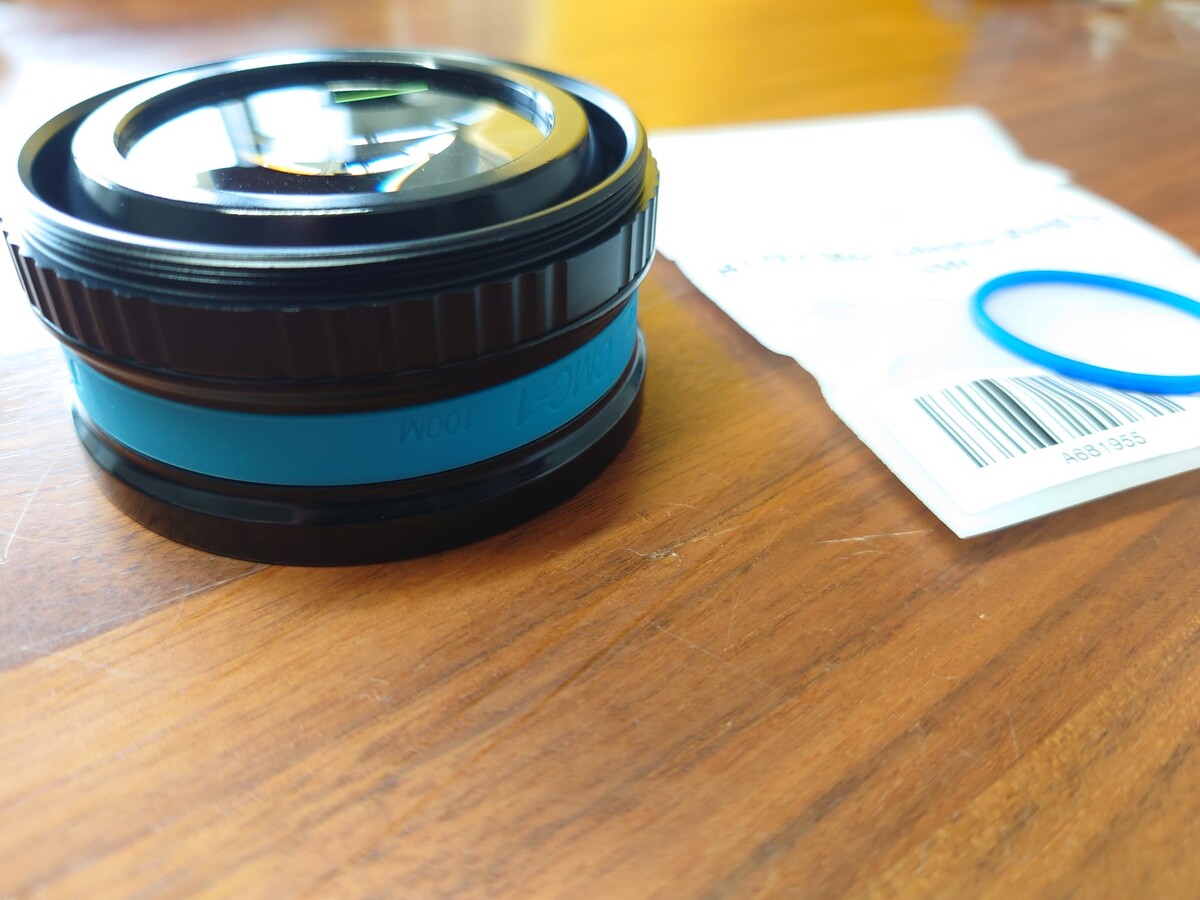
The adapter just arrived today and I can confirm it works perfectly with the AOI flip holder and the CMC-1 - the flip's locking mecanism doesn't get in the way like it does with the large adapter, and I can now remove the o-ring I was using as a spacer. This adapter was designed for the SMC-1, but I think most Nauticam wet diopters share the same design (Nauticam only lists the SMC-1, but Backscatter lists a bunch of compatible Nauticam diopters on the website, MFO, CMC, SMC, etc)

-
As a follow-up, X-Ray mag has just published a new feature on Mikomoto (and a bit of Osezaki): https://xray-mag.com/content/japan-honshu-mikomoto
-
Yes, this is a major issue with Peleliu. It's not dived as much and the currents are more complex than elsewhere, including serious downcurrents. We also had a fuel surcharge to go there and the owner was a little uneasy because of a drift incident that happened to staff a few years earlier (drifted off Peleliu and picked up safe hours later, far away, after a massive search). I've worked in Komodo so pretty cautious about this kind of thing, but really the only way to gain confidence is to dive it often, cautiously, in different conditions. We did go a few times and while I can visualise some sites like Yellow Wall, Wall/Cut Corner and Express to some degree, I wouldn't say that I'm comfortable with these, and there are plenty of sites in the area I haven't dived at all. This happens a lot on real liveaboard trips, where you sometimes even dive new sites on more exploratory trips, but one thing to keep in mind for Palau is that boat operators are generally not really used to following divers and drift dives as much as in places like Raja or Komodo. This is especially true for land boat ops. Local captains are great and are pretty much all fishermen with fantastic local knowledge, but most are used to dropping divers in one place and estimating pickups rather than following divers, which has to be taken into account on sites with drift potential like Peleliu sites or more exposed sites like Shark City for the snapper spawning. I was actually planning on diving a week from Peleliu with the op there when I had the time, but that didn't happen. The Peleliu sea bream spawning looks amazing, if anyone's done that. Sorry to hear that. It should be a little busy now but still... Keep in mind that Palau will be expensive, I don't know if the 10% PSGT is still applied (it was put into place as I was leaving), but this also increased the prices further. One thing you could look into are dive-accommodation packages. We offered packages with negotiated prices for accommodation available for people diving a certain number of days, with pretty much all the hotels I listed above, and I'm sure other operators do as well. It was quite a good deal, but yes, package or not it is still way more expensive than diving in SE Asia.
-
Agreed, you’re absolutely right about shorter rides and reaching more remote sites / areas (pretty cool that you made it to Angaur!) It takes roughly 45 minutes from Malakal to German Channel if conditions are good, and a bit longer to reach Ngemelis area sites like Blue Corner. I didn’t think of that initially because, for me, the commute is part of the trip. The boat rides through the Rock Islands can be genuinely interesting. I guess it really depends on how flexible the operator and crew is. We would sometimes go looking for whales or pods of dolphins on the outer reefs, wait for the tides to pickup at German, or do a bit of sightseeing in or around the lagoon. I actually enjoyed that aspect a lot, perhaps more than elsewhere - when it wasn’t raining cats and dogs, which is fairly common in Palau 😆 Boat coats quickly became very good friends... Another factor is group size. Groups are generally smaller, although that was not always the case, as Palau has a history of land operators taking large groups. That does seem to be changing, thankfully, and you tend to have fewer people on a site than with liveaboard drops. Don’t get me wrong, I love liveaboards and have worked on them myself (just not in Palau) and appreciate the disconnection being on a boat away from it all offers, and how great and immersive the dive-eat-sleep-repeat cycle is. But when it comes to the diving itself, I'd say the main advantage of land-based diving is flexibility. You are not locked into a busy operating schedule with fixed dive times and meals and a trip schedule, and in that respect land-based operations can have the edge. That said, there is always a trade-off, and it really comes down to the operator. I remember some land ops that still left at a fixed time every morning, which rather defeats the purpose...
-
I currently use an AOI double flip holder for my diopters (CMC-1, AOI +6 mostly), and plan to use it with MFO3 when I make the jump to a rig with the Sony 100mm macro. The other flip holder will holder either a MFO1 or the AOI 12.5 (which is similar to the SMC1) The dual flip is bulky but really convenient. And if you ever get into blackwater divin, bayonet or not you don't really want to be handling lenses in the dark over deep water if possible. As a caveat, if you ever consider the cheaper AOI flip, make sure you get the small spacer adapter for Nauticam lenses (not the one which comes with the lenses, it's too large and doesn't fit), as these diopters cannot be used as is because of the protruding lens design, which is too long for the AOI holder and means the lens rear hits the port glass.
-
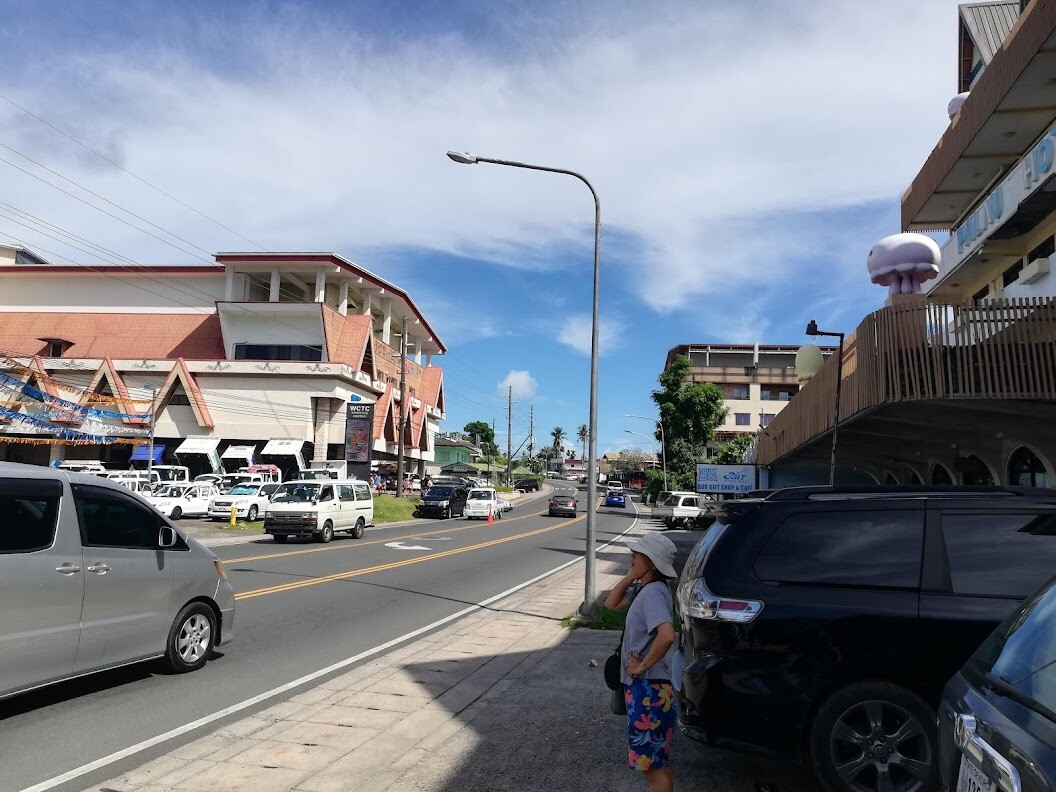
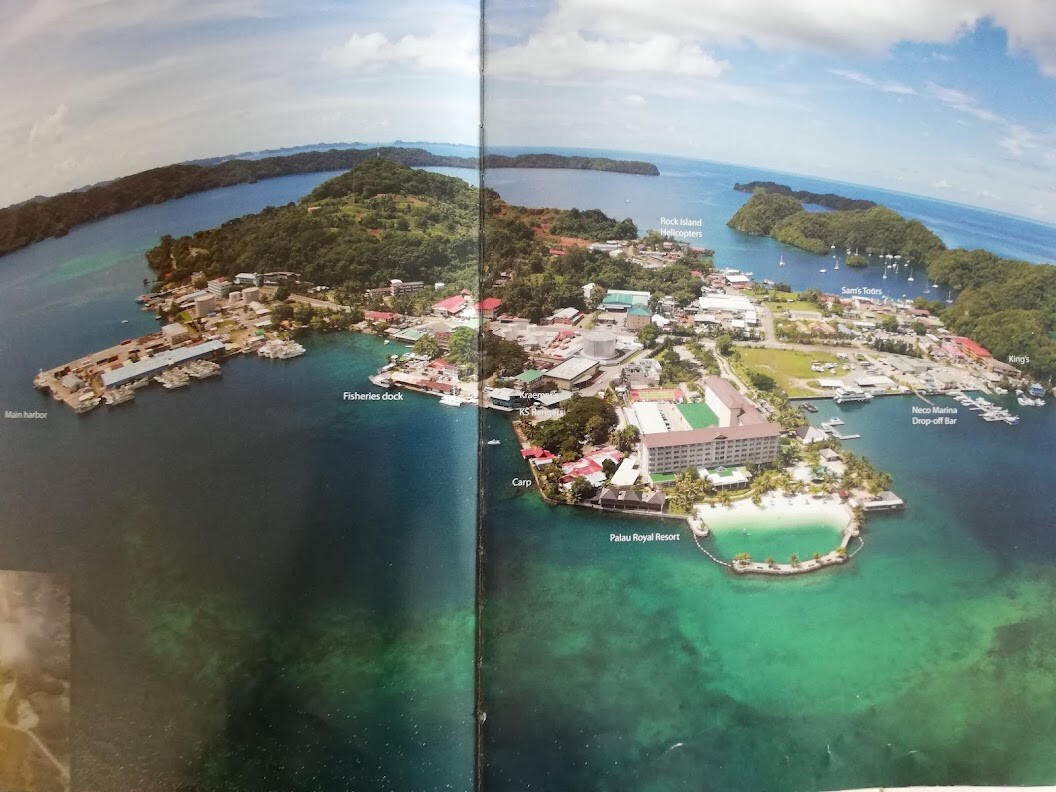
I worked there a few years back (left in 2023), so this is a little dated, but I can help to some extent. I would definitely second doing land-based diving there. The liveaboards are not true liveaboards covering a wide area. They usually end up moored near German Channel for most of the trip and dive from there as a fixed platform. On the plus side, you do get to dive Peleliu on liveaboards, which is less commonly dived from land as it is further away and uses more gas. Land-based operators are also generally less familiar with it for that reason, and it has the most complex currents in the area, which adds to the difficulty. You also get sunrises and sunsets on liveaboards, but that's pretty much it... Early diving is not really a thing, as diving in Palau is tide-dependent. Most sites are best dived on incoming (rising) tide. A liveaboard’s fixed schedule and location can actually be a disadvantage, whereas good land-based operators will plan dive times around the tides, including early departures when it makes sense. Night dives are rather average. Look into the following operators: Sam’s Tours (very experienced in the area) Neco Marine (smaller operation, owner is a photographer, staff should be able to customise dives) Blue Marlin (Japanese operation, very experienced and pioneers of many spawning dives along with Daydream. Just check if there's English support) Fish and Fins is probably still the busiest, so flexibility may be limited Another operator to look into is Palau Dive Adventures. I am not sure how they are doing currently, but their approach used to focus on smaller groups and more personalised diving. There is also a small operator based on Peleliu itself, if they are still operating (Peleliu Divers IIRC). The owner and guide was Godwin. Very remote and isolated, but excellent for diving Peleliu, and you can also access Ngemelis area sites like Blue Corner from there. Resort-wise, it really depends on your budget. All operators leave from Malakal (small island connected to Koror) in the morning and will pick you up from anywhere. None of the resorts have a real beach except the most expensive and luxurious one, Palau Pacific Resort. It also has or had a Japanese-run dive centre, but other operators do pick up from their jetty. It also has sunset views, which are rare in the area. On Malakal itself, Cove Resort is nice and convenient. For a more budget-friendly option with access to restaurants, definitely look into Palau Central Hotel. It is in downtown Koror, which is not particularly pretty, but it gives you access to actual restaurants, bars and supermarkets, unlike most resorts which are in more remote locations. If you want something less all-inclusive, this is a good choice. The drive from Koror to Malakal is about 15 minutes, so it makes no difference for dive pickups. One thing to keep in mind is that all of the scenery and diving are in the Rock Islands national park. Koror itself is not especially attractive, and aside from a few public parks there is very limited access to the water nearby. You generally need to drive some distance. Nice to do a land tour on Babeldaob for instance or drive around for that, but don't expect many nice spots to relax in the afternoon after diving like you would have in SE Asia for instance. For planning, for me the most impressive dives were the spawning dives (bumphead parrot fish and snappers) - bumpheads is the easier one as it's a more protected area, whereas the snappers is more exposed (so condition dependent and challenging with a camera rig). These happen a few days before the new moon or full moon - it's a very early morning dive, and operators will want to have seen you in the water first so don't arrive straight for this, but plan ahead with the operator (and for this land-based operators often have the edge). It's a dive you will remember. Hope this helps. Feel free to ask here or by PM. cheers Downtown Koror: Malakal from above:
-
Some software, like DaVinci Resolve, has a function where you can set colours using a colour checker, which helps establish accurate colour values. Here is the process: https://www.youtube.com/watch?v=mao2HSKxMkY Underwater, where colours are filtered anyway, it seems a bit overkill to aim for colour accuracy rather than visually pleasing results. For example, the colour grading on BBC Blue Planet is far from technically accurate. That said, some videographers do use colour checkers as a shortcut to establish baseline colour information for grading. Personally, I use a WhiBal grey card to set white balance underwater, then adjust in post based on personal preference rather than strict accuracy.
-
Selfish enquiry for the nearby future - has anyone worked on focus gear for the Sony FE 100mm F2.8 GM in its Nauticam N100 Macro Port 125 by any chance?
-
I was just thinking of that this morning as I was struggling to film a hairy shrimp swinging on a leaf at 6m depth... I did get shots when it hopped on a piece of dead coral, but yes, a protector could be very handy in the shallows in certain circumstances. Wonder how functional it is for surge - the dynamics seem complex. Very interesting idea, I'd also love to hear if anyone has something that actually works
-
One good person to ask regarding Osezaki would be Kenji ICHIMURA. He runs Dive in Japan ( NPO Japan Diving Experience) working to facilitate diving in Japan for non-Japanese speakers. Contact info is here: https://dive-in-japan.com/contact-dive-japan I know Osezaki also happens to be his diving home base, and he recently wrote an article on Osezaki for X-Ray Mag here: https://xray-mag.com/content/osezaki-gateway-deep-heart-suruga-bay I've heard he was at the Salon de la Plongée this year, so you might actually have met him there 😁
-
As a follow-up, it seems Nauticam makes a small adapter which can be used with the AOI flip: https://www.nauticam.com/products/m67-adaptor-ring-for-smc-1-to-use-on-25104-25105?variant=46258313097 It is designed for the SMC-1, but I think the design is similar to the CMC-1. I have asked for confirmation that it will work with the CMC-1 and MFO-3 on an AOI flip holder.