


Everything posted by Barmaglot
-
Sounds like it is set to advanced mode. Use the Metabones utility to switch it to green mode, and you should get C-AF, but you will lose video AF entirely.
-
Huh, that's odd... I've used a 7Artisans 7.5mm fisheye with the same dome, and while focusing was somewhat annoying (I padded out the focus ring with double-sided tape and used a 16-50mm zoom gear to focus), it was possible. Looking at specs, now, yeah... the 7Artisans 7.5mm lens is listed with 15cm minimum focus distance, whereas Samyang 8mm specs 30cm - that can certainly impair its function in small domes. Being a fisheye lens, you can't use a diopter either. Obviously no one has tested it in water before offering it for sale, although it might be okay for surf photography uses. Still not as silly as the optical bulkheads on their FX30 housing though.
-
They do seem to at least test for vignetting, as in some cases they note focal length limitation, but otherwise, yeah, they're not too concerned with proper lens positioning. Still, for a 180 degree fisheye lens, using a hemispherical dome, 'edge of vignetting' is pretty much the proper positioning. What exactly did you use that wouldn't focus at all? The only thing I've run into even remotely similar is 16-50mm lens with 4" dome - it works at shorter focal lengths, but fails to focus when zoomed in, as the dome is too small; the virtual image that it generates is too close for the camera for the lens to focus when using a longer focal length. Did you try to use a lens with a long minimum focus distance behind a similarly small dome?
-
I just looked through various Nauticam port charts, and it appears that the 8-15mm is gone from most of them - weird. Isotta is more helpful though. For Sony cameras with Canon 8-15mm, they spec a 40mm extension for bare lens, and 60mm for lens + TC. They also spec a 50mm extension for Sony 28mm prime with fisheye converter. Other wide-angle lenses, like the various flavors of Sony 16-35mm require longer extensions. On the SeaFrogs side, 8" dome port V.8 lists 28mm f/2 with fisheye converter as compatible, so it is probably close to Isotta's 50mm extension in terms of dome positioning, while V.9 and V.10 target various 16-35mm lenses and are likely too long. It's very unlikely to be an exact match, but it's probably in the ballpark. Fisheye lenses are generally somewhat tolerant of slight misalignments in dome positioning, so a bare 8-15mm has a good chance of working with it, but if the extension is slightly too long, it may vignette. If it does, then adding a teleconverter (make sure to use the latest version from Kenko) should lengthen the lens enough to get rid of the vignetting and give you a useful zoom range. In any case, you will most likely have to make your own zoom gear, as SeaFrogs support the Nikon 8-15mm (with Z6/Z7 housings) but not the Canon one. If you want, I can share a zoom gear that I made for Tokina 10-17mm on SeaFrogs A6700 in TinkerCAD - it should be the same as their plastic A7 series housings on the gear engagement side; you just need to tweak the height and internal diameter to fit the Canon 8-15mm. Edit: On the other hand, the SeaFrogs V.8 dome is also listed as compatible with Sony 10-18mm APS-C lens, which, on Isotta's charts, is listed as needing just 20mm of extension, which gives you an idea of SeaFeogs' level of precision there. Still, if the extension is too short, with a fisheye lens you might not even notice, and if it does become an issue, you can add a 23mm extension ring.
-
EF mount flange focal distance is 44mm, whereas E mount is 18mm, so the Metabones adapter fills the difference at 26mm.
-
Interesting - it looks like SeaFrogs offer a port and zoom gear for a 70-200 F4, although they don't specify whether it's a 1st or 2nd generation lens. Looking at wayback machine, this listing appeared quite recently, so it's likely to be the 2nd gen one, and the 4" diameter front element suggests that it should have the full zoom range without vignetting. I have to admit I'm kinda curious as to how it would perform... but not US$2000 level of curious.
-
I don't have a Divevolk housing to try and answer your first question, but as for the second, these crossbars are available on Aliexpress, example: https://www.aliexpress.com/item/32934231664.html
-
Looks like third time was indeed the charm - now both ends appear to have a snug but not overly tight fit. As an added bonus, it turns out that if I use my old short macro port (originally meant for 16-50mm kit lens or 30mm macro) instead of the 4-inch dome, I get an absolutely perfect fit with the Canon EF-S 60mm macro lens: null This opens up the possibility of using the 60mm with wet lenses, such as attaching the UWL-09F to widen its field of view a bit for larger subjects on blackwater dives. Time to progress to the waterproof print iteration.

-
There was a recent thread on the subject in the photography forum: But, what exactly is the challenge with framing on the internal display? Is it the angle? Visibility in sunlight? Size? Some of that can be solved with a much cheaper and less bulky magnifier hood.
-
FWIW, if you're worried about FX30 overheating, the a6700 is at least as susceptible to that when shooting 4k over prolonged periods, but honestly I can't imagine scenarios where you'd be shooting video for over 20 minutes straight while underwater. FX3 and A7SIII are full-frame cameras, so an entirely different price bracket. FX30 is definitely a more capable video camera than a6700, so if you're looking for a pure video device, it holds the advantage, but a6700 is an excellent hybrid choice, great at both video and stills. Regarding corner quality, some years ago I did a comparative test with my a6300, 16-50mm and 10-18mm lenses, using SeaFrogs 6-inch and 8-inch ports, although the 8-inch port is more like 180mm in actual dimensions. You can see the results here: https://1drv.ms/f/s!AupWSggdlFYKjtRFu-IIxyopM8fvAA?e=oq7ekL - a6700 shouldn't be much different. As I understand it, a6700 and FX30 use the same sensor, but FX30 is purely a video camera, lacking the ability to fire strobes entirely as it has no mechanical shutter. The 1/160s flash sync speed on A6xxx bodies (as well as A7C series) is not nearly as big a deal as some make it out to be. It's about half a stop worth of difference - shooting wide-angle, I'm at considerably slower shutter speed almost all the time anyway to keep background bright enough, and if I want dark background, 1/160s and f/16 at ISO 100 is plenty to make the background comfortably black. The only scenario where it really comes into play is sunballs, and even then, f/22 and full strobe power is generally quite enough. Another point of note: if you want a fisheye for wide-angle, Sony has very limited native choices, and most users adapt Canon lenses (8-15mm on full-frame, 10-17mm on crop), but autofocus options with adapted Canon lenses are limited - at least with my Metabones IV adapter, its green mode works very well in stills, but does not autofocus at all in video, while advanced mode autofocuses in video, but has degraded performance in stills (tested with Canon 60mm macro and Tokina 10-17mm fisheye),
-
It's 1/160s, not 1/60s. As a long time A6300 user (same sync speed) who just upgraded to a6700, I don't find it particularly limiting.
-
Took my new a6700 out for the first time yesterday and checked focus with red light. Conditions weren't perfect - the dives were shallow with lots of sunlight, but very poor visibility (tons of particulate matter in the water, lost sight of other divers at 3-5m) but I found some dark crevices, and to my surprise, I was able to see perfectly well on the camera screen while using the red mode on the focus light. I don't know what is it that Sony had changed between a6300 and a6700 in this regard, but whatever it is, it appears to be working very well.
-
Sorry about cluttering up the thread with only tangentially relevant info - @TimG, maybe it should be split into a separate thread in the DIY forum?
-
I used a local shop here in Bangkok, and it cost me 650 THB (about US$18) to print zoom gear + the port adapter I'm working on, and another iteration of the port adapter that I just ordered cost me 350 THB (including shipping), so it's comfortably under $10. For the reference, here's the fit of the gear inside the housing: The contact pads are a bit untidy after I filed them down, but they work. The driving cog is on the bottom left, the other two are just frewheeling supports.
-
I guess I'll have to take my chances and most likely iterate once.
-
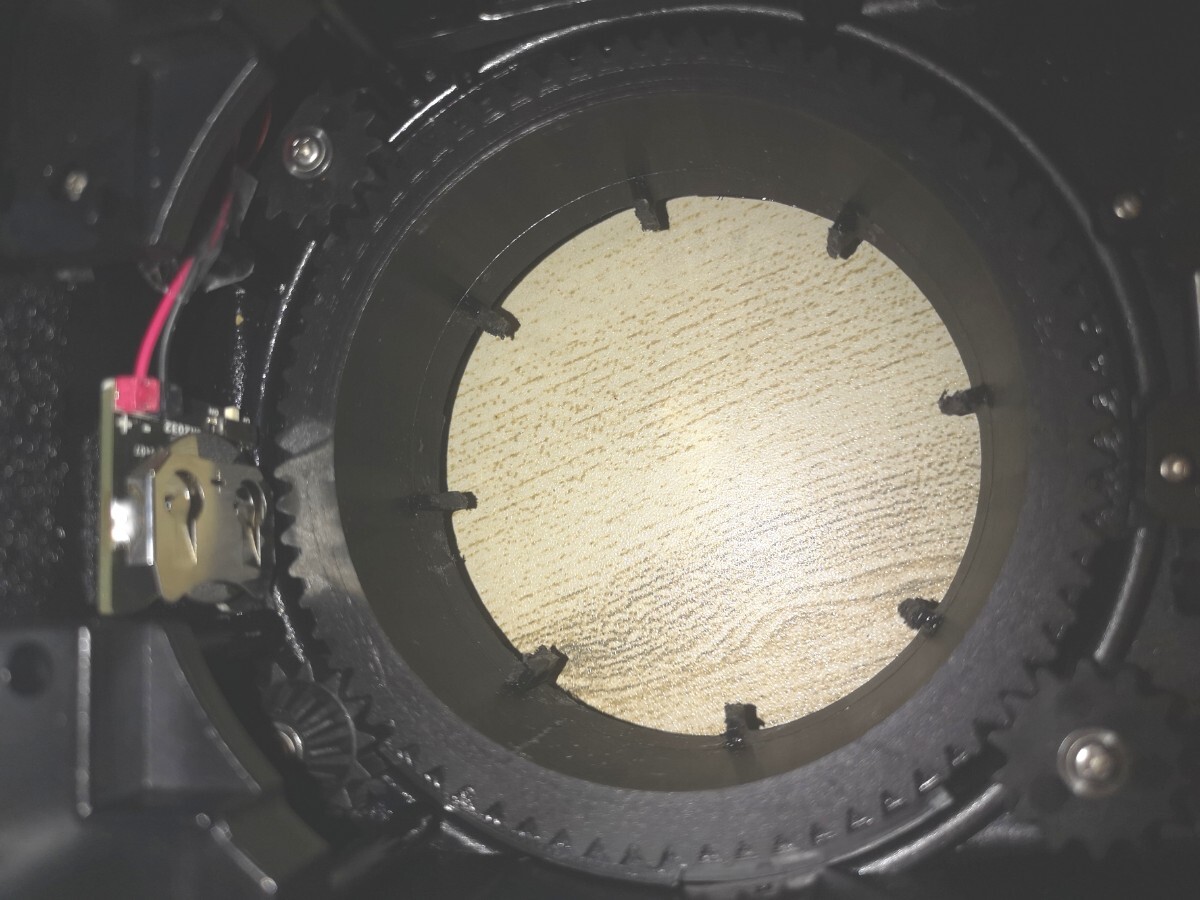
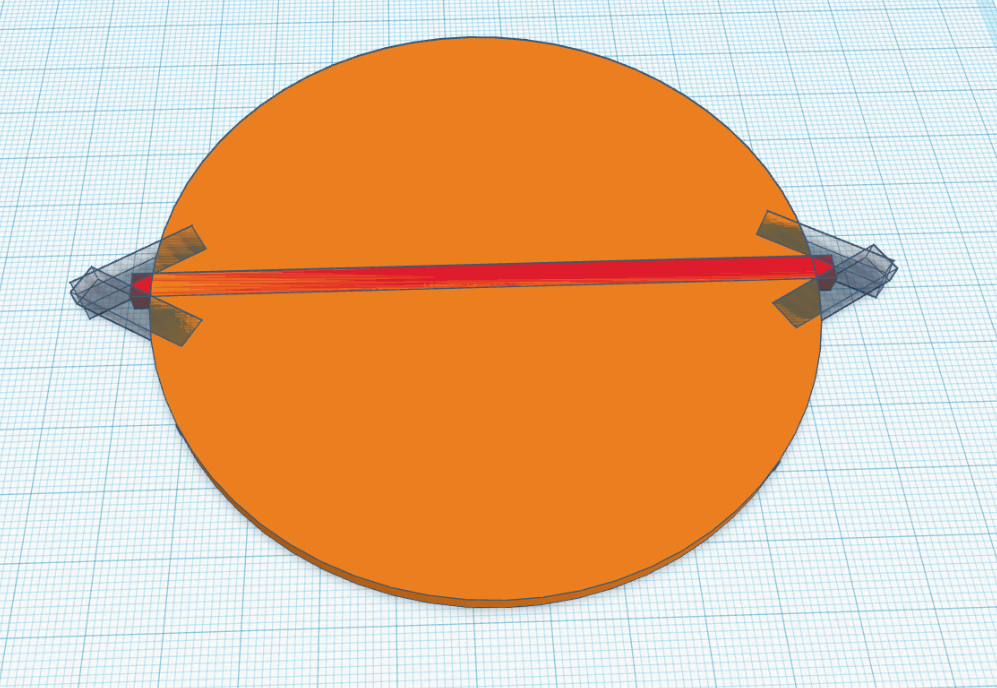
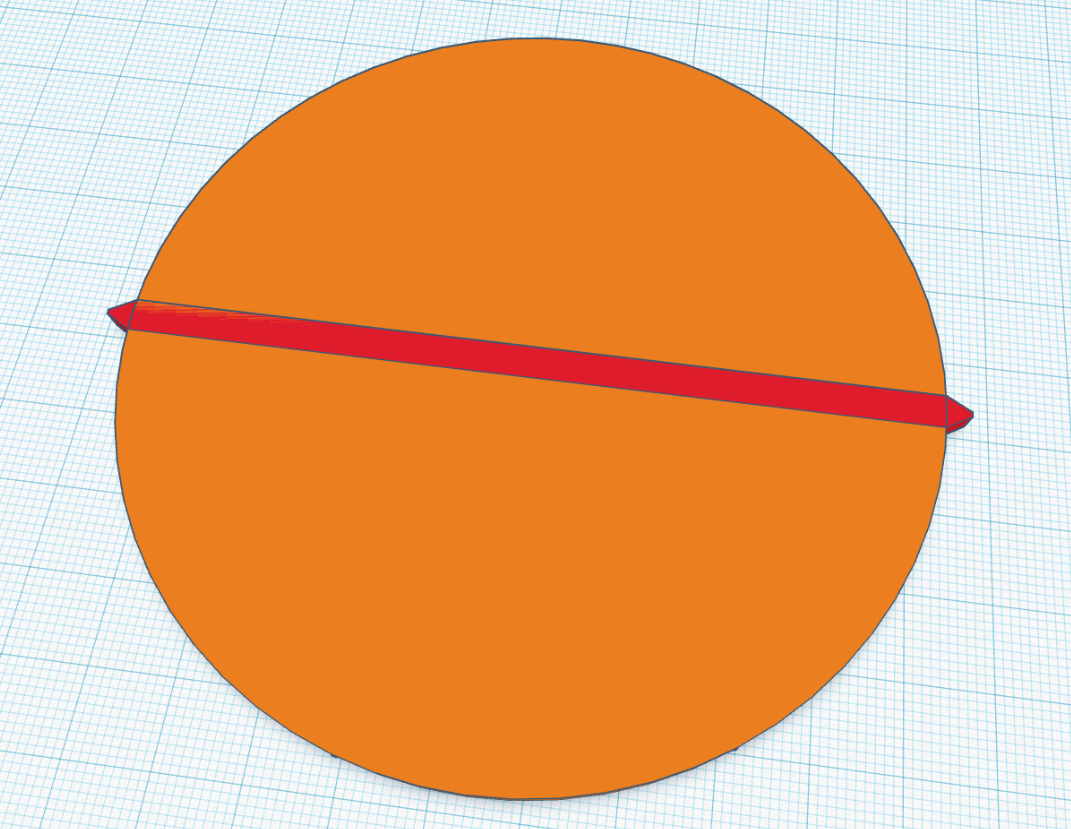
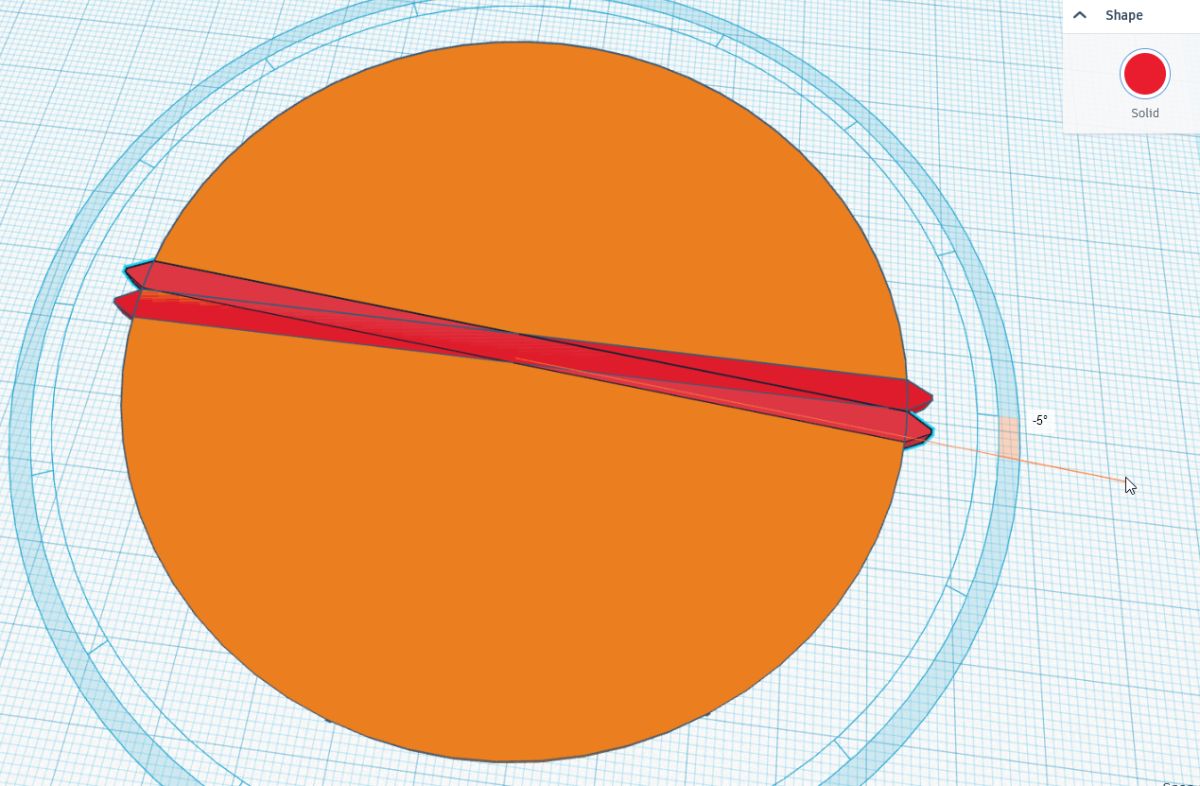
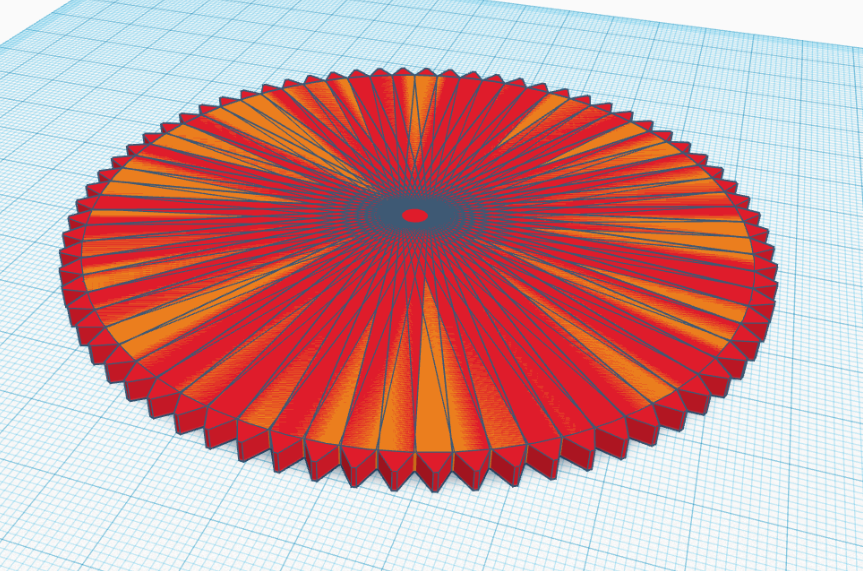
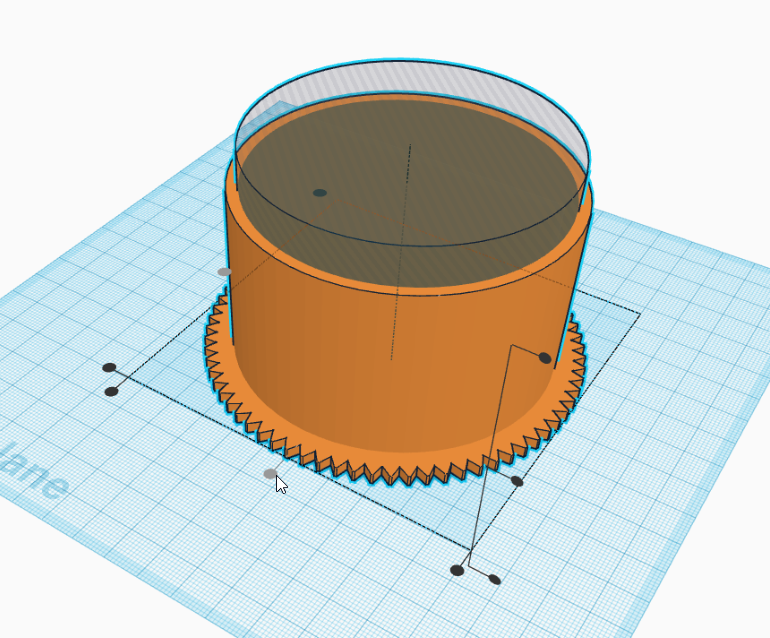
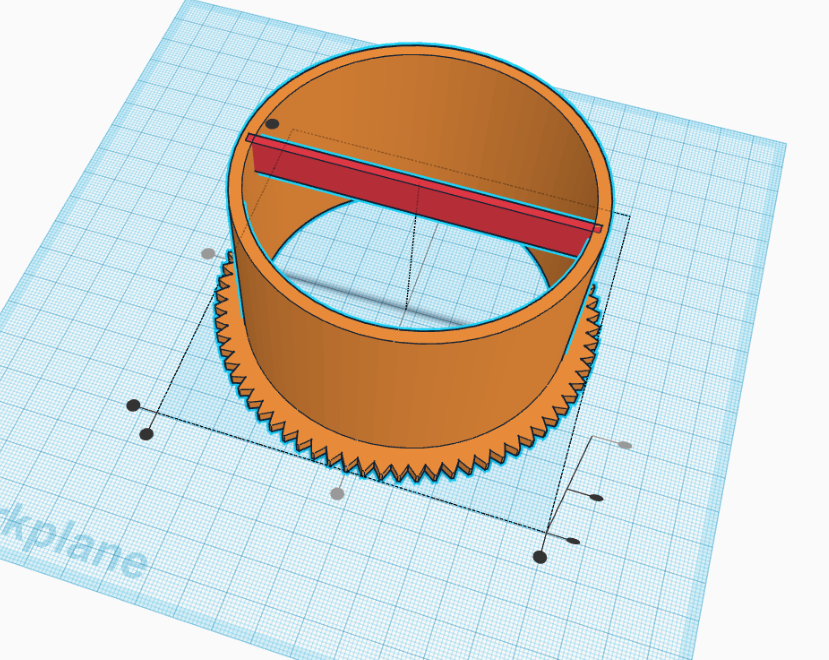
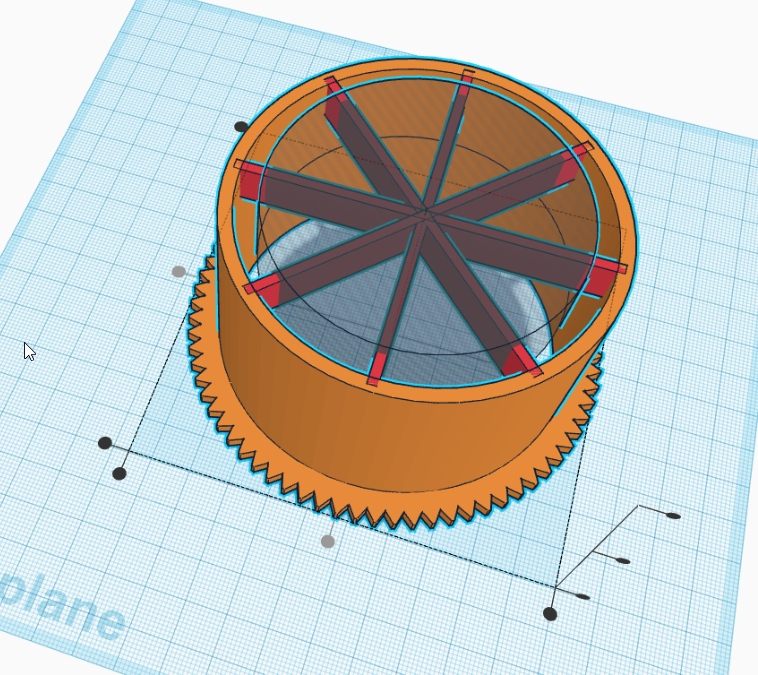
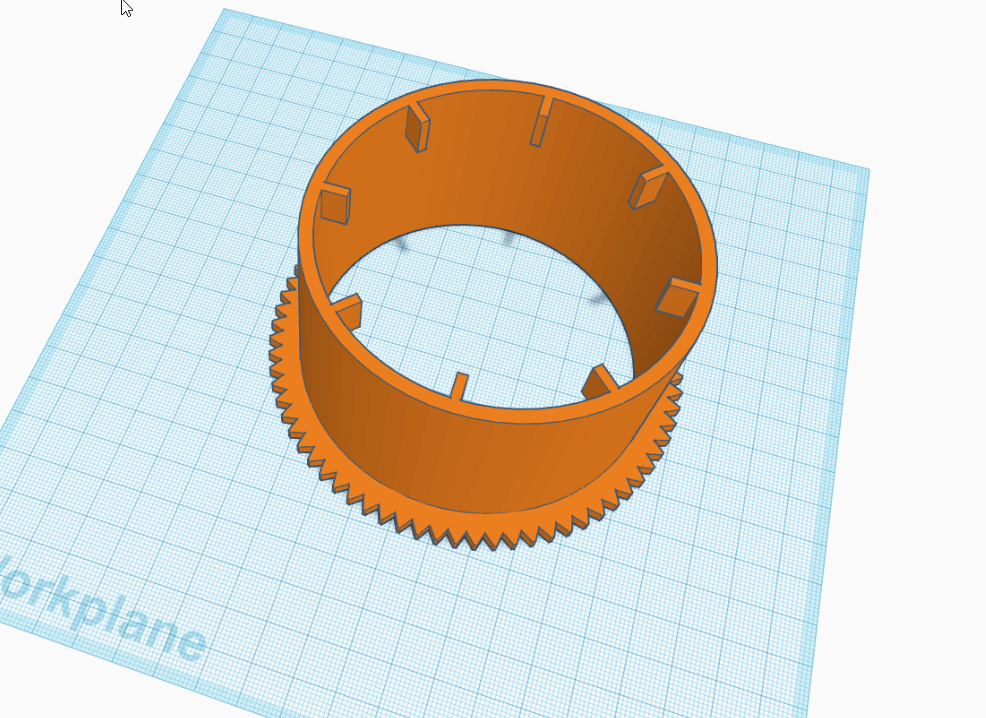
I just made a zoom gear for Tokina 10-17mm fisheye to use with my SeaFrogs a6700 housing, and here's the process that I used. It might look primitive for someone with working knowledge of CAD, but it's what I came up with having had zero experience beforehand. I used the free online TinkerCAD - it runs in a browser, so you don't need to install any software. First, I took a pair of calipers and measured an existing zoom gear for my housing, finding the diameter at the tips of the teeth, at the bases of the teeth, and the width of each tooth. I also counted the teeth, ending up at 72 - a very convenient number, giving me exactly 5 degrees offset between each tooth. Now, in TinkerCAD, I created a cylinder and set its diameter (width x length; TinkerCAD doesn't do 'diameter') to what I measured at the base of the teeth, and its height to the teeth's thickness. Then I added a box, with its length set to the gear's diameter at the tips of the teeth, width set to a tooth's width at the base, and height set to the same as the cylinder. I selected the box and the cylinder and aligned them to each other, so they would be centered. To this, I added four small boxes of the type 'hole' rather than 'solid', each rotated 30 degrees and positioned to intersect with the first long box at its junction with the cylinder. This is basically what I got: Selecting the four small 'hole' boxes and the long red 'solid' box, I grouped them, and got my first two gear teeth: null Selecting this shape, I hit 'Duplicate and repeat (Ctrl+D)' and rotated the duplicated shape by 5 degrees: Repeat 34 more times and I have a full gear of teeth. It's a bit tedious, but not that difficult: Select all, group, and now I have my basic gear as a single piece. Now, put the camera with the lens that I'm making this for into the housing, and use the calipers to measure the distance between the driving cog in the housing and the far edge of the zoom (or focus, if that's the target) ring on the lens - this is going to be the gear's height. Add a solid cylinder of the appropriate height, and diameter to fit within your port's internal diameter, with a few mm of clearance to spare. Add a hole cylinder slightly taller than everything and a few mm smaller in diameter than the solid one - the difference will be gear walls' thickness. Align everything: null Select all, group, and now the gear is hollowed out. Now, the final measurements are the width of the lenses zoom or focus ring, and its diameter. Add a solid box that is slightly longer than the hole cylinder I used to hollow out the gear in previous step, as tall as the target ring is wide, and a couple mm thick, pull it level with the top of the cylinder and align it in horizontal plane: Duplicate, rotate 45 degrees, repeat two more times. Add a hole cylinder of the diameter equal to the target ring's diameter, drag it to overlap the four boxes, then align everything again: null Select all, group, and voila - the design is ready to send off to the printers. Export to STL and get in touch with your nearest printing service. Now, in my case, I had to iterate once - the gear ended up being slightly too small; the teeth were barely catching on the driving cog. I just took the whole thing and increased width and length by 2mm - this got it perfect on the second print. The eight nubs that contact the lens also ended up slightly too long - they wouldn't fit over the lens, even after I expanded that last hole cylinder on the second print. Rather than do a third print, I simply filed them down a little bit, and now they fit perfectly. I went through this whole process start to finish to take the screenshots to illustrate the post, using arbitrary values for sizing, and it took me maybe 30-40 minutes start to finish. Doing the actual measurements would add a little time, but still - this is basically an hour or so long project, not accounting for iterations.
-
Right, but I'm using a local print shop here in Bangkok to print non-waterproof drafts so that I can dial in my design, with the intent to send the final version to @Isaac Szabo to print it using his tested method. I'm somewhat worried that the design that produces an exact fit using the local shop's printer and settings will produce something else when Isaac runs it through his process.
-
@Isaac Szabo, a question if you don't mind - how repeatable are parts dimensions across different 3d printers? I just got my second draft of the extension, and now the housing bayonet is perfect, with just the right amount of snugness to rotate with a bit of effort, but the port side is a little bit loose. I have reduced the internal diameter of the opening from 92mm to 91.3mm which, hopefully, will get it exactly right, but I'm a bit worried that when we're talking sub-millimeter tolerances, a different printer, different material and different settings can put it out of alignment.
-
First draft of the extension/adapter, with the Tokina 10-17mm inside: Got the dimensions a bit wrong - the port side is a little too snug, not leaving space for a o-ring, while the camera side is too loose, not getting any friction. The zoom gear worked on first try but is also a bit too small - the teeth are barely catching. Altered the design, sent it to the print shop for another draft run - fortunately it's quite cheap here in Thailand, less than $20 for both parts.
-
Strobe modeling light is useful on blackwater dives when you get a critter that is attracted to light - that way you can track it by spinning around, instead of losing it as it swims into your focus light. I'm talking about a different situation though, shooting stuff that will retreat into its hole if you shine a light on it, doesn't matter where the light comes from.
-
Interesting idea - no, I haven't tried that. The Weefine Smart Focus 1000 that I use does have full and half-power settings in its red mode, but I've only ever used the full. Weather permitting, I'm planning to do some macro dives this coming weekend, so I'll try that out.
-
Shooting macro, every now and then, I encounter a light-shy critter - saron shrimp, banded pipefish, some crabs, etc. I have a red mode on my focus light, but actually using it is near impossible - at least on my Sony a6300 + 90mm macro lens combo, I basically get a solid red screen with no distinguishing features. Pointing it here and there while mashing the focus-on button I get some darker blotches but nothing identifiable, so getting a shot is basically a matter of blind luck. I'm currently transitioning to a new a6700, and playing with its features, I discovered that if I set the white balance to a custom value off the red light (it ended up reading something like 3600K), then - at least while playing with it dry, in a darkened room, under a red light - the on-screen picture is a lot clearer. The resulting shot is extremely green-tinted, but when shooting raw, it doesn't really matter. However, and this is even more frustrating, this only works when live shoot effect is set to ON - when using settings appropriate for macro (f/16, 1/160s, ISO 100) this produces a black screen, since it previews the exposure as it would be without a flash, and if I set live shoot effect to OFF, then the white balance value is ignored along with everything else for the purposes of framing display, and everything goes super red and indistinguishable again. Are there any ways to make using red focus lights easier on modern Sony mirrorless?
-
Looking forward to hear of the results. All the reviews of FE 50mm that I've seen were done many years ago, when it was first released, so it'd be good to know what its comparative performance is with newer cameras.
-
Yes, but @ChipBPhoto is looking for something wider than 90mm to use on his A1. Yes, a 60mm lens on FF would be like using a 30mm on M43 - and as it happens, the 30mm is the most popular blackwater lens on M43 cameras. The questions which stand (and thus far haven't been answered) are: How large is the actual image circle of the Zeiss 50mm in terms of full-frame coverage? Not in APS-C mode, but in full-frame mode. For Canon EF-S 60mm this is known - full coverage at 1:1, slight corner vignetting at longer distances. How good is its focusing speed and reliability vis a vis Sony FE 50mm and Canon EF-S 60mm? And again, the wider AoV is not for shooting larger subjects at a similar distance, but for easier target acquisition at distance before moving in to closer distance for similar framing. The FE 50mm would be the obvious solution for a 'wider than 90mm macro lens', but it suffers from limited minimum aperture (f/16) and has a very poor reputation for focusing speed, which may or may not be alleviated by the newer-generation autofocus in the A1 body, hence @ChipBPhoto looking at alternatives.
-
How would you rate their focusing speed (traversing between far and close focus, locking on to subject) in air in different lighting conditions, comparing against each other?


