


-
+10000% for the timer feature.... How have you not implemented this yet with the easy to update settings via the app. The scenario you outline for the reason why you don't do it applies to maybe the 1% of the 1% using your strobes. Please do this yesterday.
-
Based on the very high demand they will have for this new lens for many, many, many years to come I can only imagine that it will be an eventuality; if not with this port with a v2 of it. There's too much money to be made not to do it. I've already heard of a long list of orders for this port from my HK supplier.
-
I wonder if I should just order this new port, or go with the Nikon 87mm macro port + the 100 to 120 adapter as discussed earlier in this thread. It would likely be 2.5mm shorter than the Nauticam one above, and might not fit as it will be insanely close....
-
That's very logical; and I think you are right. It should fit; but be very very tight...
-
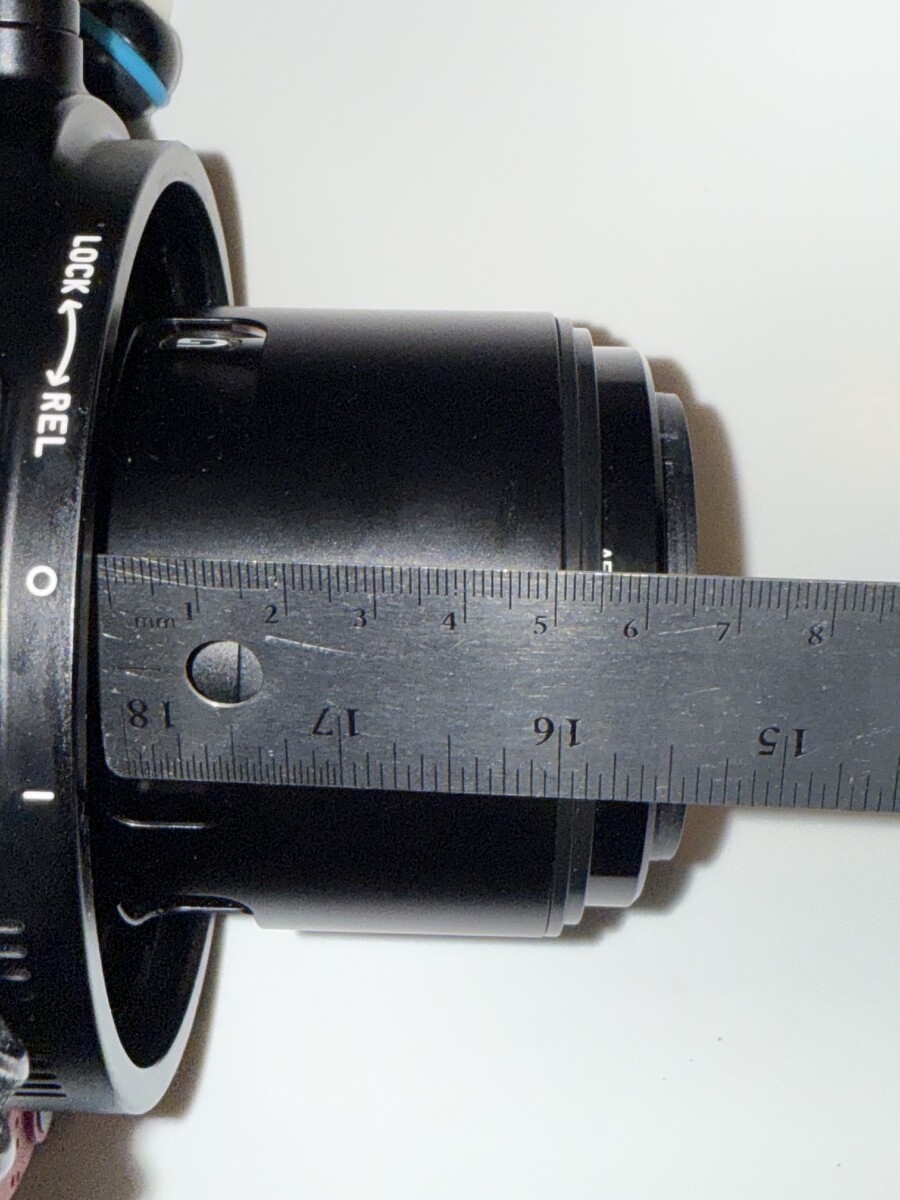
Here's a look (i know it's not the best) at the A1 housing with the current Sony 90mm mounted to the camera with the N100 to N120 (NA-37305) adapter installed. Appears to be about 66mm from the edge of the adapter. I would appreciate a solution that used this adapter; as it would make switching from shooting macro to my FCP-1 slightly less burdensome. If things fit together as I would expect; it would be 66mm(ish)+17.4 = 83.4mm (within 3.7mm of the Macro Port 87 which seems reasonable to me - but I could be wrong). UPDATE: I've also measured this with the dumb ruler about 10x and the measurement I get varies anywhere from 66-70mm (ish). I think it's closer to 70mm than 66mm (as pictured).
-
I have been long awaiting for this lens to arrive (since initially investing an a new A1 back in 2021). After a few years of just using the CMC, I couldn't wait any longer; and I finally cracked in January 2024 and bought the aging 90mm for my upcoming trip to Lembeh - in hopes to get better macro, which it delivered on in spades. Overall it's been a great lens; but I also won't miss it much. And I'm very excited this lens is finally here. I recently did a trip to Bonaire with the Sony 90mm + MFO-3 and loved that combination. But I hope/think it will be even better with the 100mm. I would also be surprised if Nauticam doesn't have a purpose built port (and or) extensions for this lens available within a month of it's release. They've done far more work for a much smaller market (like making the Canon V1 housing that I also purchased). A port has to be one of the easiest things they can manufacturer; probably takes them less than an hour in CAD to produce the file for the machines.
-
If you go back to my post from Aug 21; that shows my 3 battery 18350 solution for the Canon V1.
-
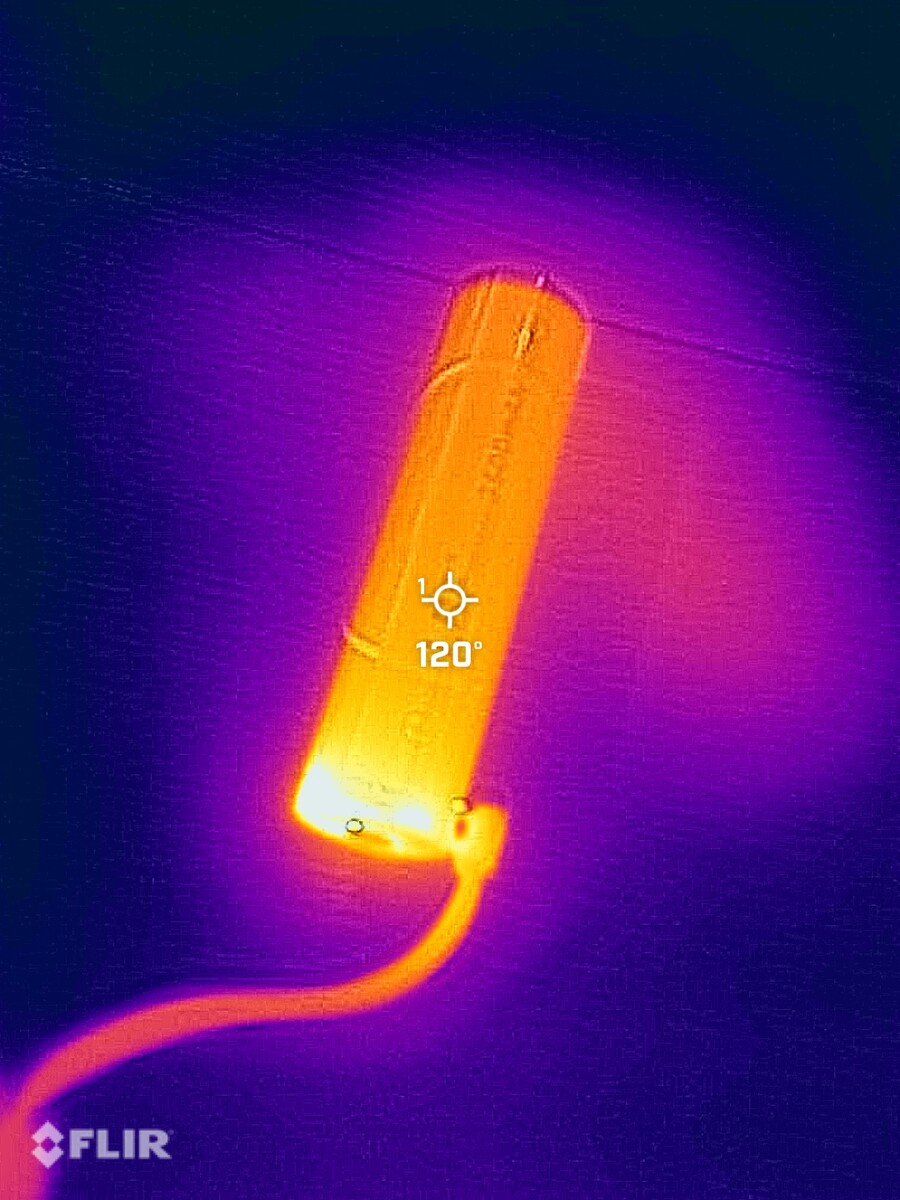
Yeah, the charging circuit on this battery is not safe at all... My custom solution earlier in this thread is exponentially safer. Can't say I'm surprised #china. So let this be a warning of what not to do or you could start a fire. AKA: Only buy batteries from reputable sources; and if it's hard to find something there's likely a good reason for that. These batteries are immediately getting disposed of. But the "silver lining" is these things did start "rebooting" on their own when max temp was achieved.

-
Not sure if I love this solution so far, the battery is getting pretty hot during the charging process. It would probably be ideal to run two batteries at 7.2V for this solution; but that requires "work." I'll keep an eye on the max temp of the battery with a thermal camera and report back.
-
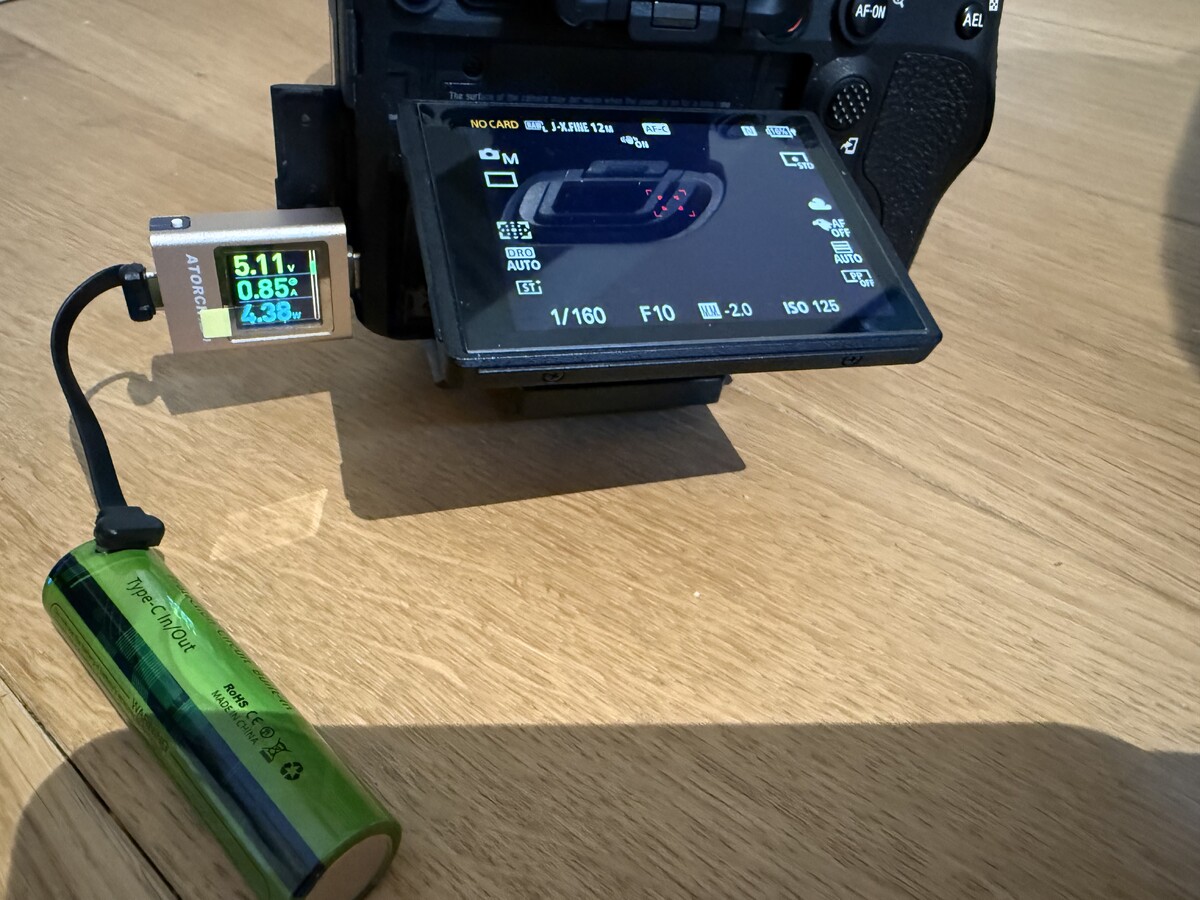
USB-C delivers 5V, I believe it just ups the V and drops the amperage using a micro boost converter. Update: Just confirmed (see below) **I'll keep this thread updated in case my camera starts on fire; you never really know with some of this stuff....

-
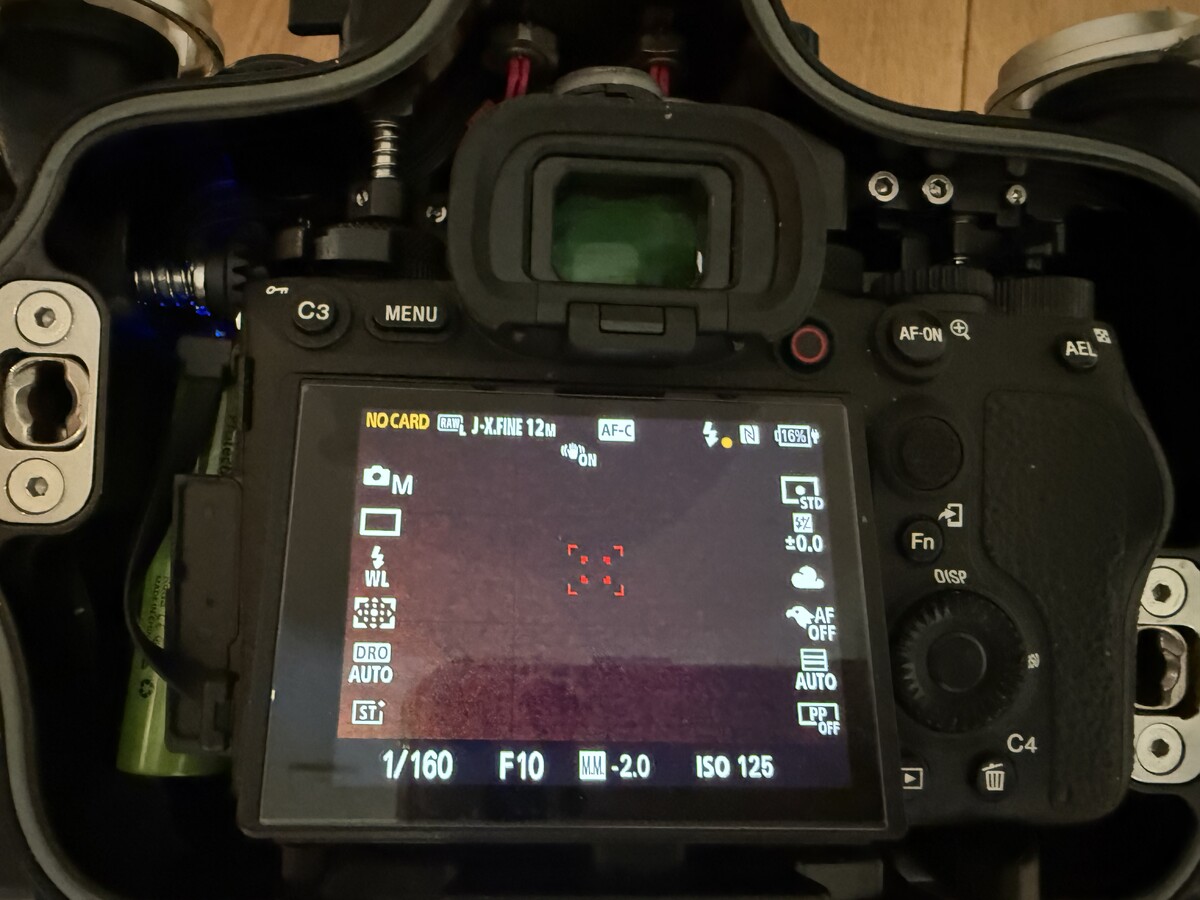
The last photo shows the 1x 18650 battery in the housing (green thing on left) with it plugged into camera and the camera charging. This battery has a built in bi-directional USB-C port (most batteries this size only have support for charging the battery, not charging a device - but this one does). As you can see in the upper right screen shot, it's charging my battery via USB-C. If you have 5cm that is enough; you could fit in an 18500 battery (the 500 part representing 50.0mm or 5cm). Scroll back to see my custom 18500 battery pack for that solution.
-
I'm super happy; while building the custom battery for my wives housing I starting thinking if I could do something similar in my Nauticam Sony A1 housing. My solution is exponentially easier, and anyone with a similar housing can do this with no electronic knowledge required! A bit of background, I noticed you can buy 21700 batteries with bi-directional USB-C circuit charging built into the battery itself; I was wondering if something might exist for 18650's as well; and it took some digging but I found some (and I was order #1001 AKA#1) so I don't think anyone else knows about them: LBF BatteryButton Top Protected 18650 3500mAh Flashlight Battery Typ...【Battery Specification】Battery type: 18650 Button Top PCB Proctected, Capacity: 3500mAh, Wh Rating: 12.95Wh, Voltage: 3.7V, Size: 18.5*70.5mm(0.72*2.77 inches), Feature: Type-C Input/Output, Quantity: That combined with this from Amazon: https://www.amazon.com/dp/B0F8HW858S And it fits perfect in the housing. Just put a little electrical tape over the positive/negative ends for safety; plug it in and you are good to go. If my math is right this should add about 70% capacity to an existing Sony battery (aka 1-2 more dives). Here it is installed:
-
It can also do 4k 60p unlike the old model.
-
We really should move this thread to a new forum regarding custom battery solutions, but oh well here we are... This might work (as the 16mm isn't discontinued yet). And actually they still might be able to make the M14 one as the description says they are manufactured on demand. It would be "clunkly-ish" but you could maybe do this: NauticamM16 to M14 Step-Down Adapter ~for Electrical BulkheadAllows for the use of M14 electrical bulkheads in M16 housing sockets.and this NauticamM16 Offset Connector with Dual Activation Vacuum Valve ~C...This dual-activation offset vacuum valve supports creating a vacuum with either the hand pump or via a low pressure inflator. The offset allows the bulkhead to be used for another purpose such as an e
-
If you want to take the risk and forgo the vacuum (scary), you could for sure do it. I would recommend keeping your battery; and just charging it through the USB port. The RX100 can charge and be powered on at the same time. Some camera's only charge when off (but still, just turn off the camera between dives and it will charge up). The Canon actually runs off my custom battery pack (when turned on, and my pack has juice); and when the camera is off it charges the camera battery. You really don't want to use a dummy battery unless you have no other choice; as you are giving up additional capacity and redundancy.


.jpg.857dbbfbdc4d79d9c6ebf7b4ba96ed1b.jpg)
Important Information
Terms of Use Privacy Policy Guidelines We have placed cookies on your device to help make this website better. You can adjust your cookie settings, otherwise we'll assume you're okay to continue.