



Wetpixel member Barry Guimbellot (Dupsbear) has a great article on the front page about making your own small dome port for CFWA photography. The end result looks amazing.
- 55Posts
- 55Replies
Read-only discussion
DIY small dome port for CFWA
55 posts
-
-
Wetpixel member Barry Guimbellot (Dupsbear) has a great article on the front page about making your own small dome port for CFWA photography. The end result looks amazing.
I am one of Barry's friends who has this port. I can attest to its quality of workmanship. Soon, I hope to get some pool time to shoot with this puppy.
Bob
-
I am one of Barry's friends who has this port. I can attest to its quality of workmanship. Soon, I hope to get some pool time to shoot with this puppy.
Bob
Pretty awesome. I may have missed it, but is this a glass or acrylic dome?
It would be interesting to know how it compares in price and quality to a 'commercial' dome like the Zen.
-
Pretty awesome. I may have missed it, but is this a glass or acrylic dome?
It would be interesting to know how it compares in price and quality to a 'commercial' dome like the Zen.
It is acrylic. You will need to contact Barry Barry's site for price, but it should be less that the Zen.
Bob
-
Fantastic work Barry - thanks for the great info and development (I know how much work that is especially making fiberglass!).
Cheers
James
-
Pretty awesome. I may have missed it, but is this a glass or acrylic dome?
Acryllic - blowing a glass dome is serious work, arcyllic is more manageable without specialist kit.
This picture shows a home-made acryllic mini-dome on my F100 housing (right):
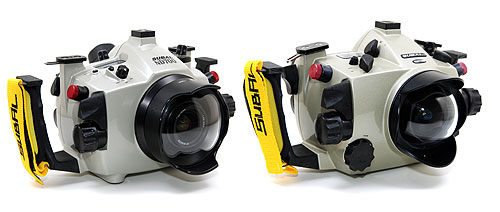
Certainly a useful item to own.
Alex
-
Yes, the dome is acrylic.
I priced a glass dome and found for my configuration each dome, coated inside and out, would cost ME $1000. Over a grand for a port to me is not the best use of my money. Acrylic is easy to get scratches out, glass is another matter. Glass actually has a slightly higher refractive index than acrylic. For me, using acrylic is a no brainer.
Barry
-
Andy just asked what was an advantage of using the Tokina 10-17 with a 1:4X teleconverter in my port. I told him it give me more working distance so I can still light my subject and still get a good depth of field.
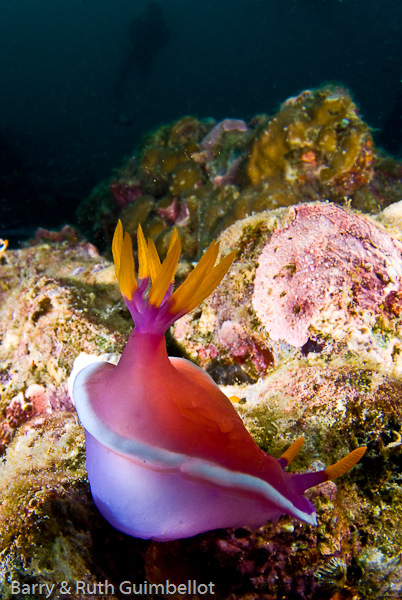
Below is an example of a nudibranch taken with the 10-17 and a 1:4x teleconveter. We were beside a wreck on a very murky day, so my diver is very dark in the image. On a better day, I would get a better image of the diver with this combination.
I also tried the 10-17 with the teleconverter in a flat port just to see what I could get. I was trying to get good depth of field but with a wider field of view.
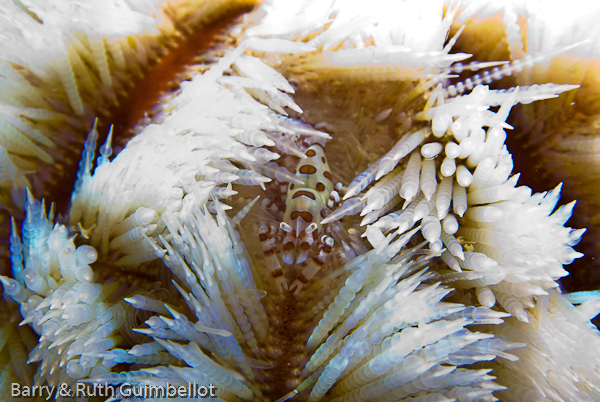
For those of you that are aware of these little shrimp on urchins, you will appreciate the depth of field in this image. Although not using my mini-dome, this image shows the benefit of a teleconverter. Without a teleconverter, I would never have been able to light these subjects.
Barry
-
I'm chewing over buying a mini-port for CFWA. If I get one, why would I still need my 8" FE port? I can see the obvious advantages of the CFWA port - but what are the disadvantages that make a grown-up dome port still worthwhile?
-
Your still going to need an 8" dome if you want to use any sort of rectilinear wide angle lens or shoot under/over shots.why would I still need my 8" FE port? -
Oh right! Thanks mate.

I'd forgotten about over-unders
-
Oh right! Thanks mate.
I'd forgotten about over-unders
Those are half the fun!
-
Those are half the fun!
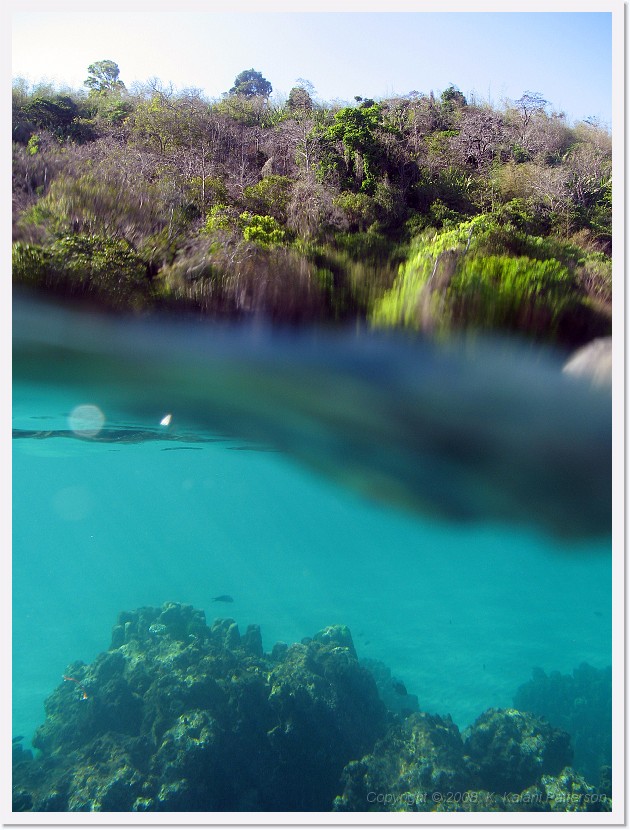
You mean it's not "fun" to try to do an over/under with a point and shoot? (no dome, just 1" of flat glass)
I'm always up for the challenge, but I agree my success/failure ratio of 30:1 could stand improvement.
LOL
-
Andy just asked what was an advantage of using the Tokina 10-17 with a 1:4X teleconverter in my port. I told him it give me more working distance so I can still light my subject and still get a good depth of field.
Below is an example of a nudibranch taken with the 10-17 and a 1:4x teleconveter.
Barry
Several people have contacted me wanting to know what do use for a gear if using a Tokina 10-17 lens with a1:4X Kenko teleconverter in a Nexus housing. Below, are some pictures of a Nexus gear that will work. The gear is for the Nikon 12-24 mm lens. The fit is tight but works great.
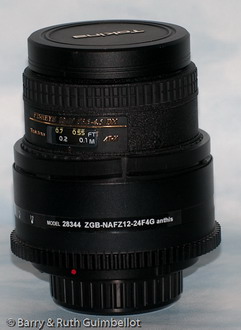
Above, is the completed gear with lens and teleconverter.
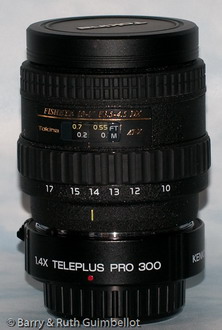
Above, is the lens and TC without a gear.
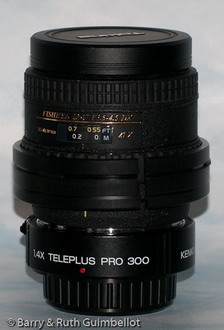
The above image is the lens, TC and inserts that come with the Nexus 12-24 gear.
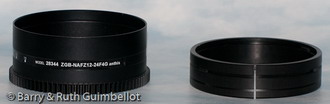
Finally, the Nexus gear with the insert that comes with the gear.
I use the above setup when I know I will not be shooting extra wide like in a cenote or in wreck photos. The lens and TC combination gives a field of view close to the old Nikonos 15 mm lens, but with a zoom.
I designed my mini port to accept the above setup without additional port extensions, which makes the port much more versatile.
Barry
www.creativeillusionsphoto.com
www.marinekeywords.com
-
Barry, have you considered making the port for Ikelites modular system?
Regards Bent C
-
Barry, have you considered making the port for Ikelites modular system?
Regards Bent C
Hi Bent C,
No, I was just trying to make a DIY for my Nexus that worked out good enough to make some to sell. I don't want to try to make ports for other housings.
Thanks for asking,
Barry
www.creativeillusionsphoto.com
www.marinekeywords.com
-
Hi Bent C,
No, I was just trying to make a DIY for my Nexus that worked out good enough to make some to sell. I don't want to try to make ports for other housings.
Thanks for asking,
Barry
www.creativeillusionsphoto.com
www.marinekeywords.com
That is to bad, Barry! It looks like a great port. I am amazed that it is even possible to make such a port as DIY. Greta jobb.
Regards Bent
-
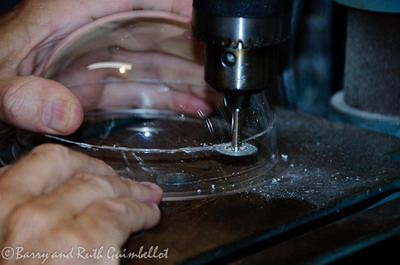
Well, I am still building mini dome ports and thought I would answer some questions members have emailed.
How I get a straight cut for the dome is by using a drill press with a diamond cutoff wheel. I carefully measure with a millimeter gauge and slowly cut the dome by keeping the dome secured to the table with my opposite hand.
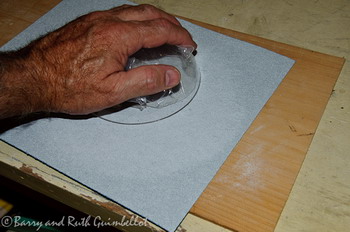
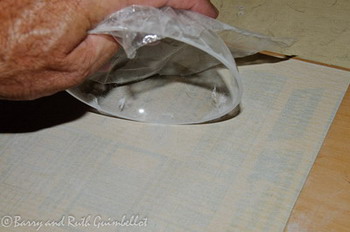
After cutting the dome, I use new/sharp sandpaper on a flat board to make sure the dome sealing surface is kept flat. Then, I hand cut the inside and outside edge of the flat surface, since acrylic does not like sharp edges and might craze or fracture.
Once my dome sealing surface is flat, I collect my housing parts and secure them together as explained in the original text.
After the dome is secured and allowed to dry for several days, I take a Nexus port cap, remove the center pressure release plug and install a air tight hose adapter in the port cap. A automotive brake vacuum is used to check every dome several times before going into a wet pressure tank.
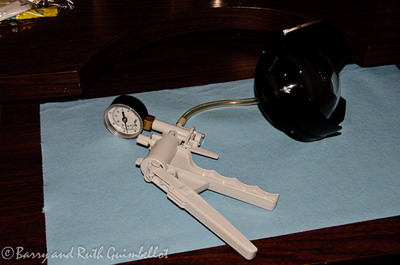
When I know the dome is water tight, it is ready for the ocean.
I hope these pictures help those that want to make their own mini dome port.
Barry
-
Well, I am still building mini dome ports and thought I would answer some questions members have emailed.
I hope these pictures help those that want to make their own mini dome port.
Barry
Thanks for the post. I'm still trying to put an old glass port on an old Ike port. Although I'm afraid that the curvature of the dome may not be enough for the Tok with 1.4. Also the Ike port diameter is slightly smaller than the port diameter and needs some sort of fitted adapter end. Got my diamond cut off wheel and drill stand though...LOL.
Bo
-
Thanks for the post. I'm still trying to put an old glass port on an old Ike port. Bo
Hi Bo,
A Wetpixel friend of mine is machining a dome for the Ikelite port to fit the Tokina lens. I will be happy to give you his contact information in private.
Barry
www.creativeillusionsphoto.com

