



DIY Fiberoptic Strobe Cable for the Olympus Tough Housing
To add a strobe to my Olympus Tough housing (ref 1) I made an inexpensive fiberoptic cable and a minor modification to the housing.
The Olympus Tough PT 056 and 058 housing has a plug-on black plastic adapter for a Sea&Sea-type fiberoptic cable
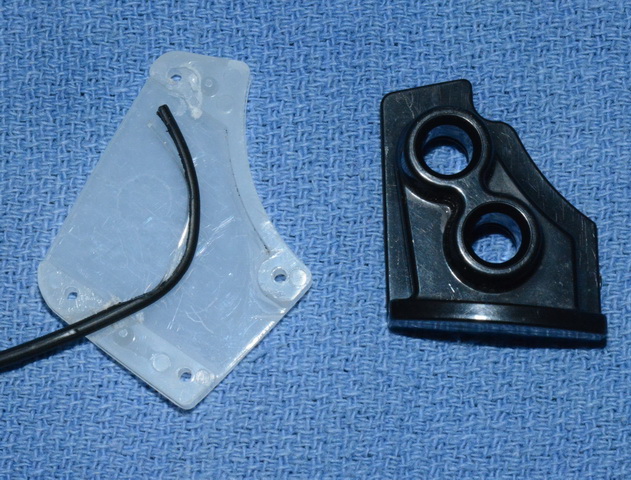
Photo 1
But this adapter obstructs the flash from camera’s built-in strobe such that it does not light the subject, it is also easy to lose and is expensive (PFCA-02 and -03 Optical Fiber Cable Adapter). (As some strobes with a sensitive flash trigger may not need a fiber optic cable, it is a good idea to first test the housing with a mounted strobe and no cable.)
The approach described here is to plug the DIY fiberoptic cable directly into the housing’s flash diffuser, with no cable adapter, so that the camera’s flash can light the subject.
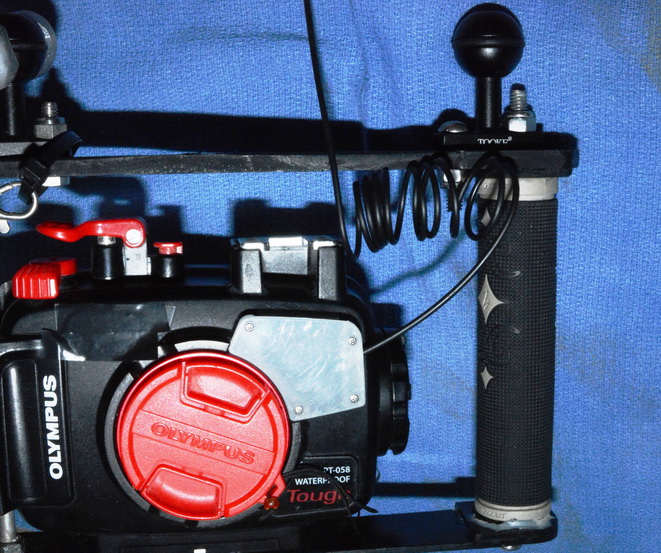
Photo 2
Details:
a. The fiberoptic cable is a Toshiba Toslink cable (ref 1), with both ends cut off with scissors or a razor. To coil the cable permanently wind it around a tube or round rod and secure in place with tape or string, then immerse it in boiling water for one minute (ref 3, I do not know if boiling might impair light transmission by the fiber).
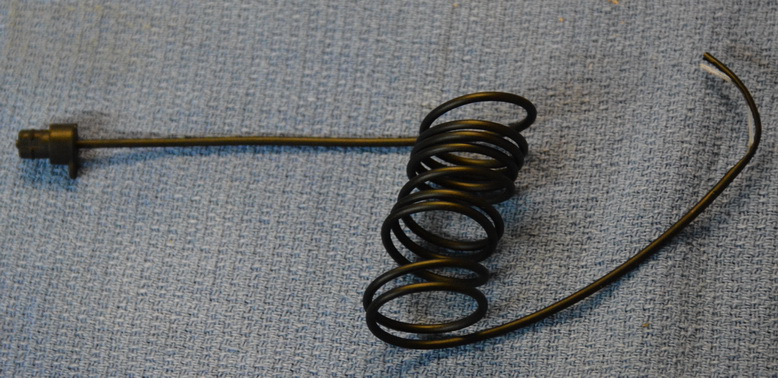
Photo 3
b. With a sharp razor, shave lengthwise one end of the cable’s black sheath to uncover about 5 mm of the optic fiber
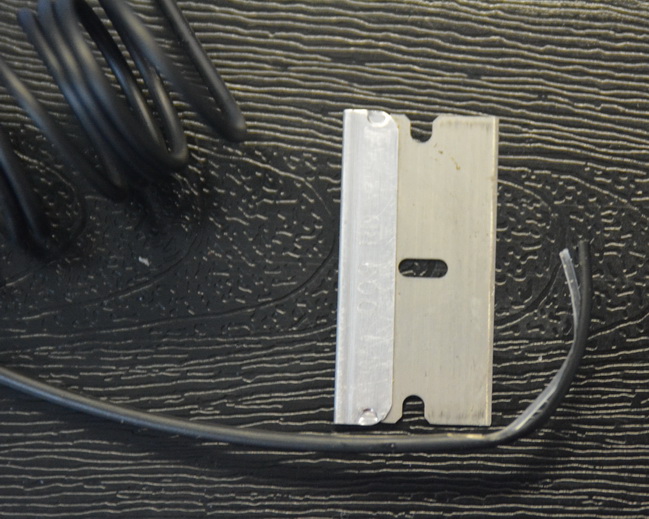
Photo 4
The bare optic fiber captures the camera’s flash to trigger the strobe.
c. The shaved end of the cable fits tightly into a channel or groove cut into the plastic light diffuser (Photo 1). The diffuser is unscrewed from the housing with a small Phillips screwdriver and a groove is cut into the back, facing the housing, surface of its outer edge (Photo 2). I cut this groove with a Dremel grinding bit; a small saw or a round file can also be used.
d. A Sea&Sea type plug, or similar is fitted on the cable’s strobe end (ref 1, also Parts).
The fiberoptic cable is pushed into the groove for use and can be pulled out for storage or travel.
References:
1. DIY tray for the Olympus Tough housing. http://wetpixel.com/forums/index.php?showtopic=62587&hl=%2Bolympus+%2Btough+%2Btray
2. 6FT Premium Digital Audio Optical Optic Fiber Cable Toslink SPDIF Cord 6 ft HD is available from Amazon or eBay
3. Excellent and popular post with multiple contributions on DIY fiberoptic writeup with parts, has pages 1 and 2, don’t miss
page 2.
http://wetpixel.com/forums/index.php?showtopic=60564,
Also:
http://wetpixel.com/forums/index.php?showtopic=45302
Parts: http://www.divervision.com/inon-double-hole-rubber-bush-for-fiber-optics-456212143565

