


Everything posted by Isaac Szabo
-
 Yeah Chip that's how I interpreted it too - with the important addition of improving image quality. I've long been bothered by the sharpness loss towards the edges with macros behind flat ports. Some diopters improve that, but then I lose the ability to focus on many of my normal macro subjects. So if this does what I think it does, it will be a welcome addition for me.
 -
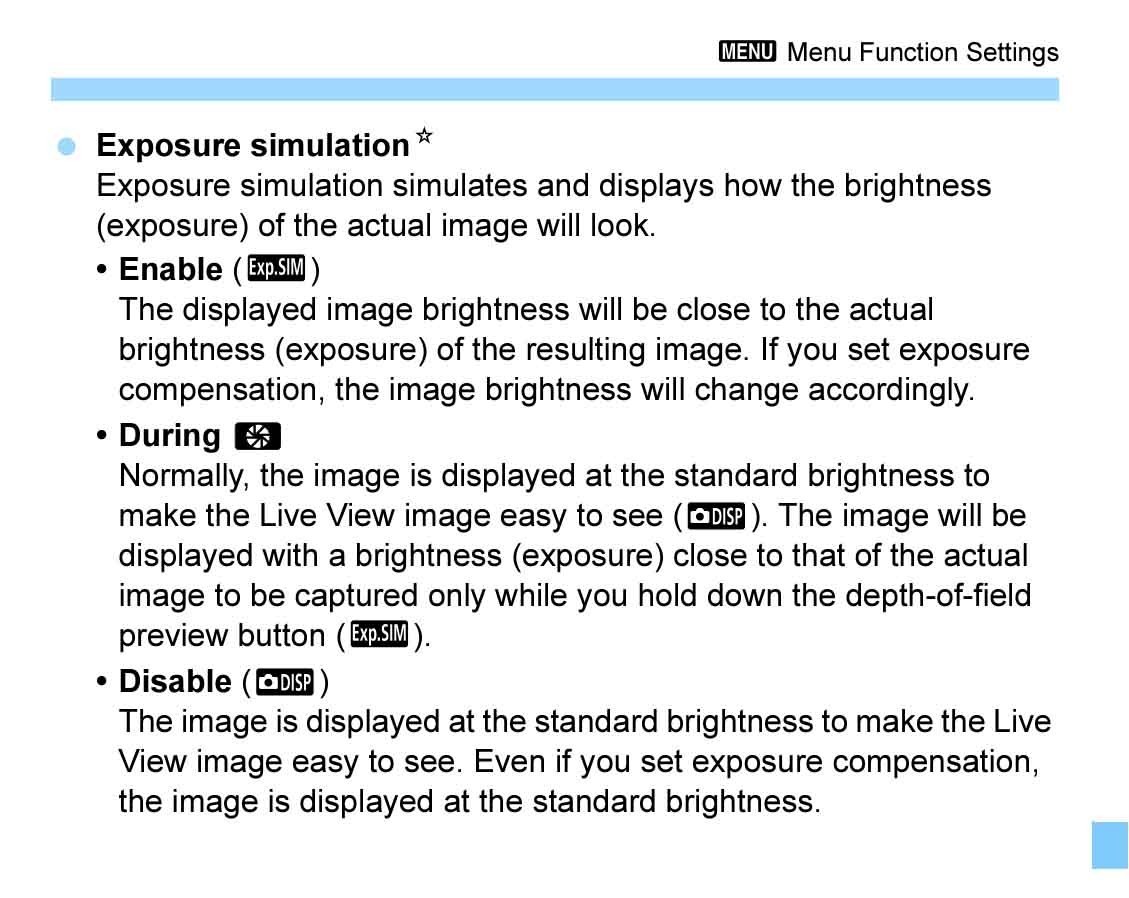
As a point of clarification, it is the camera that is making the auto adjustments to the liveview image. The monitor just displays the signal that the camera sends it. I don't think there's any way to output the auto liveview settings to your shooting settings, other than maybe setting the camera to a fully automatic mode. Short of that, you could temporarily turn exposure simulation back on which might help you dial in your settings more quickly than reviewing test shots. You can likely assign it to a custom button or menu so that you can quickly turn it on or off. As for your second question, my guess is that an HDMI cable or connector could be slightly loose or damaged. If you use a monitor long enough, it tends to happen eventually. While it could be any part of the HDMI pipeline, the ribbon cable and connectors are the most fragile. I have learned from experience to travel with spares for those. It might be a good idea to ask Kraken if they have seen this issue and know what might be causing it.
-
In the live view shooting settings, try setting exposure simulation to disable.
-
Yeah Chris I don't know exactly why this happens. I'm just relaying that it has happened to me a couple times and to one or two other people I know. Sealed Nauticam optics, heated up in the sun, fogged inside when taken into cold water. Same Nauticam optics have not fogged if kept covered/shaded from the sun before taken into cold water.
-
I have seen it cause fogging in other circumstances. Most recently with Nauticam optics like the WWL-1 and EMWL. After they have heated up in the sun they can develop internal fogging when you take them into cold water. It can take quite a while for the fogging to clear (30 minutes or more). I think I have also experienced this kind of fogging with regular wide angle lenses and dome ports, but it has been quite a while ago, so the details are not clear in my memory.
-
Here are some tips to reduce the chance of fogging. The first two are generally the most significant: 1. If possible, seal cool, dry air inside the housing (such as from an air conditioner). 2. If you have a vacuum system, the more air you vacuum out, the lower the chance of fogging. 3. When opening up the housing to change batteries, make sure no drops of water fall in. 4. When the housing is out of the water, don't let it heat up in the sun. 5. Silica gel packets can help but in my experience are less significant than some of these other things. Since it sounds like the air temperature will never be much warmer than the water temperature, I doubt you will have fogging issues if you follow a few of these tips. The biggest risk of fogging comes when the housing is filled with humid air that is significantly warmer than the water.
-
Sure, I'll send you a PM. I'm not sure what you have available in the EU. Here in the US I order Overture PETG from Amazon (or Polymaker PETG, which is identical).
-
Oh no, sorry Alex! I hope it doesn't put too much of a damper on your trip. Maybe I should look into tethering the lens to the port?
-
Thanks Tim!
-
Thanks Brandon. It's hitting me pretty hard at the moment, but I'm sure I'll get past it pretty soon.
-
Thanks for the kind words about my freshwater work, Brandon! Sounds good. Hopefully a few more pop up soon. The turnaround time has varied quite a bit depending on how many other lenses I have in at the moment and whether or not things have been going smoothly. Sometimes it has been as short as a week or two, other times well over a month. Currently I am running behind as a number of things have conspired against me (lots of orders, difficulty getting good optical alignment on one lens and having to redo it a few times, my 3D printer breaking and needing parts/repairs, my basement flooding, and just today getting covid for the first time and feeling horrible). But once I get caught up again my goal is to be getting them done within around a week (or two at the most).
-
I haven't tried hand polishing with cerium oxide, but I do think it could work. Also, it may be obvious, but I should note that polishing with cerium oxide can remove optical coatings from glass. I'm not sure if your viewfinder is coated and if so whether removing the coating would cause any issues. The front dome of the RS 13mm is coated, but I have not been able to detect any issues from removing it.
-
I use a benchtop buffing machine with cerium oxide powder mixed in water on the buffing wheel. It removes water stains from glass very effectively. It can remove scratches from glass as well, though it does so very slowly. Since I'm doing it manually it is only practical for removing light scuffs and scratches - deeper ones would take too long. Care must be taken to not let the glass heat up too much during polishing, which means polishing passes of 5-10 seconds followed by immersion in cool water for at least the same amount of time before continuing polishing again. At some point in the future I hope to figure out an automated system so I can leave it running for hours/days and remove deep scratches. Back when I used acrylic domes I removed scratches from them with the benchtop buffer with a plastic polishing compound on the buffing wheel. It worked very well and didn't take too long. It was much easier than polishing by hand and gave me much better results. Again it was important to keep the dome moving so no particular area heated up too much and to take periodic breaks to let it cool down.
-
I'll mention that there is one on eBay for $2800 plus shipping/taxes. The front dome appears to have lots of water stains, and the seller says it also has a small/minor scratch. However, if you are planning to have me convert the lens to Sony, it's worth noting that I do have the ability to polish the front dome for an extra fee of $100. It would definitely remove all of the water stains, and it can also remove very light scratches and somewhat diminish deeper scratches. If you or anyone else is interested in maybe purchasing that copy, I would recommend messaging the seller and asking if they might accept less given the condition issues. Considering that other lenses without the condition issues have sold in recent months for prices similar to what they're asking, I personally would think somewhere around $2300-2500 would be more reasonable. And it has been listed for quite a while, so maybe they'd be motivated to accept a lower price.
-
Hi @Fabian! The vast majority of my photography is done in small to medium North American streams. While great clarity is nice, 1.5-2m is totally doable. You don't need great visibility as long as you can get your lens close to your subjects, so close focus wide angle and macro can work well. We are fortunate to have high freshwater biodiversity here in the US, but I'm sure there are some very interesting things to shoot in German streams too. If you're interested, my instagram is @isaacszabo.
-
Maybe you're already aware of this, but I'll mention that there are four on eBay right now. One in particular is interesting because it is an auction style listing starting at $2400 USD and ending in a little over a day. I'm not sure if anyone else will bid or if there is a reserve on the auction, but that price would be a good deal these days since the going rate seems to be $3000+.
-
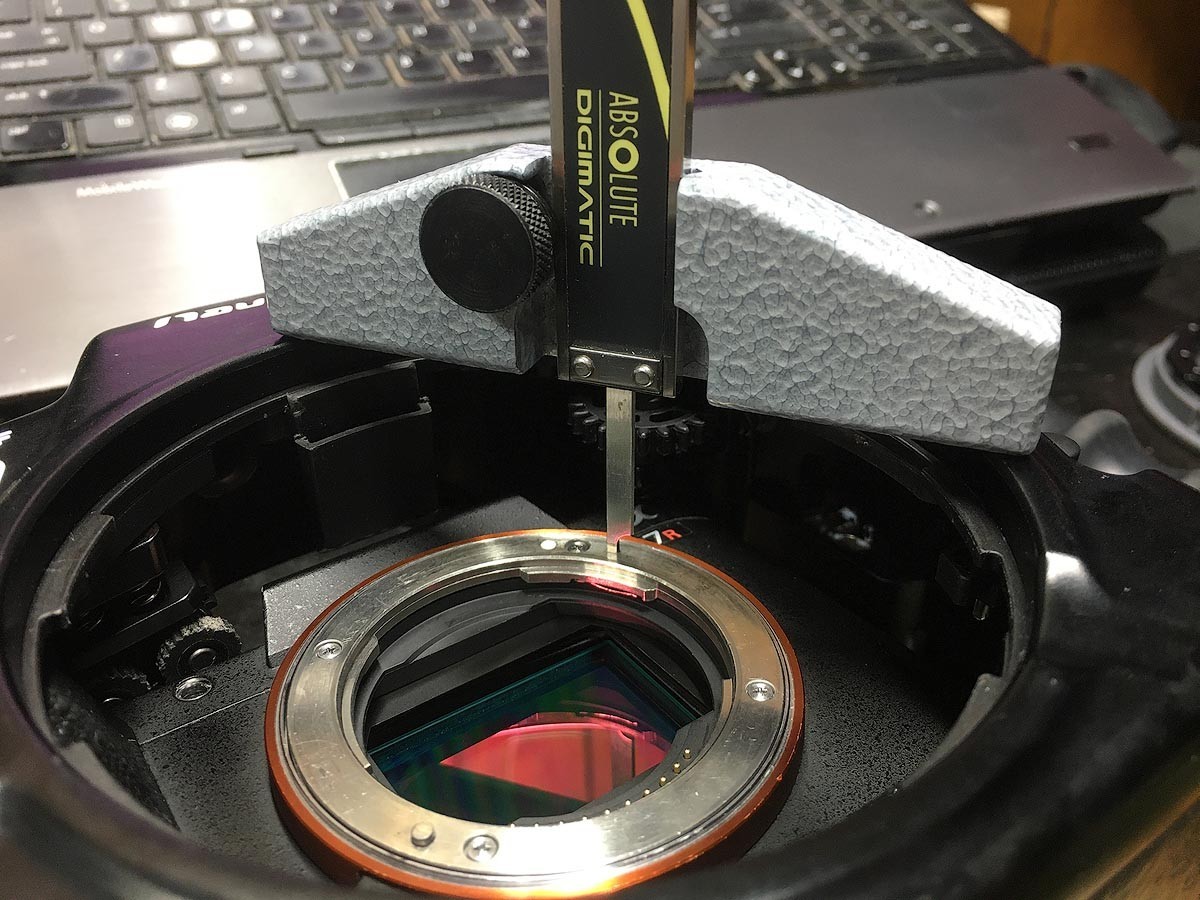
Isotta is 38mm (for Sony mirrorless at least). Someone with a depth gauge measured N120 Nikon Z for me at 66mm. Is your 58.8mm measurement with a DSLR or mirrorless housing?
-
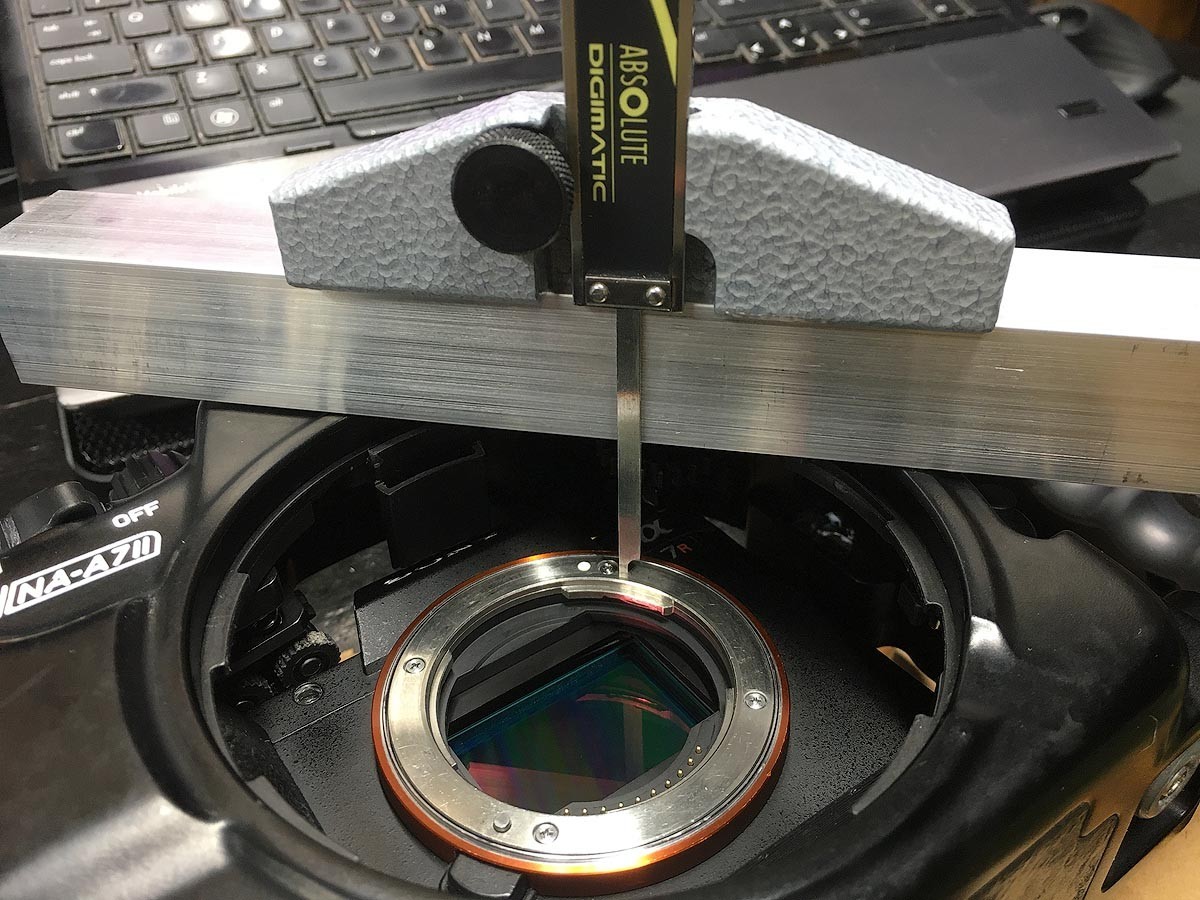
I assumed it would be the same until someone said it wasn't, which makes no sense to me for reasons you mention and others. Yep, for accuracy you need something that can span the port mount opening like this: Or as you mention you can lay a straight object across it and subtract its thickness:
-
Interesting. How accurate do you think your method was (ruler, calipers, depth gauge, etc)? It would be nice to know for sure since I make N100 RS13 ports. It's unfortunate that it's not the same for all their Sony FF housings. On this thread he claimed 27mm:
-
On my NA-A7II housing the distance is 26mm. Someone claimed it's 27mm on newer housings, though I haven't been able to confirm that yet.
-
Thanks! Maybe I'll try it if I get an SLA printer. The material properties relevant to my main application (making ports) look to be inferior to PETG (assuming I'm interpreting them correctly) at a cost 5-6X higher, so I don't think it would be a good option to replace what I'm already using for that. However, it may be useful some of my other applications that don't need as much strength and would benefit from increased detail.
-
That's great to hear. Glad it worked for you.
-
Can you recommend any affordable resins or additives to try for printing ports that might stand up to diving pressure, saltwater, UV, bumping into rocks, etc?
-
Nice. Of course it can work. I just said that it's not ideal when precision is needed since adding epoxy resin is imprecise. I used to add epoxy resin to o-ring grooves. It worked but sometimes I added a bit too much or not quite enough. I also personally just prefer to have prints waterproof straight off the printer and not have to put more work into them. But by all means do what works for you.
-
The profile I've developed in PrusaSlicer for my MK3 is not directly applicable to a different slicer/printer. However, the main settings that come to mind are: PETG filament 0.4mm nozzle 0.10mm layer height for ports, solid prints composed entirely of perimeters/walls for hollow items like a float, designs probably need a minimum wall thickness of around 3mm random outside seams and staggered inner seams extrusion multiplier/flow ratio around 20% higher than normal And then there are other tweaks to temperature, speed, linear advance, etc to improve print quality. Bambu's slicer is simpler than Prusa's and may not have all the necessary options (such as staggered inner seams), so using another slicer such as OrcaSlicer may be preferable. No matter what it will likely take a fair amount of experimentation to find a sweet spot between watertightness and acceptable print quality. You also need ways to test if the prints are actually waterproof and capable of withstanding pressure. I print a small test chamber that I can pull a vacuum on and monitor a pressure gauge to see if it holds a vacuum indefinitely or if leaks over time. If my print settings pass a vacuum test and I print a real object such as a port then in addition to a vacuum test I also I test it in a hydrostatic pressure chamber to ensure that the design will withstand the pressure that I need it to. Of course, if post processing prints with resin is working for you and you're happy with that, then there's no reason you need to do anything differently. I can see how that could work well for something like a float, but it's not ideal for something that requires more precision such as a port with an o-ring groove.

