Everything posted by Nando Diver
-
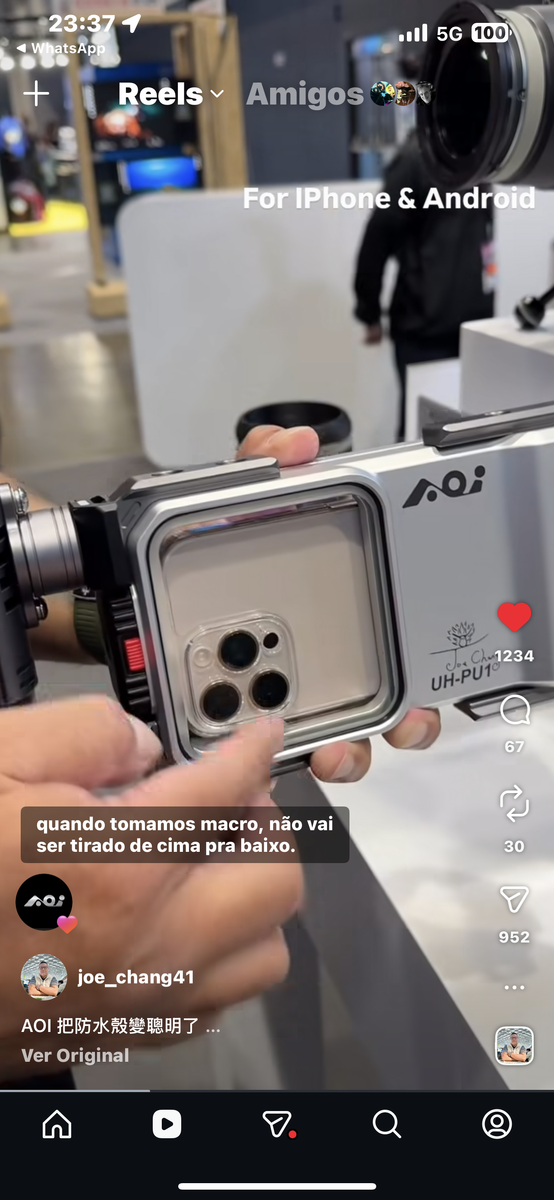
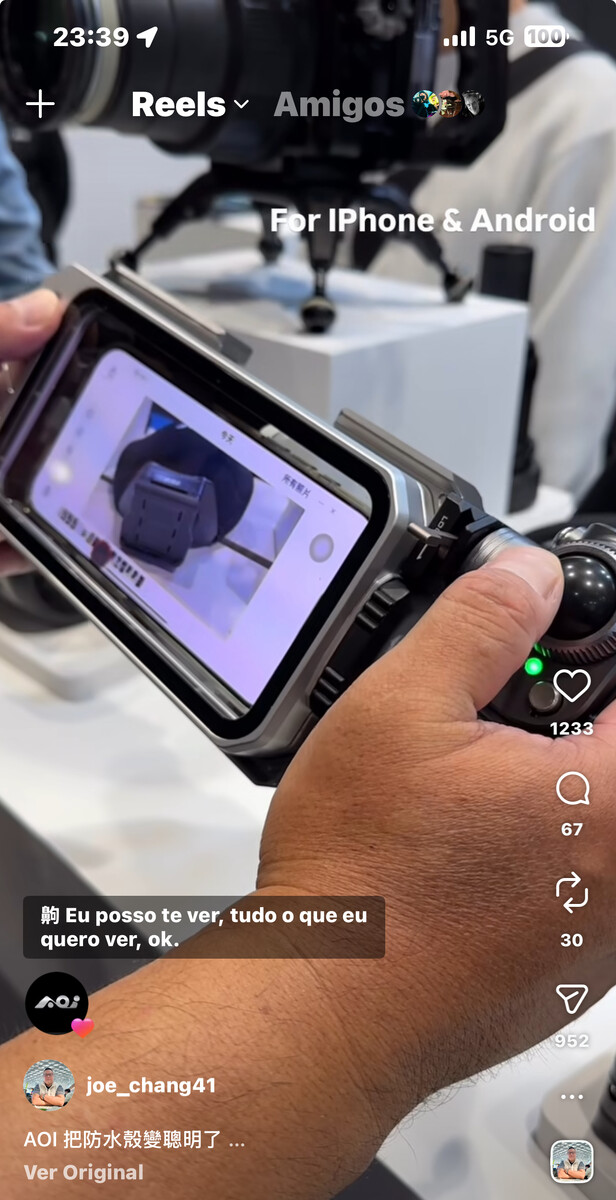
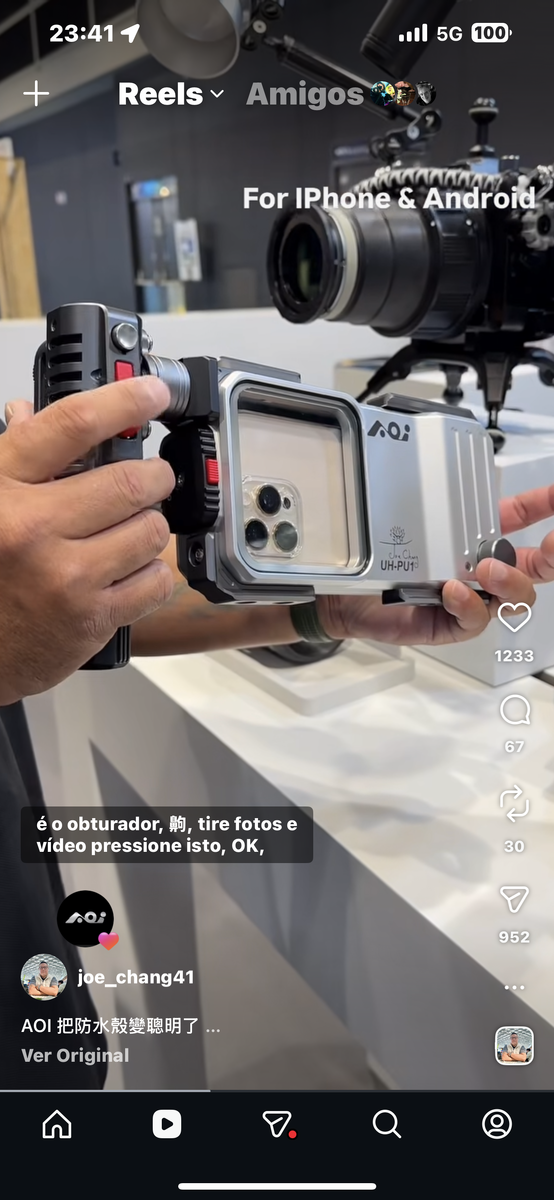
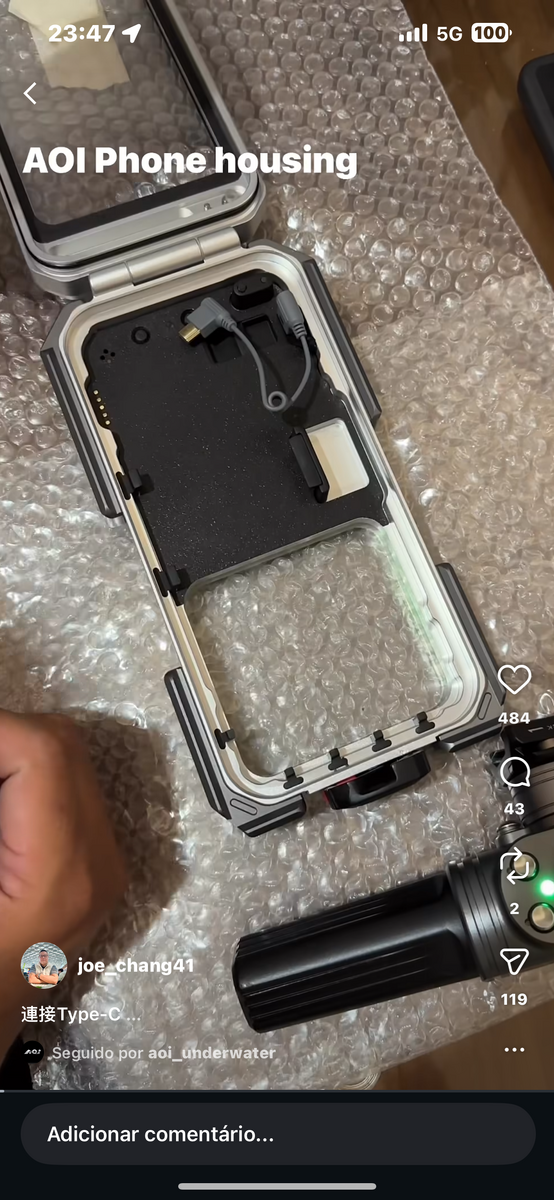
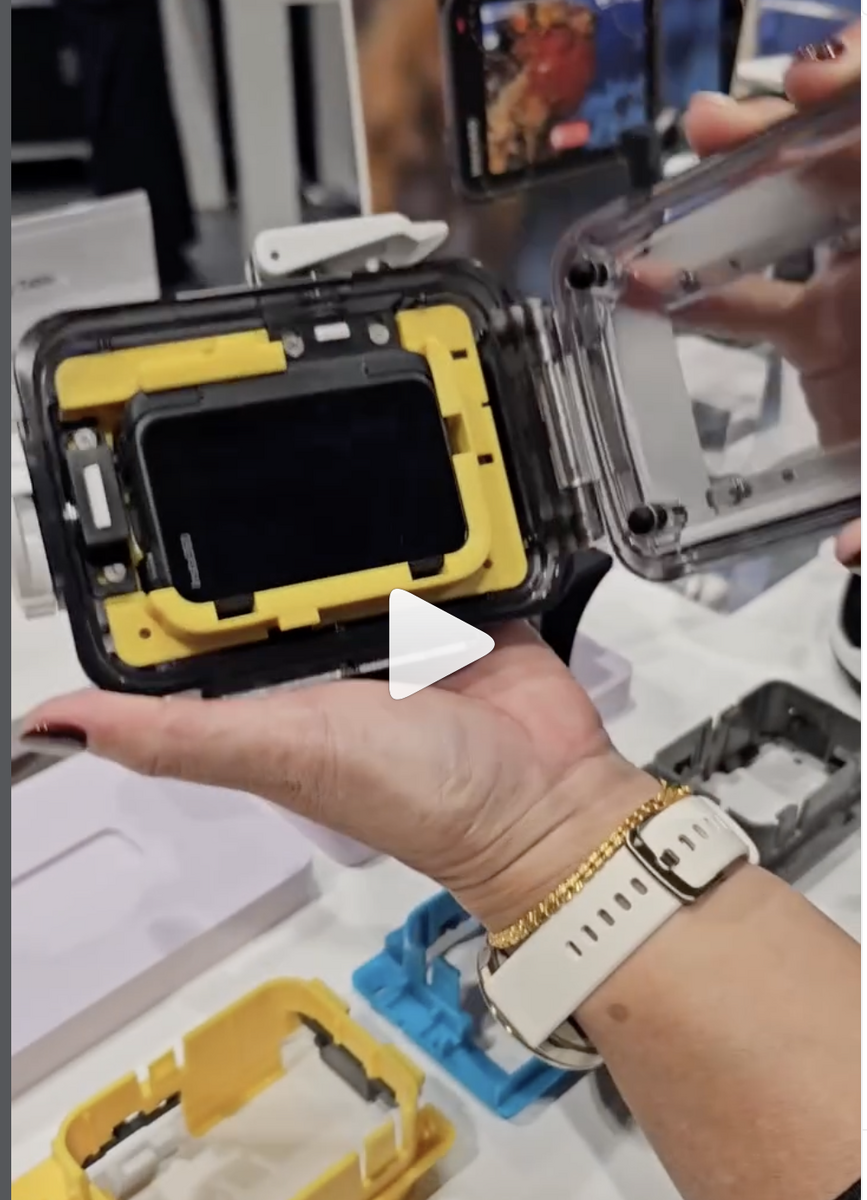
The smartphones Android & Iphone they also have a new AOI underwater case, with battery, mouse and shutter. i suspect this case might able to accomodate some SSD. Reference AOI UH-PU1 Videos https://www.instagram.com/reel/DSTlozHmMZe/?igsh=MXA4aHl6cmFqb3VkZg== https://www.instagram.com/reel/DSREsH7gR9p/?igsh=ZGs5Y215b29kMDY4
-
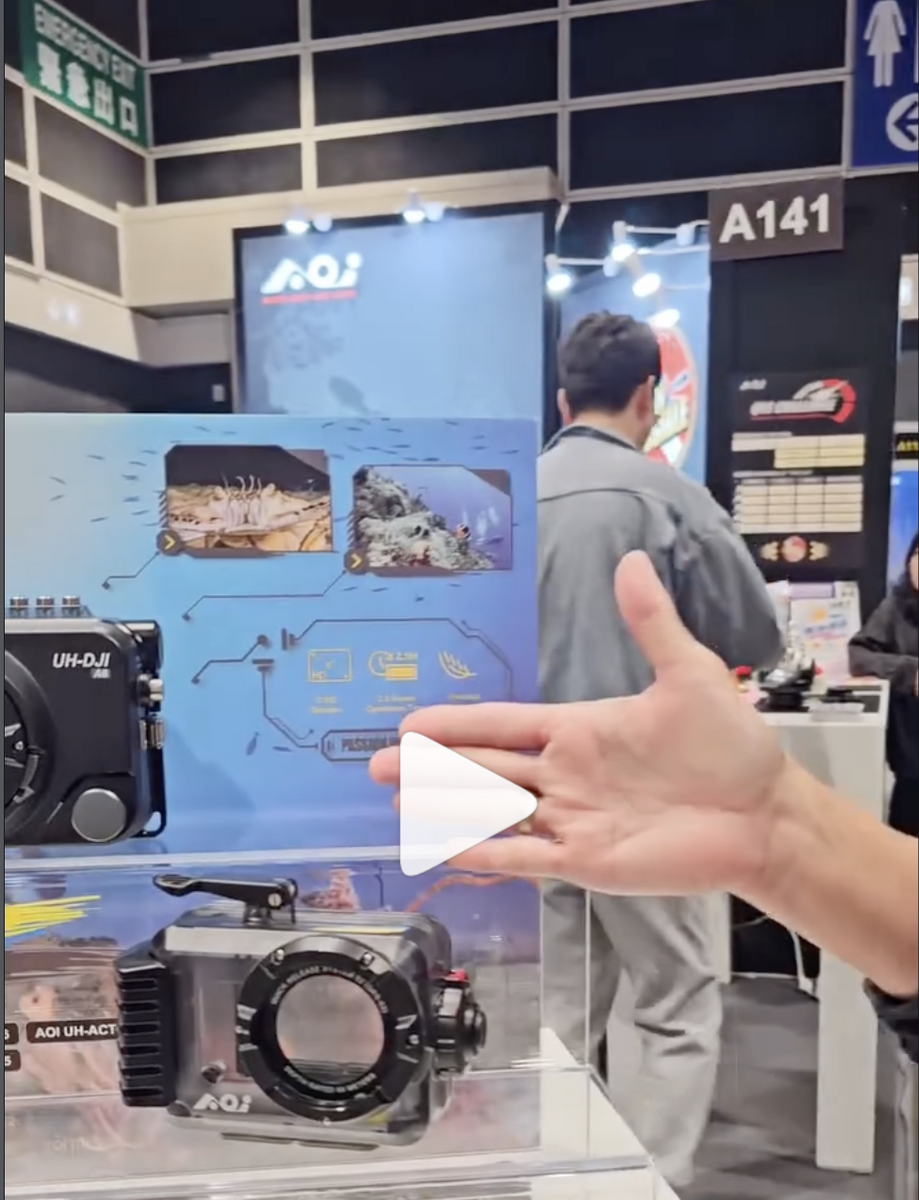
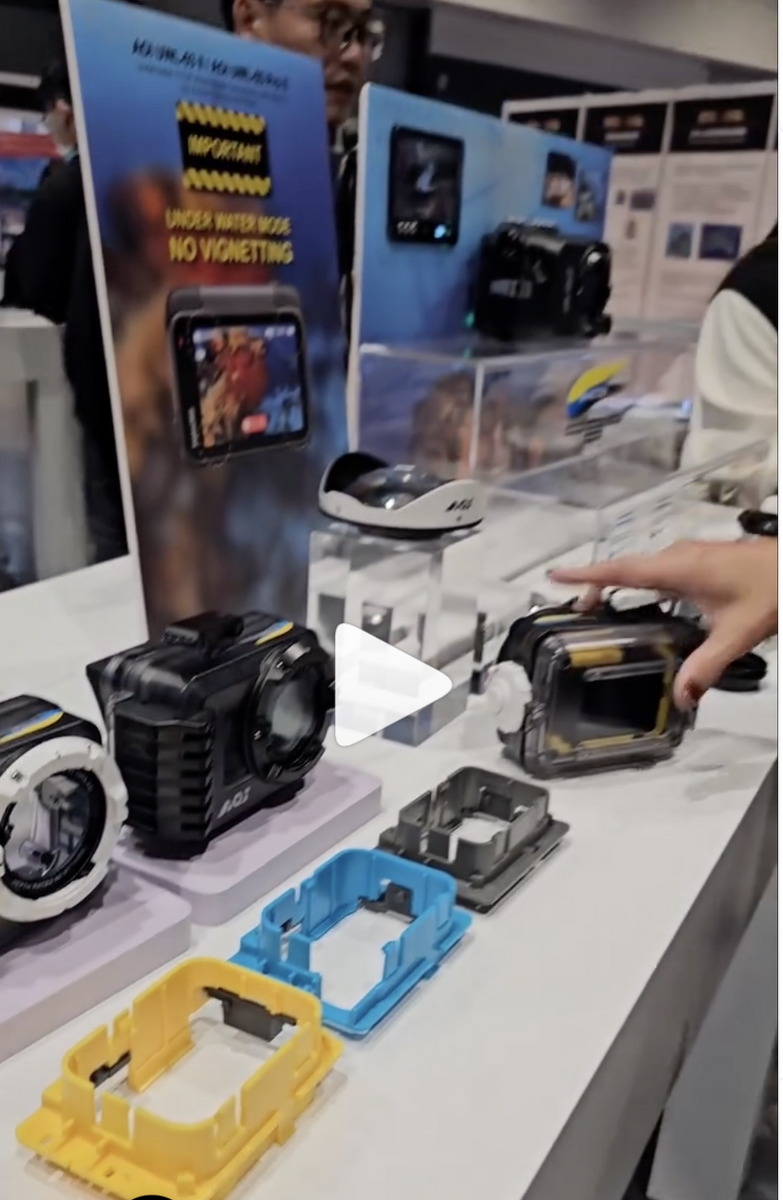
Beginning of 2026 AOI will have 3 new camera Housing for actions cameras with Quick release Built-in for Wide Angle and Macro, reference AOI UH-ACT in one of the videos is visible that the housing is able to use UMG-01 Magnifier lcd viewfinder, and according to the advertise at the show no more vignetting underwater. Available & prices from Fev/March 2026 video here from hong kong show https://www.instagram.com/reel/DSPCOYZEQTg/

-
GP-TUNE Plugin 🫡🫡🫡
-
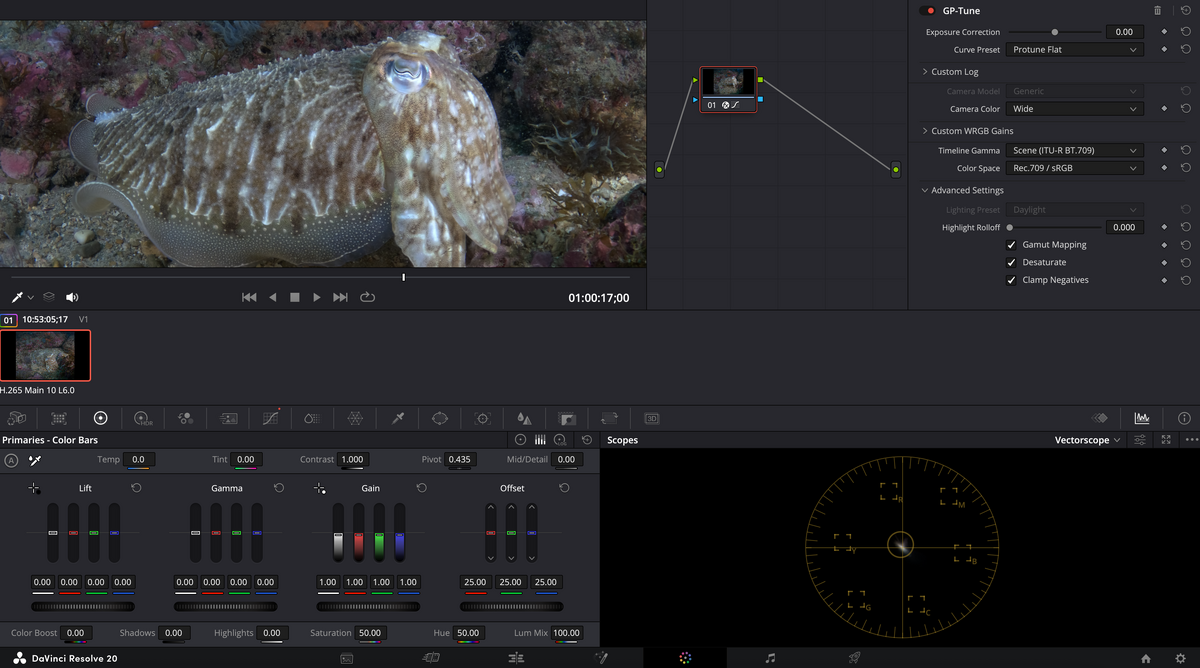
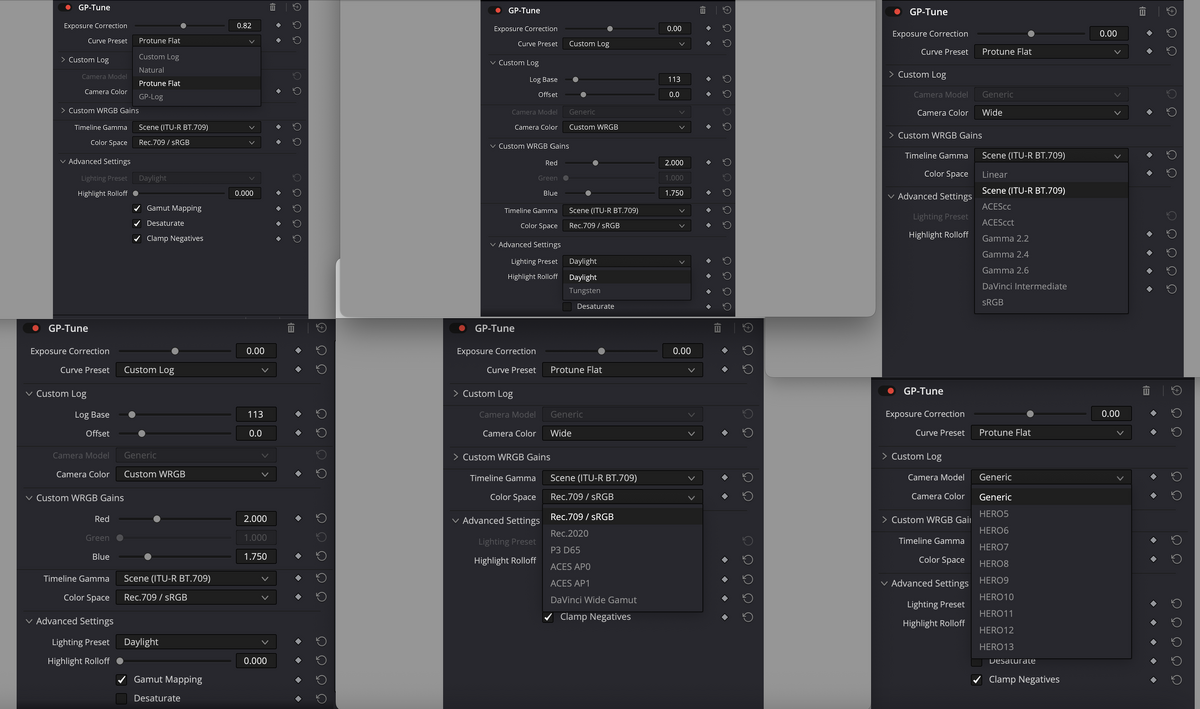
Regarding the GP-TUNE plugin its very easy to use, but its important to read the Manual and their tutorial to make sure you get the correct profile settings in davinci. https://xtremestuff.net/gp-tune-plugin-manual/
-
Heres another example
-
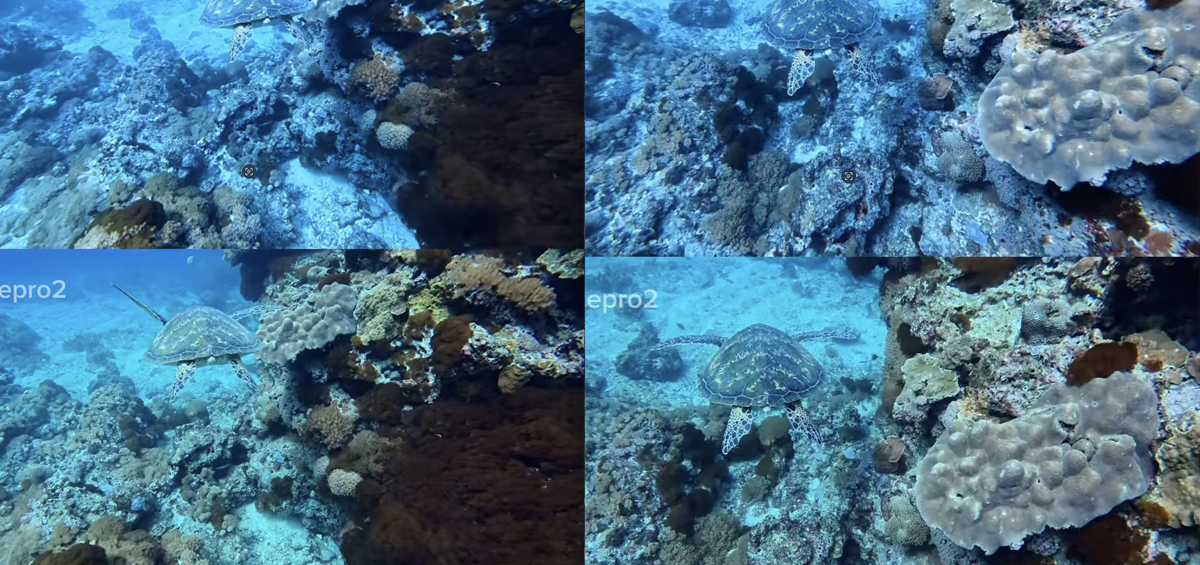
Ive got better results using Wide + Flat, in terms of sharpness/crisp/color and specially more details in dark parts...
-
Heres another test with Gopro labs firmware this time i added the Wide Color Gamut for underwater filming Gopro Labs Firmware * Wide=1 Wide color Gamut * Bitr=190Mbps Bitrate * Dive=1 optimized for water refraction (No corner distortion) The reason i want to try Wide color Gamut its because sometimes the Video was a little soft, with loss of detail in shadows, i was prepared to turn off Noise reduction with Gopro labs and later i could use Neat video 6 or Davinci Resolve Denoise. After some underwater Filming I've test different Luts in Davinci to convert the Labs Wide to Rec709, some of them had mix results and was bit frustrating and time consuming. Then i decide to opt for GP-TUNE Transform IDT (21€) but didn't realise its for the Davinci resolve Studio paid version, but luckily this year the Xtremestuff they released the GP-Tune Plugin (26€) that works brilliant with free version of davinci resolve. The GP-Tune Plugin is prepared to work with Normal Gopro firmware but also with the Labs firmware, and in terms of color grading is much faster to get correct calibration. The results in my opinion is a step forward to more quality.
-
The insta360 ace pro 2 has underwater Mode but no WB lock.. and its only 8 bit The dji action 6 has scuba mode and QRS button that can be personalize to lock white balance underwater The Gopro 13 has gopro labs firmware and its possible to create permanent preset for WB lock, bitrate up to 200Mbps and new feature called DIVE=1 that remove underwater distortion, dont forget to Keep Denoise settings at low to avoid a soft video. The Gopro 13 also has 5.3k mode with resolution of 5312 x 2988, perfect for 16:9 or 9:16 for media viewing for later crop the video without any loss of quality. Optional With Gopro 11 it was necessary to use Wide Color gamut (wide=1) + oMLOGB=400 to get GP-log Profile lookalike. But on the Gopro 12/ 13 you can simply use Gp-Log + wide=1 for more details, and later a specific LUT to convert back to Rec709 during color correction. Basically Wide color gamut + oMLOGB=400 are able to push dynamic range and get better details in dark shadows, but is also recommended to apply NR01=1 (permanent disable denoise but more details) and later remove noise in post-production with Neat video 6 or davinci resolve studio (both paid options) ps: this hacks can be applied permanently using QR code once, Optional 2 Wide angle lens from AOI UWL-03 are great upgrade for any of the action cameras above. Ps: The insta360 or DJI can be an easy underwater actions cams for the untrained eye, or the average joe for viewing in small smartphone screen, especially if you do shallow dives with natural lighting their color sensors accuracy can be enough for some people, but has soon you pass certain depths you are limited by firmware, Gopro labs unlock that limit.
-
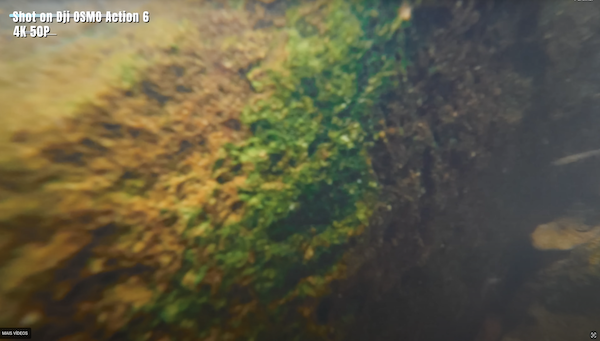
Looks like the Full sensor marketing of Dji Action6 dont keep their promises.... Fiming in 1:1 or 4:3 the imaged is cropped
-
Another video
-
stop and zoom, Acepro 2 look much better
-
Dji Osmo action 6 from this video is looks inferior to Insta360 ace pro 2 released one year ago The Osmo Action 6 loses focus and appears to have less detail
-
Whats the bitrate of Osmo action ? Heres the bitrate on gopro 13 with labs firmware...

-
Never try it.. its here DAMP=0.1 to 1000 https://gopro.github.io/labs/control/extensions/
-
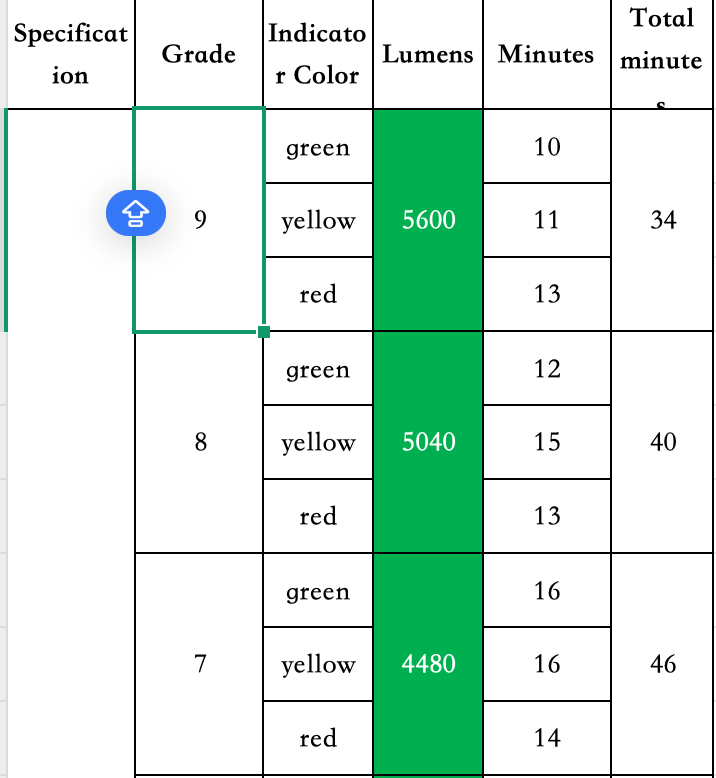
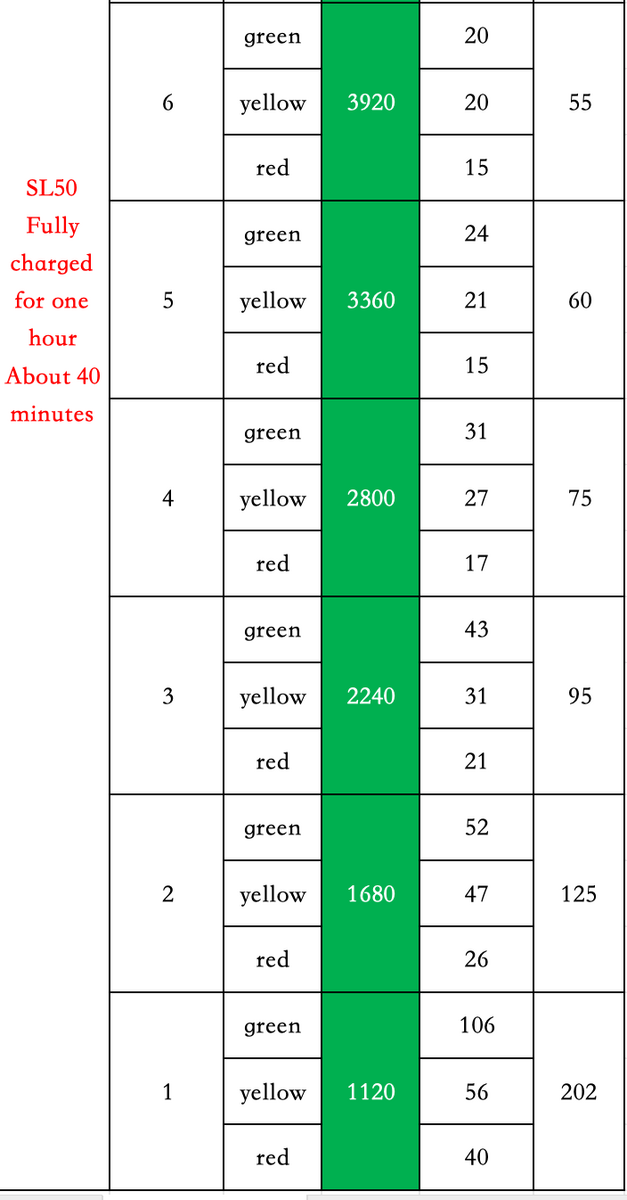
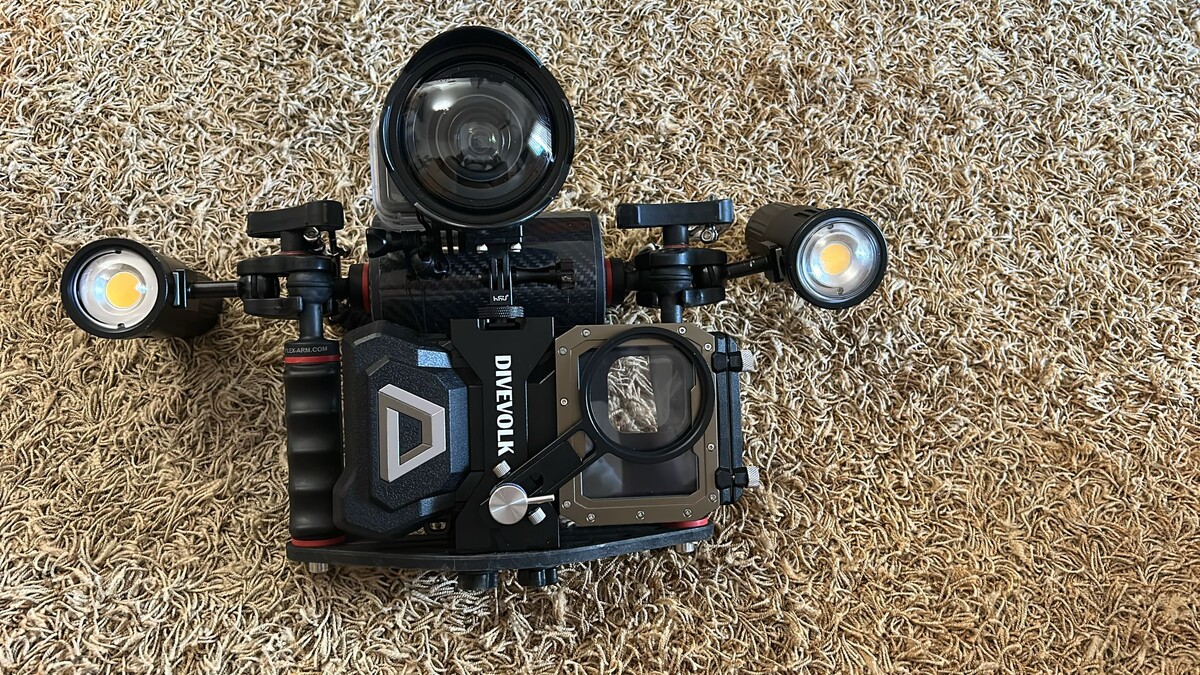
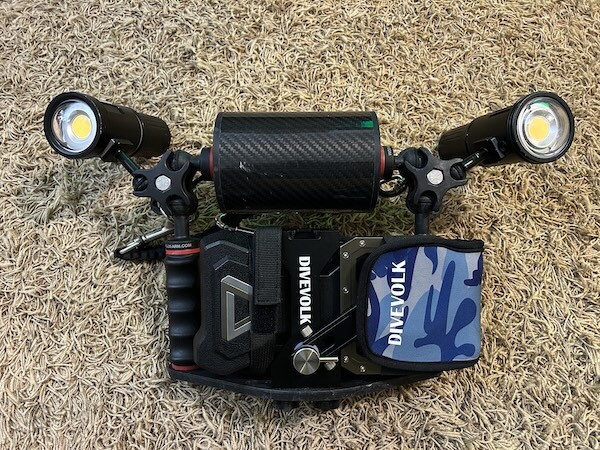
Does dive lights weefine solar flare 7000S are great ( CRI 95 + Beam 150) but does lights deserve better than gopro. Your filming will have excellent light conditions for sure. Im using 2x divevolk LS50 (CRI 96 + Beam 120 + 5000 lumens ) and im using them in minimal brightness between 1 and 2 ( 1680 & 1120 lumens each) The things is, the ideal filming distance for the Gopro is +- 1m to 30cm, and too much brightness will get you too much backscatter, or you will need some extended arms. But with 2 extended arms sometimes you will be far away from the subject, or limited to small spaces, and the small sensor will struggle in case the diving conditions aren't the best. Im keeping one of the LS50 for macro filming + divevolk case, and ordered 2x bigblue AL1300XWP (CRI 85 + Beam 120 + 1300L) for the Gopro13. Dont get me wrong, i love the LS50, but their weight is compromising my system.. a goodman handle with 2x bigblue AL1300XWP + Gopro is all that i need if i want to take advantage of action camera size.
-
For scuba Diving or snorkeling i dont see the Dji osmo 6 being better than the Gopro 13 with labs firmware Gopro 13 labs firmware 5.3K 5312 x 2988 8:7 bitrate 200Mbps Dive=1 dive mode that remove underwater distortion WBLK Mode that lock white balance after 1 second DJI osmo 6 4K 3840 x 3840 4:3 bitrate 120Mbps

-
Well... i change my mind ☹️ This is super heavy and bulky... about 4kg in total. I lose flexibility to make macro shots in small spaces.. With strong currents the divevolk mass drags and affect the overall stability of the gopro filming... I decide to make 2 separate systems: Divevolk + single dive light with cold shoe + tripod + Macro lens Goodman handle + gopro13 + double dive light + wide angle lens
-
Upgrading to larger tray (32cm) from flex-arm to fit the divevolk case. The gopro 13 + AOI UWL-03 will be used for wide-angle video (cold shoe) The iphone will be primary for super-Macro video Haven't decide about: Macro Lens (67mm) Flexible/Gorilla Tripod
-
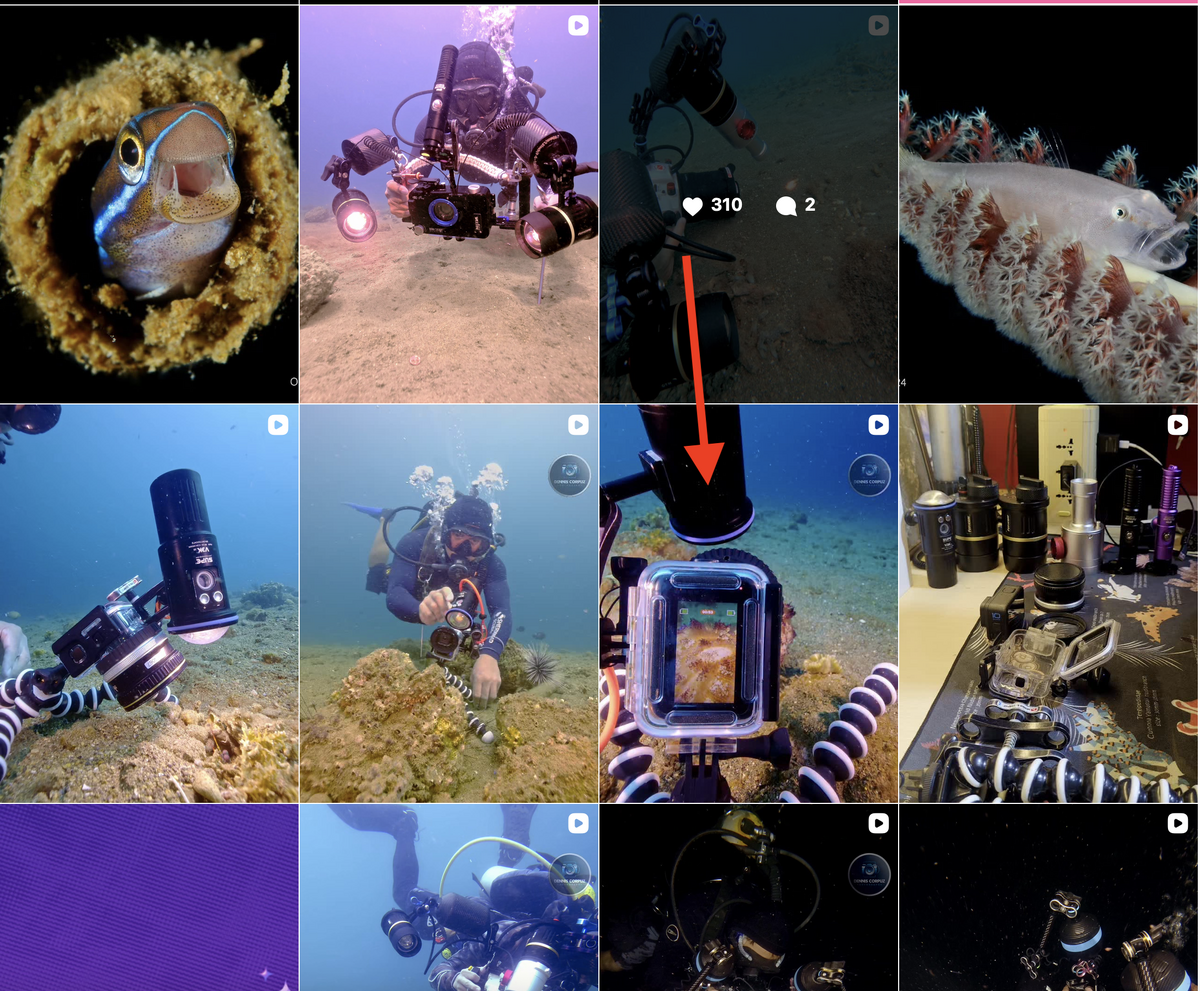
See this video made with gopro 10 and samsung s25 Macro with gopro is OK, but for super macro smartphone is the way to go On this account see the video marked with red arrow https://www.instagram.com/notorious_fotografer/?g=5 The advice is simple... dont invest too much in gopro macro..

-
Other option AOI ULC-03 focus distance 40mm (min.) to 78mm (max.)
-
For macro you will need a tripod Macro mini focus distance 7.5 cm (3.9 inches) UCL-G55 focus distance 4.8cm to 6.2 cm (1.9 to 2.4 inches UCL-G100 focus distance 7cm to 15.2 cm (2.8 to 6.0 inches) UCL-G165 focus distance 10 cm to 35 cm ( 3.9 inches to 13.8 inches)
-
Yes, WBDV it acts has a red filter (see first page of this topic) It can work well at 20m depth, but the same profile will have to much reddish at surface/shallow water. I though to use different WBDV profiles to different depths but i think the WBLK is enough and we have more control. Imagine you going to Malta and film purely wrecks at 30m/40m.. perfect..but if someone point some dive light to what you are filming... the filming will have excess of red. its very experimental..
-
@Gmsalterego yes.. i send the video to visual category ( 60 seconds) but the top three winners had proper visual macro and better ambient.. The competition rules are strict, like the 3 categories need to be presented separated , clean cuts, no transitions, no text, no pictures, macro needs to be 70% of image, original music, no copyright...30m maximum depth and 90m maximum each dive. From 8 diving spots, i was only was familiar with one, other divers that take this competition more serious, spend weeks diving in those spots before the competition, this year they about 80 participants. Its very good to share experiences and techniques.
-
Heres video (60 seconds Fish, Macro, Ambient ) from past week where i participate ( for fun) in CMAS underwater Porto Santo & Madeira 2025 i had no macro lens with me ☹️
-
if i need to use Denoise video i would do it in davinci (no longer available in free version)