


Everything posted by CaolIla
-
That's a picture from @Hiloboy and the model and here the protection on my old retra pro You see it's realy wide the beam is not restricted
-
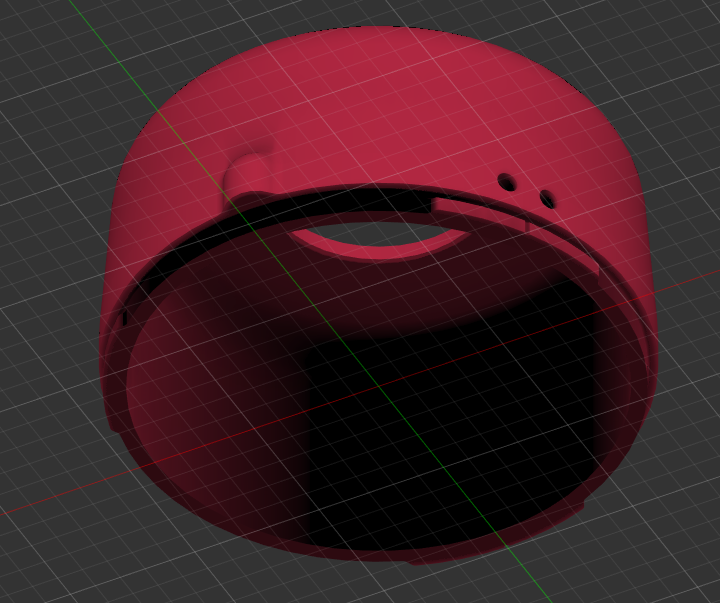
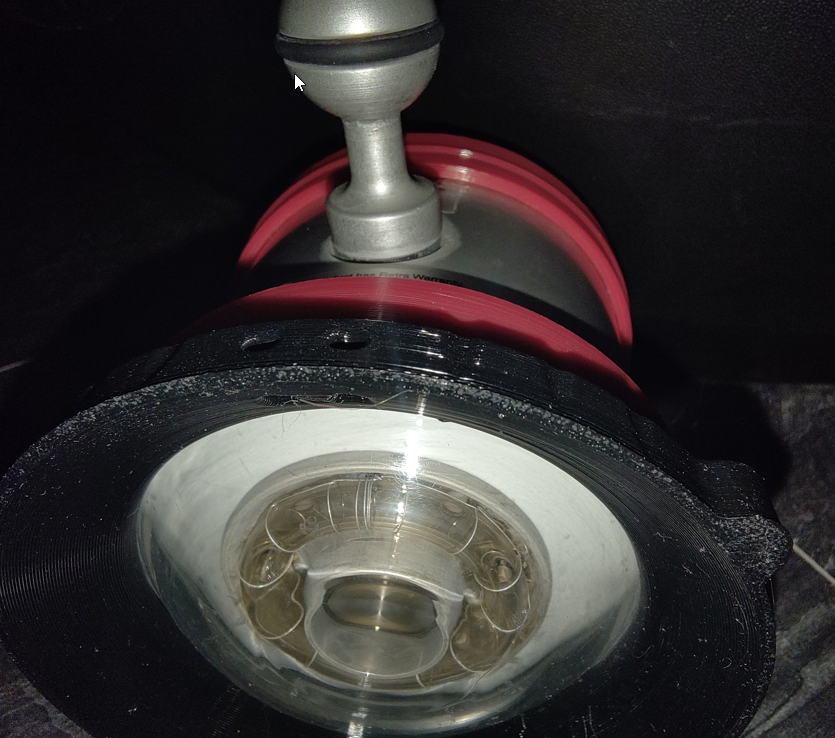
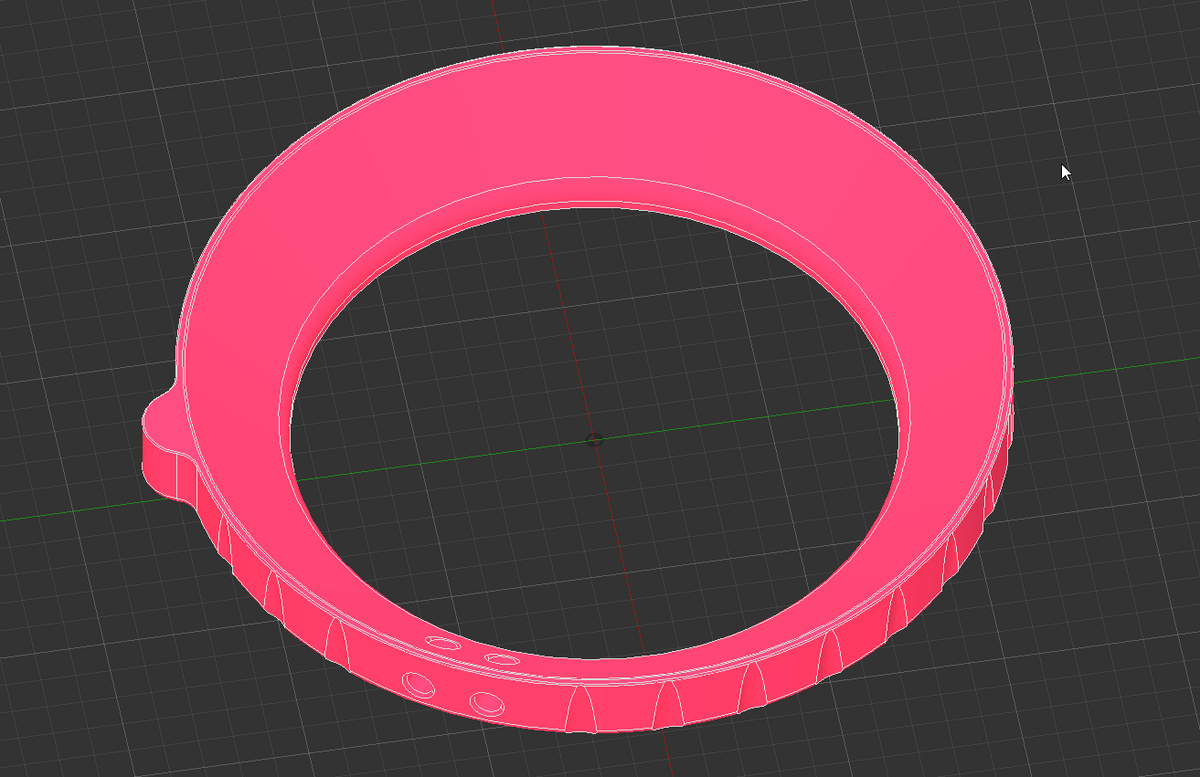
If you can share the 3D files that would be amazing! I have this part It is a protection and with this I can put the Retra on a table without that the glas is touching. It's also large that's mean I can make wide angle without losing light on the side. @Hiloboy ask me for a simple "snoot" I build one without testing it. I'm right know make some test with an adaptation of this one..
-
Yes and it is good to read somme other point of view.. I like the point with the snoot
-
I have 2, 8x charger ;) Humm can be a good argument... need to study this point, but a solution will be for me add some buioncy on the snoot to have exactly what is OK. Shore dive ??? what's that? ... seriously 4 AA more or less on my setup (+/- 10 Kg) will change nothing Randomly clicking... hummm no no ... but when you found the good position why not shoot 2 3 or more time expectly when the subject is moving "fast" I had problems with the batterie life with my retra pro... Diving without booster was not an option. Probably with the Max II it's possible.
-
I'm really happy the lght generate with the new MaxII the diffuser is in my opinion not necessary. I didn't try the reflector with the Max II But with the old Pro I like using it in some situation wide angle situation to put the focus on a coral or on something else. In one month I go for 2 weeks in Malapascua + South Leyte (Sogod Bay) It will be the first trip with the new retra strobe... I'm pretty sure that I'll enjoy the new model.
-
I changed recently from the old Pro to the Max II... the consumption are realy different. I didn't make for the moment a trip with the new one. But i'm sure that I will make 4 dive with the Max II Probably 300 or 400 photos with the booster. I made 2 dives more or less 250 pictures batteries was 75% full Like @TimG I found no reason to dive without the booster 8 is better than 4 batterie Faster and more .
-
Hi @foetusmachine I'm using a SMC1.. you made the swith to the 3... what are after 3 dive the improvments (If they are ;) ) Thanks
-
Not bad I make in 3D Printing 2 Float for my wifes lights.same result but only a little bit nicer (with pink color ;) )
-
My camera is allways cliped at my BCD...and I have allways the hand on it... They are my rules
-
Thanks @Chris Ross for the information that I can go to ISO50 with my R5... I was somtetime blocked Many thanks
-
Yes a very important point this the stability... No twist Clipped ON Close to neutral Yes Go up quite slowly but go UP Surface is allways "near" and you ca follow... bottom can be deep very deep where you can't go
-
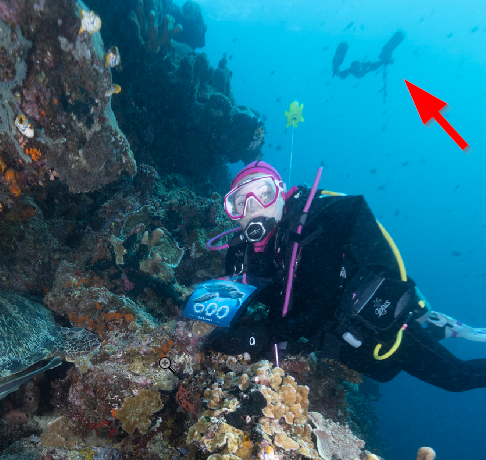
I found a picture. I only see that after the dive... during the dive I was making photo look at position etc... not the small thing in the background It was the first day of a 3 week trip in Indonesia.... Also the 600st dive of me wife. We was lucky Why it happend she gave the gopro to the guide ... he give her back and she didn't clips the gopro to her BCD... I toke picture and she didn't remember she didn't clip it... that's it. It was in the wall from Bunaken...
-
My wife have a gopro with lights It's negativ... I build flots in 3D printing for the lights... result it's light floating... She lost the camera i na near vertical wall... the guide and she started seraching... I goes up... See nothing.. The boat cam I ask to show if.... YES some m away... the boat take the gear and I go down to inform that all is ok... My camera is also floating it is for me a MUST.
-
I agree 200% of that For me it's the same but without the "sometimes". in 2026 we (my wife wanted to) go French Polynésie.. "Direct" flight over the USA, stop in LA but We will fly east over Singapore and Auckland ... ;) It's longer, expensiver (not a lot) and ist a good moment to visit Aukland and Singapore :D
-
You are right... but the problem is "not 100%" I'll not tkae the risk. Other country didn't have this tax I'll go theyre
-
Lucky man :)
-
You have the answer
-
For those wanting to show some more pictures from Halmahera / Sali Bay Sali Bay 2024 | Flickr underwater and over Halmahera 2024 Aérien | Flickr
-
Other point if you are lucky....very very lucky you can see blue whale I saw video form 2023 and also one from 2025. We wasn't lucky enough in 2024 ;)
-
I saw the group an afternoon I was alone with a guide visibilty was bad, and current was there. But good moment Exact.. I had "some problems" with my R5... was not easy.
-
Hi Luko We stayed for 10 nights at SaliBay last year. Like you I can say Sali Bay Resort : Service very good Underwater hummm ok but ... a lot of but.. We had a lot of garbage... you didn't mentionned that... good for you. On our side we had some dives with current... and one with a very veryy strong current who appared more or less instantanly. The guide managed the situation well and after that we stopped the dive (we was not as far from the end) The current was to strong to have fun, and was descending After this experience I understand why the guide are carrefull in case of current. The visibility was bad, no very bad in the afternoon. I wrote a report (in french) here CR : Voyage plongée au Sulawesi du Nord et Halmahera du 24/05 au 16/06/2024 - Compte-rendus de voyages - Plongeur.com - Le site de la plongée sous marine Like you i'm not sure to go back again I've meet Lisa in september 2024 in Germany and in January 2025 in Paris during diving show. She said the weather was rainy (bad ?) during 2024. You had not so good condition underwater why go back in this condition. ? Thanks for the confirmation that our experience was not as rare. Halmahera is for me over rated. Thank you for your report and some nice photos
-
That really a good argument... a second is the price, a stay in a resort is sheaper with more comfort (it s ma opinion )
-
Nice to read that... Christmas is coming soon ;)
-
Since 10 years I have my own floating arms... never break one and lost something. one time an arm imploded ok it was at 50 m deep... and it was an arm buil with PLA not the best best.
-
Thank you for this example ... I like this picture... It's not the moment for me to buy the MFO-3... but in the futur... YES :)


.jpg.857dbbfbdc4d79d9c6ebf7b4ba96ed1b.jpg)