


Everything posted by CaolIla
-
+1 for me I was 2 times in Dauin and for me APO wide angle (macro also, but to change a little bit from macros ;) ) for the coast in Dauin macro macro and macro
-
Thank you for this picture. It is the confirmation that the choice of buying the new retra max II was to good choice... the other strobe are so huge in compareason of the retra..
-
good idea..
-
-
Hi, I have buy the G55 and the G100 for my wife last year. It is good for filming small things.. but it is not allways easy with the G55. I didn't use it personnaly but she startet to film more and more small shrimps and she make more an more good small sequences. I buy first the G100 and after one trip add the G55.. it give the possibility have fun with a GoPro For me the quality is ok and it was a good decision to buy it.
-
Good point for you :) That'is why I sugest BT
-
Hi @Mathieu Cornillon Thanks, For sure I have a lot of interest... I'll contact you after my trip Thanks again. Hugues
-
Bluetooth ??? The price of the hardware is "nothing"... the price of the maintenance, is much more... I guest that the main reason not to implement firmeware update are the support they need to give. USB-C ... it is a opening --> to make this part watertight is expensiver as bluetooh... and for sure they will be some fllooding
-
@administrator It is possible to change the tittle of the subject in " MFO-3 Cap and Hood" Thank you. Hugues
-
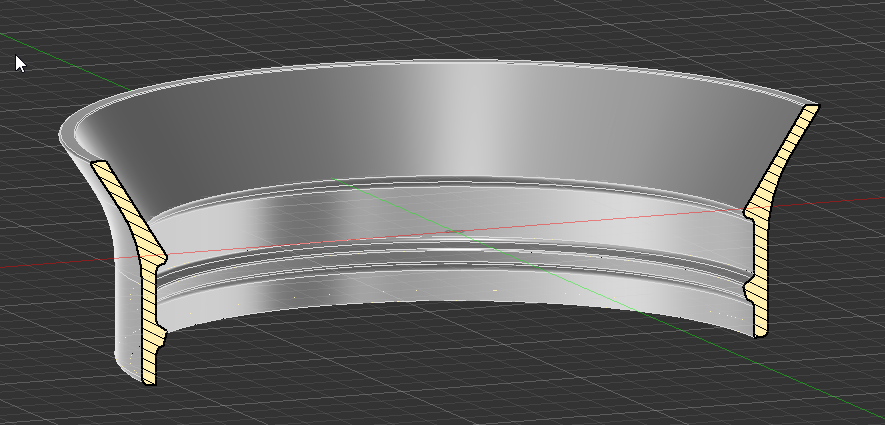
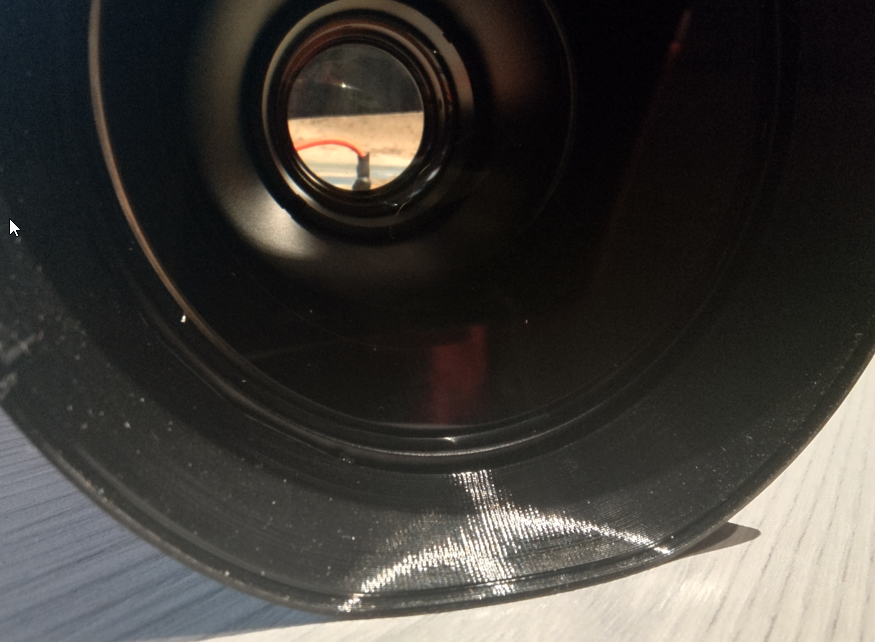
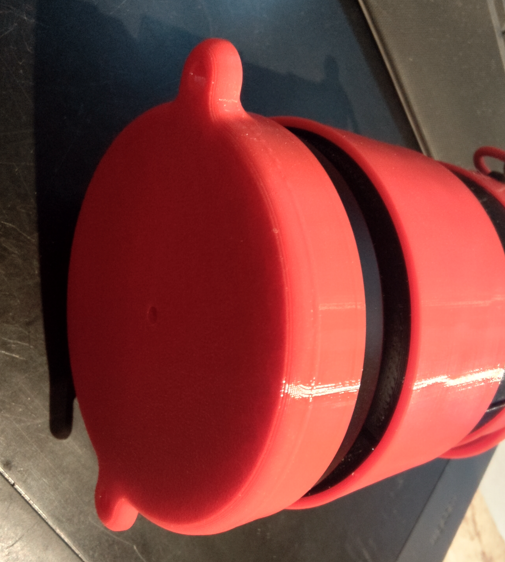
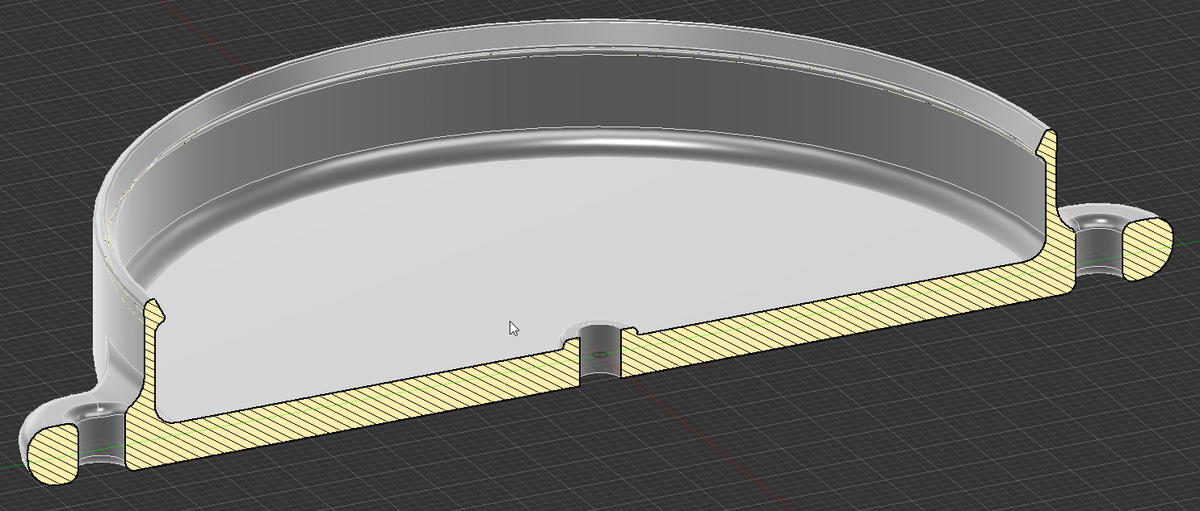
It tooks more time as estimated Printing with TPU need to be patient more that with normal PETG or PLA. It is very slow. The last version First print the part on the top was vertical... not good I saw the hood thru the lens I made a second with a top larger but to thin probably. It is ok but I'm not happy. Now I increase the thickness of the part in the top In 2h now I'll have THE hood ;) The hood is a little bit visible thru the lens (really only a little bit) but in the water I'm sure it will disapear. Second version The hood is 18 mm deep, for surr it will provide a good protection at the front glass of the MFO-3. It is firmly in place it can't be loosed. If you want the STL, ask I'll sent you the file in a MP. (Sorry @Davide DB I didn't publish the file, I want to know who is using my "work" to many consumer... and no feedback, it's my point of view please respect that. Thanks)
-
That's the remark I made with the UWT trigers... no firmeware update like other
-
I found a element to simulate the frosted glas. I can make to part, before the frosted glas to concentrate the light of the retra in the best manner. And the second in the tube... until the output Less try and error... I'll have something to do this winter... 😍😝
-
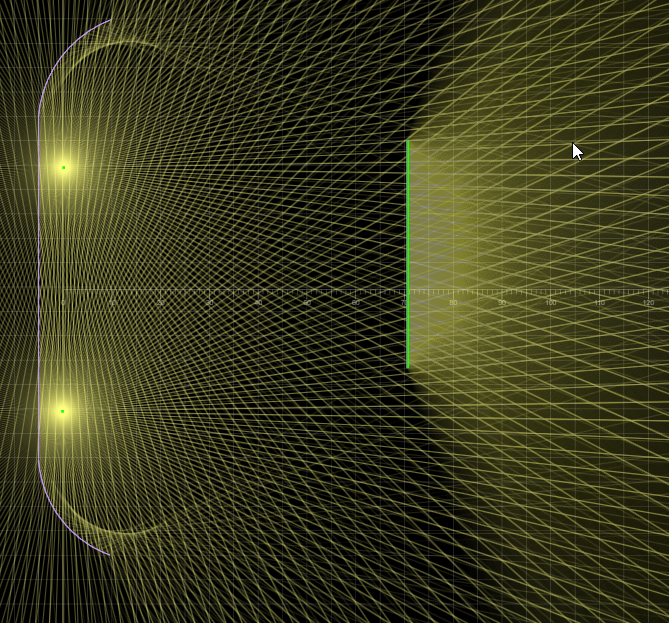
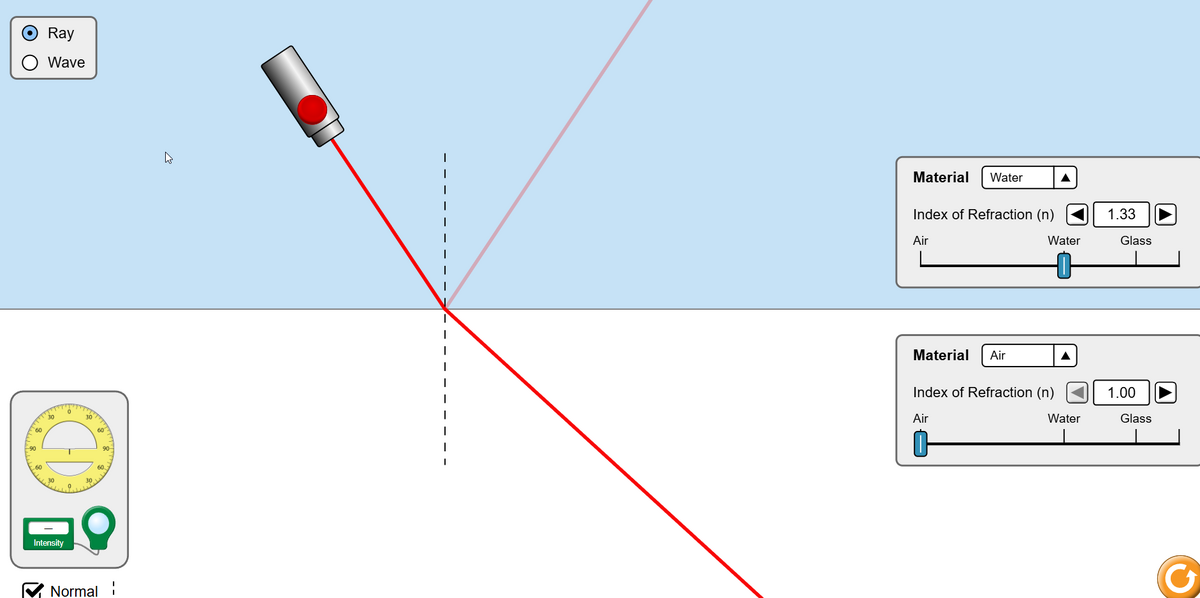
I found some web site to make optical calculation this seem to be a good one Ray Optics Simulation - PhyDemo I startet the modelisation of the retra snoot... (can be a good "work" for the coming flight ;) In red I draw on the prtscr the "snoot"... 🤣 I need to find now how to define different refraction index with this tool because we have water and the lense didn't work like in the air.. and this for some other infos. Bending Light
-
Not a bad idea... on the other side the MFO-3 is for larger subject.... normaly the glas didn't approach coral or other things... I have the base to build a short hood I'll make that today
-
I had this opinion with my "old" Retra Pro X the booster hummm the 8 batteries... this wasn't a good combination. With the new Max II wouah it change my life. The AA can be found world wide... it is an argument You will have the Maxi... still not deliverable ... something seems to be wrong with the new model with Lion... I'm happy to have changed my pre-order from the maxi to the max II
-
The result, I need to attach a small bungee and it is ready for the trip
-
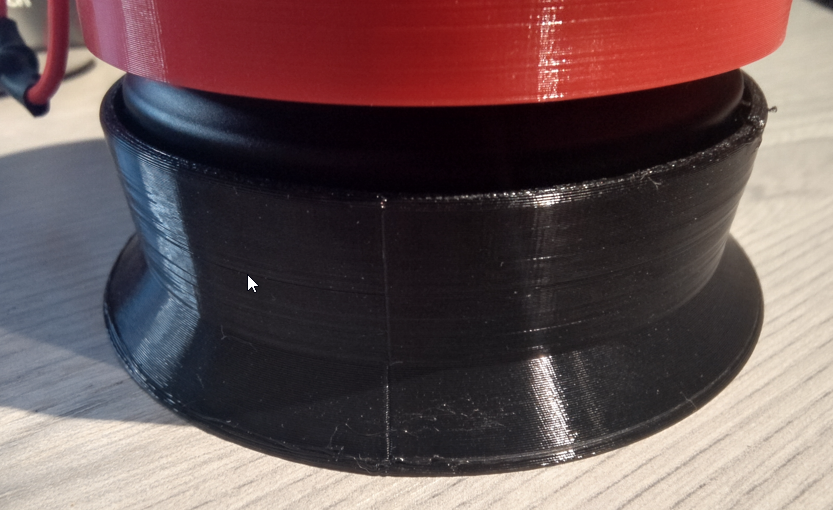
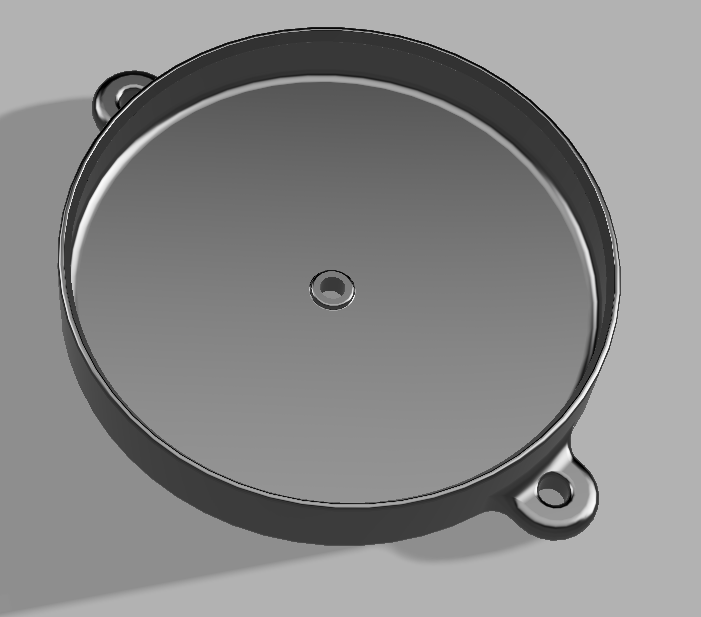
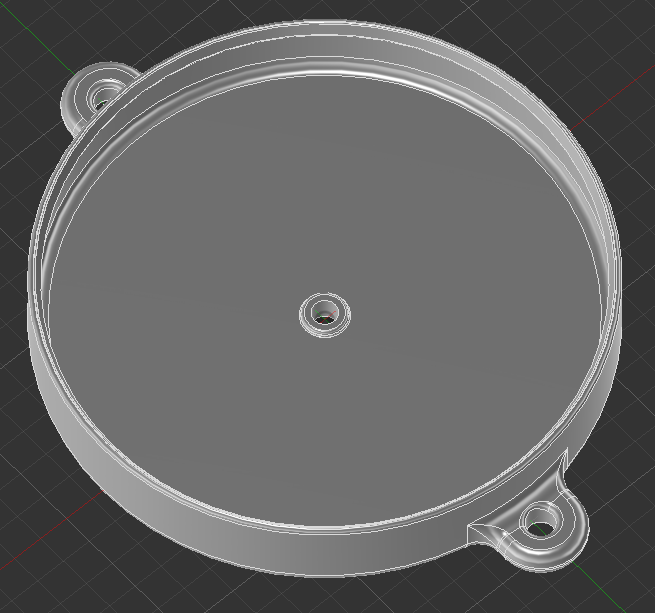
Hi I found that the original cap have some problems. nothing to hold it when not on the lense Heavy (relatively ;) ) Black... I don't like ... seriously difficult to find if it his lost. I build a new one, to print with TPU l You can print it in red ( like I made it) or black and why not pink or some phosphorecent TPU.... If you want the 3D STL... ask I will sent you the file. If you want some modification same ask...
-
I'm diving in France & Germany in Dry suit I know what it means... and with a 20 L tank (yes 20 L ;) ) I forgot to say... with my camera :)
-
The Retra have a big advantage for you from Spain "Address: Retra UWT, Ltd., Spodnje Gameljne 36a, SI-1211 Ljubljana - Smartno, Slovenia (EU)"
-
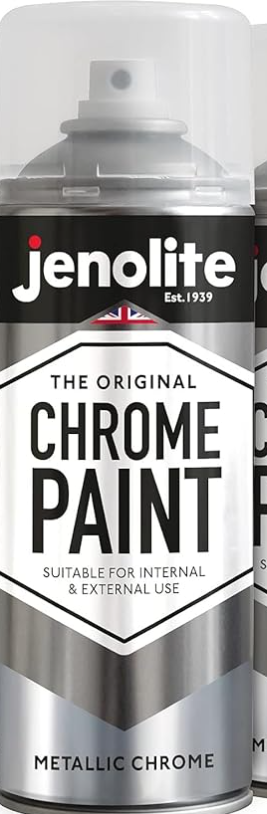
I'll make test with this find on Amazon... the bomb are wiating to be used since 4 months :(
-
I need to make test with the 3D modélisation software I use to look if the raytracing possibility are good enough to achieve the target of a good calculation of the result. With to software I used before (at work)I believe it was possible.
-
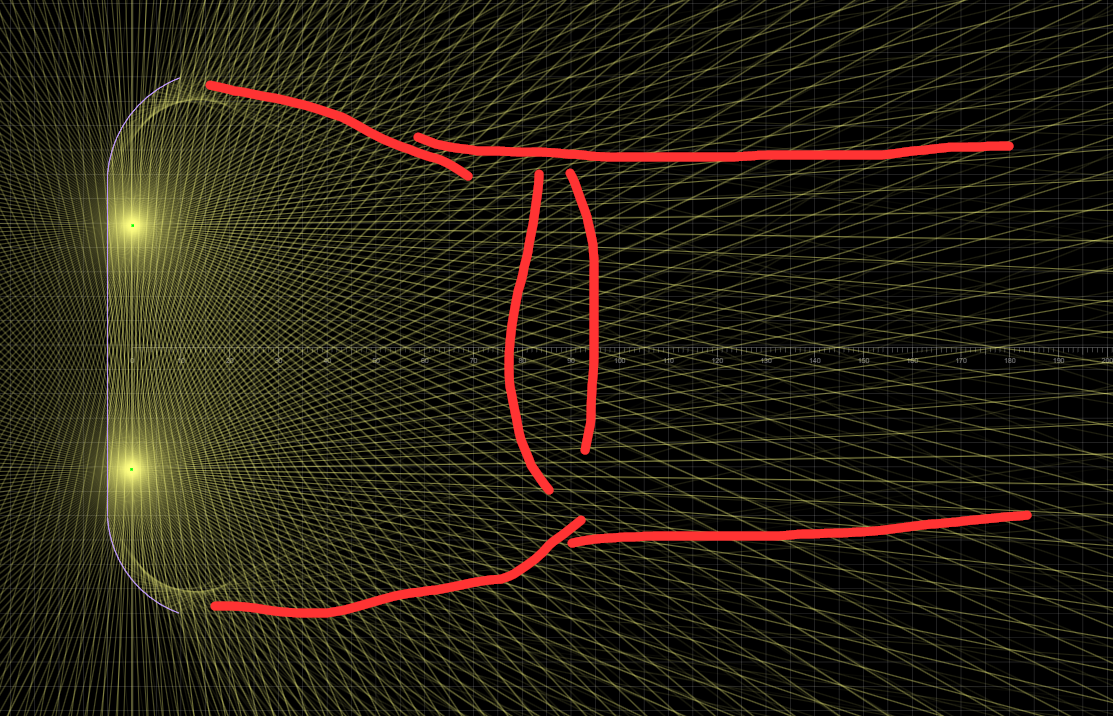
That is more or less what I made in the past. with 3d Printed piece to try different position IN AIR....that is the problem in water the light/lenses work not the same. I bought some mirror paint bomb the idea is to put 1) before the frostet glas (or a very lite frostet glas) a beam concentrator like that Painting the inner part of the snoot before the frostest glass like a "mirror" will help. The inner form need to be calculate to concentrate the light on the frosted glas. The first part will help to minimise the lost of light on the source. Part 2 after In the "tube" It can be painted like mirror... but also there it will help to calculate the form of the tube/cone what ever you want to name this to reach a maximum of the ray to be // at the end of the "tube". If it is not good enough used some "lenses" as collimator to reach a good directed flow of light in front of the snoot.
-
The frostet glas is there to made the light source more diffus.. the light go out on the other side did not have a direction but got more or less in 180 ° direction. The fresnel lens in this construction is directly putted after the frosted glas and the frostest glas is beetween 5 and 10 mm from the front of the strobe glas. As near as possible. It the final version I'll made 2 mm I'll didn't try with only the fresnel prehaps it is ok... but I have a doubt. I'll try it to show if the light is uniformfly coming out... I'm really not sure my fear is that there will be a "dark" zone in the middle. I'm not an optic specialist I need to study a little bit more the principle of lenses and find a software capable to make some calculation. to avoid to many "Try and error" loops. A problem is the change/or not of material on the glass interface..water didn't react same as air. The lense are build and giving focal distance etc in air not in water. I repeat the idea is to build a snoot with 1) as light as possible (for travelling) 2) as short as possible 3) suitable for ring strobelight, like the Retra 4) As less as possible lost of light,--> pilot light brighter 5) in the high end version an option for a diaphragme to smoothly change the size of the spot light.
-
Small feedback I wrote to Retra... very fast answer... a Sunday. :) That can justify the price... each minutes is € during a trip 🤣 The Update is only for iPhone for Android the last firmeware is v3.1.
-
It^'s more or less what I have.... I'm still thinking about removing the 2 torch ... but in night dive or in some location it is good to have the light for searching small stuff. Also when you lost the other turn on the lights help a lot (to be founded ;) ) In the worst case.. I have the 2 SOS on the Retra AND the troch... Same for the go-pro on the top of the housing... I didn't use it a lot... but in some case... really usefull to have an other angle of view if something special arrive... Dophin or ???? Like here Dauphin Hurghada 202310 | Hugues Brun | Flickr


