


-Edit.jpg.0739718b849caea17a4f73bb93954a2a.jpg)
Everything posted by Dave_Hicks
-
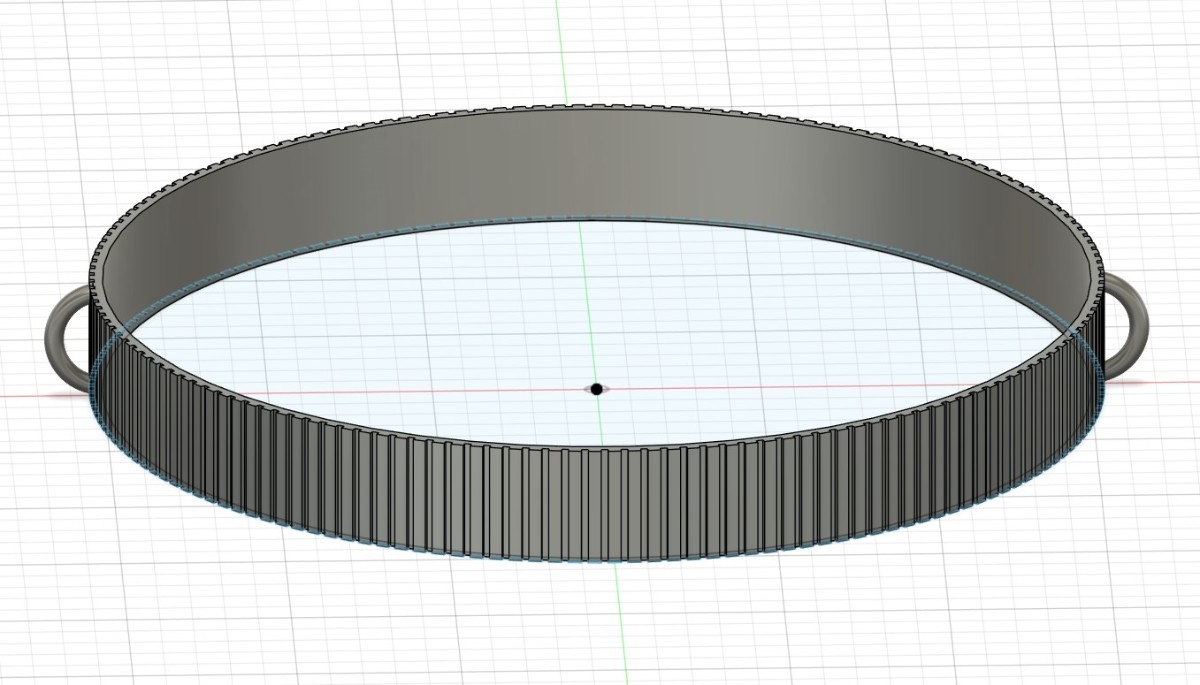
 The rubber grip collar on my WWL-C fell off after a recent dive. The soft rubber probably got cut by a rock while taking a photo at a low angle. I made a replacement rubber collar on my 3D-Printer using TPU rubber filament. This material is tougher than the original rubber, and I added a couple of Loops to the design on each side to enable the addition of a lanyard. As you much often remove the WWL underwater to release bubbles, a lanyard is a good idea to avoid dropping it. (loss/damage) I don't know how common this problem of cutting the collar is, but the lanyard loops make it a useful enhancement regardless. I used fishing line and a spring clip to attach the port to the housing. Cosmetically, my design looks identical to the original. I printed in black, but one could make this in any festive color of your choice. The design is freely available at: https://makerworld.com/en/models/637896#profileId-563389
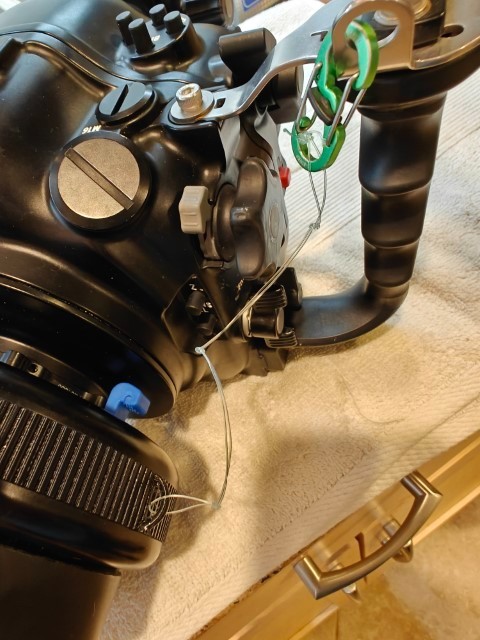
-
I printed these with supports on my Bambu FDM printer. I also tried without support (of the internal cavity) and it was just cleaner with. On the Bambu with AMS there is a cool trick where you can print with PLA or PETG, then use the other filament for the support interface layer. They don't stick together well, so the supports pop right off very cleanly. The AMS automates swapping between filaments.
-
Welcome! Always glad to see more PNW divers. I'm in Seattle and we have an extremely active dive community here, with tons of amazing diving around Puget Sound. Between Puget Sound, Hood Canal, and British Columbia, we have the best diving in North America. If you are not diving at home, I strongly encourage you to look into it! You'll get in a lot more diving and improve your photography skills quickly if you can just drive yourself to a day of great dives with friends. Cheers, Dave
-
Nice! Tight is better than too loose, you can always do a bit of sanding if needed. I have found that they stay on really snuggly underwater even if loose. Not sure if the holes will have an impact. Couldn't you just flip the print orientation to avoid adding holes?
-
I would be surprised if you can't buy a second hand D500 Nauticam housing. On the other hand the Z8 is amazing. You could get a Z6 as well for a bit less. Either will work great.
-
I used my MF-2 & HF-1 strobes up in God's Pocket (North Vancouver Island, BC, Canada) all last week, and gave some knobs to a couple of other divers as well. Everybody found that they worked great and make a big improvement to the usability of the strobes. First field tests were a success!
-
Clean your bed with dawn soap and a scrub pad. Add a brim to the print for better adhesion. I didn't need to, but it may help.
-
Clean your bed with dawn soap and a scrub pad. Add a brim to the print for better adhesion. I didn't need to, but it may help.
-
See if there is a local "maker space" at your community center, library, high school or university. The plans are available online and anyone can print them for you.
-
I am interested in a couple of items. Will PM.
-
Assuming the Nauticam gear itself is the same for Nikon and Canon, I could easily make one with some photos and two very precise measurements. I like making these things, and have done about 6 zoom and focus gears to date. 1) Diameter of the zoom ring in millimeters. 2) Distance in mm from the underside of the housings gear sprocket to the top of the zoom ring. 3) Confirm the outside diameter of any Canon / Nauticam gear and the tooth count. Let make sure it's the same as Nikon. Photos of the lens & tc put together from profile and top down. It might take a couple of tries to dial it in, but we could likely minimize this by providing a few variations in thickness of the friction sleeve. I am off diving this week, but pm me if you want to try it.
-
My 3D print design for the HF-1 Power Knob slip over cover: https://makerworld.com/models/610783
-
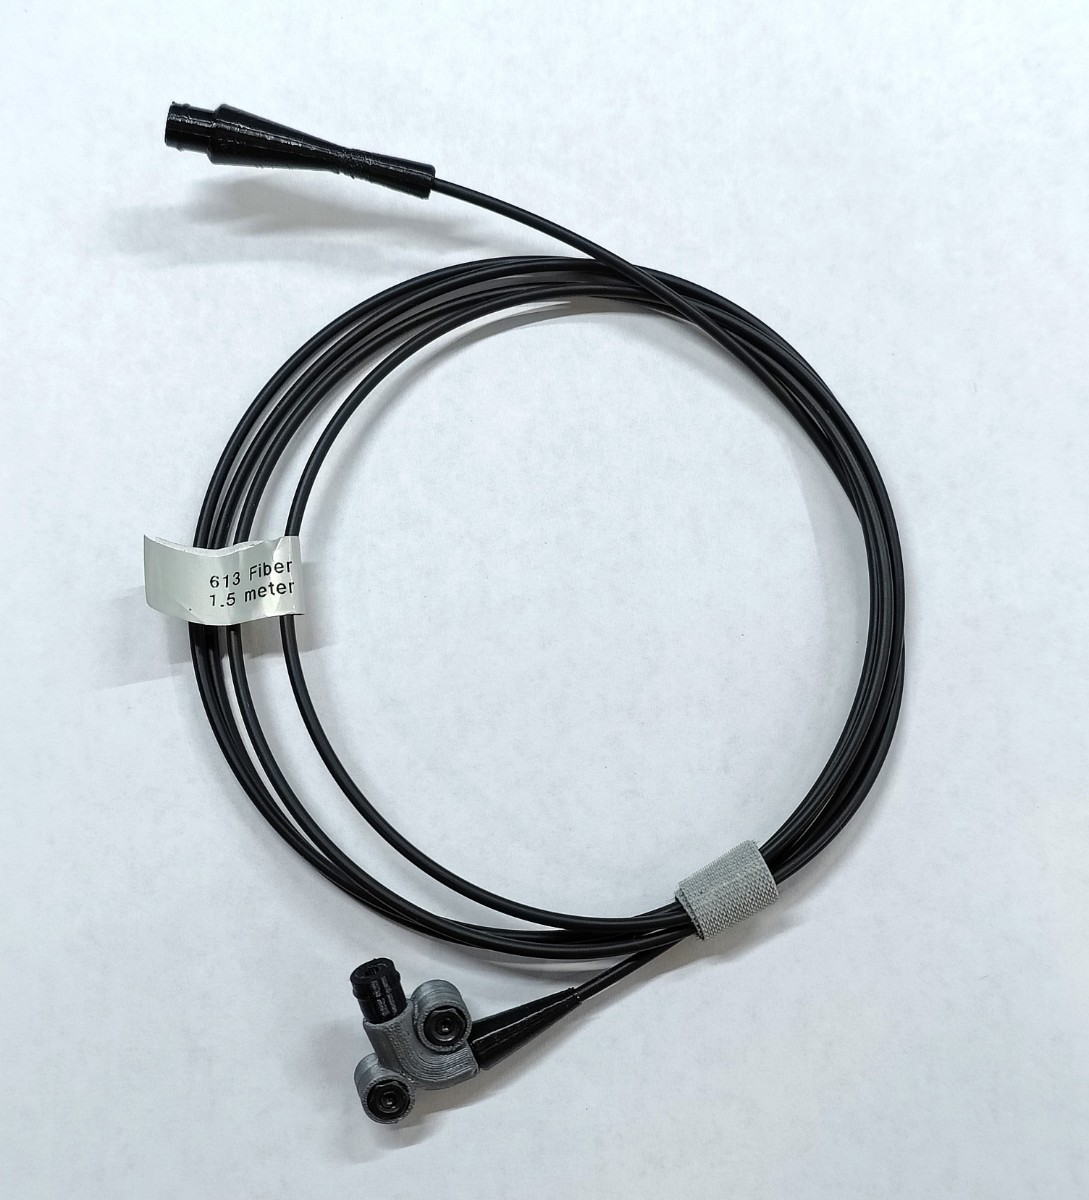
If you have access to a 3d printer, I have a design available for 2mm OD fiber optic connectors. Both 180deg and 90deg connectors. These are as good as anything you can buy. https://www.thingiverse.com/thing:6134211
-
Perhaps it is oil filled? Or some sort of lubricant or sealant on the interior became dislodged? I think you are going to have to send it to Nauticam for service. In the future leave cameras on the deck, perhaps in a cooler bag. It's the safest place for them.
-
FYI, the MF-2 power knob modification also works on the MF-1. The power knob is identical on both strobes. The HF-1 is a different size.
-
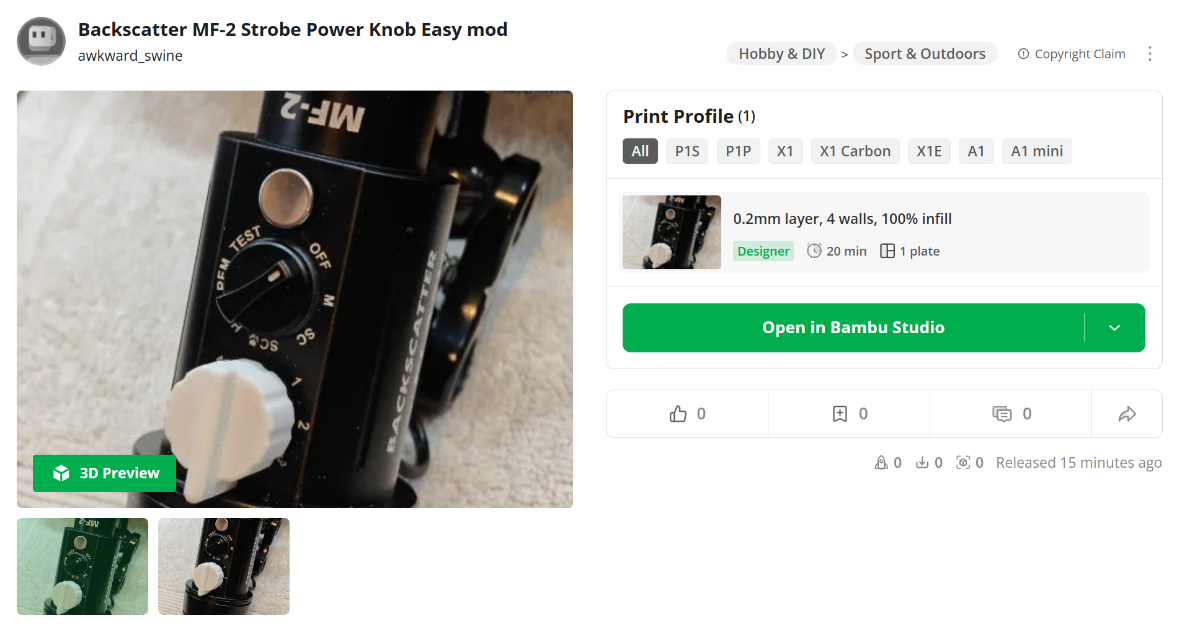
I have posted the Backscatter MF-1 and MF-2 strobe power knob modification on MakerWorld. https://makerworld.com/en/models/612317#profileId-535510
-
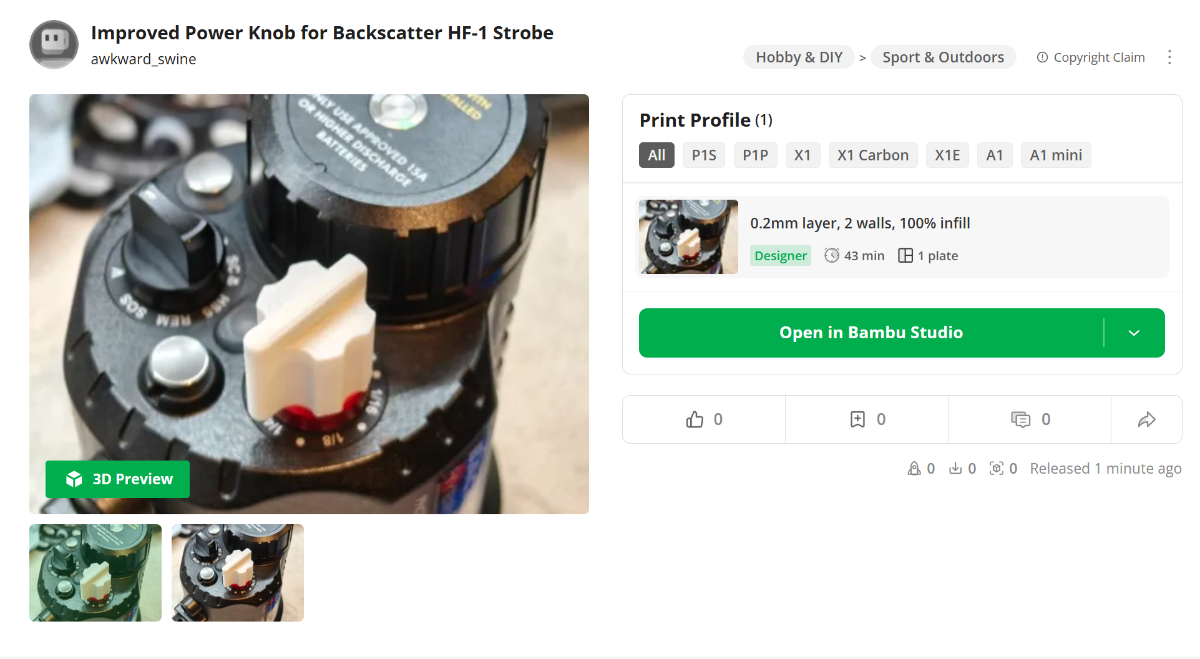
I have posted the HF-1 power knob modification on MakerWorld. https://makerworld.com/en/models/610783#profileId-533907
-
The 10 knobs I made cost 91 cents of materials. 🙂
-
I did two dives with the improved power knobs on my HF-1 strobes. Coldwater in Puget Sound, down to 112 feet @ 50F, wearing dry gloves. The modification worked Great! So much easier to turn the knobs and it's easy to tell by feel what the level is set at. The vertical paddle of the knob is set at 1/4 power which you can consider the "home base" as it is vertically aligned with the strobe itself. Every two clicks are another 1/4 power +/-. I poked at the slip-on knobs at depth, and they are nice and snug. Water pressure holds them on tightly. Not going anywhere on a dive but are still simple to remove out of the water. I printed this first batch with White PLA+ for visibility and sprayed on some clear coat to protect from UV a bit better. I chose white for visibility at night. PLA is not the best material for outdoor gear, but it was the only white filament that I have. Some other PLA+ prints I use underwater have held up well, but I will likely get some White PETG for the next set I print. I'm going to make a similar knob for the MF-2 strobe next.
-
I am in Seattle. I will PM.
-
I have 3 Inon 330s and now that I am using HF-1s primarily, I suppose I don't need 3 spares. I'd be willing to sell one of my 330s. Maybe $375 usd. With accessories. Mount, diffusers.
-
I am still using my old 1:1 45deg Nauticam viewfinder on my new Z8. The Z8 has an option to make the viewfinder display slightly smaller which allows it to work just fine with the older models. That's $1700 you do not need to spend! I am sure the new models work slightly better, but not that much better.
-
Better flip your camera over so the pictures come out right side up!
-
Give aways only. I made some extra to share, and will share the design soon.
-
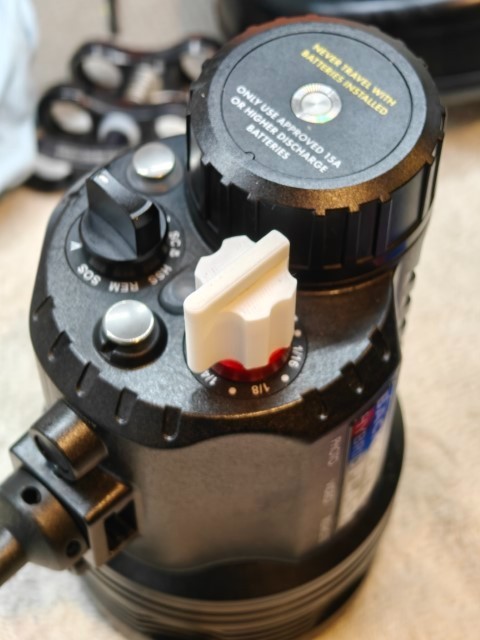
The Backscatter HF-1 strobe has been out for a couple of months now, and a number of divers are using it with great success. The reviews have been largely positive as well, and it seems to be a great product. I've done about 20 dives with the HF-1s and I'm really pleased with it. The power level, recycle time, battery life, and actually useful videos lights add up to very compelling product. When compared to other strobes with fewer features at almost twice the price, it's a killer deal. All that said, when I've talked to other UW photographers about it, I've really only had one criticism related to the controls and ergonomics. The Power Level Knob is terrible. The Power Level Knob is too difficult to turn while wearing gloves and worse, you can't tell By Feel what power level position it is in. There is a tiny white dot on the knob indicating its position which you can't see unless you point the strobe's back right into your face. Personally, I use long arms and rarely have the strobes pointed straight forward so I have to reposition the strobes just to change the power level. At night this is even worse as you also need to point a light at it. This design is very problematic, and I hope Backscatter will fix it in later production. In the meantime, I have come up with a solution. I made a new knob that slips right on top of the existing one. This simple 3d-printed part slips snuggly over the existing knob, aligned with the existing white dot. It is much simpler to turn with glove on or off, and you can easily tell it's position by feel. The knob turns freely in the full range of settings. It was just as easy to print out 10 as 2, so I made a big batch to share with others who might be interested. I still need to do a few more test dives with it before I declare it to be finished, but I'm pretty happy with it so far. I'll publicly share the 3D STL design files once I've tested it a bit more.


