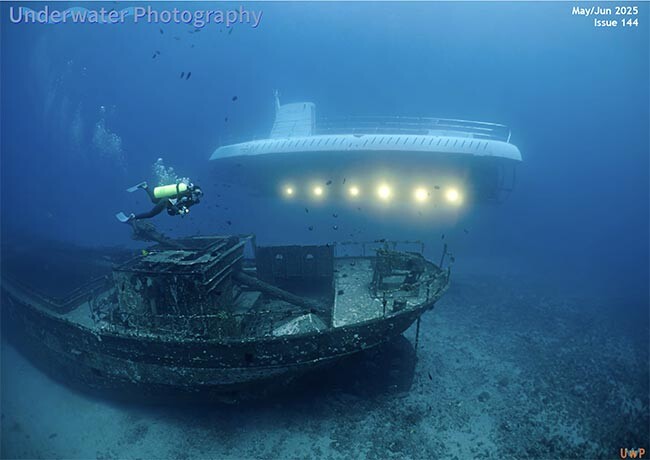
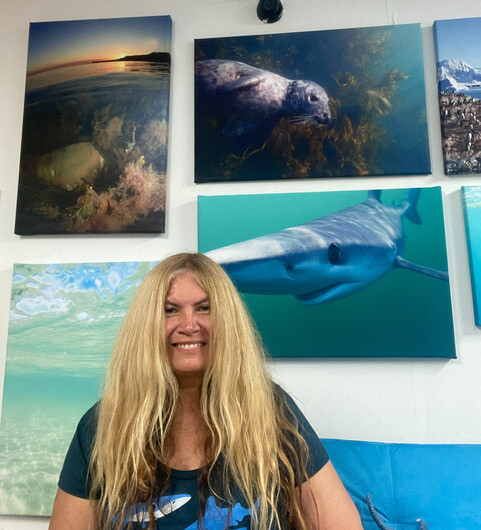
Waterpixels is delighted to announce that Maria Munn has joined the team as our Compact Systems Specialist.
For many years Maria has taught and specialised in producing amazing images using compact systems especially the Canon G series. She’s been looking too at action cameras and housed smartphone systems and has posted some really helpful guides and reviews.
A more detailed resume for Maria is on our About page. We’re sure members will welcome warmly her knowledge, experience and enthusiasm. Great to have you with us, Maria.
According to the Nikon firmware website, version 5.20 brings the following:
Added support for “NX Field*”, a remote shooting system for corporate users. * Visit the “NPS” website for overview and user’s manual of NX Field. Nikon Professional Services (NPS) (English) Note: “NX Field” app for smart devices may not be available in some countries and regions. • Renamed d14 [Display on during burst] in [CUSTOM SETTINGS MENU]. • Fixed the following issues: - Pressing the playback button after repeatedly shooting bursts would in rare cases corrupt the display of all images. - In rare circumstances, optimal exposure could not be achieved during burst shooting after changing the exposure in mode M. - In synchronized release, pressing the shutter-release button of the master camera halfway initiated autofocus on the remote camera with the following setting selected. ▸ [CUSTOM SETTINGS MENU] > a6 [AF activation] > [AF-ON only]
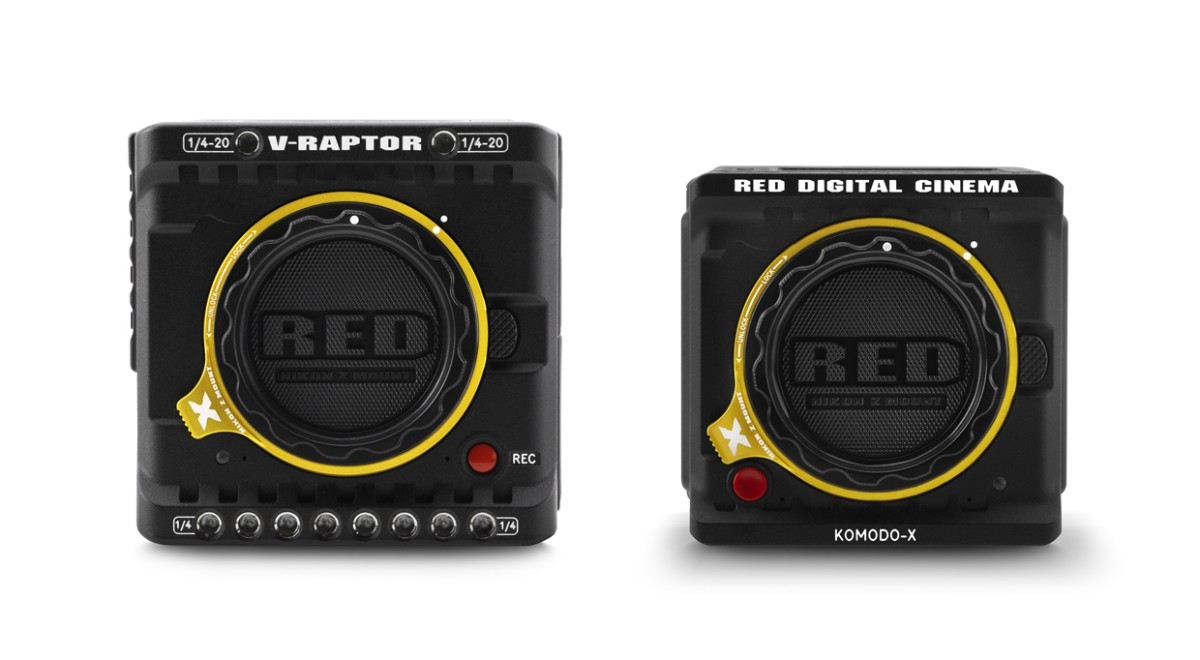
When Nikon acquired a controlling stake in RED Digital Cinema in early 2023, the industry took notice. For photographers and filmmakers alike, this wasn't just another corporate merger—it signaled Nikon's serious commitment to professional cinema production and a strategic evolution beyond still photography.
Strategic Integration and Immediate Benefits
The integration has moved quickly. RED has already released cinema cameras featuring Nikon's Z-mount, creating a native pathway for Nikon glass to reach professional cinema environments without adapters. This compatibility breakthrough offers significant workflow advantages for creators invested in both ecosystems.
The technical advantages of the Z-mount make this integration particularly powerful. With its 55mm diameter and minimal 16mm flange distance, the Z-mount delivers exceptional optical flexibility, supporting everything from ultra-fast apertures to edge-to-edge sharpness across varying sensor sizes. For RED's cinema application, this mount architecture provides future-proofed optical performance while simplifying lens choices for filmmakers.
Image credit: Nikon.com
Nikon's Video Evolution
Z9 vs Z8 - image credits: cined.com
Concurrent with the RED acquisition, Nikon has dramatically expanded the video capabilities in its flagship cameras. The Z8 and Z9 now incorporate features previously exclusive to dedicated cinema cameras:
Internal 12-bit RAW recording
ProRes and N-RAW codec support
Advanced log profiles
Professional monitoring tools (waveforms, vectors)
Timecode synchronization
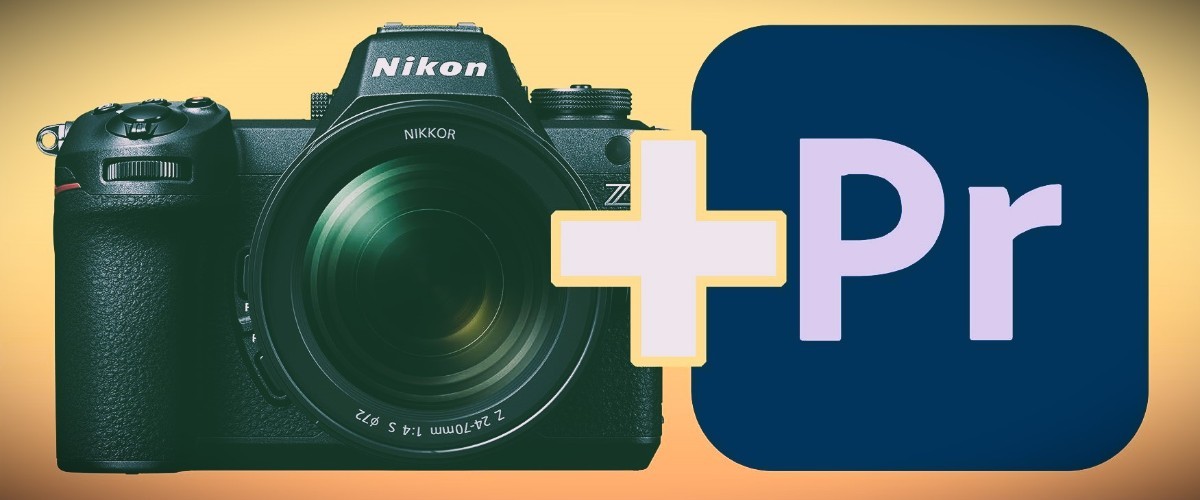
N-RAW and R3D: Complementary Codecs
Since the acquisition of Red, Nikon has two Raw codecs in house. Rather than competing internally, Nikon's N-RAW and RED's REDCODE (R3D) formats serve distinct purposes within the expanded ecosystem:
N-RAW targets hybrid creators and solo operators with its efficiency-focused design. The 12-bit compressed RAW format balances high-quality acquisition with manageable file sizes, making it ideal for documentary filmmakers and content creators who need cinema-quality results without complex external recording setups.
REDCODE RAW (R3D) maintains its position as the industry-standard cinema codec, optimized for controlled production environments and post-heavy workflows. Its established integration with DaVinci Resolve and REDCINE-X makes it the preferred choice for high-end production houses REDCINE-X is a free, professional-grade software application provided by RED Digital Cinema. In addition, Adobe has announced that it will support the N-Raw codec within its video editing software Premiere Pro.
The Future Landscape
This strategic alliance is redefining Nikon's identity in the visual content creation space. By bridging the gap between hybrid creators and cinema professionals, Nikon is positioning itself as a comprehensive imaging solutions provider. The RED acquisition doesn't represent a casual expansion into video—it's a fundamental repositioning that leverages RED's cinema expertise alongside Nikon's optical and sensor technology.
For working professionals, this integration promises future innovations that blend RED's cinema heritage with Nikon's technological prowess, potentially creating entirely new categories of imaging tools designed for modern visual storytelling across all formats.
Nikon announced the Z5 II mirrorless camera last night, but in addition to that announcement was another exciting update for Nikon videographers. The company revealed that Adobe will finally offer support for Nikon's N-Raw video format in Premiere Pro. N-Raw is Nikon's proprietary 12-bit Raw video format. It supports Rec2020 color gamut and allows users to adjust white balance in post-production, much like what's possible with Raw photo files. As a result, it provides more flexibility during the editing process. Despite that extra data for editing purposes, it also produces smaller file sizes compared to Apple ProRes Raw. It's ideal for those who need editing flexibility while saving space on memory cards and hard drives. The only other options for editing N-Raw files are DaVinci Resolve and RedCine-X Pro, so it is great to see Adobe getting on board. While support for N-Raw in Premiere Pro is certainly welcome news, users will have to wait until "the end of 2025." Nikon didn't provide more specifics than that, simply saying it will come with an updated version of Premiere Pro coming later this year.
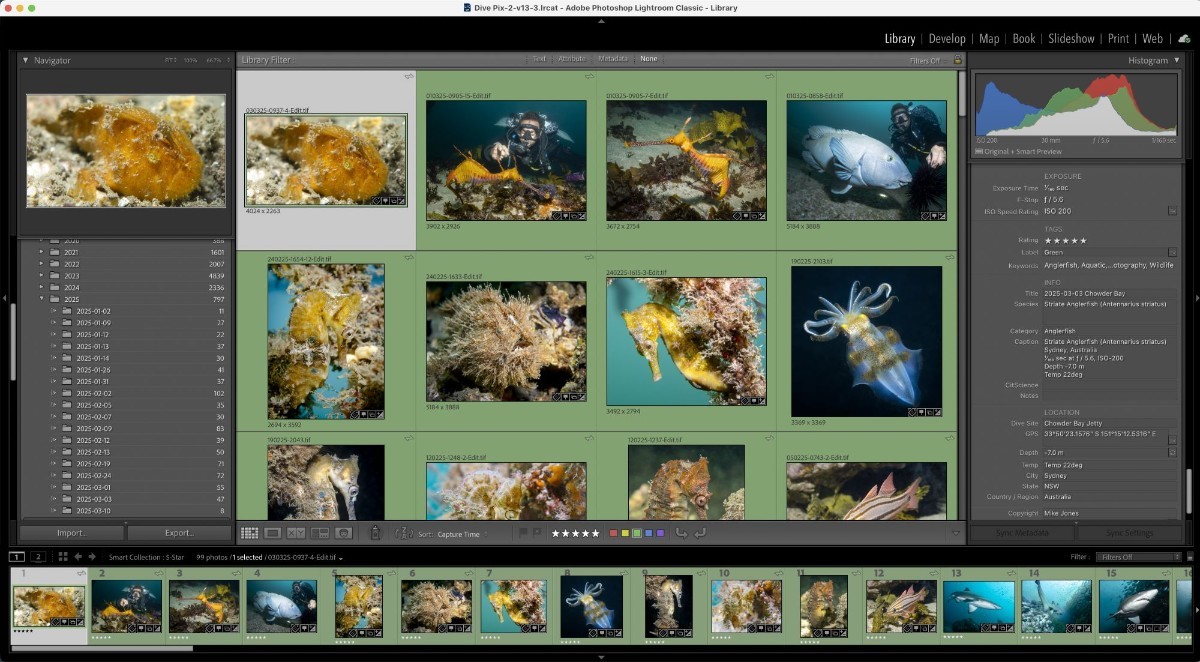
Managing underwater photography collections can be overwhelming, but with Adobe Lightroom's robust metadata features, organization becomes seamless. On his blog, Mike Jones outlines a systematic approach to metadata management, emphasizing the importance of consistent practices to enhance searchability and gain deeper insights into marine environments.
Key steps include:
Rating: Assigning ratings to evaluate image quality.
Keywords: Applying terms to describe the environment and subjects.
Title: Using a consistent format for easy grouping.
Species: Recording both common and scientific names.
Category: Grouping similar species under broader classifications.
GPS: Adding precise coordinates to document the exact location of each shot.
Implementing these practices transforms your photo library into a valuable dataset, capturing snapshots of time, place, biodiversity, and behavior.
For a comprehensive guide, visit Mike Jones's blog:
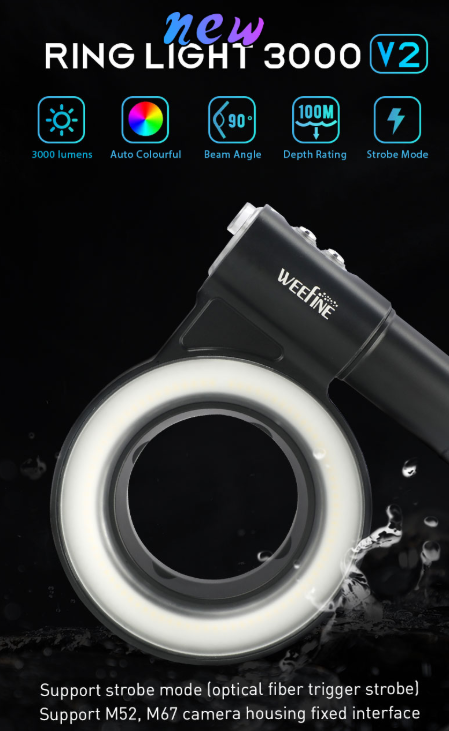
Weefine have just released a new ring light, the WF101 Ringlight 3000 Version 2 to compliment their existing WF105 Ring Light 3000 CCW but what are the differences between the two and why would you prefer to use one over an external strobe?
Ring Lights are particularly useful in macro underwater photography, providing shadow-free illumination when a subject is close to the lens (the WF105 Ring Light provides 1000 lumens of light allowing users to shoot at just a 25 mm distance from their subject), super ideal for lighting tiny subjects, particularly if they are in an area difficult to illuminate evenly with an external strobe. They are a fabulous smaller, lighter (just 470 or 480 grms above water/245 arms underwater), more economical option for those macro lovers starting out in underwater photography who don’t want or need to invest in a larger, heavier strobe.
Images @ Pauline Wong and Ken Thongpila
Both versions provide a 90 degree beam angle with a continuous 1800 lumens of light for 45 minutes and 3000 lumens for 12 hrs of strobe use. As mentioned above the WF105 is a Super Close Ring Light providing 1000 lumens allowing for softer lighting, making it ideal for super close subjects. Both have a built-in strobe port offering a Strobe Mode with a specialised optical fibre cable. The newer version WF101, also provides extra options of blue and red light aside from white light (5500k), whereas the WF105 offers the possibility of adjusting the colour temperature (3500-8000k) to allow extra colour precision. It also has 19 brightness options via an adjustment knob compared to 4 with the newer WF101 V2 via a push button which also boasts 4 choices of power levels - 100%, 75%, 50% and 25%.
Battery wise, the WF105 offers the extra option of USB-C charging, with both offering 3 colours to indicate battery power, making it easy to see if a quick boost is needed between dives.
Finally both are depth rated to 100 ms/330ft and offer the ability to be used with lenses of both a 52 mm and 67 mm lens thread.
To sum up, Ring Lights are a fabulous way for a beginner to get started capturing their favourite macro subjects as the light will never need repositioning, giving your subject a flattering soft glow and can lessen the risk of backscatter in your images.
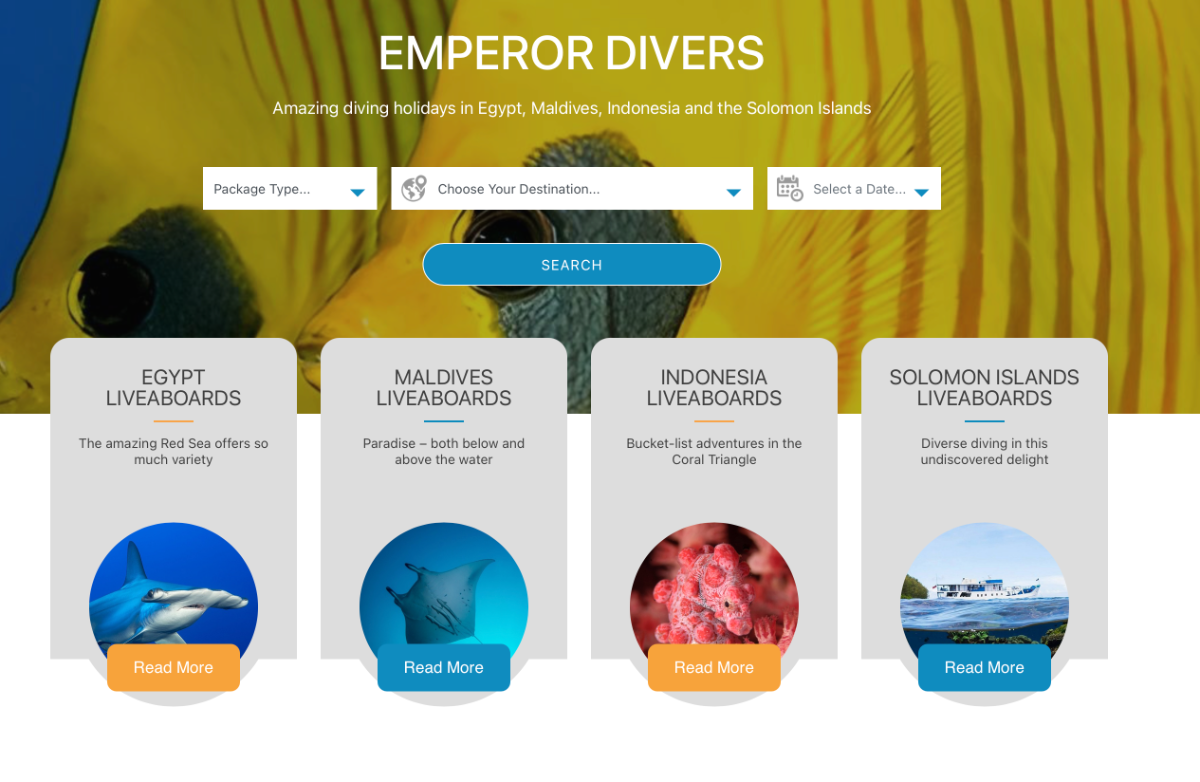
Waterpixels is delighted to report that Emperor Divers have joined our growing lists of industry supporters.
Since 1992 Emperor Divers have shared their experience of scuba diving in the Red Sea, Maldives and Indonesia and have looked after thousands of happy divers – a great many of whom keeping coming back to us year after year.
Emperor's focus has always been on providing safe and sustainable diving holidays for everyone. Liveaboards, Resort Diving and PADI Courses are what they do. They cite ‘Must-do’ dive itineraries to include ‘Best of Maldives’ , ‘Red Sea Reefs & Wrecks’ and Indonesia’s ‘Komodo’, ‘Banda Sea’ and ‘Raja Ampat’.
Having dived with Emperor many times over several decades, I can heartily recommend them.
The team at Waterpixels are delighted to announce that our 1000th member, @Grega joined the Waterpixels community on 15 March. An especially warm welcome to Grega!
Thanks to all those who have signed up since we started in Dec 2023. We reached our 500th member in February 2024 and have seen a continuous stream of people signing up since then.
We'd like to thank members for continuing to engage so positively and in a great spirit of willingness to share and be helpful. We're especially delighted that unpleasant exchanges continue to be few and far between, sadly a rarity on an online forum. It's the contributions to the forum from members and their willingness to share experiences, ideas and advice that has allowed the site to continue growing so positively. We look forward to everyone's ongoing contributions and to many new members coming onboard.
Like most things, some attention to maintenance is usually a good idea. Underwater camera and cinematography accessories are no different, especially with the use and abuse most of it gets in unforgiving environments. Naturally, the better something is taken care of, the longer it will last, and even though Ultralight Camera Solutions products are virtually indestructible, treating them with respect will keep them in good working order.
For the underwater photographer, after every dive, the best thing to do is thoroughly rinse everything in freshwater, inspect and service it if needed so it is ready to go when needed. For most of us, it's easy to forget and overlook these things that will bite us in the butt later, especially when we decide at the last minute to go diving. Being proactive is always better than being reactive.
To learn more about caring for and maintaining your underwater photography accessories, we have put together some information and videos that you can view at the link.
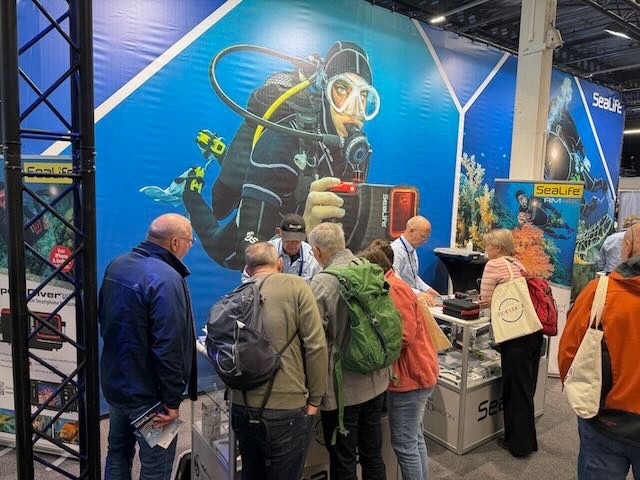
I've finally recovered from the Go Diving Show which was held at the NAEC Stoneleigh Park, Coventry, Uk last weekend and what an incredible show it was. From showcasing diving equipment, holiday destinations, marine conservation and of course underwater photography over a 10,000 square metre area, there really was something to inspire everyone.
Underwater Photographer of the Year is celebrating 60 years and had 30 of it's winning images on display from the entrance and throughout the show to inspire visitors as well as a packed audience to view them on the stage on Saturday afternoon. Here is Saeed Rashid introducing some of the images.
Winning Image - Catherine Holme's "Kaleidoscope of Colour" - Brand New Category "Coral Reefs"
Runner-Up - Jenny Stock's "Gardens of the Caribbean Reef Shark"
There was also a dedicated Photo - Inspiration Stage with a wide variety of underwater photography talks to inspire. The hugely talented Jenny Stock concentrated on the "Creativity and Ethics of Photo Manipulation," Simon Rogerson, Editor of SCUBA Magazine shared secrets with the audience of "Photographing Big Animals" and Ellen Cuylaerts enthralled with tales of her past trips and the important of being a DAN member.
There were a wide variety of underwater photography specialists exhibiting, some for the first time.
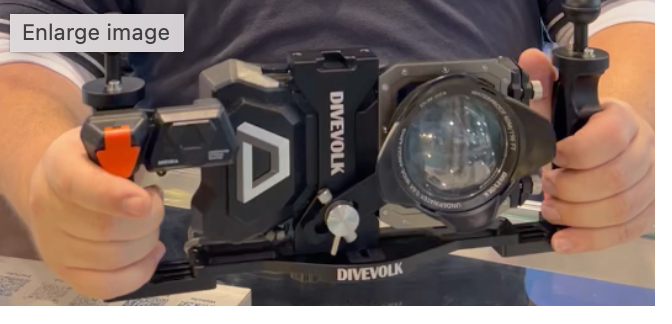
DIVEVOLK were popular and stole the hearts of many visitors, with Louis and Kai from DIVEVOLK HQ in China flying in especially to demonstrate their award-winning innovative touchscreen smartphone underwater housings and accessories. Who else is in love with their new "Dreamy Pink" model?
It was great to see Sea & Sea again, who had a variety of strobes on show for both compacts and d-SLRS.
Orcatorch were also exhibiting, sharing a stand with Sea & Sea. They were demonstrating their popular D710 Best-Selling Dive Light which delivers 3000 lumens of light in 5 different colour options. Which one is your favourite?
The ever popular Dr Alex Tattersall of Underwater Visions/Nauticam UK had his usual stand which he shared with Light Balance who are also retailers for DIVEVOLK. The popular team of Anne & Phil Metcalfe from Alphamarine Photography were there and Nemo Photo had their first stand at the show. Nemo Photo are the main distributors for Ikelite as well as offering Marelux and Go Pro products.
I'm still buzzing from the show, with the 8 hour drive there and back, it was totally worth it. A huge well done to Mark and Penney Evans, all the Go Diving Team and of course the Exhibitors for creating such a brilliant atmosphere. I'm sad at having to wait a whole year to go back. Who's joining me?
Meet Stuart from Atlantis Berlin Wassersport & Mee(h)r who talks us through Divevolk's new Trigger Release which can be added onto their housings to make starting and stopping video recording much easier to help reduce video shake, as well as of course capturing images.
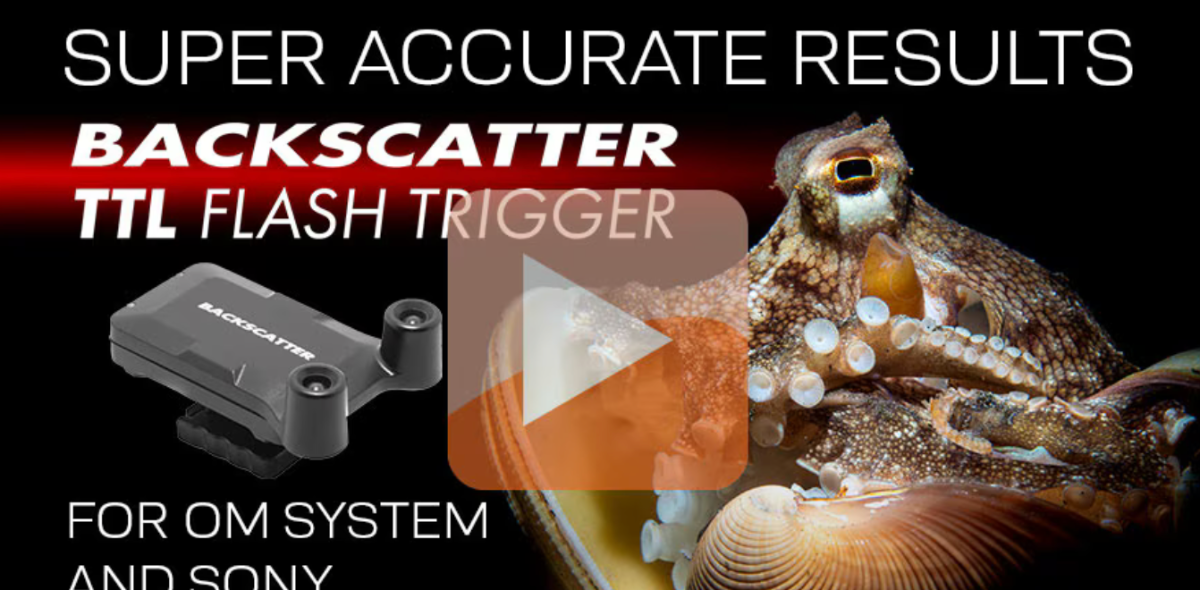
Backscatter Smart Control Optical TTL Flash Trigger Review & Setup Guide
[Moderators Note: Waterpixels member, James Emery, is the Marketing and Media Manager at Backscatter]
The Backscatter Smart Control Optical TTL Flash Trigger provides super-accurate, automatic flash exposures with Olympus/OM System and Sony cameras using Backscatter strobes. The Olympus/OM System trigger is TTL compatible with the Mini Flash 2 and Hybrid Flash, while the Sony trigger is TTL compatible with the Hybrid Flash. The Backscatter Smart Control Optical TTL Flash Trigger is more than just a TTL trigger, it also can be used for manual triggering, rapid firing over 30 frames per second, and HSS (high speed sync), all built into a self-contained USB-C rechargeable unit.
The Backscatter Smart Control Optical TTL Flash Trigger has three different models, two universal types for Sony and Olympus/OM System cameras, and one for Nauticam full-frame Sony housings.
Watch the video for the key features of the Backscatter Smart Control Optical TTL Flash Trigger
Watch Our Full Review of the Backscatter Smart Control Optical TTL Flash Trigger
Smart Control Optical TTL for the Most Accurate Results
Underwater systems utilize different methods to achieve TTL through a camera, housing and strobe, including hardwired TTL, digital optical TTL, and S-TTL (slave or mimic TTL). The Backscatter TTL trigger uses a digital optical system in the form of Smart Control Optical TTL, which is a proprietary TTL system, to achieve accurate results.
DEMA (The Diving Equipment & Marketing Association) show begins on Tuesday November 19th in Las Vegas. Marelux will have a booth in the imaging section where participants can see and handle the latest equipment including the excellent Apollo III & Apollo S strobes. I used the Apollo S strobes for 65 dives and now over 12,000 images on a recent trip to Bali. I will be in the booth along with Stanley and Bella, we will be happy to answer your questions and demo any equipment of interest. If you are at the show please stop by booth #7125 and say hello.
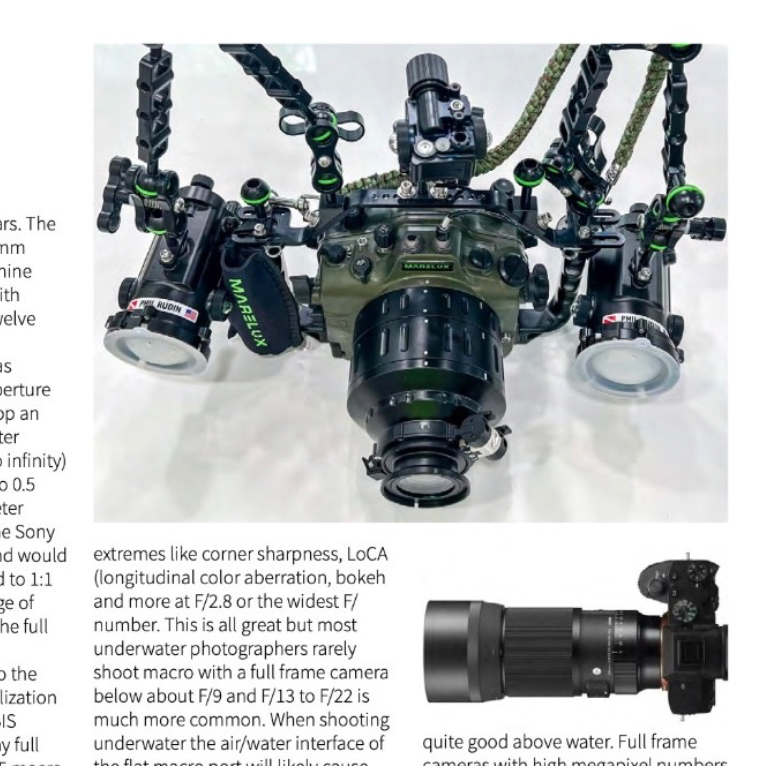
Sony and Panasonic underwater macro photographers shooting full frame should checkout my latest review in UWPMAG.com issue #141. It fully details the Sigma 105mm F/2.8 macro for FE and L-mount cameras. I reviewed the Sony version of the lens using Marelux housing, ports, strobes and Marelux closeup lenses +10, +15 and a +5 including stacking two lenses. If you are looking for a quality macro at a reasonable price or wanting to add to add an additionaly macro lens this may be the lens for you.
The Dutch dive show, Duikvaker, was held in Houten on 1-2 February.
The German boat show which includes diving, Boot, is massive in comparison, but Duikvaker being purely diving is, as a result, very manageable. Many of the dive companies who exhibited at Boot were at Duikvaker so a large array of equipment was there both from distributors and dealers to poke, prod, try on and lust over. I was very tempted by the heated vests from Venture Heat!
PADI ran its annual Member Forum and explained that they had increased their commitment to Duikvaker and intended to continue with that.
A good number of photographic equipment manufacturers, distributors and dealers attended including Sea and Sea, Seacam, Anchor Dive Lights, Onderwaterhuis and SeaLife.
Sorry, still no sign of that underwater unicorn, the Inon Z-xxx
If Houten, which is just south of Utrecht, is easier for you to reach than Dusseldorf, Duikvaker is worth a look for future years. More information about the show is here:
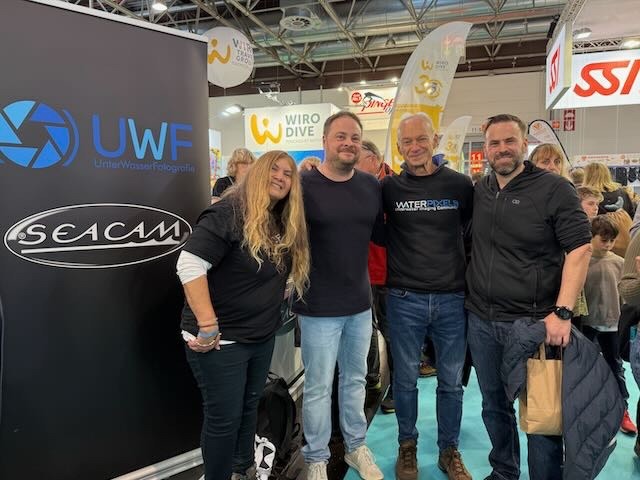
The annual German "Boot" show took place on 18-26 January. I visited on 25 January to see what might be new in the dive and underwater photography world and met up with other Waterpixelers.
I was also tasked with tracking down the new unicorn of the underwater photography world, the Inon Z-xxx
Boot is a massive show spread over 13 exhibition halls. It wouldn't be hard to spend a few million euros there - assuming you had them in the first place. Diving was maybe one and a half a halls with displays of wetsuits (lots of weird camouflage suits - what is that all about?) and posters showing muscled combat scuba divers, fast-roping from helicopters carrying waterproofed weapons. I'm yet to see one of one of my dive trips but who knows. Quite a few rebreather stands around as well plus the usual suspects, Scubapro, Cressi, SSI, PADI. Lots of resorts: Raja Ampat, Lembeh, Egypt etc etc. And, as always, a few sellers of the critical doo-dads that we all need: clips, hooks, fancy tags etc etc.
Slightly disappointingly there wasn't so much to see from an u/w photo perspective: Nauticam, Seacam, Easydive and Divevolk either had a small stand or shared one with a distributor but that was pretty much it. Nauticam had their housing for the Nikon Z6III which, I thought , surprisingly big for such a small camera body. But, no, sorry, not a sniff of an Inon Z-xxx.
It was very good though to meet up with three other members, Maria, Hans and Chris.
One thing I did notice which might be of interest was the growing number of dive propulsion vehicles (DPVs) including some very cool tiny ones.
I'm off to the Dutch dive show next Saturday and will report back from there too.
Without a doubt the Olympus TG Tough range have revolutionised the world of underwater photography for both snorkelers and divers in recent years, making incredible results achievable for the beginner as well as giving a vast variety of options to expand creativity.
But with so many options for accessory lenses and makes available, what should you be looking for if you want to start adding a creative wider angle to your images.
This festive period I was super busy helping answer some of the popular questions that I see on other forums so I've put this together in the hope that it might help someone else too.
So let’s start as a snorkeller. Is a housing really needed? Personally I’d always suggest one, even if it’s just to have that extra security measure and of course remember that you will need one to add on extra wide angle lenses at a later date. Not only have I seen them flood in the water for no apparent reason but it’s all too easy in the excitement of getting in the water to accidentally not close the battery door or overlook a tiny pesky hair trapped in the seal. When you’re travelling to unique, once in a lifetime destinations, it’s always better to be safe.
Then there’s the option for snorkelers to add on an Olympus FCON-TO2 (which is also waterproof) directly to the Olympus TG range via an adaptor, CLA-TO1, with just one easy click. This will give you a wider field-of-view than the camera’s own 25 mm one and is great if you are using the camera above water too for wide landscape images. It’s great for small reef scenes, but for larger subjects such as this seal above, a wider field-of-view is needed to fit more of it in. It also struggles with above and below shots.
But if you use an Ikelite Housing with a dome port for your Olympus TG, you can simply just pop the camera and the FCON-TO2 lens into the housing, giving it a much wider field of view so you CAN capture much wider scenes, achieve split-level shots too and create a perfect snells window effect when framing a
subject above you.
The Pros are:-
the edges of the image are sharp and there’s no vignetting
the system stays light (just over 1 lb for the whole unit) compared to adding on a wide-angle lens directly to the front of a different housing which can make the housing tip forwards and downwards, even with a tray to help balance it.
The Drawbacks are:
keep an eye out for black corners to your image as the dome shade may interfere with the overall result and if this happens, simply remove it.
Did you know that with this set-up you can actually zoom through the lens to achieve sharp close-up images too? Check out Ikelite’s website or direct link here to see how it performs underwater:
So let’s look at other wide-angle lens choices. A super popular choice with many starting out is Backscatter’s M52 Air Lens or AOI’s Underwater 0.75x Wide-Angle Air Lens (weighing 20 grams underwater/160 gms on land) which give an 81 degree angle of coverage, sharp corners, is light and easily screws into a 52 mm threaded mount. It works perfectly to restore the camera’s topside field-of-view underwater and at the same time will restore your image’s colour, sharpness and clarity by reducing the water column, therefore allowing you to get closer to your subject. It has an Anti-Reflection Coating too. You can also zoom through this lens to take full advantage of the TG’s Microscope Mode. An extra super useful touch is that you can attach the lens to your housing via a lanyard (a very thoughtful touch which is included with your purchase) which will keep your lens safe when you are underwater.
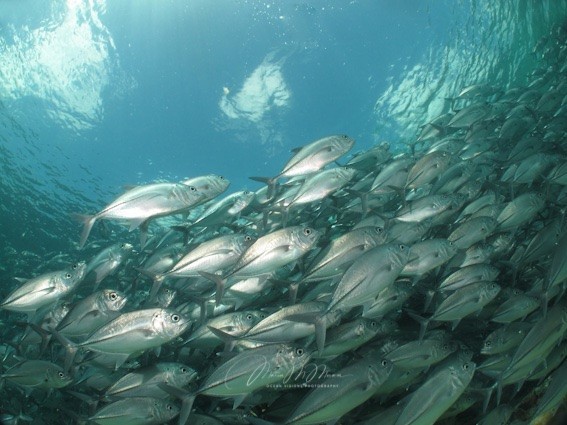
It’s a great lens for turtles, large fish like groupers, divers and small reefscapes.
I loved using this lens when I had the chance to photograph blue sharks off the coast of Cornwall with my Olympus TG-6 It produced detailed results as you can see here, but I really needed a wider field-of-view to be able to capture the whole body of the shark to be able to have a sharp result throughout the image.
So do you really need to go any wider and why? For all those cave, wreck and super wide reefscape scenes with or without a modelling diver, this is where a wider angled wet lens really shines to capture both dramatic and creative images. There are a few makes to choose from such as Kraken, Weefine, INON, AOI and of course Backscatter!
Backscatter have done a sterling job to design and innovate wide-angle lenses especially designed for the Olympus TG series and this lens is fabulous for those dreaming of capturing those captivating wider angled scenes. Like the Air Lens, it delivers sharp corners, there’s no vignetting (where little black areas appear in the corners of your image), has an Anti-Reflection Coating and you can zoom through the lens for those all important close-up shots, making it perfect for capturing Close Focus Wide Angle Images.
Want to go Ultra Wide to capture even more of those wreck, pier or scenic cave shots? Weefine has designed a super wide conversion lens (depth rated to 60 ms) which offers an incredible 150 degrees at 24 mm and easily screws into an Olympus TG housing’s 52 mm thread mount. It also comes with an adaptor for 67 mm thread mounts. Just be careful as the weight of the lens is heavier than the others (690 gms in the air/255 gms underwater). It has a multi-layer BBAR coating for anti-reflection and optical clarity. It has an optical grade polycarbonate dome which is easy to repair if needed. Again you can zoom through this lens if needed. A super wide lens is incredible useful for close-focus wide angle images, allowing me to get much closer to my subject and with the use of just one strobe placed over the middle of my housing, I could illuminate the above subject.
Kraken has also its own KRL-02 52 mm Wide Wet Lens which offers a 145 degree at 24 mm. It has also been designed with a 52 mm thread, also has a multi-layer BBAR coating for anti-reflection and optical clarity purposes. It also has the capability to zoom through the lens for a tighter frame.
Just be aware that vignetting (black edges to the corners of your image) may still occur with different housings and lens combinations. If you notice this, just simply zoom slightly until the effect disappears.
So there you have it, an introduction to the wonderful world of wide-angle creativity. Wide-angle has been my calling in the world of underwater photography and there's nothing more that excites me than creating a unique scene which captures guests' attention and creates a conversation to encourage them to explore our underwater world too.