


-Edit.jpg.0739718b849caea17a4f73bb93954a2a.jpg)

Dave_Hicks
Members
-
Joined
-
Last visited
-
Currently
Viewing Topic: Which camera & housing? -
Country
United States
Everything posted by Dave_Hicks
-
That's a good reason. But not one that i need to be concerned about for my needs.
-
What is color? If 99% of PC and Phone users can only see sRGB, then i don't see the point. Why do i need to see colors that nobody else can? Artists, film makers, publishers can deal with this for their needs. The rest of us manage to cope with sRGB.
-
Nauticam just released a new housing for the Nikon Z5II that does not include the added width to seamlessly accommodate F-mount lenses. It's far more compact as a result and basically targeting newer Z-mount native users. One has to imagine that they will shift to Z-mount native housings for more models in the future as F-mount recedes farther into the past. EDIT - Looks like this shift is well underway. The Nauticam Z6III housing also uses this new more compact form factor. NA-Z5II Housing for Nikon Z5II Camera – Nauticam To enable F-mount they optionally offer adapted gears or a port body with integrated F-mount compatible gearing. (which is pretty crazy looking)
-
The Web runs on sRGB and many print shops work only in sRGB. For my needs of online display and creating large format (30 inch) prints, sRGB is the best choice. I personally don't see any need for an Adobe color space monitor or workflow.
-
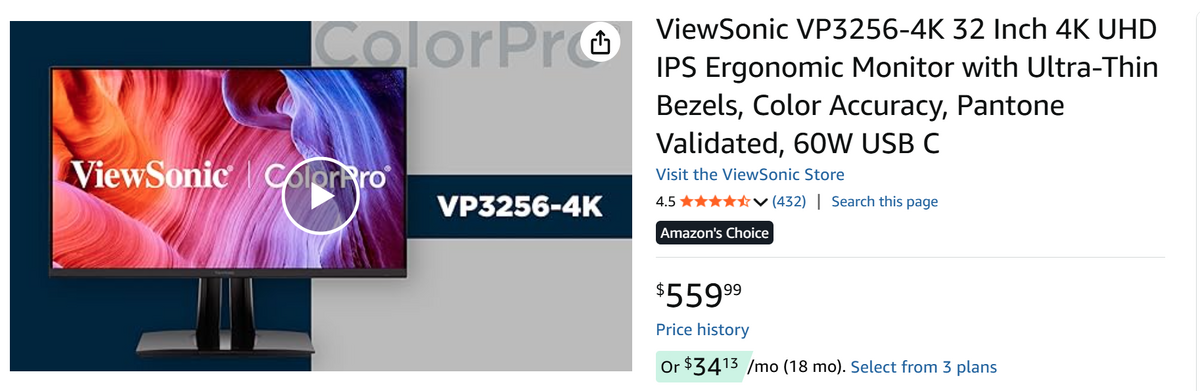
I think this model is probably an identical display to my model, but it's been updated with a modern USB-C hub. Mine is USB-A only. (with HDMI and DP video inputs)
-
I've been using an older version of this Viewsonic 32" 4K monitor for years and it's been fantastic. It is moderately priced at under $600usd. It's 100% sRGB which is more than adequate for my needs, and probably most non-professional users. It was over $700 when I bought it 6 or 7 years ago, so this seems like a great deal.
-
The design for these adapter models has not been published: https://makerworld.com/en/models/2391114-adapters-for-retra-and-backscatter-hf-1-strobes#profileId-2619513
-
The model for this design is now available for download: https://makerworld.com/en/models/2391039-universal-dome-port-cap#profileId-2619412
.jpg.2e76a3347c65042585fcdd1f6f66544a.jpg)
-
In a few days I am leaving for a three-week trip to Raja Ampat. Nine days at Misool Eco resort, then 9 more days on the Emperor Harmoni liveaboard. I've only been shooting the Maxi's in darker cold water with limited visibility. Using them in bright clear conditions should add some additional perspective and the high dive count will be a good measure of their reliability and battery capacity. I'm doing my packing for a trip today and considering what to bring along. My current planned camera loadout is looking like this: Nauticam Z8 system 2 Retra Maxi Strobes 1 Backscatter Atom Strobe with adapted OS-1 snoot 1 Backscatter MF-2 as an additional backup strobe Nikon Z105mm macro lens w/MFO-1 Nikon Z24-50mm w/WWL-C Nikon AF-S 8-15mm w/140mm dome Macro setup with the Atom + Snoot for primary, Maxi with macro rings for secondary Wide angle setup with the two Maxi's, optional reduction rings & filters I've shot the HF-1s lots of times in these conditions, so I won't bring them on the trip.
-
They should be about the same. The strobes are very close in color temperature and the filters both target 4500k.
-
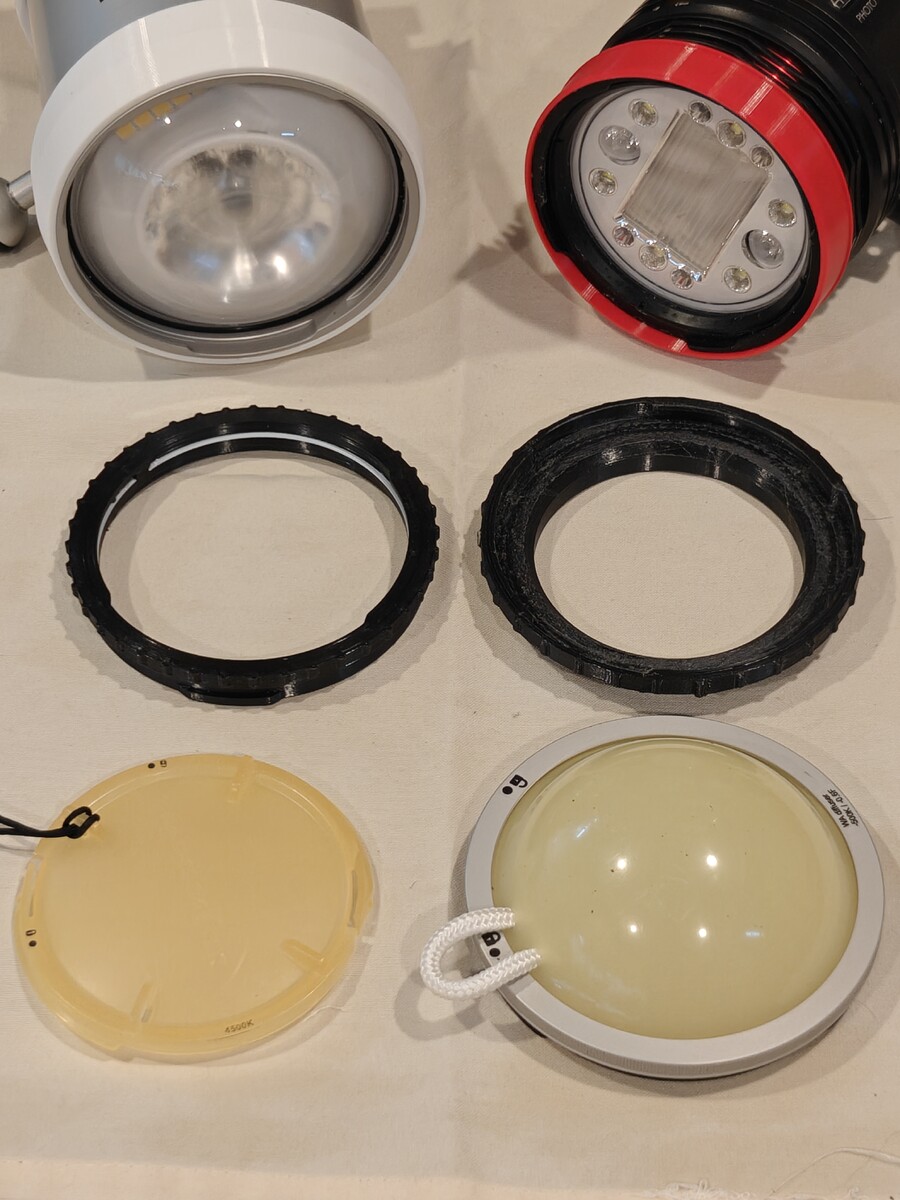
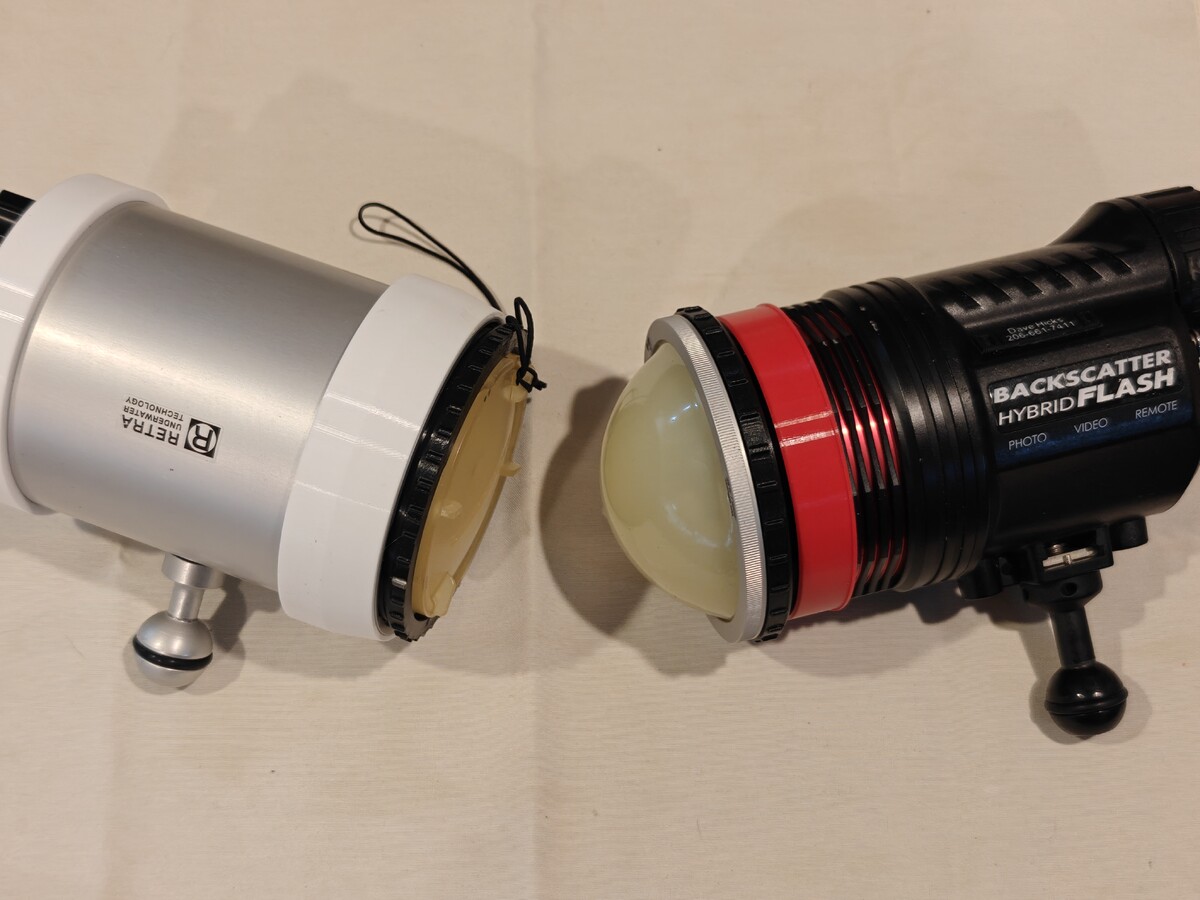
I made a pair of adapters for Retra and HF-1 that allow the use of accessories from the other brand. I have warming filters more mounted in the photos, but you could put an LSD on the HF-1, Backscatters Floro filter on the Retra, etc. Mix and match accessories.
-
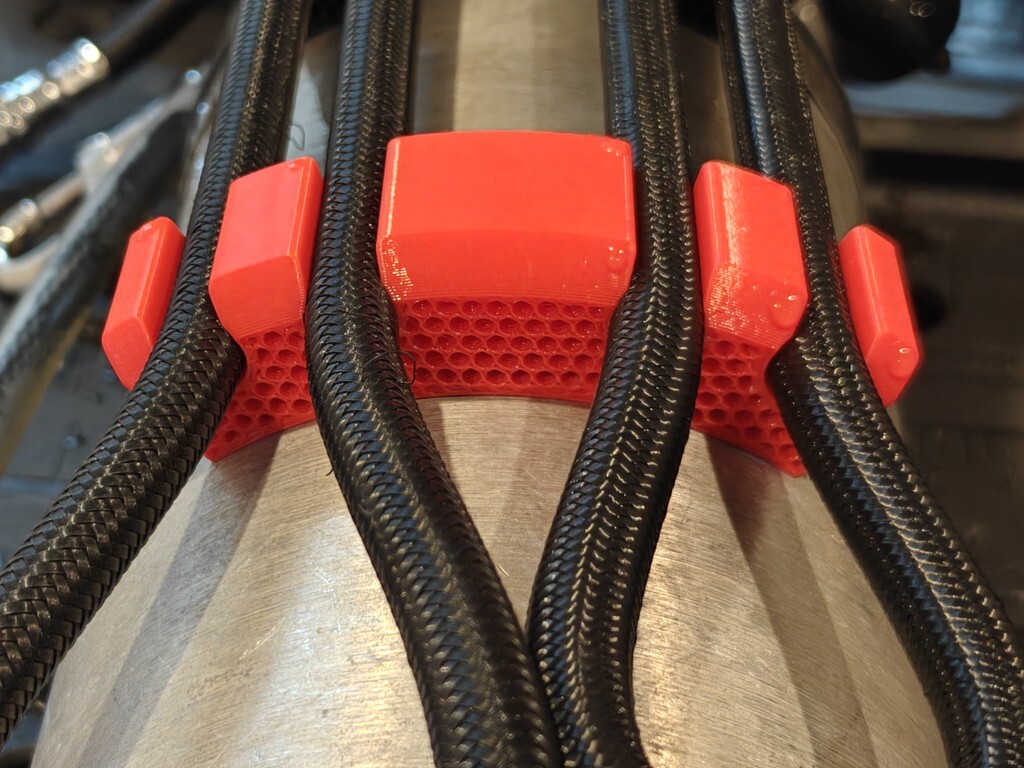
I think there is only one version. It is hardness 68D vs 95a or 90a, etc for standard TPU. I looked the Shore Scale for reference: The Shore A Hardness Scale measures the hardness of flexible mold rubbers that range in hardness from very soft and flexible, to medium and somewhat flexible, to hard with almost no flexibility at all. Semi-rigid plastics can also be measured on the high end of the Shore A Scale. The Shore D Hardness Scale measures the hardness of hard rubbers, semi-rigid plastics and hard plastics.I am using Bambulab TPU for AMS - So yes it does work with the AMS! I've only recently started to work with this version of TPU, and it is very nice. It is too rigid for softer rubber parts needed for things like my sync-cable-connectors, but great for more structural parts. This Port Cap and the Stage Bottle Hose Organizer work great with it. It's also super convenient to have it loaded and ready in the AMS at any time. https://makerworld.com/en/models/2025358-scuba-hose-organizer-for-stage-bottles#profileId-2183580
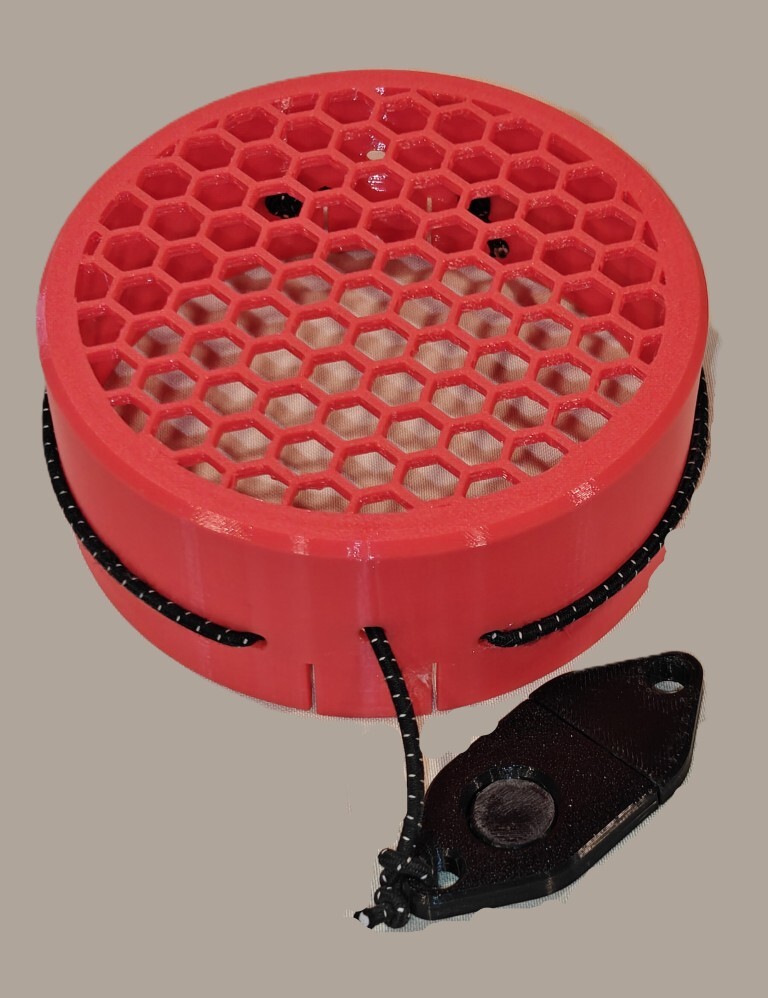
 The grip tabs on the cap are not going to catch due to the bevel at the bottom, but the bungees will hold it in place. I'll add this to the model.Is this the boundary you measured?
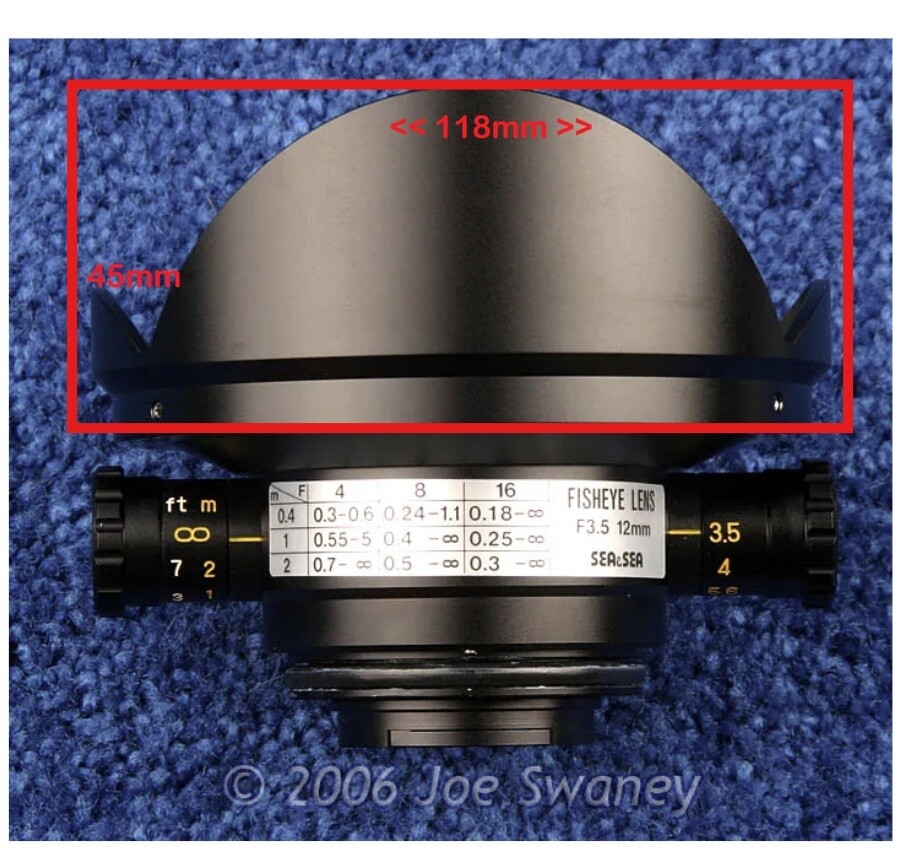 Yes, it's a parametric Fusion360 model. Inputs are simple: Outer diameter of the port shade (which must be 100% vertical on the OD) Height of the tallest shade leaf to the flat underside of the port body dimensions need to be accurate to 1mm, round up The dome port needs to be a simple "mushroom" shape dome for this to work. BTW, the open grid is a property assigned in the slicer software, so it can be solid, tight, loose, whatever you like. It's just a modifier that applies a honeycomb infill with no top/bottom layers, creating the hex pattern. If you provide your port model and dimensions, I will generate a model for it and include that when I upload the design to Makerworld. I probably won't share the Fusion360 file though.This 68shore TPU is pretty cool: Flexible, but supporting 19lbs / 8.6kg without deforming. The cap is under 60grams.
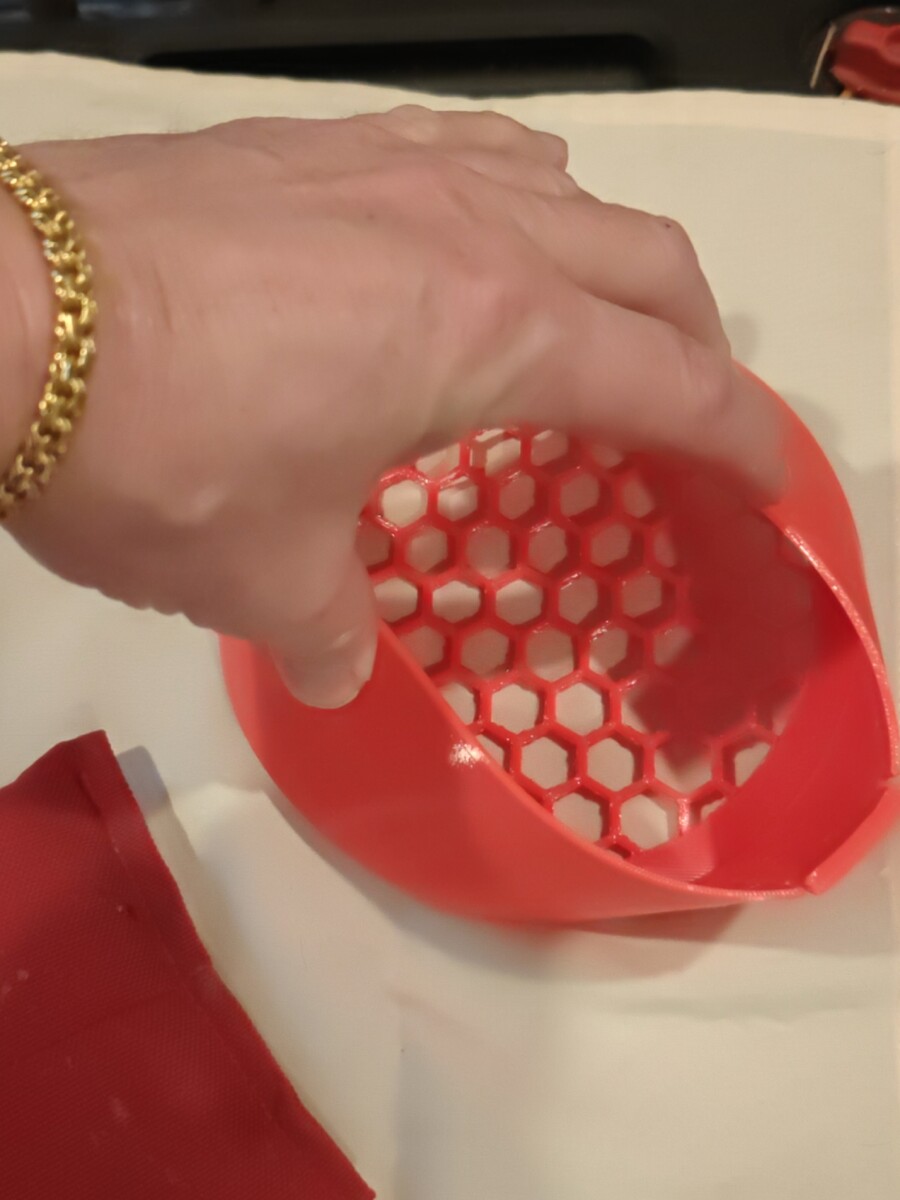
 30% hex pattern about 5mm cells:
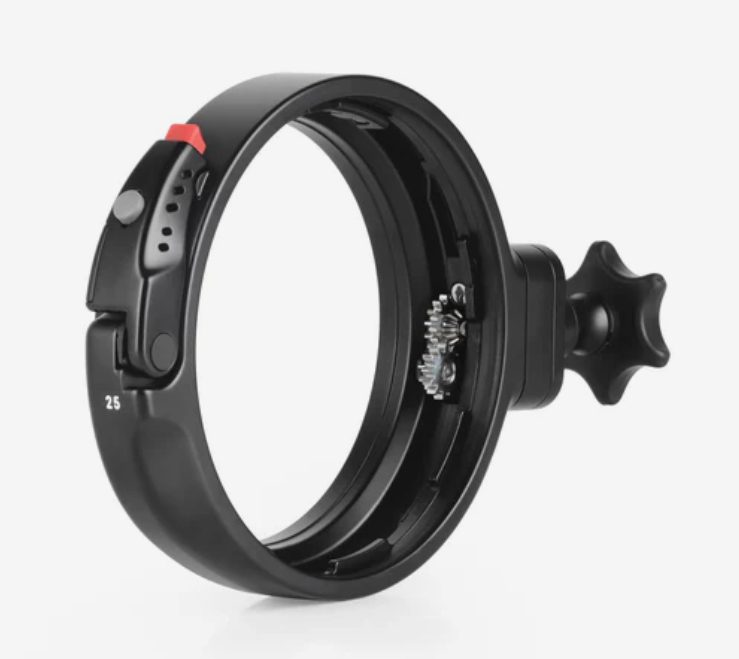
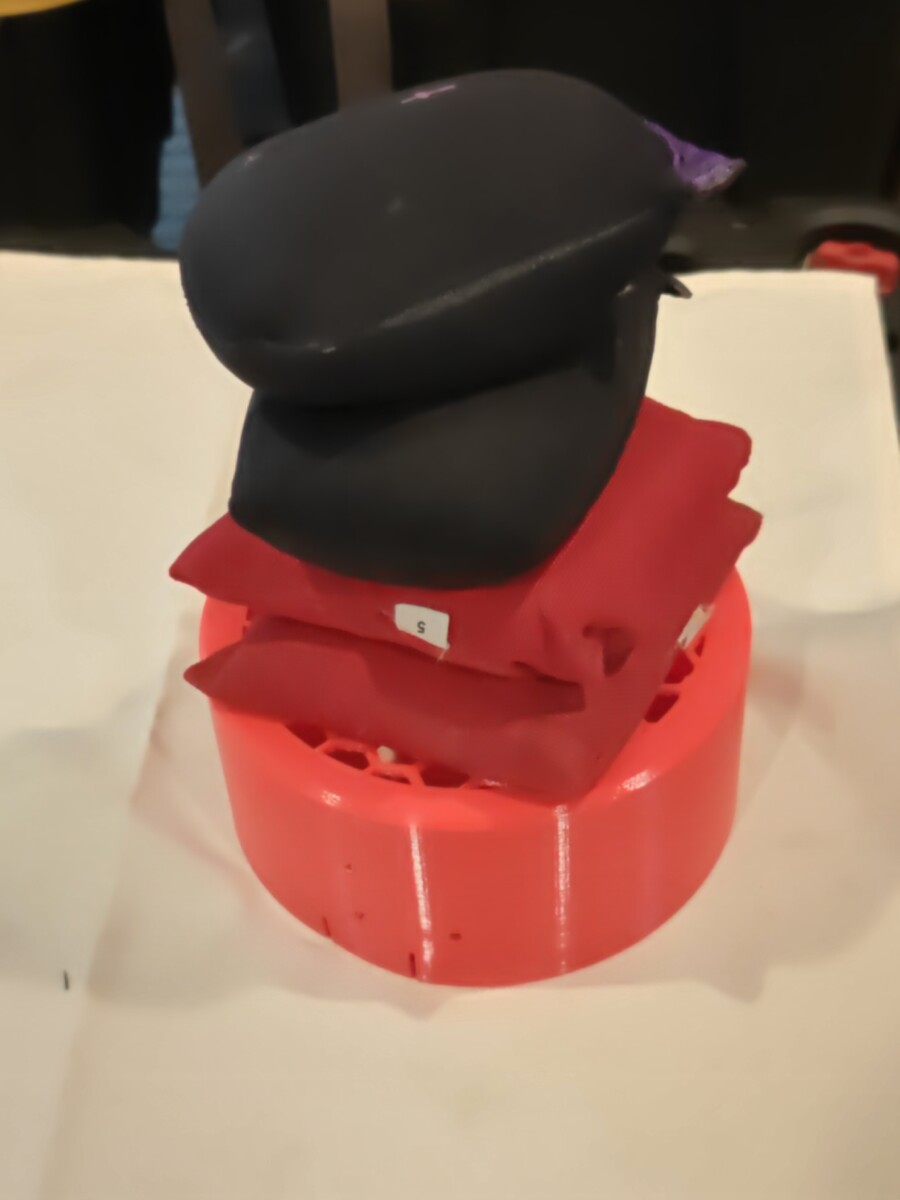
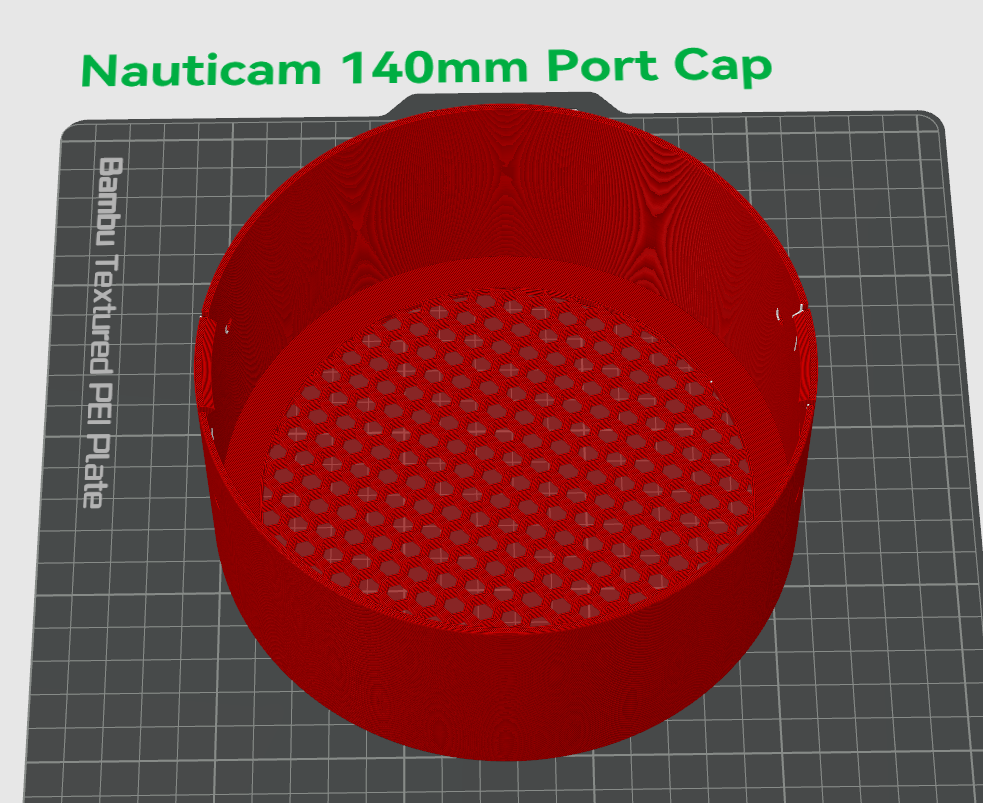 I can see that possibility but i think its low probability. I could make the mesh tighter however. I will try that maybe 5mm or less cells. This is intended to replace a neoprene cover, not an OEM provided locking hard cap. In that context, this cap is quite stiff and will protect better than neoprene which actually does touch the glass and scratches domes with salt and sand all the time. This will flush well in a dunk tank even better than a hard cap and definitely neoprene.A fellow WaterPixel user asked me if it would be possible to make a hard dome port cap for a new port. They were not comfortable with the provided neoprene cover and wanted something that would provide more protection in and out of the water. I considered it for a bit and came up with the following design for a "universal" dome port cap. It's a parametric model so a port cap can be generated from just a couple of dimensions, providing it's for a conventional dome port style. I prototyped it for a Nauticam 140mm dome port and made another version of the users 6-inch dome. I printed this in a very tough TPU with a 68-shore hardness. It's flexible but quite rigid. I used an open face grid design to avoid the typical resistance that makes removing port caps harder than necessary. A pair of clips hold the cap in place, with bungees for a more secure connection. What do folks think of this design? I've not tested it in the water yet but will soon. Nauticam 140mm and 6-inch dome: (the smaller part in the photos is incomplete...)
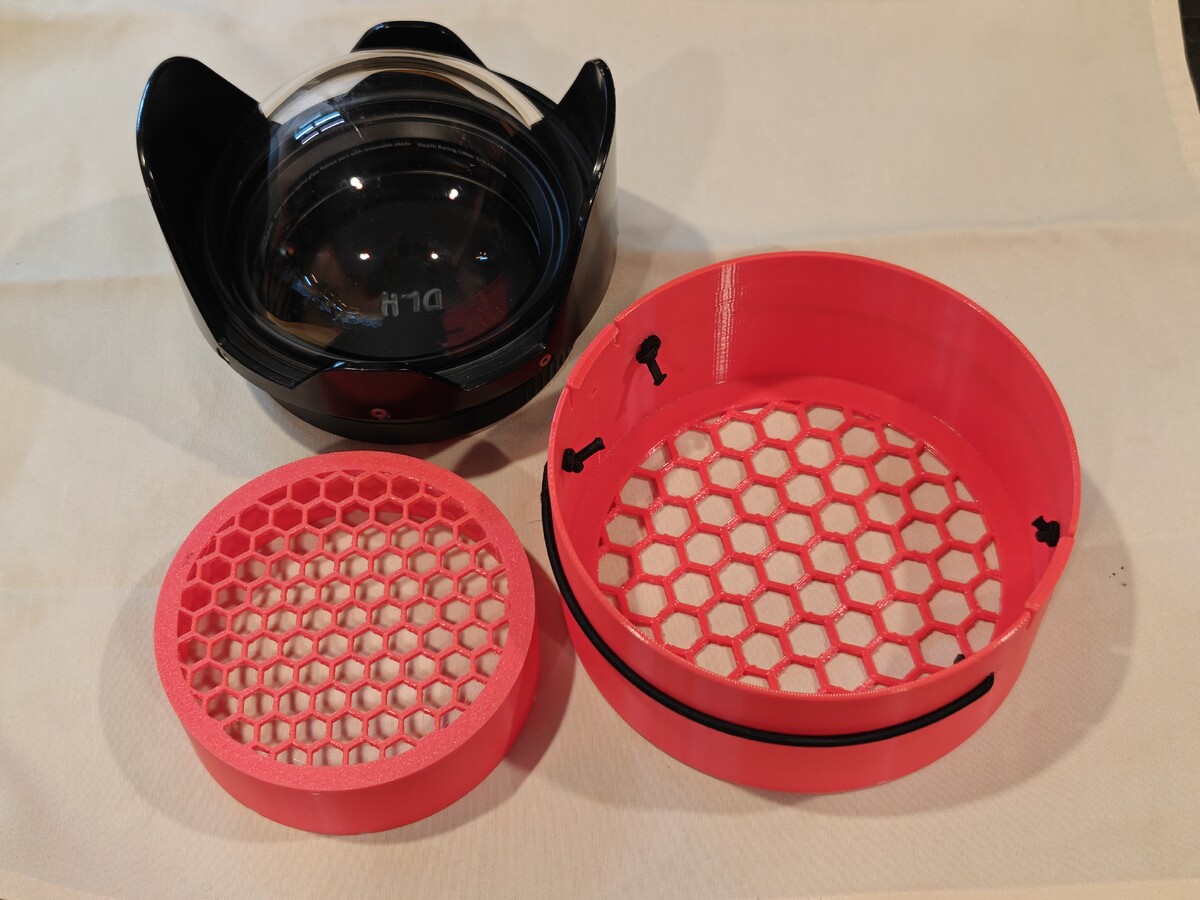
 All of the strobes have fired at least 1000 times now, HF-1 tens of thousands at least. I won't be doing any static in water testing.I spent a little time today Re-Flashing some wall space with an aim to create more separation between the three strobes at the highest power levels. The tests so far have not shown a lot of gradation, possibly due to the short distance, low ISO, and small aperture. I repositioned at 150cm from the wall, set ISO to the Z8 base of iso64, and aperture of f16. I only shot the Boost, +2, +1, and Full settings on the three strobes, as applicable. Photoshop luminance Mean and Point measures collected. I calculated a delta of the Mean measurements with the Maxi Boost mode as 100% and other results relative to that. There is indeed a greater spread between the measured results using this method, supporting the idea that the previous settings were probably losing fidelity and flattening the results. TLDR; Maxi@Boost > HF-1@+2 Maxi@+4 (aka Full) > HF-1@Full HF-1@Full > Atom@Full Here are the results and visualization:
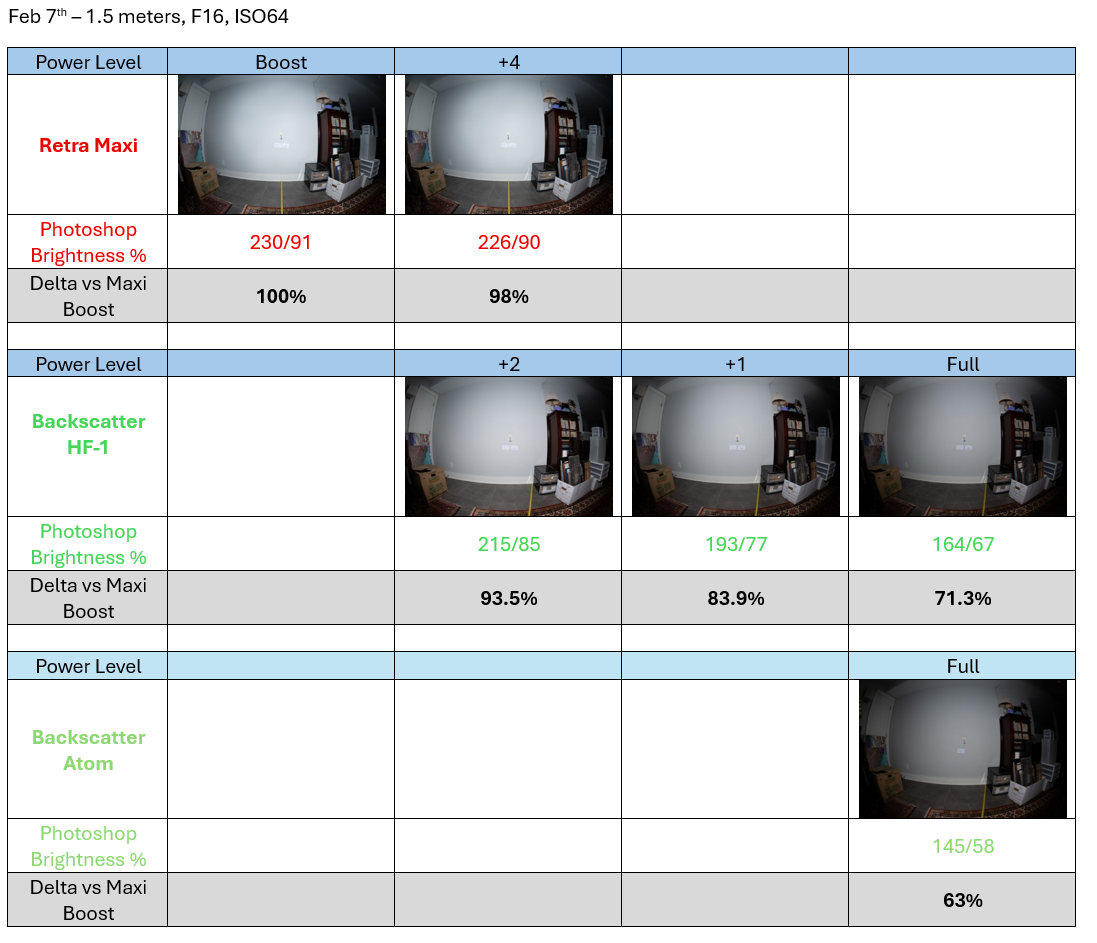 It's probably this one: $125 for acrylic Inon Dome Lens Unit IIIA – Reef Photo & Video Inon: Looks like it available in acrylic or glass INON Dome Lens Unit III [Features]Didn't we have a long thread about this with some parties claiming they go years without cleaning and its a manufacturing defect at fault? Despite the wide spread existence of gold contact cleaning products?


Important Information
Terms of Use Privacy Policy Guidelines We have placed cookies on your device to help make this website better. You can adjust your cookie settings, otherwise we'll assume you're okay to continue.