-Edit.jpg.0739718b849caea17a4f73bb93954a2a.jpg)

Everything posted by Dave_Hicks
-
BTW, the Nikon 24-50z lens is dirt cheap on used lens sites like KEH. The WWL-C is fairly reasonable too.
-
Maybe a little crazy. A 230mm dome is a beast and a lot to handle. It will be big and easy to bump it in to stuff and possibly damage the dome. The 230 is really a very niche port and many UW Photographers only use it for split shots at the surface. If you are worried about spending money on gear you won't use much, I'd put a 230mm dome near the top of that list. You should consider starting a little smaller, maybe with a macro lens or smaller dome. The 140mm fisheye or WWL-C are nice and compact, a lot easier to start out with.
-
Get two cables. +1 to making your own, but DIY is not for everyone. If you need two cables for two strobes, buy 4. They do get broken, damaged, and lost. So that comes to $400 for what is about $30 of industrial fiberoptic. If you have a 3D printer, you can make your own connectors and buy your own fiber. These days, you could buy a printer and the fiber optic for less than $400! You can get more info here, including a reliable source to buy top quality, industrial grade fiber: https://makerworld.com/en/models/846729-diy-optical-fiber-sync-cable-connectors#profileId-1454437
-
With the Z8 two of the best options are: Nikon f-mount 8-15mm fisheye with 140mm dome Nikon z-mount 24-50mm with WWL-C wet port You will get a lot of use from these two setups for many years to come. I'd argue these two might be all the wide-angle options you need. I recently used the 8-15mm for point blank shots of Humpbacks:
.jpg.0c5d54615921d9545b5dc85582327f97.jpg)
-
Friends don't let friends TTL. 😉
-
There is very real value in having a Spare strobe. Backup, loaner, flexibility, etc. Getting 2 Atoms and an MF-3 seems like a great combo to me. The MF strobes will not replace a full powered strobe like the Atom, HF-1, or similar high-powered strobes. The MF strobes are strictly Macro and Snooting machines.
-
Close enough for an awesome photo! And a little white balancing will greatly improve that image! I know all my whales needed WB work even though I was 1-2 meters away from some of them as they tried to run me over!
-
A final Whale-Tail goodbye image from Magdalena Bay.
.jpg.d4c189fc02788c71981cb2f9f323bf1d.jpg)
.jpg.6ec30e0e737a58eed095441165f7a456.jpg)
-
That tool was for film camera in an automated rig, not underwater housings. I took it more as a proof of concept. Parametric models with OpenScad are pretty common in 3D printing, and housing lens gears would be a great application for it.
-
I have a basic template from which I customize: OD of the lens zoom/focus ring Distance from Housing Sprocket to top of zoom/focus ring Height of zoom/focus ring Plug in OD & Height parameters to customize a TPU friction ring Plug in OD+Thickness of TPU ring and Distance to top of zoom/focus ring to customize the Gear Cylinder That works for most lenses. It's only if the lens telescopes or required access to switches that I need to do anything else, like add cutouts. I've made a few rings for people with just these measurements, without ever having access to the lens. I usually provide 2 or 3 TPU rings with minor variations in thickness to allow for variances. So far, it's worked pretty well. Probably half the custom gears I've made are for niche manual focus lenses (LensBaby, Laowa, TTArtisan) for which nobody makes or sells gears. Custom printing them is the only option, so its pretty cool to be able to provide a solution. Example: https://makerworld.com/en/models/1804480-nauticam-focus-gear-for-ttartisan-100mm-z-mount#profileId-1924490
-
I was just thinking about trying to make a Parametric OpenScad model for Nauticam gears. It would work for a lot of them, but there are some lenses that need more complex mechanisms. Some of the manual focus lens gears I've made required complex 4-part sliding/turning components because the focus or zoom gear telescopes when turned. A good rainy-day project for the to-do list. :)
-
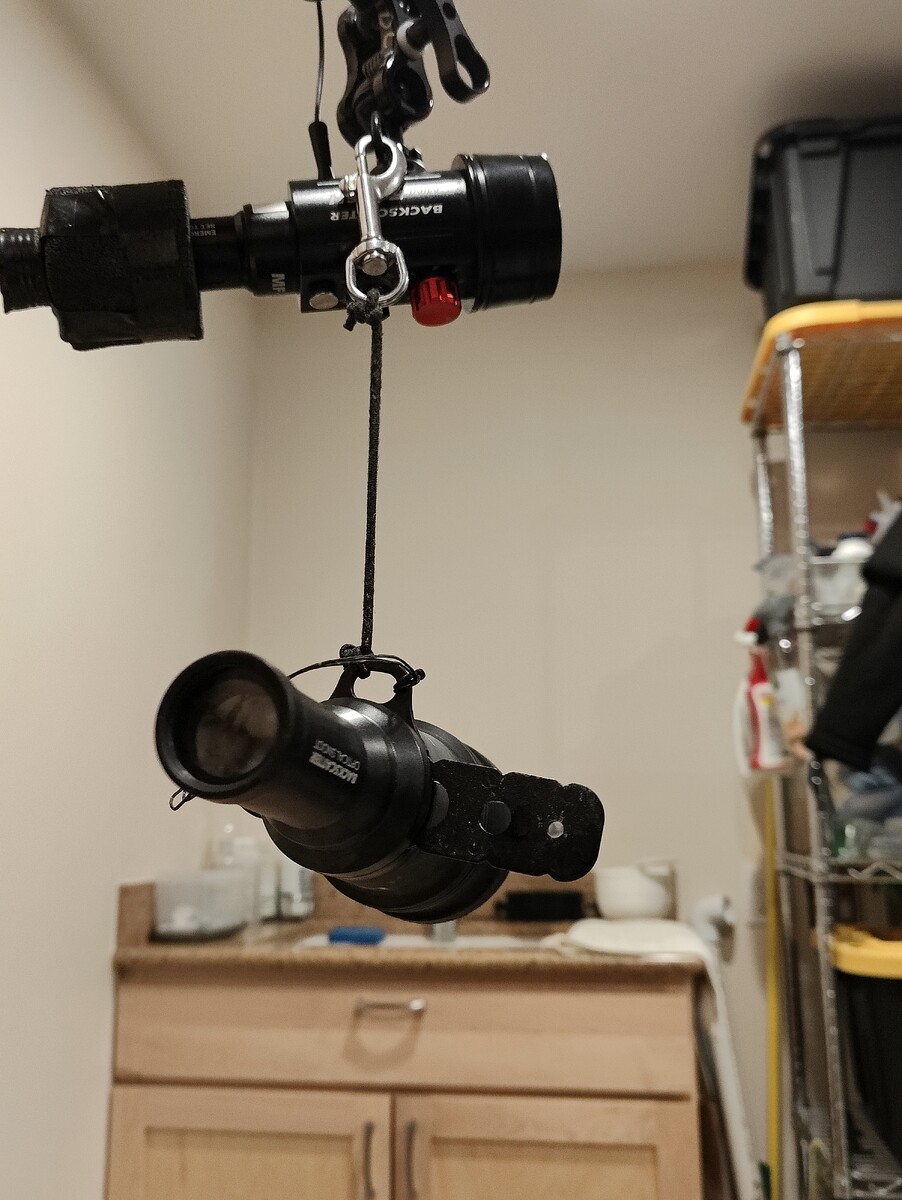
I use the OS-1 on by default and only remove it occasionally so letting it hang is reasonable. If you kept it off by default you might want a mount. Here is one on printables: Backscatter Miniflash 2 (MF-2) and Snoot (OS-1) holder by DarrylB | Download free STL model | Printables.com
-
I will 3d Print something with the slightest excuse, but for this scenario I think a small bolt snap and an oring zip tied to the MF-2 ball mount is hard to beat.
-
I had Ikelite housings for years with the D70, D300, and briefly the D800. With the D800 I felt like the Ikelite design had gotten out of its depth. Wide angle lens/port combos with full frame were not good, clipped the image and had terrible ergonomics. I moved up to a D800 Nauticam housing and never looked back. To their credit, Ikelite updated their housing design and completely re-vamped the port system to address the issues I experienced. Recently, I had some experiences with Ikelite housings while trying to assist a friend having trouble. My friend had bought a used Ikelite d850 housing and sent it to Ikelite for servicing and overhaul before using it. It came back with a Broken hotshoe wire, that I had to solder together. The zoom gear for a 16-35 had to be screwed down and prevented the camera from being removed from the housing. If the lens release lever was not positioned just so, the camera would be trapped in the camera, Catch-22 style. An improperly installed ISO button control that depressed the control and froze the camera. Had to remove the c-clip and reinstall the button. Finally, the shutter dial knob would not engage with the camera control. I would no longer recommend an Ikelite housing to even my worst enemy.
-
This is wildly wishful thinking David. We are comparing the Caribbean to how much of it looked 5 or 10 years ago. There has been a dramatic and rapid decline. The sad part is that we will likely be saying the same things about the fabulous Pacific dive spots in another 5 or 10 years as they continue and accelerate their decline.
-
Burst mode shooting is not a unique feature, most modern strobes should support it. The models using Lithium Ion batteries will be better suited for it however. Backscatter HF-1, the new Atom, Marelux, Kraken, and the Retra Maxi (if they ever ship it) would all be good options. But you could still have a trigger problem. I had to address this even with a capable strobe.
-
Welcome Jenny!
-
A friend who just went said Lots of fish, lots of Dead corals. A sad decline in the last few years.
-
The strobe should not phantom drain overnight even if left on. That sounds like a defect either in the build or in the design. Maybe strobes will drain eventually keeping the capacitors charged, but 12 or so hours seem pretty quick. Other strobes on the market automatically go into standby mode when left idle for 15 minutes to avoid this problem.
-
Does Retra have a pre-flash learning mode? You want that to be OFF. If there is no way to force it off, it could be a trigger problem. I've reported and had issues with the Nauticam trigger before, but with Backscatter strobes. In my case Backscatter was able to get Nauticam to send me a replacement trigger with modified firmware to address the problem. Contact Retra directly and discuss the Nauticam manual trigger with them.
-
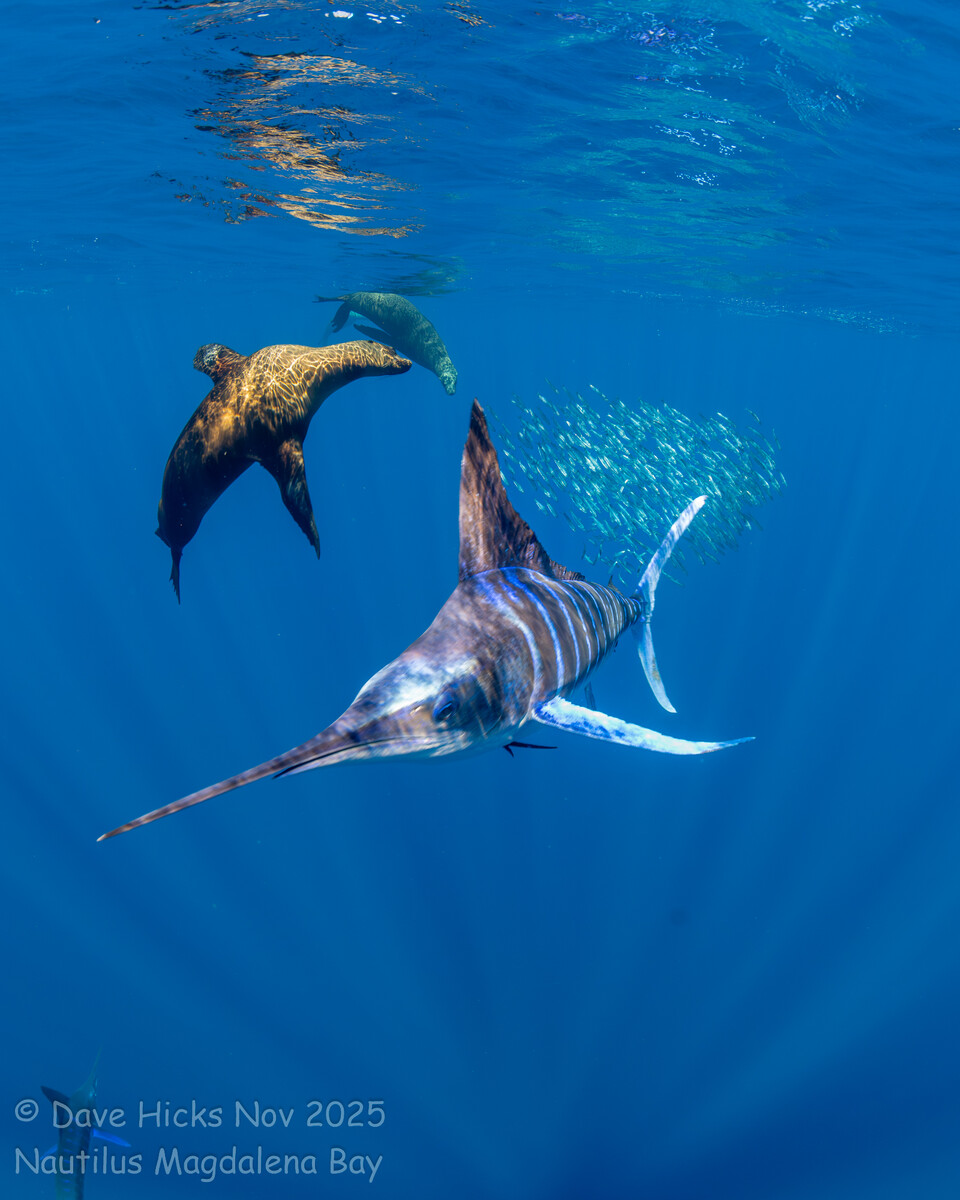
A couple of Marlin, Sealion, and Baitball photos!
.jpg.4db287724372557f0257a361545f52c4.jpg)
-
You should be able to look at the meta data in an image file to see the shutter speeds and other settings.
-
What was your shutter speed? If you set the shutter faster than the sync speed of the camera, you get a partly black vertical band. A quick search says the max sync (shutter) speed for the Canon 7D is 1/250th of a second. Anything faster than that will create a black curtain.
-
All of your galleries are very nice with some great photos! To be honest, I don't see any real difference between the Inon and Retra images. Some of the Inon sunballs are better than any in the Retra galleries. I think you got great results with both sets of strobes. I still have a pair of Inon 330s and they are still great strobes. I moved to HF-1 for features not available with the Inons. Super fast recycle times, 5000 lumen video light, and much more power. I'm keeping the Inons for backup. They are currently on loan to a buddy with a busted Retra.
-
Keep the camera out of the cold as long as possible. Add a USB bulkhead to charge between dives.