Yet another update to Lightroom for Classic users - to v14.5 - was released on 12 August . This has all sorts of tweaks especially to the Generative Remove tool.
It uploaded and ran on my Mac Studio without a hitch......
I came across the following article by By David Clapp, published on 31 July 2025 in Digital Camera World. Worth a read, I thought!
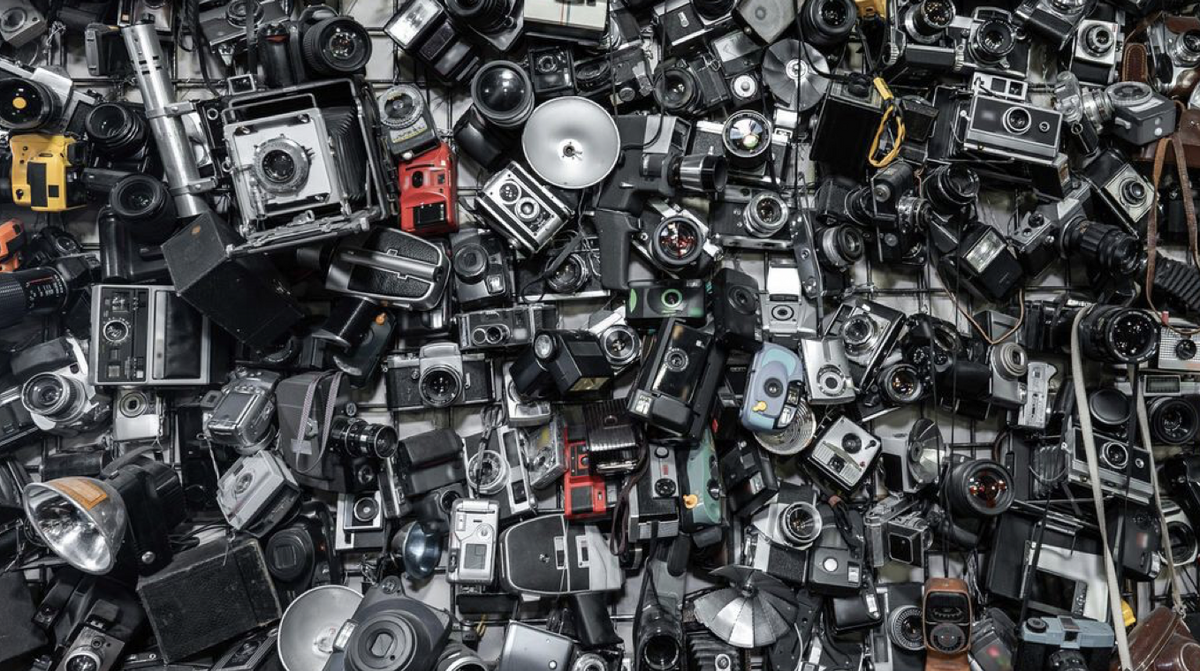
"It’s getting near that time again - as September means a new iPhone. Then there’s a new Android. Then it’s the turn Fujifilm / Canon / Nikon / Sony / Panasonic etc - all of them use tried and tested strategies stretching back as far as the 1930s to make you, the consumer, feel dissatisfied with the equipment you own. Let’s be frank, you are a subliminal and anonymous target for consumer capitalism and those at the top do this for one simple reason - they stay in business by selling you new products. Simple.
Most media-based products like cameras, computers, musical equipment and many others, have a central strategy, to put you into a constant state of dissatisfaction. The subject-focused camera you yearn for will never be released, so they include firmware / software / shiny updates to keep you on board. You learn and adapt your championed model, but it only gives around 75% of what you need it to do. Slowly, we become desensitized, used to dissatisfaction and slowly the wheel turns. The industry fuel is acquisition and consumption. The beauty of this strategy is that we the consumer believe it is a direct path to creative happiness and that in monetary terms it is. The areas where this is most prevalent is in two places in our modern age — advertising in all its forms (YouTube / influencers / social media) and text-based discussion forums - which cultivates and accelerates our desire to purchase. We consume, reflect, and then complete the financial circle of moving our money back into the machine.
What creates the anxiety to purchase can be covered in a number of fundamentals. Does the item look attractive to us? Look at any high-end digital cameras and the form factor is enough to pull us into their tractor beam. Then there is functionality. People are obsessed with technical specs, the online media in particular thriving with clickbait controversy.
Then there is photo-social class - does the product elevate us to a level of satisfactory peer acceptance? Do we then feel connected to a new economic group, or a sense that we could finally achieve creative altitude like never before? It’s all a grand illusion. After the initial wonder, hard research, handling, contemplation, and purchase phases subside, the brain returns to a base level (look up Look at any high-end digital cameras and the form factor is enough to pull us into their tractor beam. Then there is functionality. People are obsessed with technical specs, the online media in particular thriving with clickbait controversy.
Then there is photo-social class - does the product elevate us to a level of satisfactory peer acceptance? Do we then feel connected to a new economic group, or a sense that we could finally achieve creative altitude like never before? It’s all a grand illusion. After the initial wonder, hard research, handling, contemplation, and purchase phases subside, the brain returns to a base level (look up ‘hedonic adaptation’) and it is here where the forums like Canon Rumors start the cycle once more. The idle mind starts to speculate about imaginary cameras, features and from here the tribalism leads to threads full of conflict and antagonism, that could potentially be extinguished with a gear purchase. My rule is simple - upgrade when features arrive you cannot live without. In the last 20 years this has been Live View, weather sealing, GPS, WiFi, and recently (for me) 4K video. "
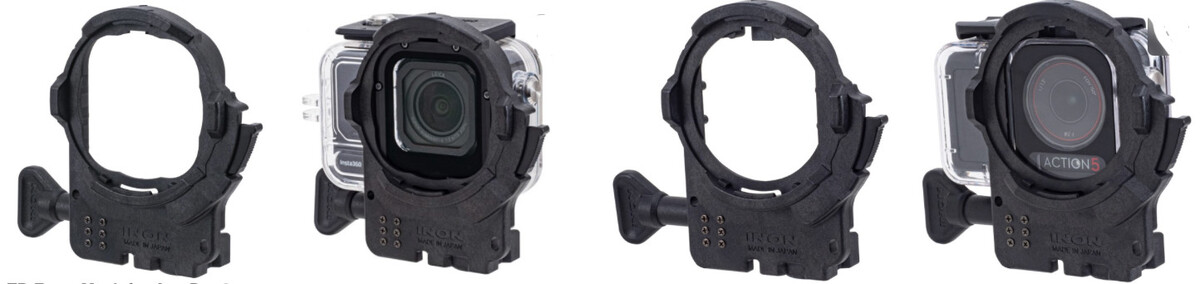
INON INC. releases two new ZD Front Mask on August 5, 2025,: the ZD Front Mask for Ace Pro 2, designed to fit the official Dive Case for Insta360 Ace Pro2, and the ZD Front Mask for Osmo Action 5 Pro, made specifically for the official Osmo Action 60m Waterproof Case.
Attaching the INON ZD Front Mask allows the use of the underwater semi-fisheye conversion lens UFL-GR140 ZD (*1) which can deliver wide and quality view with its large-aperture optics across more wide-angle FOV settings on Ace pro 2 and Osmo Action 5 Pro, as well as the compact UFL-G140 ZD.* Also, the wide variety of INON close-up lenses (UCL-G165ll ZD, UCL-G100 ZD, UCL-G55 ZD) (*2) now allows Ace pro 2 and Osmo Action 5 Pro users to enjoy macro imaging that wouldn’t be possible with the camera alone.
INON also releases the 4D Light Grip in late September, which can be mounted onto the housings of various action cameras. This highly versatile grip allows users to attach both an action camera and a light at the same time.
(*1) Lens hoods included with UFL-GR140 ZD shipped before Augst 5, 2025 may be visible in footage. Please use the updated "Lens Hood II (for UFL-GR140)" which is available for separate purchase. (*2) UCL-G100 and UCL-G55 shipped on or after August 5, 2025 will come with newly designed Focus Stick that helps prevent interference when used with AcePro2 and Osmo Action 5 Pro. For existing UCL-G100/UCL-G55 users, updated Focus Stick II is available for purchase to replace the original Focus Stick.
Please note: a further update to the firmware files was released on 31 July. Pro Max firmware is now v2.17 - the version from the previous day was 2.15.
Retra have announced updates to firmware on a number of their strobes.
Pro Max II to v3.1 Pro Max to v2.17 Prime+ to v2.4 Pure to v2.4
The updates include bug fixes and performance improvements. Full details are set out in the usual App Store update pages.
A few months ago in November, Scubalamp showed a new "small strobe". I like small strobes and wanted one, but they have never appeared on the Scubalamp website. However there is a Fotocore GTM (the same ones in the Scubalamp posts that are available. I bought two of them, and last Saturday, I got to try them out here in Los Angeles. The strobe is a bit larger than the AOI RC strobes, and a bit smaller than the YS D3 Duo.
The strobe is machined aluminum and appears to be very solidly built if a bit heavy (815 g without the 2 x 18650 batteries). The strobe has 7 power levels that are shown on a nice little LED screen on the back. The key advantage to the GTM is that it has beautiful light since it uses a circular flashtube. One peculiarity of the strobe is that it uses only flattop 18650 batteries that are both hard to find and expensive. I have boxes of 18650 button tops, but no joy in these strobes.
To test them out, we went out diving to our local favorite spot off of Palos Verdes not far from LAX. I was shooting an OM-1 camera in an AOI housing with the 2 GTM strobes an a Leica/Panasonic 45 mm macro lens. The AOI has a built in LED trigger that never missed a shot with the strobes, I was using home-made fiber cables using the 613 core fibers.
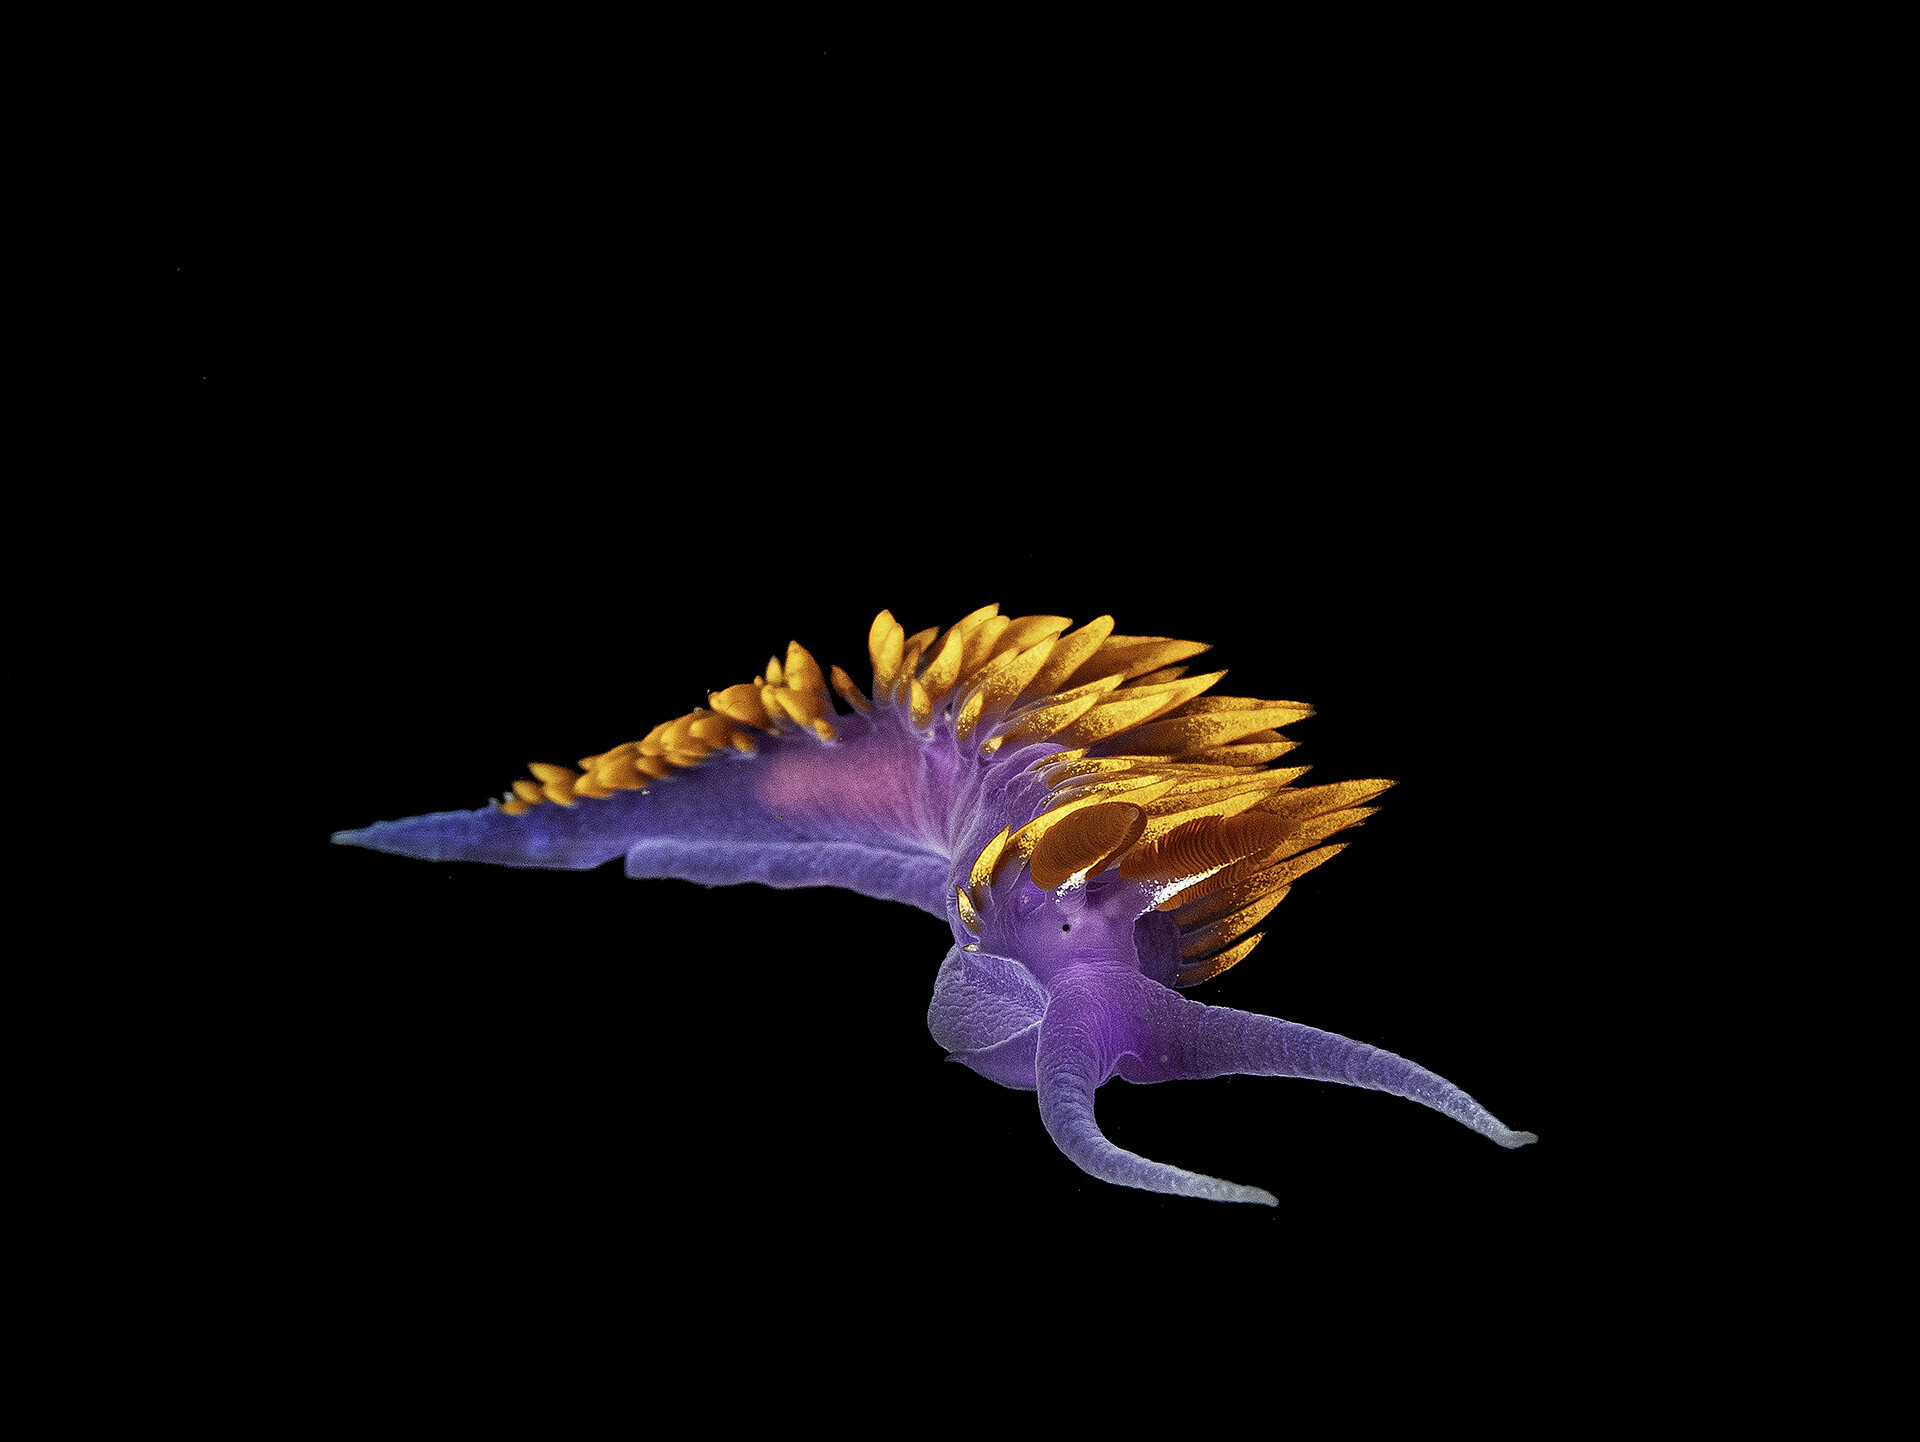
The Balonophyllia is a solitary stony cup coral, its main claim to fame is that in the colder months (it is always cold at PV, typically 50F, 10C) it can in fact sequester dissolved organic carbon from the seawater directly. Hopefully it can teach its warm water cousins the same trick. If California had a state nudibranchs it would likely be the Spanish Shawl
These guy are everywhere and are quite beautiful. Interestingly the orange/blue/red and purple colors are all from the same molecule but with different arrangements of some elements.
Black eye gobies are always curious, coming by to see what you are doing and smiling at you
Two similar nudies are Porters and MacFarland; you tell them apart by the number of stripes. Porters has 2 syllables and 2 stripes, MacFarland has three of each.
And finally there are clowns.
Overall, I am very pleased with the performance of the GTM strobes. I didn't have a chance to see how they would be for wide angle (mostly the visibility was 2 meters or so) but at least in the studio they seem as powerful as the YSD3.
If you are looking for strobes for macro shooting with some occasional wide angle take a look at these.
Mafia Island is located in the Indian Ocean, off the East African coast of Tanzania. I learned about Mafia Island from reports of several scubadivers in internet platforms, who consider it an “insider tip”. In November/December 2024 three divers (Lisi, Franz and me) set out towards Mafia in order to experience firsthand the diving and possibilities for UW-photographers.
Mafia Island is not difficult to reach via international flights from Vienna/Austria to Dar es Salaam/Tanzania. From there, the travel continues with a short 30’ flight via domestic airline. The airport in Kilindoni, the largest village of the island, is small and, accordingly, the airplanes are small too (the photo shows the main building of the airport and, to the left, the nose of the aircraft that brought us there). By default, only 15kg of luggage, including the cabine luggage, are allowed in the small aircraft. It is very positive to note, that one can book extra luggage in advance by EMail with the domestic “Coastal Airline” (https://coastal.co.tz/), in order to avoid unpleasant surprises when arriving with masses of unannounced luggage. This way, our extensive diving and photo equipment was “nullo problemo” (in order to avoid overload of the aircraft, we had to book an extra seat in advance, that remained empty).
There are several resorts located on Mafia Island, but only a single one, “Big Blue Mafia Island Diving Centre” (https://bigblumafia.com/) is perfectly positioned within the Mafia Island Marine Park, where most of the diving spots are located (the marinepark fee, that has to be paid for every single day of the stay once upon entrance, is worth every single cent). This resort is owned and managed by Maura, an Italian, who is the friendly contact person for booking and payment. She is married to a local diving instructor, native to the island, who runs the diving base (their son is working as diving guide, one can say it is a true family enterprise; also the other instructors, guides and employees contributed to a very pleasant stay including safe and wonderful diving).
Accommodation is simple, but corresponds to western standards, comprising tasty half (or, when required, full) board and aircondition. Cleaning and freeing the huts from mosquitoes with pesticides is done twice per day. At this point it is appropriate to mention that effective repellants and malaria prophylaxis are strongly recommended by our Austrian tropical medicine specialists.
Diving is done using Dhow style boats, that provide plenty of space for the few divers. They are made from heavy tropical woods and are powered by an outboard engine. When winds allow, the boats are also able to sail along silently and swiftly. Chole Bay is the heart of the natural reserve and accordingly most diving spots are located within the bay. Depending on weather, diving spots outside the bay can be dived also. Since the tidal range within Chole Bay is substantial, departure times for the two-tank boat dives are dominated by the tide, are highly variable from day to day and were between 05:00 AM and 14:30 PM during the two weeks of our stay. Despite careful consideration of tidal times, substantial currents are possible. At low tide the visibility within the bay can be pretty modest (as low as 4-5m), but at high tide and also outside the bay it can be remarkably good (up to 30m). Taken together, the diving conditions are certainly not easy for UW-photographers. This is more than compensated by outstanding biodiversity and abundance of species that guarantee the presence of great motifs in high number, rewarding those that take up the challenge.
School of common blue-striped snappers (Lutjanus kasmira), outside Chole Bay. Sony A7R5, WACP-C, Sony 28-60mm @28mm, 1/160s, f/10, ISO 100, 2* HF-1 (4500K diffusers):
Also inside Chole Bay, the quality of hard coral is good. Sony A7R5, Canon 8-15mm @15mm, 1/100s, f/10, ISO 100, 2* HF-1 (4500K diffusers):
Attracted by me, since I was using the macro setup (when I was equipped with the fisheye lens, mating Nembrothas were almost guaranteed), a giant Potato Grouper (Epinephelus tukula) shows up inside the bay. Sony A7R5, Sony 90mm macro, 1/200s, f/9, ISO 100, 2* HF-1 (4500K diffusers):
The diving comprises plenty of motifs for wideangle photography, but Chole Bay can be regarded as a true macro destination for UW-photographers as well:
Numerous nudibranch species can be encountered around Chole Bay. Noteworthy to state, our stay coincided with the mating season of the Golden Nembrotha (Nembrotha aurea). These seaslugs are hermaphrodites and mating takes place by connecting the sexual organs, located on the right side of the body, with each other in order to transfer the sperm. Sony A7R5, Sony 90mm macro, SMC-1, 1/250s, f/14, ISO 100, 2* HF-1 (4500K diffusers):
Blue Pseudoceros flatworm (Pseudoceros bifurcus) moves leisurely over hard coral. Sony A7R5, Sony 90mm macro, SMC-1, 1/200s, f/14, ISO 100, 2* HF-1 (4500K diffusers):
Shrimp city is a coral block located inside Chole Bay that is not only populated by countless camel shrimps (Rhynchocinetes durbanensis), but also glassfish, damselfish, anthias, muray eels and groupers. Sony A7R5, Sony 90mm macro, 1/250s, f/13, ISO 100, 2* HF-1 (4500K diffusers):
Longnose Hawkfish (Oxycirrhites typus) sitting on black coral. Sony A7R5, Sony 90mm macro, 1/200s, f/13, ISO 100, 2* HF-1 (4500K diffusers):
Reef octopus (Octopus cyaneus) peeks out curiously from its shelter. Sony A7R5, Sony 90mm macro, 1/200s, f/18, ISO 100, 2* HF-1 (4500K diffusers):
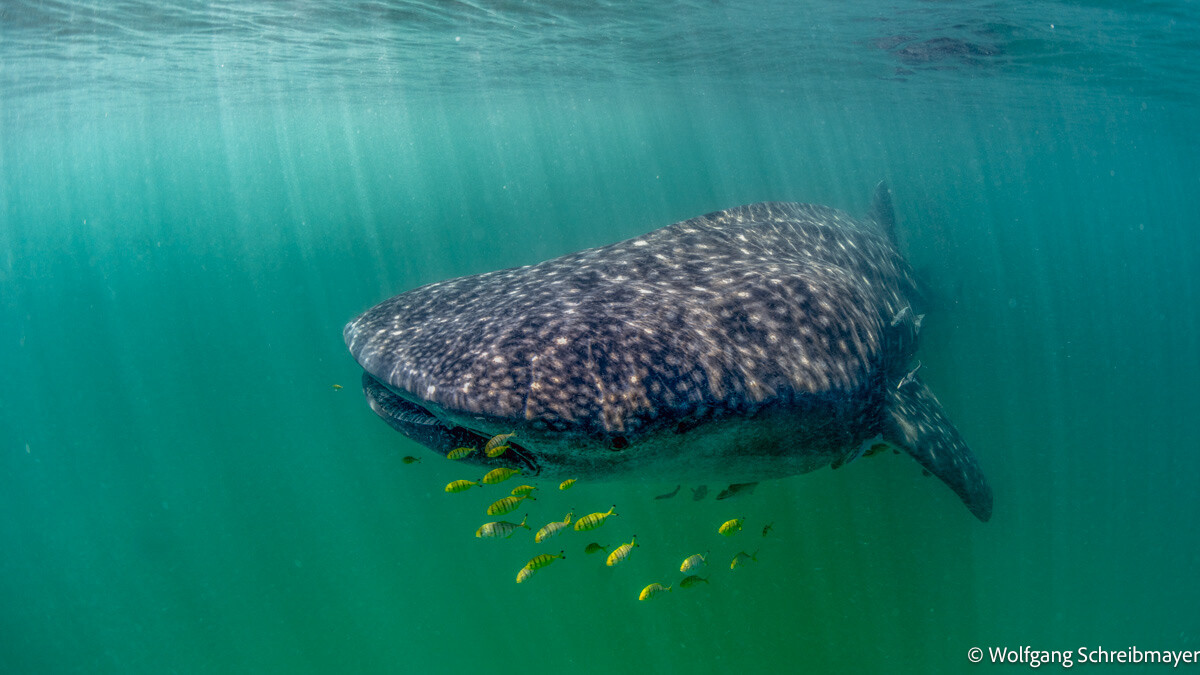
A report about diving at Mafia Island cannot be complete without whale sharks (Rhincodon typus). Outside the marinepark, between the African eastcoast, where the impressive Rufiji river ends up in the Indian Ocean, and the west coast of Mafia Island, the Mafia channel is formed. The high input of biomass from the Rufiji river delta causes plankton to bloom within this strait. This results not only in poor visibility (6-10m; and hence (again) challenging conditions for UW-photography), but, at certain times of the year, whale sharks gather for feeding. Snorkeling excursions by boat are offered and we were able to spot up to 15 different whale sharks on a single day (including a touching encounter with a female shark, closely accompanied by her half-grown up offspring).
Whaleshark feeding on krill. Sony A7R5, WACP-C, Sony 28-60mm @31mm, 1/200s, f/7.1, ISO 200:
Whaleshark fading away into the blue. Sony A7R5, Canon 8-15mm @15mm, 1/250s, f/6.3, ISO 250:
It was an unforgettable diving trip and fond memories will endure. We already have booked flights and resort for another two weeks in November 2025, in order to visit again this little paradise… 😊
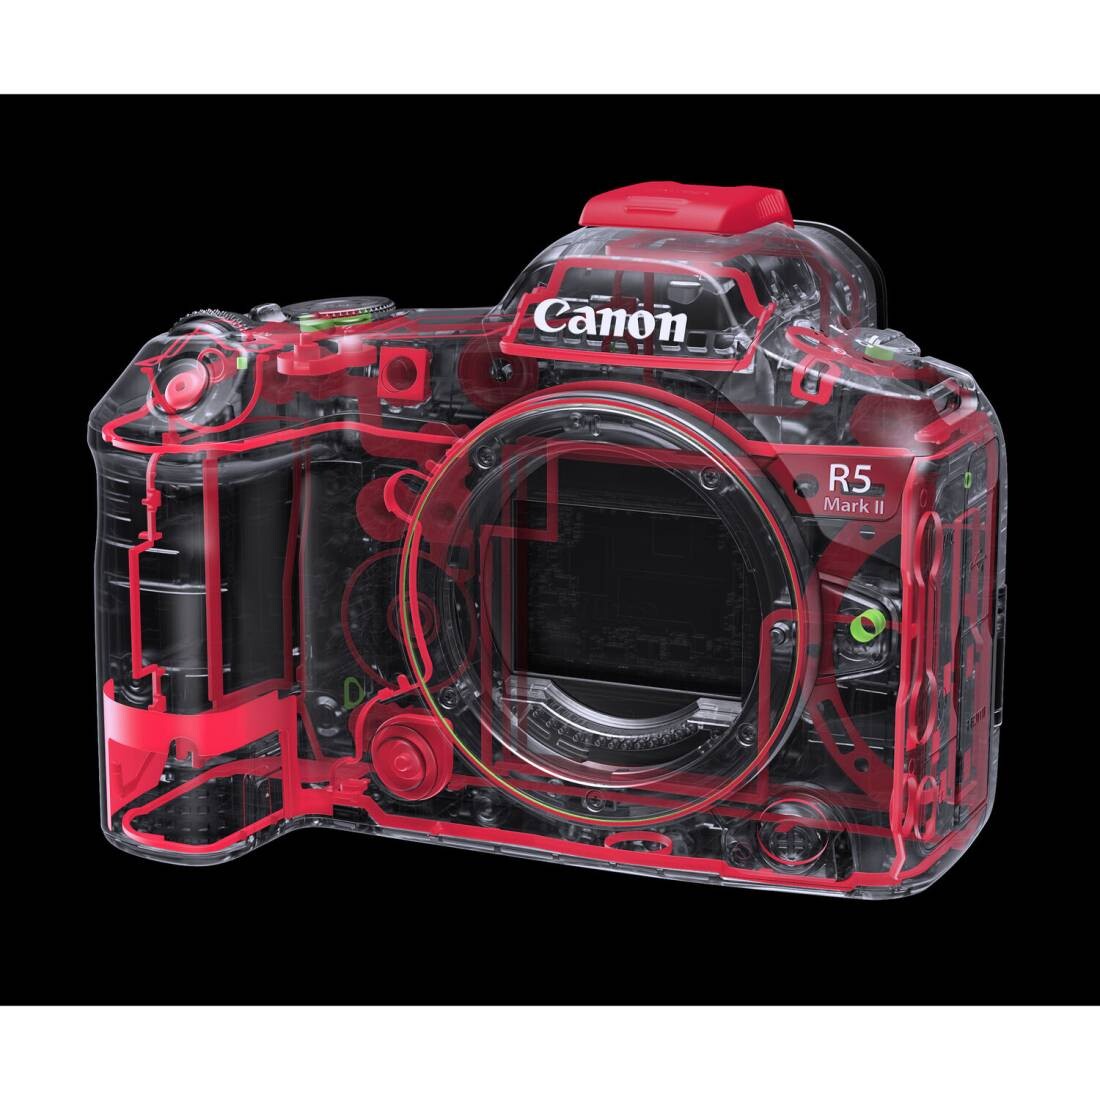
Canon has released new major firmware for the EOS R5 Mark II for the second time in a week. This update fixes an issue where video could not be recorded correctly when using a memory card larger than 2TB with the [Pre-recording] setting enabled.
This firmware (Version 1.1.1) includes fixes for the following issues identified in Version 1.1.0:
1. Fixes an issue where video could not be recorded correctly when using a memory card larger than 2TB with the [Pre-recording] setting enabled. This firmware also incorporates the following changes introduced in Firmware Version 1.1.0: 1. Improves security features. A password must be set initially. • Adds the ability to review the history of any changes made to the password, network information, or other settings. *For more information, please refer to the 'Setting a Password' section in the Advanced User Guide on cam.start.canon. 2. Enables firmware updates to be performed when the camera is connected to the internet and new firmware is made available on Canon servers. 3. Adds the ability to automatically detect Flicker at 100 or 120 Hz during Live View display. 4. Adds the ability to register focus position as a presets on the CR-A100 Camera Remote Application. This ability makes it easier to focus on subjects at the intended distance when the application is used with Robotic Camera System CR-S700R. 5. Adds the ability to select [Case Special] to expand Servo AF characteristics which is effective for subjects located behind a net in sporting events, such as badminton or volleyball. 6. Adds support for the Software Development Assistance Kit (EDSDK/CCAPI). 7. Adds a function that simultaneously protects images when they are rated. 8. Improves image stabilization control for lenses compatible with Peripheral Coordinated Control. 9. Adds the ability to use up to 8TB of CFexpress cards. Note - Cards larger than 8TB require low-level formatting by the camera. - Cards larger than 8TB are treated as 8TB cards. - Cards larger than 2TB cannot be used for firmware updating. 10. Adds to lower the image capture frame rate to help prevent overheating when connected to CR-A100 in extended remote shooting. 11. When transferring images with voice memos via FTP, the transfer order priority has now changed with voice memo (Wav) file being sent first followed by image file. If a voice memo is added to an image queued for transfer, the image and voice memo are now sent last. 12. Adds the ability to set the number of shots captured in pre-continuous shooting mode. 13. Adds the ability to set [Airplane mode] to shooting button customization. 14. Adds the ability to enable [Exposure Simulation] when a flash unit is attached. 15. Improved AF tracking during video capture for subjects that are difficult to focus on. 16. Fixes an issue in which Err70 may occur when enlarging an image after shooting with [Blackout-Free Display] set to "On" and [Servo 1st image priority/One-Shot AF release priority] set to "Release priority". 17. Fixes an issue in which Err70 may occur during Bluetooth communication due to interference from other Bluetooth devices. 18. Fixes an issue in which Err70 may occur when repeatedly shooting in the "High-speed continuous shooting +" mode. 19. Fixes an issue in which Err70 may occur immediately after startup when shooting with the electronic shutter. 20. Fixes an issue in which Err70 may occur during video recording in "FHD239.8P/200.0P". 21. Fixes an issue in which Error 70 may occur while filming in video mode with frame rate set to “50.00P” and [Movie Digital IS] set to “On” or “Enhanced”. 22. Fixes an issue in which Err70 may occur during shooting when both [Pre-recording] and [Auto send] to image.canon are set to "Enable". 23. Fixes an issue in which the camera may stop functioning properly when [Image Review] is set to "Off" and the monitor entered low brightness mode after pre-continuous shooting. 24. Fixes an issue in which video recording may not be possible when using Remote Live View shooting in EOS Utility while outputting via HDMI. 25. Fixes an issue in which large RAW image files may not be transferred via Camera Connect. 26. Fixes an issue in which a horizontal line may appear momentarily in the viewfinder. 27. Fixes an issue in which the camera may not connect to Wi-Fi 7-compatible routers.
Since 1994 the Monterey Shootout has been the annual gathering of underwater photographers in the stunning kelp beds of Monterey Bay. This three day weekend features seminars, a fabulous social mixer, and a friendly photo and video contest that makes us dive a little harder and push our creativity alongside new and old friends just a bit longer. Join us for the greatest dive weekend of the year.
The Monterey Shootout - a 36 hou... Monterey Shootout - An Underwater Photography Competition... The Monterey Shootout is a four-day weekend of diving, educational seminars, celebration, and a chance to win over $25,000 in prizes even with the simplest of underwater cameras.
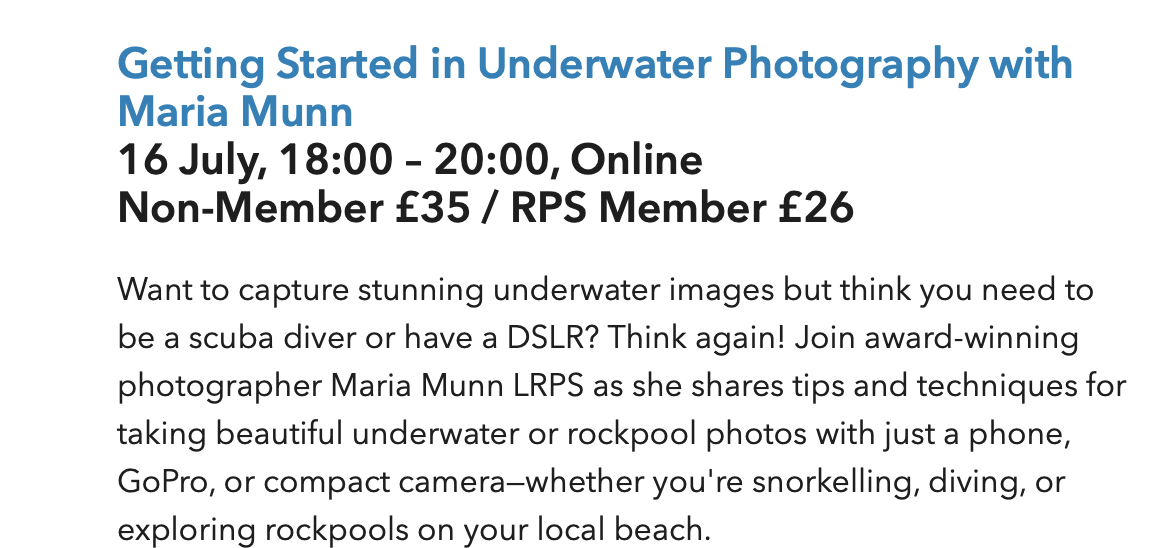
Maria , our very own Compact Camera Specialist, will be hosting an online “Getting Started in Underwater Photography” event with the Royal Photographic Society on Wednesday 16 July from 1800 hrs to 2000 hrs.
Maria will be sharing her experience over the past three years of shooting exclusively with smartphones, compact cameras, Insta 360s and Go Pros and promises to help inspire beginners capture their own vision to create award-winning content. Her presentation will delve into the many different options of accessory lenses and lights from various manufacturers with the aim of helping people choose the best system for their needs.
Tickets are £35 for Non-Members or £26 for RPS Members which includes a free copy of Maria’s eBook “Getting Started in Underwater Photography” and free online ongoing support via Zoom or at her studio in Swanage.
Details are on the Royal Photographic Society’s website at
A member who is a physician (thanks @DocTock ) has passed on a warning from the Federal Drug Administration about the effect of Scopolamine motion sickness patches used under certain conditions.
If you’re a user, you might like to read this link
Waterpixels is always happy to help promote the activities of our own members.
Husband and wife team, John Warmington (johnvila) and Sandra Kaye, have set up Critter Spotters in Vanuatu which they describe as a "Photographer-Friendly Retreat".
Here's what they have to say:
"We’re John Warmington and Sandra Kaye, a husband-and-wife team with over 40 years of dive experience between us, and a combined 26 years of living here in Vanuatu. Together, we’ve built Critter Spotter, a dive offering created for underwater photographers and thoughtful divers — and Karma Waters, a private villa just steps from the reef we call home. This isn’t a large scale commercial operation or a packaged tour. It’s a personal invitation to dive the way we dive — slowly, with care, with curiosity, and with space to stay as long as the subject needs.
𝐖𝐡𝐲 𝐕𝐚𝐧𝐮𝐚𝐭𝐮 ---- 𝐀𝐧𝐝 𝐖𝐡𝐞𝐫𝐞 𝐀𝐫𝐞 𝐖𝐞?
Vanuatu is an island nation in the South Pacific, east of Australia and north of New Zealand — a chain of volcanic islands with rich marine life, warm waters, and minimal dive traffic. If you can get to Australia, New Zealand, or Fiji, you’re just one short flight away. Direct connections from Brisbane, Sydney, Auckland, and Nadi make it surprisingly easy — especially compared to many Indo-Pacific destinations. We’re based on Efate, just 45 minutes from the international airport, in the calm, sheltered waters of Havannah Harbour — a site known for its gentle conditions and exceptional macro biodiversity.
𝐊𝐚𝐫𝐦𝐚 𝐖𝐚𝐭𝐞𝐫𝐬 𝐕𝐢𝐥𝐥𝐚 – 𝐘𝐨𝐮𝐫 𝐁𝐚𝐬𝐞
Karma Waters is a newly constructed private, one-bedroom, self-contained villa set among tropical gardens with ocean views and direct access to the reef. It’s ideal for dive couples or photography buddies who want flexibility and privacy without compromise. The king bed can be split to two singles for travelling buddies and in addition to your own comfy timber deck with water views you will have access to a large covered deck right on the waters edge, a luxurious day bed and lounges overlook the water. Grab a kayak and go exploring for yourself. We also offer on-site massage, yoga, or pilates sessions and can host your own private lifestyle workshop. You’re welcome to self-cater at your own pace, or just relax and let the water set the rhythm. There are dining spots close or private catering ca be arranged. ➡️ If your group is more than two, we can comfortably cater for up to four divers. While the villa remains best suited for couples or pairs, we’re happy to help arrange nearby accommodation for extra guests without compromising the experience.
𝐓𝐡𝐞 𝐃𝐢𝐯𝐢𝐧𝐠 – 𝐌𝐚𝐜𝐫𝐨-𝐑𝐢𝐜𝐡, 𝐂𝐫𝐨𝐰𝐝-𝐅𝐫𝐞𝐞 Our reef is one of those places that rewards repeat dives and patient eyes. Whether you're looking for frogfish, mantis shrimp, nudibranchs, moray eels — or simply just love long cruisy dives you'll have the space and time you need to make it memorable. We offer dives right from the villa, just go down the steps! It’s your choice --- we will introduce you to the area on arrival with a few guided dives and then it’s up to you – guided or unguided. Lets us know how many tanks you need! Our 5 metre diver friendly boat is surveyed and ready for adventure on request. We limit our numbers for a reason — so that you never feel rushed or overlooked. We don’t do schedules - dive when you're ready, linger as long as you want, your experience is the priority. We don’t teach – we dive and cater to certified divers only. Maximum of 4 divers. We all know the worry about weight limits and travel – we can ease that burden – all dive gear is available for hire plus we can cater to photographers with: GoPro, TG7 or Nikon D500 / Nauticam set ups on site, ready to hire.
𝐑𝐮𝐧 𝐛𝐲 𝐩𝐚𝐬𝐬𝐢𝐨𝐧𝐚𝐭𝐞 𝐩𝐡𝐨𝐭𝐨𝐠𝐫𝐚𝐩𝐡𝐞𝐫𝐬
John has spent the last decade developing his underwater photography through patience, passion, and deep familiarity with local marine life. He’s happy to share insights, offer camera advice, or help you troubleshoot a setup — casually, in-water, or over a post-dive photo chat. If you want more --- Workshops are available on request, whether you're just starting out or want a focused photo session. Sandy, a qualified divemaster and accomplished videographer, is especially intuitive with guests newer to diving, and is always ready to help spot subjects, keep an eye on conditions, or simply ensure your dive feels safe and supported. 𝐌𝐨𝐫𝐞 𝐓𝐡𝐚𝐧 𝐉𝐮𝐬𝐭 𝐃𝐢𝐯𝐢𝐧𝐠 We’ve called Vanuatu home for years — and it shows in how we host. From cultural tips to hidden snorkelling spots, we make it our mission to ensure every guest walks away with more than just good photos — but a truly memorable experience. We share what we love in a way that’s real, relaxed, , no crowds, no rush and tailored to you!
Ready to Learn More? 📍 www.critterspotter.com 📩 Email: [email protected] 📷 Follow us: @critterspotter If you're looking for a quieter, slower kind of dive trip — with time to shoot, space to think, genuine rest and relaxation, and a reef that still surprises us after hundreds of dives — we’d love to welcome you to Havannah Harbour. See you underwater,
John & Sandy Critter Spotter | Karma Waters | Vanuatu"
Adobe have announced an update to version 14.4 to Lightroom
Amongst the new features the Adobe website explains:
Reflection Removal on Desktop Shooting through a window or glass door? Use Reflections Removal to eliminate glare and surface reflections from your image, leaving behind a clean, crisp final photo. You can even adjust the Quality setting to control your final resolution—great for balancing speed and precision.
People Removal Crowded backgrounds? The new People Removal feature automatically detects and removes extra or unwanted people from your shot. Whether you're on the desktop or mobile app, it's easy to clean up your photo so your main subject shines.
View and Update AI Edit Settings Stay in control of your edits. Now, when you apply AI-powered tools like Denoise, Remove, or Lens Blur, an AI Edit Status icon will show up. If anything changes that might affect your results, the icon turns yellow so you'll know it's time to reapply or tweak your settings. It's an easy way to keep your edits looking their best with no guesswork needed.
Tether Capture with Fujifilm Cameras Lightroom Classic now has native support for tethered capture using Fujifilm cameras.
Performance Improvements Enjoy faster, smoother, and more accurate performance across tools and adjustments, making interactive editing feel quicker and more responsive. Key improvements include improvements in Crop Rotation, Brush, and linear gradient in the Masking panel.
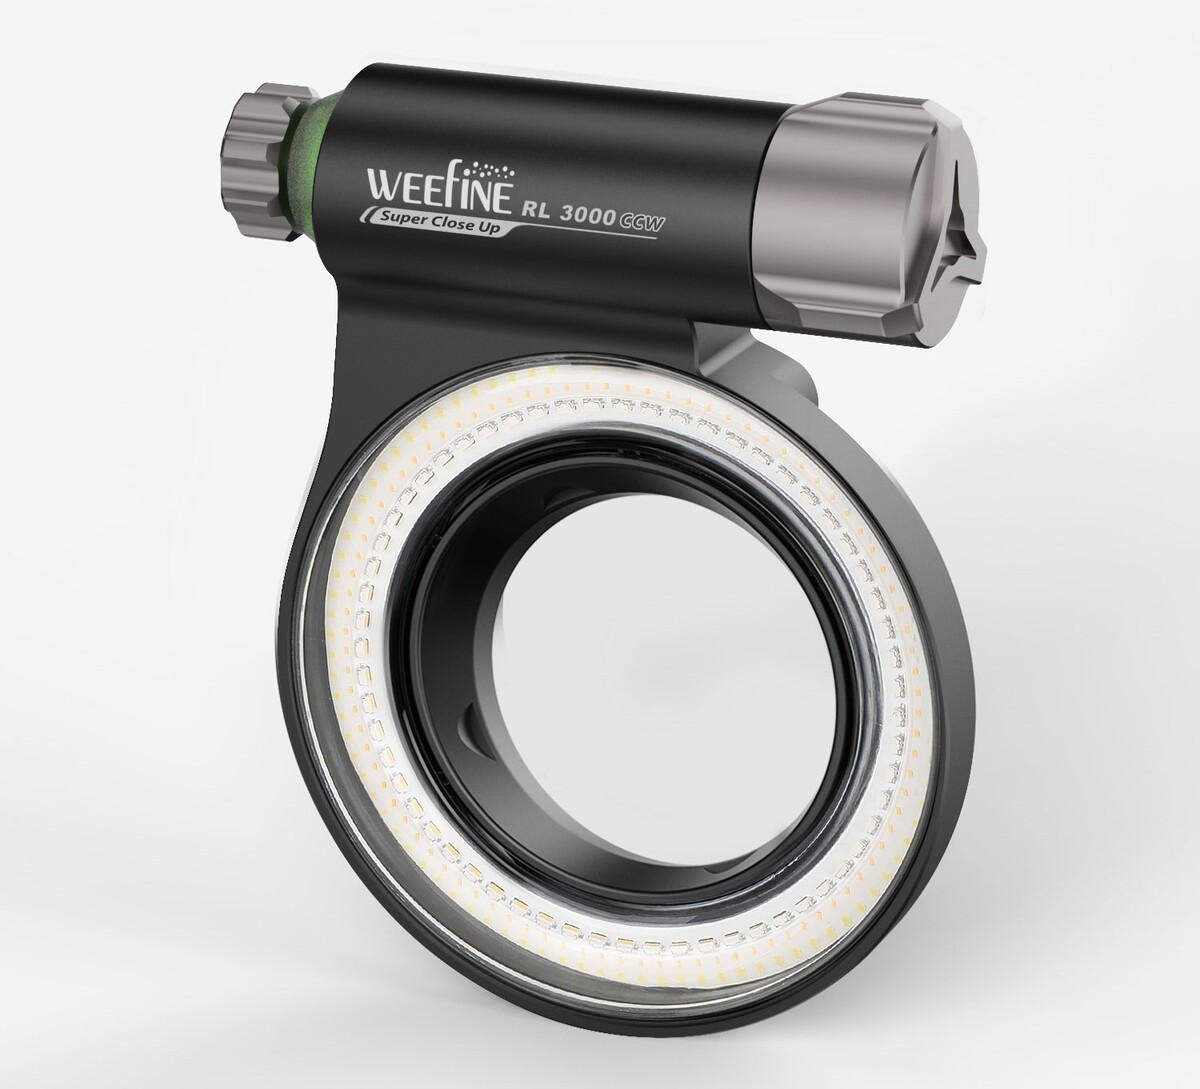
I have long fascinated with shooting ring lights underwater starting with the Inon Quadflash, through the various Athena modifications to Sea and Sea strobe heads, continuing to the Saga fiber optic rings and now to the Weefine 3000. The Weefine 3000 is the latest version of the LED lights made by Kraken and Weefine. The Weefine 3000 CCW
Weefine 3000 CCW Ring Light
It's similar to the earlier 3000 lumen LED modules but has adjustable color temperature and a 3000-lumen burst (strobe) mode. It also has a super closeup mode that can shoot subjects as close as 25 mm (1 inch) from the strobe. It is powered by a protected, 26650, 5000 mAh Li battery. The battery can be charged via a built-in USB-C port. One very neat thing about the light is that it allows for a very small, compact system underwater. No arms necessary, just the camera/housing/port and a single fiber optic cable. The light is shown below on an AOI housing for the OM-1 camera.
AOI housing for the OM-1 camera with the Weefine 3000 CCW Ring Light
The ring light can attach to any port with a 67 mm thread and can be rotated for any angle once attached. One nice feature (or bug) is that when you are using the light in the strobe mode, it remains on at low power to act as a focus light. During the day it was not terribly necessary but worked fine at night, although you will also need some kind of dive light to find your way. My wife said it was very easy to find me in or small group, just look for the circular dive light.
How well did it work? Better than I had anticipated. Years ago, I had the Kraken version of this light, and it was fine; this version with improved ergonomics (no multiple button pushes) worked great. Here is a nice little clown (Triopha catalinae) from a dive in local Southern California waters before the Raja/Triton Bay trip on the Wellenreng.
This was shot at 1/160 sec, f/7.1, ISO 200 using the Olympus 30 macro lens on an OM-1 in an AOI housing. Certainly, enough light to illuminate the subject, I slightly reduced the shot exposure by 0.1 to increase the contrast a bit.
For other local subjects, such as this anemone it also worked well. This one was shot at f/5.6, 1/160 sec and ISO 200.
I shot with the light quite a bit on our trip to Raja/Triton Bay. Here is a nice little Goniobranchus coi, shot with the Panasonic 45 lens, f/6.3, 1/160 sec, ISO 400. I was very close; you can see the out of focus gills.
I love Christmas tree worms, here is one from Triton Bay. Same lens, 1/250, f/7.1.
Here is a crinoid shrimp, same settings.
I shot a lot of tiny things, but also a bunch of anemone fish. Here is a Clarke in an orange anemone. f/14, 1/250, ISO 400.
Overall, the light worked well for the things I was shooting, it of course is completely useless for anything more than 250 mm (10 inches) away. The color temperature is fine but shooting in raw lets me adjust as needed. A friend used the light as a video light for a TG7 with a 52 mm to 67 mm adapter and said that for most nudibranchs the light was much easier to use than independent lights on arms. I wish it had more power, a 6000-lumen burst mode for this type of light would be awesome, but the current version is adequate for micro 4/3 shooters and awesome for the smaller sensor cameras like the TG series.
Isotta are an iconic, trusted name in underwater imagery built on experience and excellent customer service who have made beautiful sturdy underwater housings over the years for all kinds of camera models from Go Pros and Insta 360 Ace Pros to Canon, Nikon, Olympus, Panasonic and Sony. They offer advanced, high quality products which respond to modern needs, remaining true to the passion and innovation which Egidio Isotta started from his own dream back in 1967 in Italy.
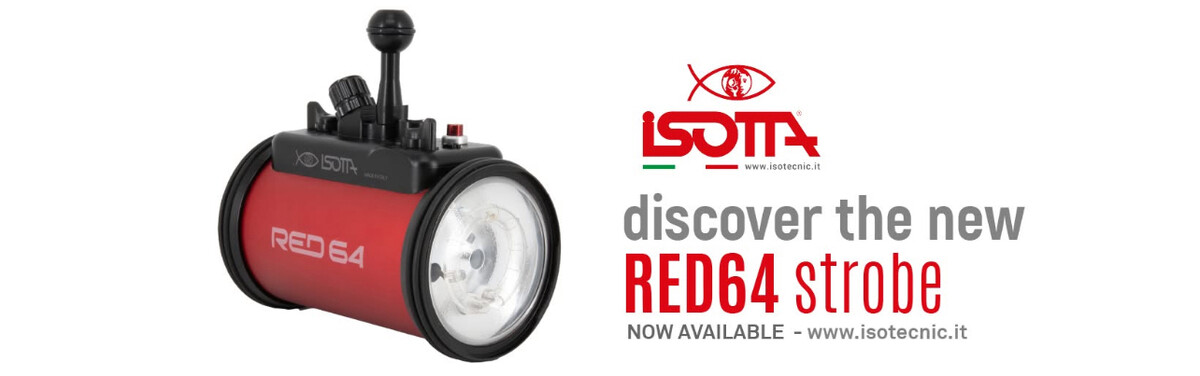
They have recently released their RED64 Underwater Strobe in the same Iconic red anodised aluminium body for which Isotta is world-renowned.
It features (to name a few) the following:
Two connections: 1 fibre optic and an S6 Power 230 Watt Guide Number 22 underwater with ISO 100 300 Flashes per full power charge Colour Temperature: 5400 K 10 stop adjustments for Flash Power HSS for Sony, Canon and Nikon Both Full and Half Power on white plus red focus light Double o-ring seals on all buttons and removable parts
It is unique in that even it's flash compartment is completely waterproof even with the battery compartment open and as with all Isotta products, has the option to customise it with your logo or name.
Finally it has a:
Working Depth at 100 metres Weight in water 230 grams Weight in air 1500 grams It measures 195 mm x 173 mm x 100 mm.
Dive on into their website at www.isotecnic.it for more information.
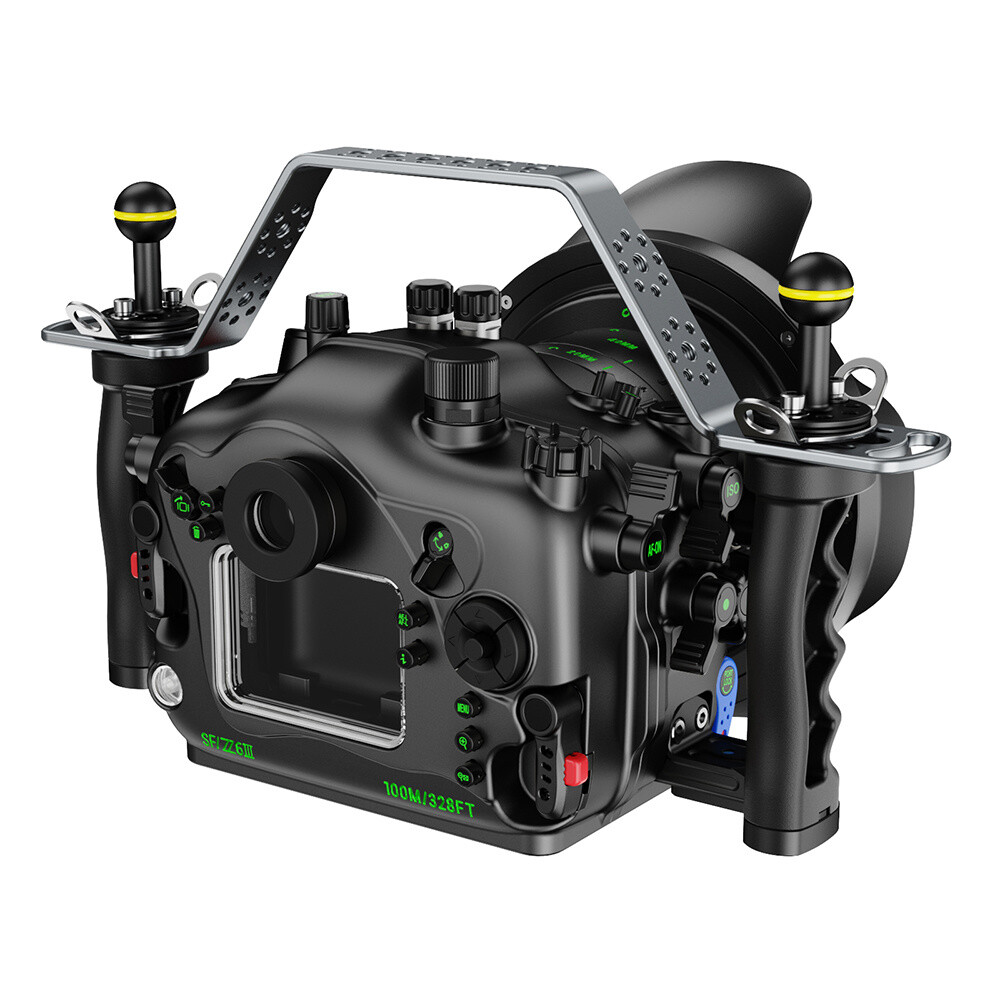
Sea Frogs has officially released its new Z6-III aluminum alloy housing, designed specifically for Nikon’s latest Z6 III full-frame mirrorless camera. Continuing Sea Frogs’ tradition of precision craftsmanship and technological innovation, this new housing offers reliable underwater photography support for both professional photographers and diving enthusiasts—further pushing the boundaries of creative exploration.
Key Features: Professional Protection and User-Friendly Design
Aviation-Grade Aluminum Alloy Construction The Z6-III housing is built from high-strength aluminum alloy, striking a balance between lightweight design and exceptional compressive strength. It performs reliably in demanding environments, supporting underwater use at depths of up to 100 meters. Its excellent corrosion resistance makes it ideal for use in seawater, freshwater, and extreme outdoor conditions.
Optimized Button Layout Tailored to match the Nikon Z6 III’s control logic, all buttons and dials are engineered with specialized technology to ensure seamless operation underwater—just like on land.
Modular Expansion Interface Includes a top-mounted M28 interface reserved for external monitor connectivity.
Optical-Grade Glass Ports and Safety Design Equipped with ultra-clear, optical-grade dome and flat ports designed to minimize distortion and chromatic aberration, ensuring maximum image sharpness and color fidelity underwater. The O-ring sealing system and pressure balance valve effectively prevent deformation due to leakage or pressure differentials, ensuring long-term durability and performance.
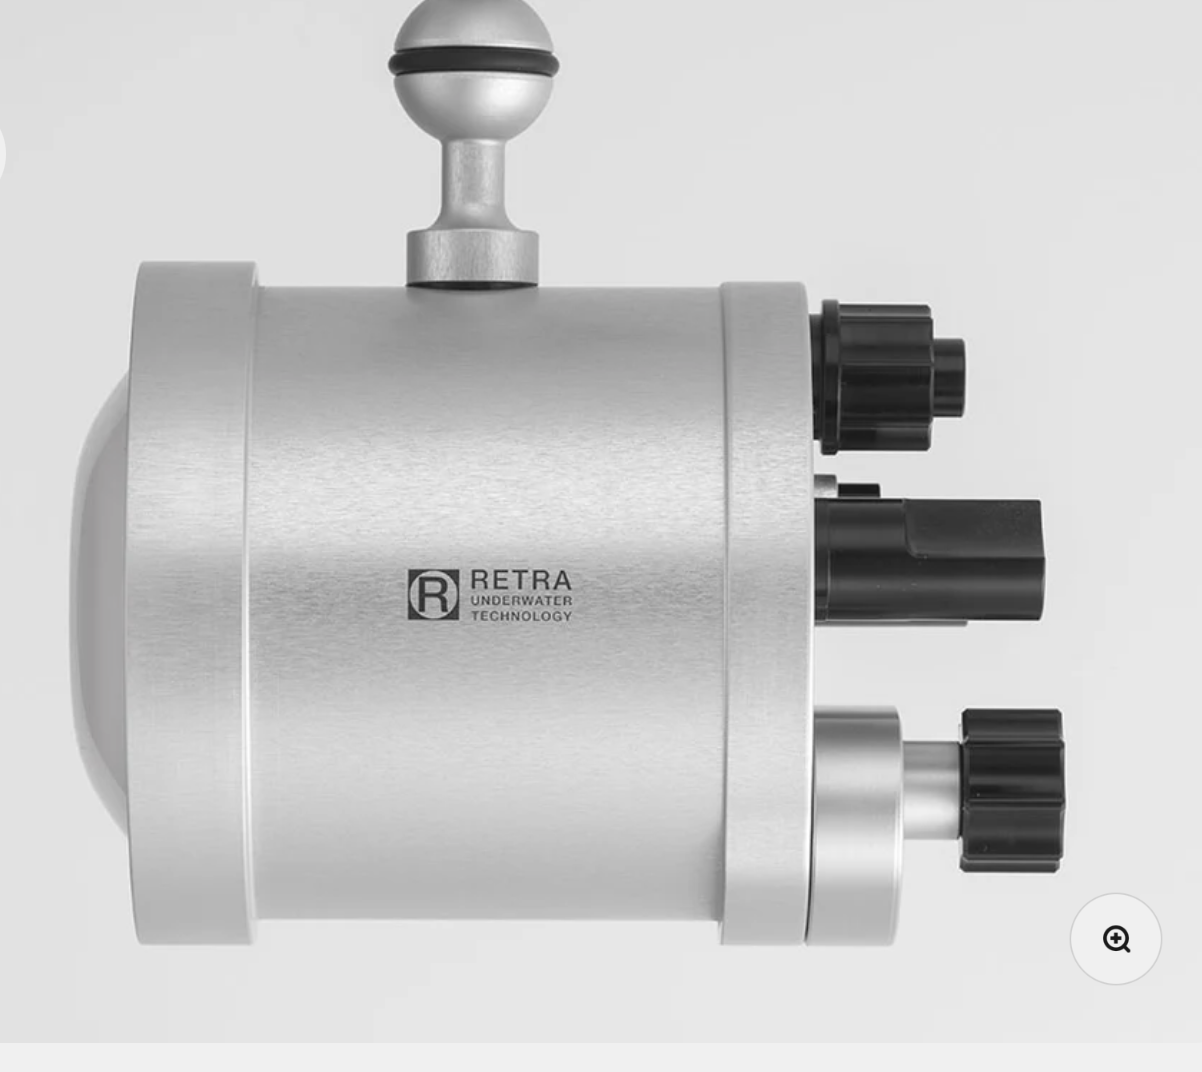
Retra have announced the launch of the new Retra Flash Pro Max II, which they describe as their most advanced professional strobe to date.
"Built on five generations of innovation and field-proven performance, the Pro Max II redefines what’s possible in underwater lighting—delivering Li-ion-level performance using safe and widely available NiMh batteries."
"With an impressive 190Ws of flash power, the Pro Max II produces 65% more actual light output compared to its predecessor—all while maintaining the same compact size and weight. This significant leap in brightness is achieved through a redesigned reflector, optimized power handling, and an improved triggering system that channels more energy into light rather than heat. Whether you're shooting fast-paced action or intricate macro scenes, you’ll appreciate the 25% faster recycle times and the ability to shoot up to 2000 flashes at 25% power using the 8×AA configuration. It even supports continuous shooting up to 60 frames per second on low power settings."
Full details can be found here:
Retra UWT Retra Flash Pro Max II The Retra Flash Pro Max II is our fifth-generation professional underwater strobe, engineered to push the boundaries of lighting performance. Delivering 65% more light output, 25% faster recycle ti...
If someone mentions the word Action Cam for underwater use, who else would automatically think of either Go Pro or the Osmo dpi range?
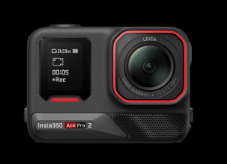
This week I've been learning about Insta 360’s Ace Pro 2 and I have to say, I’ve been completely blown away by it’s specs.
Not only does it boast an incredible Leica Summarit lens to set a completely new and unrivalled benchmark for action camera image quality (a whopping 50 MP), it has an F2.6 aperture to capture more light and reduce noise plus a 2.5” flip touchscreen plus many more incredible options to get super creative with your content.
It has an elite 1/1.3” 8K sensor with 13.5 stops of dynamic range plus support for 4K 60 fps Active HDR and 8K 30 fps video. It also has a 5 mm AI chip for further processing and powerful performance. It promises to bring smoother, crisper 8k footage with incredible clarity , even in low light conditions, backed up by it’s renowned Flowstate Image Stabilisation and PureVideo software.
It’s precise underwater colour technology ensures vibrant, true-to-life footage. It has outstanding white balance capabilities, boasts an incredible 157 degree field-of-view and is waterproof to 12 ms/39 ft.
Leica has a long history of producing some of the best optics in the world, and I'm loving seeing the underwater images captured with this little gem of a camera.
Has anyone got one? We’d love to see your images and hear your stories.
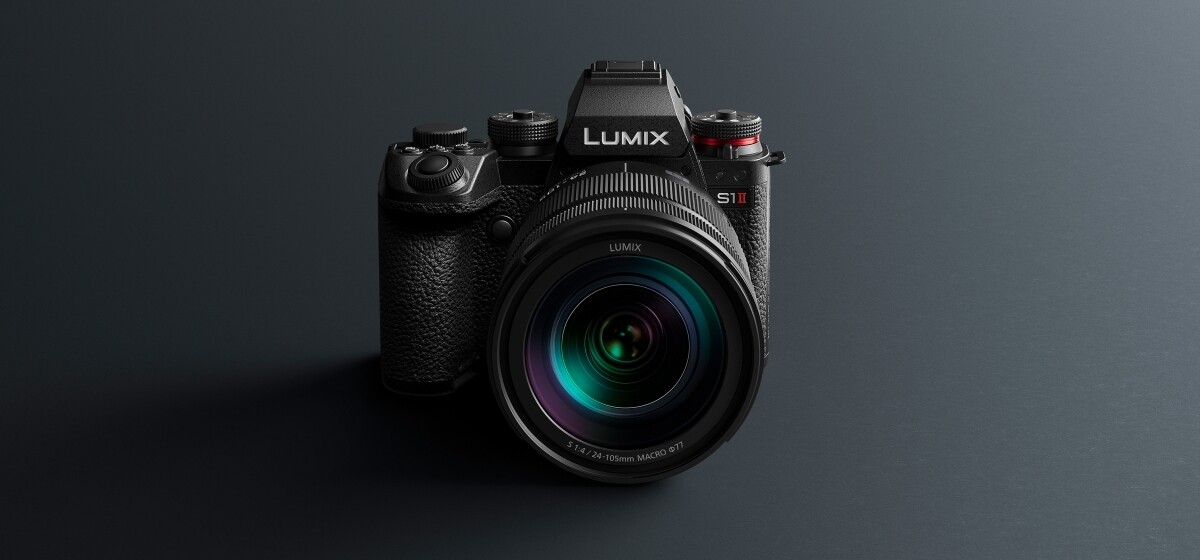
Panasonic has made a significant announcement for hybrid photographers and videographers with the launch of its new full-frame mirrorless cameras, the Lumix S1 II and Lumix S1 IIe. Both models are engineered to cater to the demanding needs of creators who seamlessly switch between capturing high-quality stills and professional-grade video.
Lumix S1 II: Pushing Boundaries with a Partially-Stacked Sensor
The flagship Lumix S1 II marks a milestone for Panasonic, introducing the company's first partially-stacked CMOS sensor. This 24.1-megapixel full-frame sensor significantly boosts read-out speeds, enabling impressive capabilities. Videographers will appreciate the ability to record 6K30p open-gate video, offering greater flexibility in post-production. For still photographers, the S1 II delivers with a remarkable 70 frames per second continuous, blackout-free shooting experience.
Key features of the Lumix S1 II include:
24.1MP Full-Frame Partially Stacked CMOS Sensor Open Gate 6K 30p Video Recording 5.1K 60p Open Gate Recording 8.0-stop 5-Axis Image Stabilization Technology Phase Hybrid Autofocus with AI Detection
Lumix S1 IIe: Streamlined Power for Creative Professionals
The Lumix S1 IIe offers a more streamlined package while retaining many of the advanced tools found in its sibling. It is built around a 24.2-megapixel full-frame BSI CMOS sensor. This model also supports Open Gate 6K 30p video recording, ensuring high-resolution video capture. Photographers will benefit from features like 96MP high-resolution handheld stills and the inclusion of Photo Styles and Real-Time LUT application.
Key features of the Lumix S1 IIE include:
24.2MP Full-Frame BSI CMOS Sensor Open Gate 6K 30p Video Recording 96MP High-Resolution Handheld Stills Phase Hybrid Autofocus with AI Detection Photo Styles and Real Time LUT
Shared Strengths and Availability
Both the Lumix S1 II and S1 IIE share a robust set of features designed for professional use. These include: Dual card slots for versatile media management. A high-resolution tilting/free-angle LCD screen for flexible monitoring. A durable body built to withstand demanding shooting environments. The Panasonic Lumix S1 II is set to retail for $3,197.99 USD, while the Lumix S1 IIe will be available at a price point of $2,497.99 USD. These new additions to the Lumix S-series lineup signal Panasonic's continued commitment to providing powerful and versatile tools for the modern hybrid shooter.
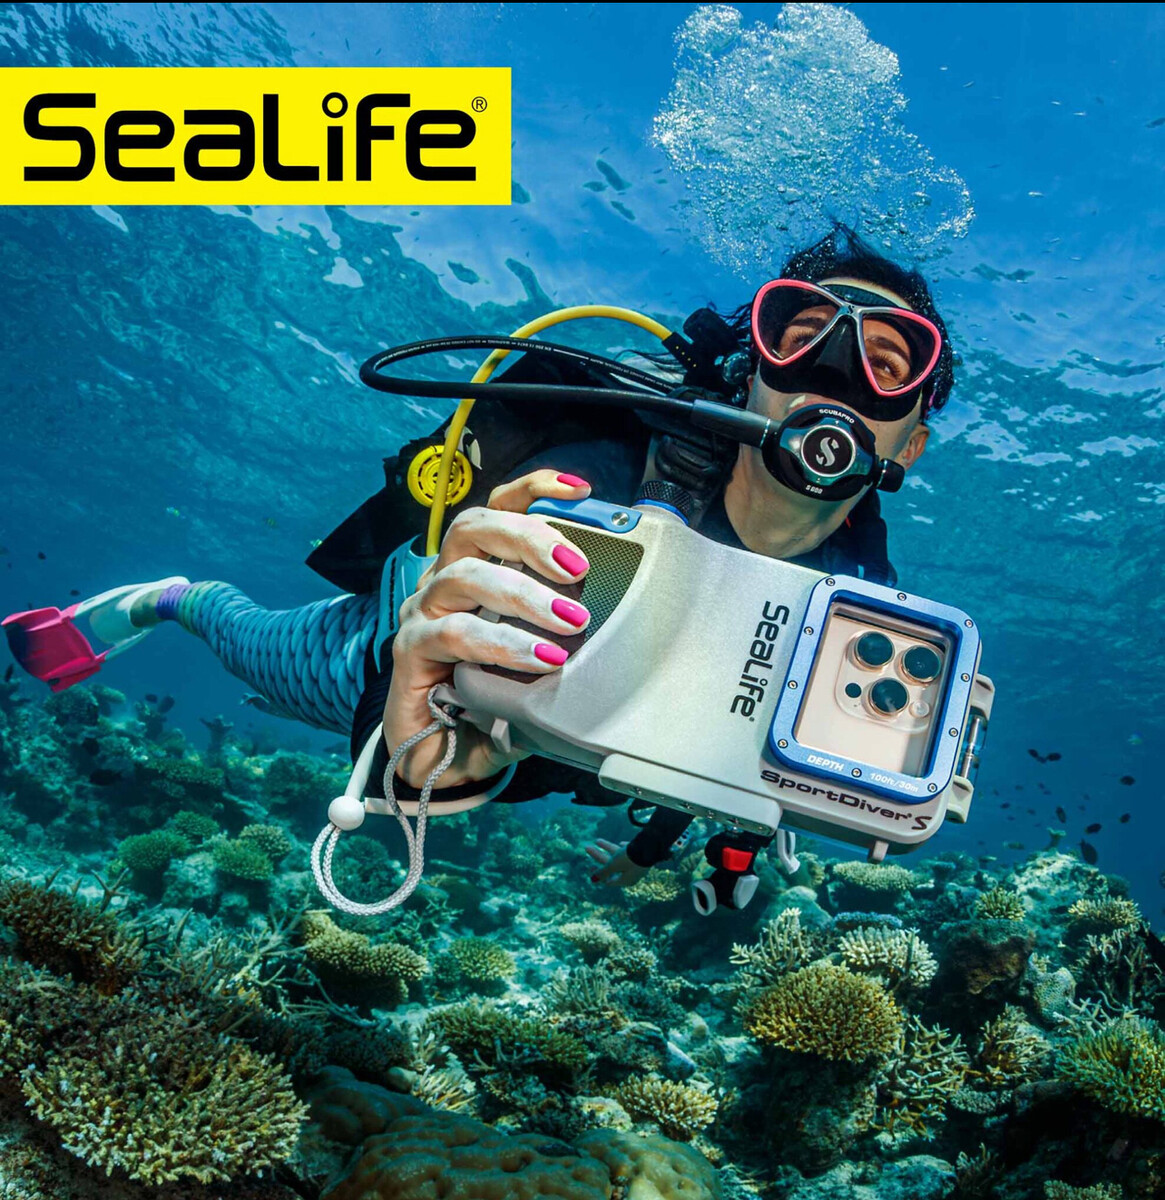
SeaLife have recently released their new S Smartphone Housing which is compatible with all iPhone models and some Android models (the Ultra is compatible with almost all Androids). It is slightly smaller both externally (16%), internally (27%) and is also 16% lighter than it’s popular Ultra model weighing in at 24 oz/680 grams compared to 808 grams. It has the same easy-to-use buttons and large shutter release making it a complete breeze to use when wearing thick gloves.
It includes the same visible Moisture and Pressure Change Leak Alerts but these are not audible like the Ultra and it has a maximum depth of 30 metres compared to the Ultra’s 40 metres. A red filter is an optional extra with this starter kit but a light weight travel pouch is included. It has 3 accessory mounts compared to the Ultra’s 7 to connect to any tray with standard tripod threads and is of course compatible with all of SeaLife’s Flex-Connect Trays.
The same popular settings are available via the free SportDiver App available on both Apple and Google Play Stores:
Adjust Zoom Exposure (EV) Auto/Manual Focus White Balance Tint Lens Selection RAW and JPEG shooting options Video Stabilization Movie Mode
SeaLife also offers a 52 mm 0.7 x wide angle lens, plus a wide angle dome lens which increases the shooting angle by 43%, allowing for a closer photography distance and improved edge sharpness. These attach directly to their lens adaptor which can be used with the Sportdiver S Housing, allowing all lenses from their range and other brands with 52 mm or 67 mm threads to be mounted directly to expand both macro and wide-angle creativity. Step-up rings can also be used for other sized lenses.
This image is of the SeaLife SportDiver Ultra Version using the Dome Lens
It is also offers more bounce for the ounce with a lower price tag of $299.95, making it a more affordable option for starters in underwater photography using their smartphone. I loved using my SportDiver housing when it was first released and this is sure to be another popular addition to the SeaLife family.
For more information visit www.sealife-cameras.com