Everything posted by Klaus
-
If you know the dimensions, you can also try a simple eBay search. There are different materials (silicon, NBU etc.) - a lot of technical O-rings sold there will be NBU but the housing & port O-Rings are likely silicon. I‘d stick with that if possible. Even if you do find the exact same size, a third party O-Ring may not be quite as supple as the original. This probably does not matter in absolute terms, but a less supple seal means perhaps that sand, hairs or jolts will more easily lead to water seeping in. Less forgiving so to speak. If you can still find an original it‘s worth the extra money, but if not the third party ones are at least really affordable.
-
Come to think of it: my first split! The edges are a bit blurry, water-contact does not live up to its promise…
-
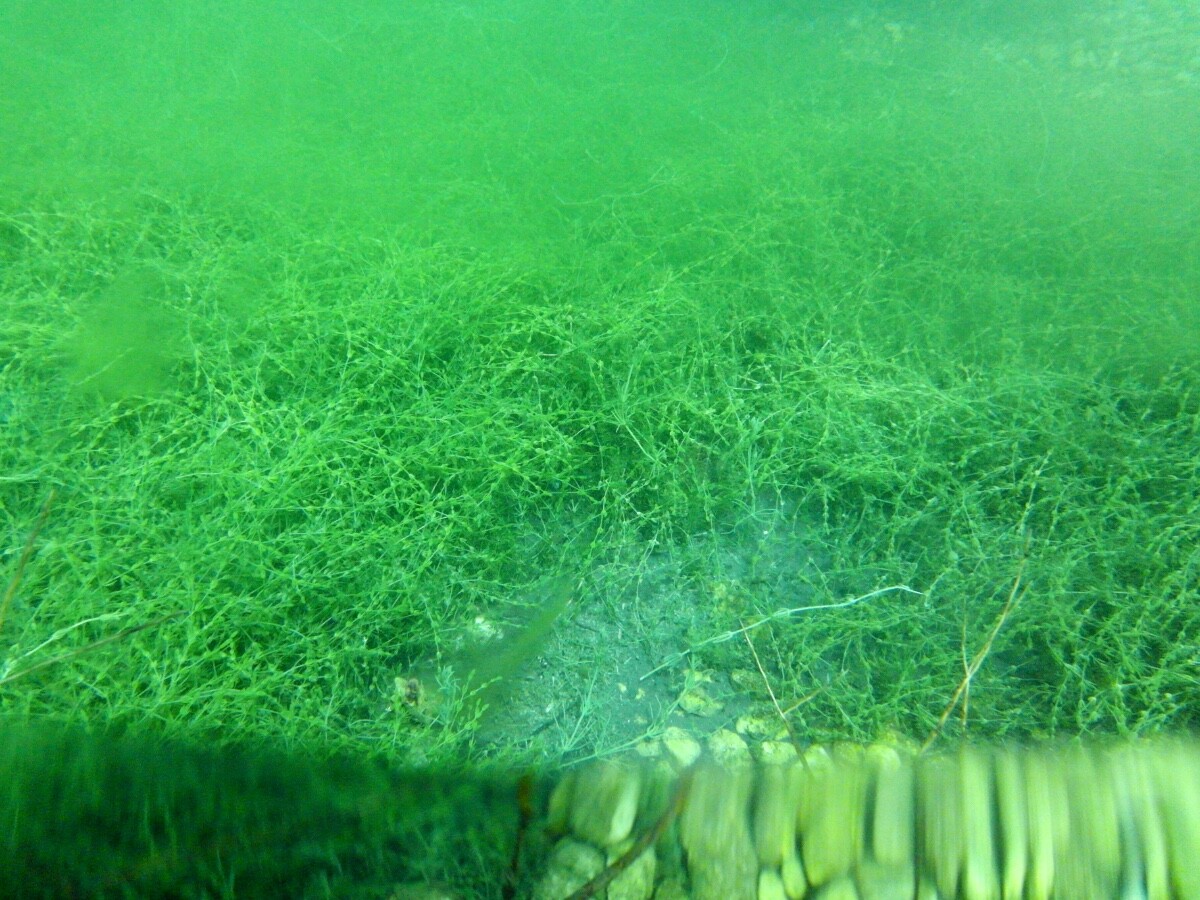
I did… This was my first stint beyond a cheap GoPro knock-off. A compact camera (Samsung wb-2000) in a second-Hand, „universal“ clear polycarbonate housing. Switched it off at some point once I realized and continued the dive; at the end the display was an aquarium - AFTER I took it out of the housing. Fortunately this was a freshwater quarry, I dried the camera and it still works today except for the built-in flash. I‘m taking it skiing sometimes now, it‘s one of the few compacts that saves a raw. Lembeh, however, is not freshwater as I‘ve read…
-
This time I‘d guess fisheye based on how much the anthias get smaller in the corners. But I only bother because of the challenge here. When the distortion is a „feature“ then it‘s usually not particularly obvious- otherwise it becomes a „bug“. whatever, I guess in the end it‘s all about releasing the shutter when you have a great subject, fisheye or not…
-
No - but great job hiding the sunball behind the soft corals to protect it from getting blown out! i can only guess - rectilinear?
-
Image quality aside (and I know this is now off-topic), the shots I admire most ist where the fisheye distortion is used as an element of the composition - a feature, not a bug. I can mostly remember this from CFWA, not so much from reefscapes. But I guess these occasion are not that frequent, hence zoomable options are more flexible. Just a thought on aspects beyond the pixel details.
-
I had never heard of the myth that fish-eyes have good corner performance. Top-side tests usually conclude that the field of view is too large for the test charts available (I.e. the patterns don’t extend into the very corners because of distortion and AOV), „real world“ shots have a chromatic aberrations which of course can be better or worse depending on the lens. Most of the times, the tests conclude with something like „ … fisheyes are extreme lenses with inherent compromises.“ Now underwater, it‘s a different story. The distance argument stated above is what I have read pretty much exclusively as the argument for using a fish-eye and it pairs well with the fact that the distortion is not as obvious for most UW subjects. There is of course nothing wrong with discussing very special aspects of optical setups - but I had never read about the supposed myth that started this thread.
-
I think he posted a picture in the thread on experimentally testing the dome port position. Looked good to me, it‘s the one with the nice pool thermometer.
-
Sorry, posted it out before inserting the link : https://www.on1.com/products/photo-raw/download/
-
I don‘t know about Sony, but with m43 raw files the adobe editors get a lot of info from the cameras and some of these you cannot even revert unless you use other editors (at least for my epl5 raws, newer stuff may be different). So there is definitely a lot more in the raw files than just the pixel intensities. I currently use on1 as an editor, certainly not comparable with LR but once I got used to it, it can do a really good job for my needs. They have a free trial version that has all features enabled - check it out if you‘re interested.
-
I suggest using the personal message feature for this kind of exchange.
-
I’d be careful with the contact cleaner /silicon oil spray. Underneath the buttons there probably are O-rings, so I would not use very light silicon oil. It will diffuse into the O-ring and dilate it, eventually this can provoke leakage. Essentially the same story as with the O-ring for the housing. But a little lubrication is sometimes needed on those hard to reach surfaces. This is what I do: I have a small bottle of medium-viscosity silicon oil (around 250 cSt I believe) and place 2-3 DROPS into a bucket of water. Then I stir this vigorously to create a suspension (does not dissolve but the droplets get smaller). I then bathe the equipment in this shortly and work the buttons while submerged. You really need only very little of the silicon oil, because it will find its way to the hydrophobic surfaces by diffusion (@Chris: Ostwald’s principle for colloids…). The medium viscosity silicon oil is still not really the best for the O-rings, but this approach deposits only a really small amount. The rest of the plastic case will also feel a bit sticky when you take it out, because this also got coated. I rinse with clean water+ wipe dry, after a few days the plastic will feel nice and smooth again. The silicon oil diffuses into the plastic. This can be good for older equipment, as the silicon replaces the softeners that the plastic looses over time and hence this restores a certain elasticity. But as always - too much of this and you will wreck the case. I try to do this procedure only once every two years at max.
-
One more thing nonetheless… Why bother? That’s arguably the most important question. If the port position is off the ideal location, then the port will cause diffraction as seen by the lens (because the light that is captured does not traverse the port at a 90° angle). Unless you are doing photogrammetry, you might not even notice the resulting distortion - and if you do, it may be straightforward to correct in Lightroom. However, the diffraction does not affect all colors to the same extent, hence it leads to color fringes (=chromatic aberration). Seeking the best possible port position i.e. extension ring size will thus reduce fringing. [Of note: Light that hits the port „straight on“ will always traverse at a right angle, hence the center will always look good (and not be distorted). Therefore fringing increases off-center and is worst towards the corners of the image.] Personally, I don’t care about the distortion (except maybe for splits in very calm water) but fringing can be distracting when it’s really bad. The good thing is that we anyways use a small f-stop to deal with the curved virtual image and that also helps a bit with the fringes. But a well-placed port may get you the same result perhaps one stop wider? I don’t think that it is necessary to achieve „ideal“ positioning and the limited set of extensions provided by the manufacturers only allows for a coarse-grained adjustment. For example, I am using an MFT Pen port and AOI only makes two extension rings for that (14 and 24 mm), so only about 3 reasonable combinations (14, 24 and 38 mm) are available. In addition, the position of the lens‘ entrance pupil may move when focusing. Thus, don’t let „perfect“ be the enemy of „good enough“! Whenever possible, the port charts or your own calculations will tell you most of what you need to know given the limited options you have. Then why did I bother? Because I could not find any information on the Samyang/Rokinon 7.5 mm fisheye lens with the Athena port under water. I like to buy second hand gear and could snap up the Athena port for a very reasonable price, plus the (manual focus) Samyang 7.5 mm fisheye sells for really cheap – less than 1/3 of the Panny 8 mm even second hand. AFAIK, the Athena is not as „mainstream“ as the Zen or Precision ports, and the Samyang lens is cherished by astro-photographers but nobody seems to use it below surface. Thus, no possibility to do any calculations beforehand. Once everything had arrived, I wanted to know whether this is totally off or worth a try under water. [I will post some images elsewhere here once I get a chance to go diving with it.] If you also want to try some funky lens that is off the beaten path, or adapt a well-known lens via Metabones to a different system, you may also be looking for a relatively easy way to check which combination you‘ll take below the surface for your first trial. The method I found in the paper is an easy way to compare the 2-3 combinations you have available and select the best one. A couple of misconceptions need to be corrected: 1) Just like the port itself, any distortion caused by it is radially symmetric. It therfore absolutely does not matter whether you use vertical or horizontal objects for a test. But to reveal this distortion you need to cross the air-water line. Due to gravity on earth, I find this significantly easier with a vertical object. Just don’t place it dead-center, and try to shoot as much as possible the same perspective with the combinations you want to compare. If you don’t believe this, just turn the camera by 90° and take another shot – it will look exactly the same. (Except if you rigged it up to the cold shoe as I sugested, because then your object will also be rotated and it no longer crosses the water-line.) 2) It is a no-brainer that a fisheye will remain a fisheye when housed behind a dome port. I can't imagine anyone here would try to "de-fish" by deliberately mis-positioning the port. This would not work. 3) I picked this up from a publication that dealt with photogrammetry for deep-sea rovers. They indeed used checkered test charts, but that is because they also inserted them slanted. The goal was to develop an algorithm that corrects for distortion even after the best possible port positioning (e.g. due to the port not being of ideal spherical shape) because that allows for even higher precision. Calibrating distances, especially for computer vision, is of course much easier with checkered patterns than simple lines. But unless you care for highest positional accuracy in your image processing, you’ll be perfectly OK with a simple vertical thing (straw, ruler, thermometer, strobe arm…) that’s placed at about 2/3rd from the center of your image. Interceptor121 provided a really good proof-of-concept image above. Of course, checkered test charts also work, but they are not easy to find when a workshop member invites you to try a new lens while you're on a liveaboard. If you’re lucky, however, Interceptor121 is also there. After you narrowed down the port position for your system experimentally, he can use his math to back-calculate the entrance pupil position (-range) of that particular lens and afterwards forward-calculate the best available scenario for the systems of all other workshop participants. That’s where the combination of theory and experiment really shines!
-
Very interesting, thanks for sharing it here!
-
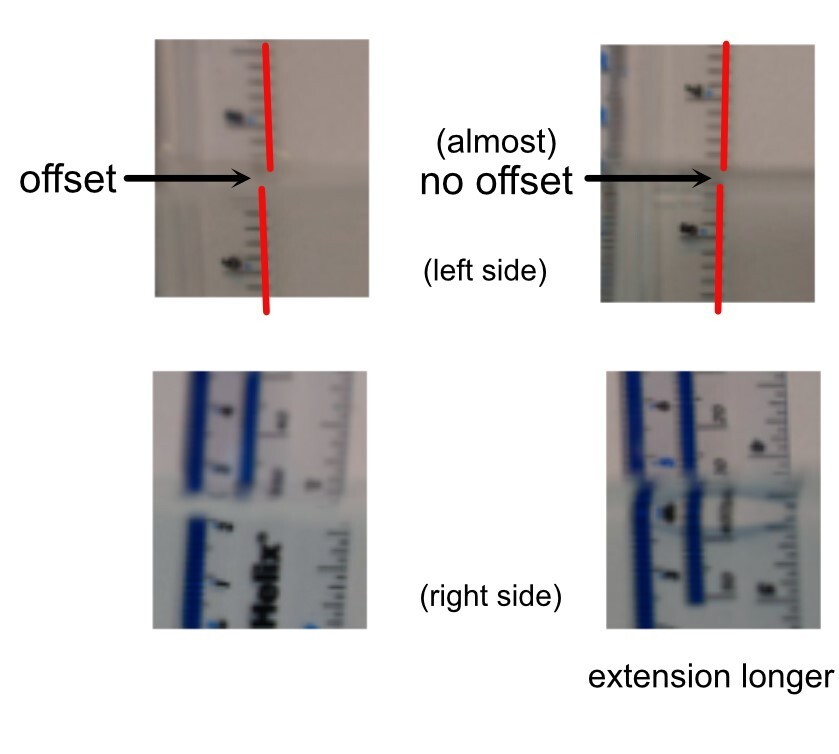
It happens right at the air-water-interface. The goal is to find the extension length that will lead to a minimal offset in how the line continues under water vs. in air. If you have no offset at all, then your lens renders exactly the same image above and below the water line. This happens only when the lens and the port are optimally arranged with respect to each other. I have probably sent people on the wrong track when I wrote about „stright lines“. Please excuse my lack of eloquence, I am not a native English speaker. Correctly stated, the observed effect here is the lateral offset of straight lines entering the warter. I have cropped the critical regions from the nice images provided by interceptor121 (thanks again) and annotated it accordingly - the test is essentially like aligning an inkjet print head (and this comes from the publication I cited, not my imagination). null The optical laws have been derived through simple experiments and vice-versa we can verify optical geometry with such tests. Of course everyone is welcome to suggest additional approaches to complement and/or replace it, I am not at all saying that this is a mandatory exercise. I also think that having the port in the ideal position by no means implies that it’s the right port for the lens in question. It may be possible to derive this from the rest of the images, but I have no idea how and that is explicitely not the topic of this post. I have said what I wanted (and by now more than once), so I will stop posting in this thread. Cheers, Klaus
-
That is exactly what I meant, and if the information is correct that the image on the LEFT is with a longer spacer then that fits the interpretation. The shorter extension leads to barrel distortion and that causes a displacement to the outside (because that distortion does not happen in air). I‘m not trying to give a lecture on optics but to point out a simple test that will indicate in which direction one should make a change (displacement to the outside > longer, displacement to the inside > shorter). If that is true, then it is quite likely that already the second configuration tested will be the best one available to a given person. Let‘s just leave it with this and see whether anyone finds it useful. That is the main point here. For me it already is, because I couldn‘t find the information for either the Samyang lens or the Athena port (lack of perseverance). But I now know that this will have some limitations that I can only solve at the expense of more vignetting, so I won‘t bother. GAS cured, thanks to your help!
-
Thanks for the clarification. So let’s sum this up: If the lines in the test shot continue with an offset to the outside of the image (i.e. the uw part is slightly enlarged), you need to increase the distance between lens and port. That‘s the opposite of my initial interpretation of the publication text. I suppose that if you go beyond the optimum, then the lines will be off-set to the inside. And even a 5mm difference from the optimal dome position is visible in this test. Whether 5 mm matter in practice is probably a different question and practical considerations, such as vignetting or plain availability of parts are also limiting the options. For example going back to my own shot I wold thus need to add an extension to avoid the offset, but there is already some vignetting so I won‘t do this. It‘s reassuring that theory and test come to the same conclusion (as they should). With the calculations you can get an answer BEFORE you have the parts in hand, provided all the required information is available. Cool!
-
Dome port physics aside, I have to say it is a nice thermometer… I like it.
-
Nice picture, thanks a lot! Which one has the longer extension- the one on the left or the one on the right? Sorry if I don’t get it when I should…
-
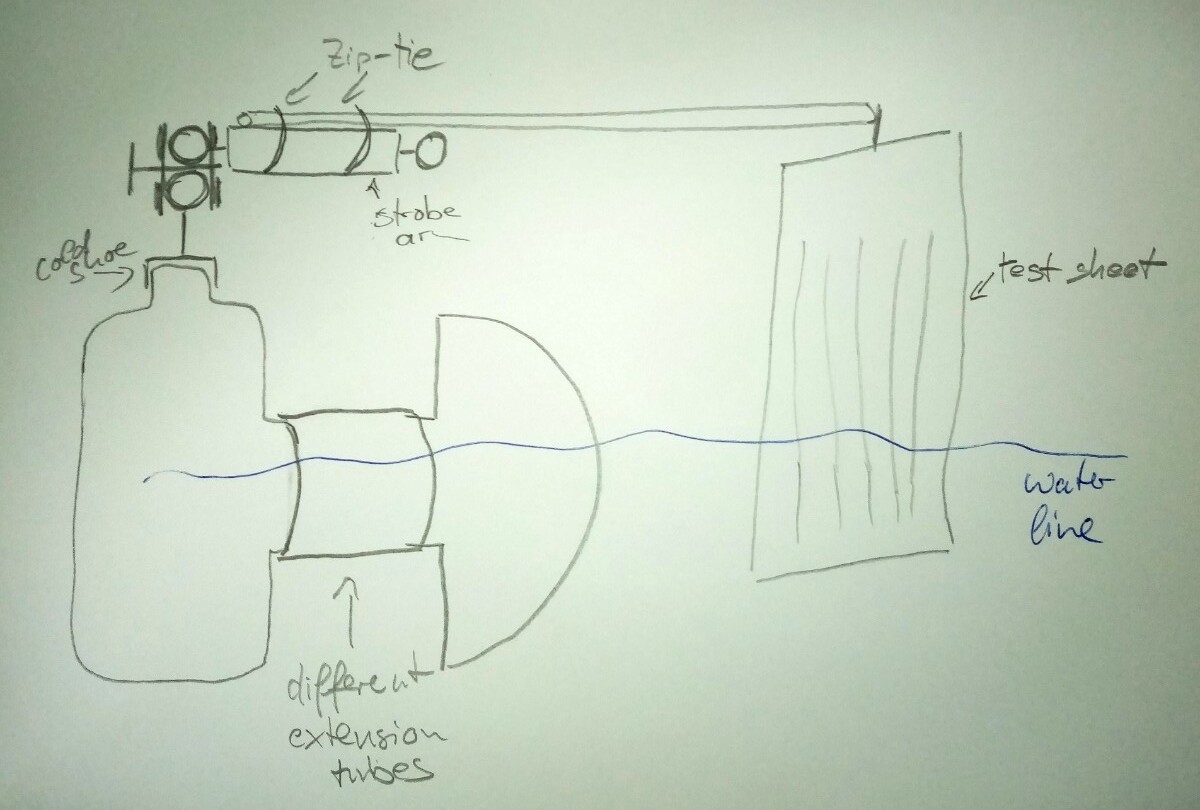
I think the easiest may be if you fix a test-object to the cold-shoe of your housing via a strobe-arm - I made a sketch in case this sounds cryptic. That way it may be fairly straightforward to get a small series of comparable shots with different length extensions, perhaps quicker that mounting it on a tripod again every time. In the article I found they say "misaligned front" when the uw part is enlarged (and vice-versa); I interpret this as the rays from the dome converge in front of the lens EP, but perhaps it is the lens that's in front of the convergence point? If you can do the test, I'd appreciate to know about your conclusion. I just don't have those toys (yet) to do it myself.. 😞 If you look at Phil Rudine's recent post on the 10 mm Laowa and dome-position test, there's a split with a floating pool thermometer and you can see that the uw-part is slightly enlarged. Perhaps that's exactly why he took this shot, after all it's quite intuitive - we want those lines form the thermometer (aka dive-boat) to continue perfectly straight into the water.
-
Yes, as I pointed out this will not help for assembling an order. I also think (but haven’t tested) that the effect kind of scales with the camera-object distance, hence when comparing configurations you probably need to get the camera into the same spot, using a tripod or some other stationary holding thing. Pool or plastic box does not influence the physics, but you need a calm water surface for the split. I think that as I progressively succumb to GAS, I may come back to this once in a while and play around with the available combinations. I can then maybe find the best solution available for me, not necessarily the ideal one (as mentioned in the first response). And while this test can keep me amused on a rainy winter weekend, it certainly won’t improve composition or diving skills - this is what’s currently limiting most of my shots. I just like the concept; it is charmingly simple and direct, test the port exactly to what it is intended for. In the publication this is only the first step, they then continue on with simulations and calculations to deal with the errors that REMAIN after the alignment. This is obviously of no relevance for me but apparently improves the photogrammetry.
-
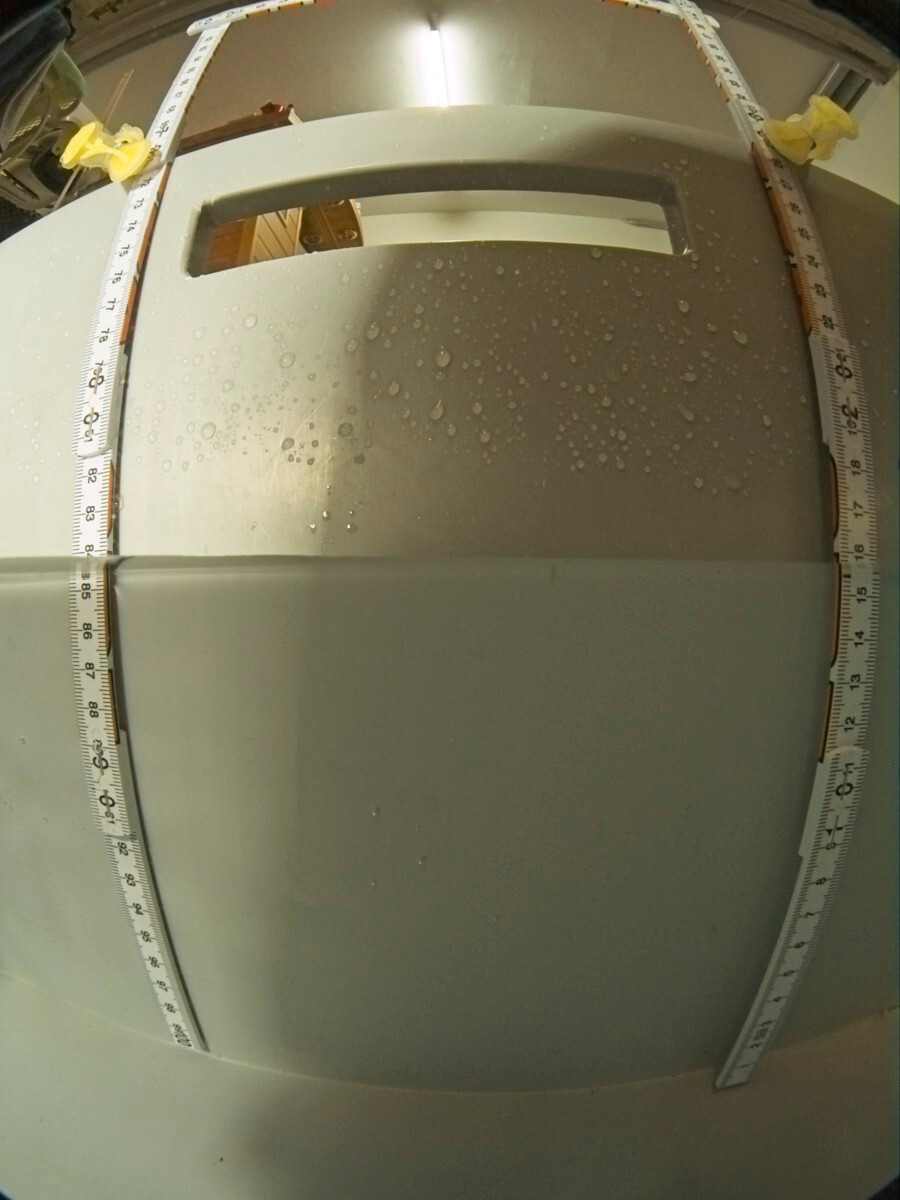
There is apparently an experimental solution to solve the lens positioning problem within a dome-port. I found a publication (see below) from a team that calibrates photogrammetry cameras for deep-sea rovers at an oceanographic research institute. Perhaps it is already well-known in this community – but I figured I’d share it anyways. Note: This is not about choosing the right dome size, curvature etc. – just the lens position relative to the dome. The idea is quite straightforward: The goal of the dome-port is to avoid refraction by permitting the light to traverse the water-glass-air interfaces at a 90° angle – there should be no difference between air and water then. This is only possible when the lens is in the perfect position, hence our dilemma. If the position is not optimal, there will be refraction (grossly oversimplyfied: the dome will act a little bit like a flat port). Now the trick is to TAKE A SPLIT SHOT of a straight object that enters the water. If the lens is well positioned, there will be no refraction and the lines continue perfectly. Otherwise, the lines will be displaced and slightly enlarged or reduced in size. In the publication they had the camera on a screw-mount and could adjust its position (and hence the lens) „live“. For a housed „normal“ camera one would vary the port extensions until the best possible image is obtained. I tested this with my newly acquired (second-hand) Athena Fisheye dome on an Olympus Pen housing with the Rokinon/Samyang 7,5 mm fisheye. This is probably a sub-optimal setup because the dome was designed for the Panasonic 8mm lens which is longer than the Samyang. The image clearly shows that the lines are displaced a little bit. It’s best if you zoom in to the air-water-interface on the right, which is nice and „flat“. According to the publication, I should thus vary the lens position = spacer length. If I understood the publication right, then a displacement towards the outside (as in my test-shot) translates to shortening the spacer (which I can’t – there’s none) whereas a displacement to the inside indicates that a longer spacer is required. I don’t own a spacer and thus cannot try to aggravate the issue either for further demonstration. This seems like a simple test to perform once you have the lens, the dome and a collection of spacers at your disposal. It is unfortunately not helpful if you are trying to figure out what to order. But perhaps with the help of friends or at a workshop this can be of interest. Certainly my representation of the physics here is oversimplified, certainly there are many more things to consider - I am not claiming to be a specialist. But experiments don't need to be absolutely perfect as long as they are informative and useful. Publication: Mengkun She, Yifan Song, Jochen Mohrmann and Kevin Köser: Adjustment and Calibration of Dome Port Camera Systems for Underwater Vision (2019), part of Lecture Notes in Computer Science, https://doi.org/10.1007/978-3-030-33676-9_6 (you need a subscription for this, but try Google with Authors / Title before you pay…)
-
Thanks Tim, much appreciated.
-
I am totally new to all this, but just received my first dome yesterday (used). Since this is a 10 cm Minidome for a pen housing I was thinking of getting a cap-type cover for it. Essentially a plastic hood that does not touch the glass of the dome. How should that be used to prevent the staining marks?
-
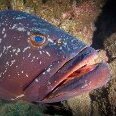
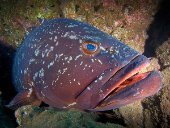
I think you have created a nice resource collection here for anyone who wants to try sharks without baiting! I agree on the dose-effect and greenwashing risks, but I suppose we can start way before the bait-box with that. Hence I would not want to break into an ethical discussion because someone publishes a respectful (!) picture of a shark that has been baited; this may have been a minor contribution to the total impact of the journey. I throughly enjoyed a dive with big groupers on Madeira this summer, although they were clearly way more accustomed to divers than they should be. Whatever their routine may be, or have been in the past - it is for vacationers like me. And it was a cool photo opportunity! So I‘m not that much „better“, if at all.