

-
Ooh, that's a good question. I wouldn't think so as the for the vacuum to be able to pull on the inner lens block the latter would have to be sealed to the lens housing and I don't think it is. So, the vacuum can "sneak in", and can act all around it and pull in all directions and thus, it shouldn't move. At least, that's how I see it.
-
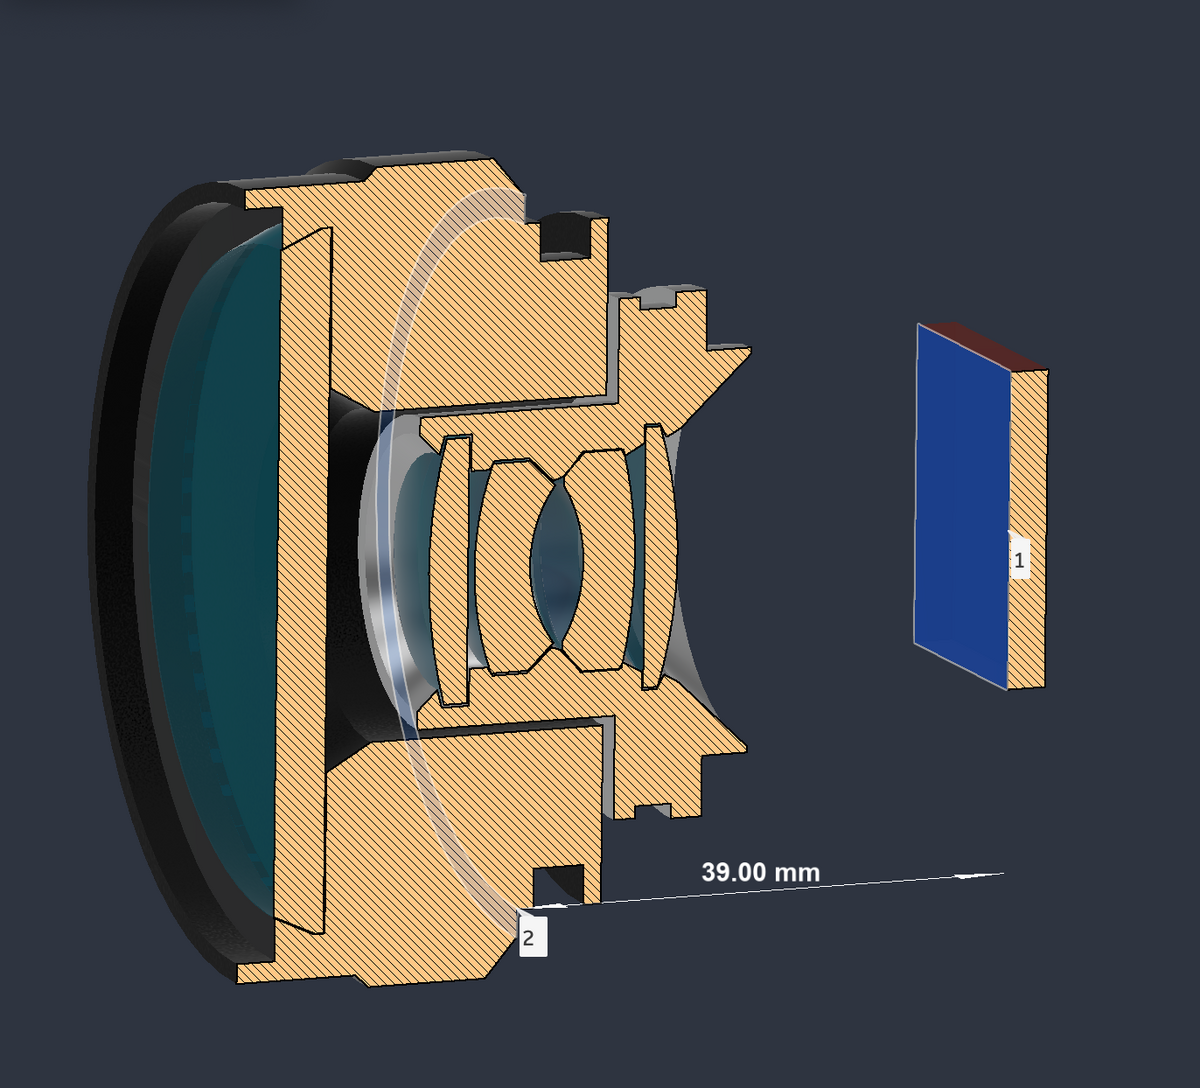
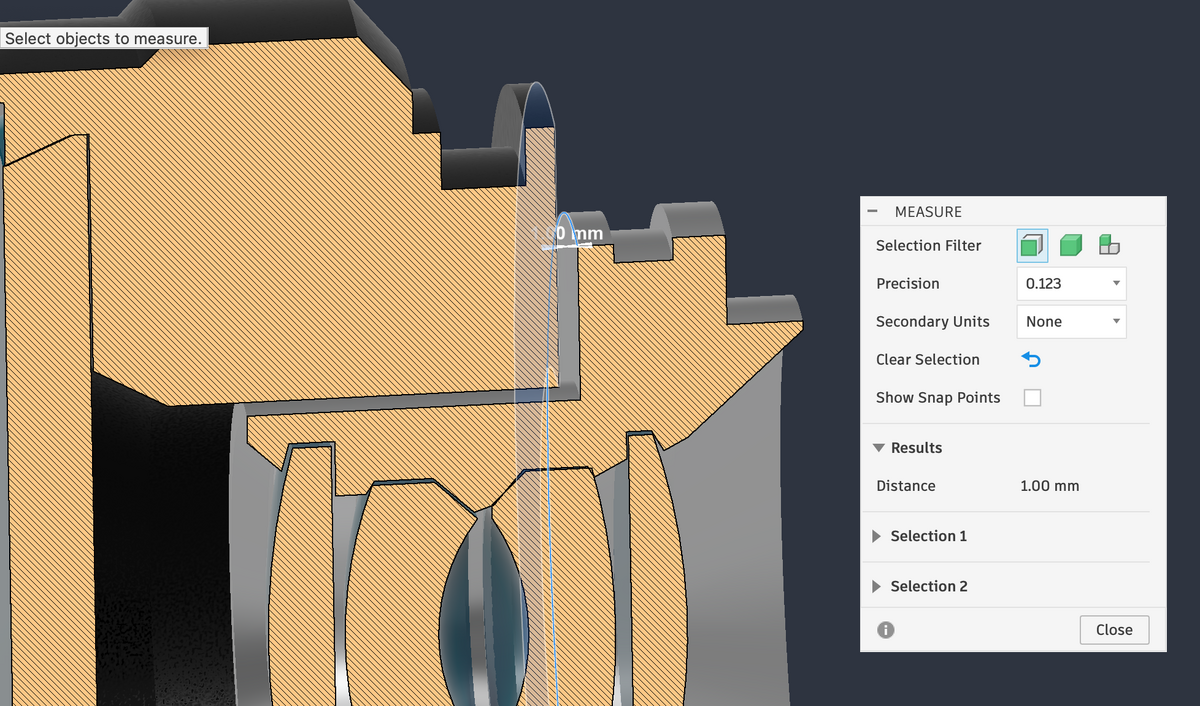
For The Visual Learners (Aren't We All) To the best of my ability and tools, I think these are the dimensions: And I reckon they were aiming for a 1.0mm nominal pull out of the spring loaded lens block when mounted:
-
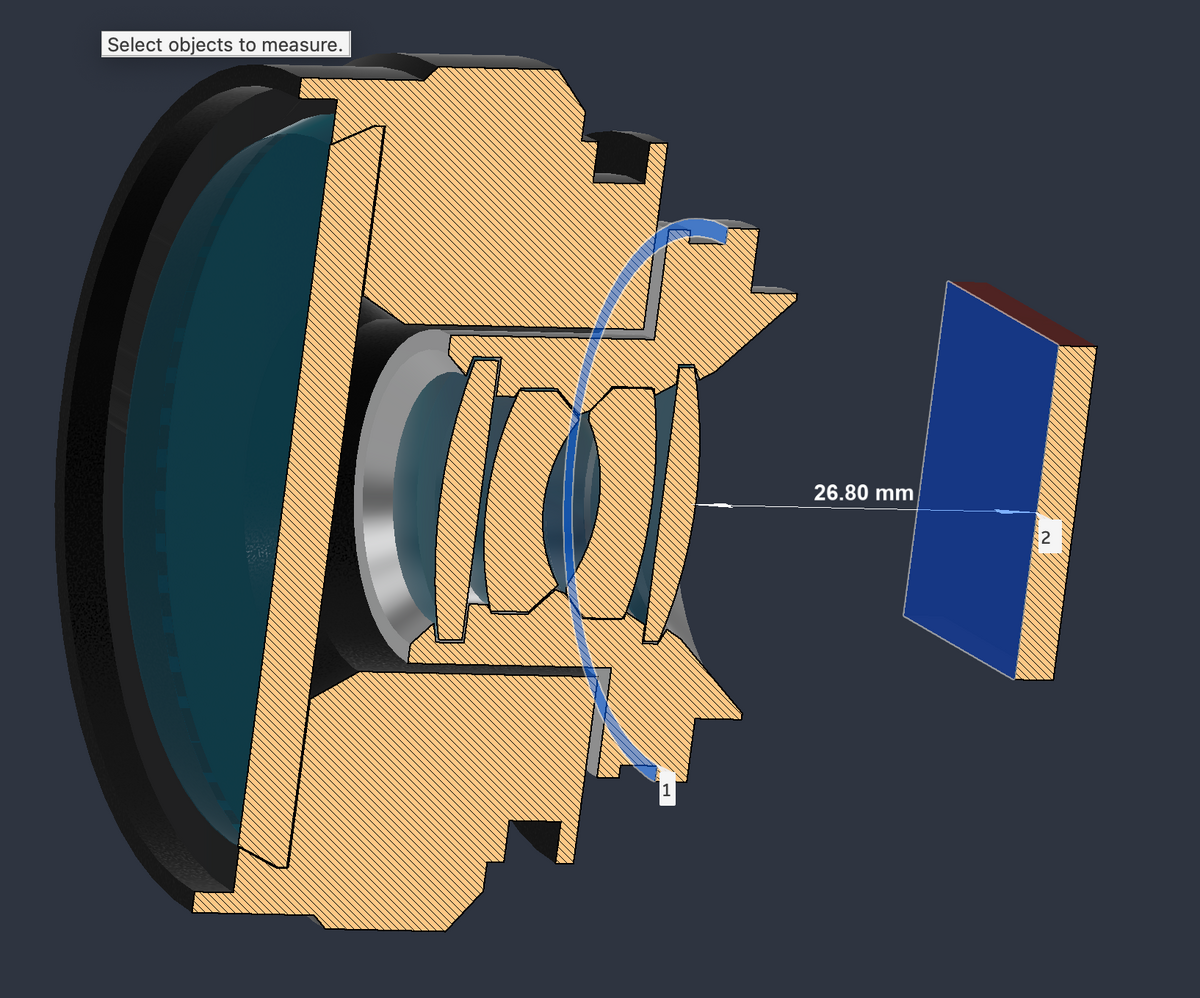
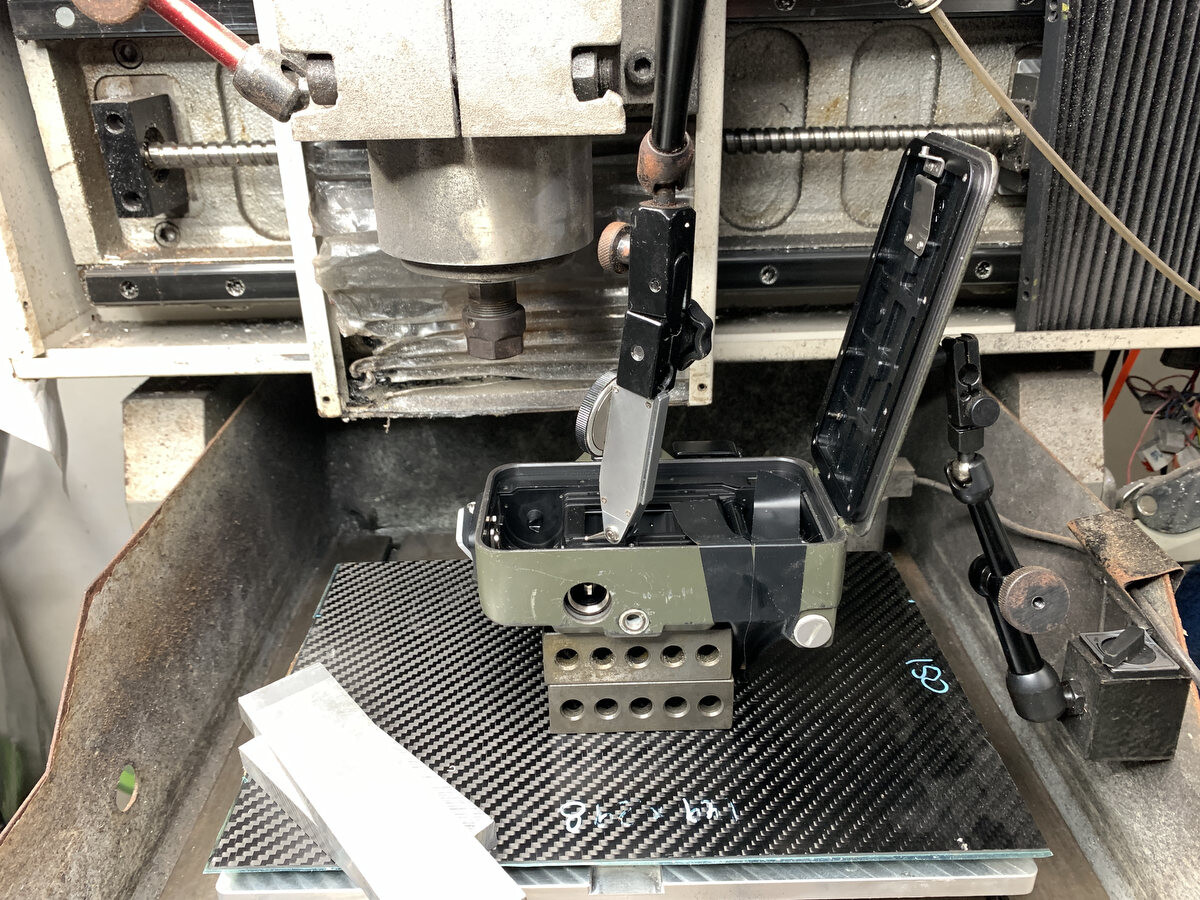
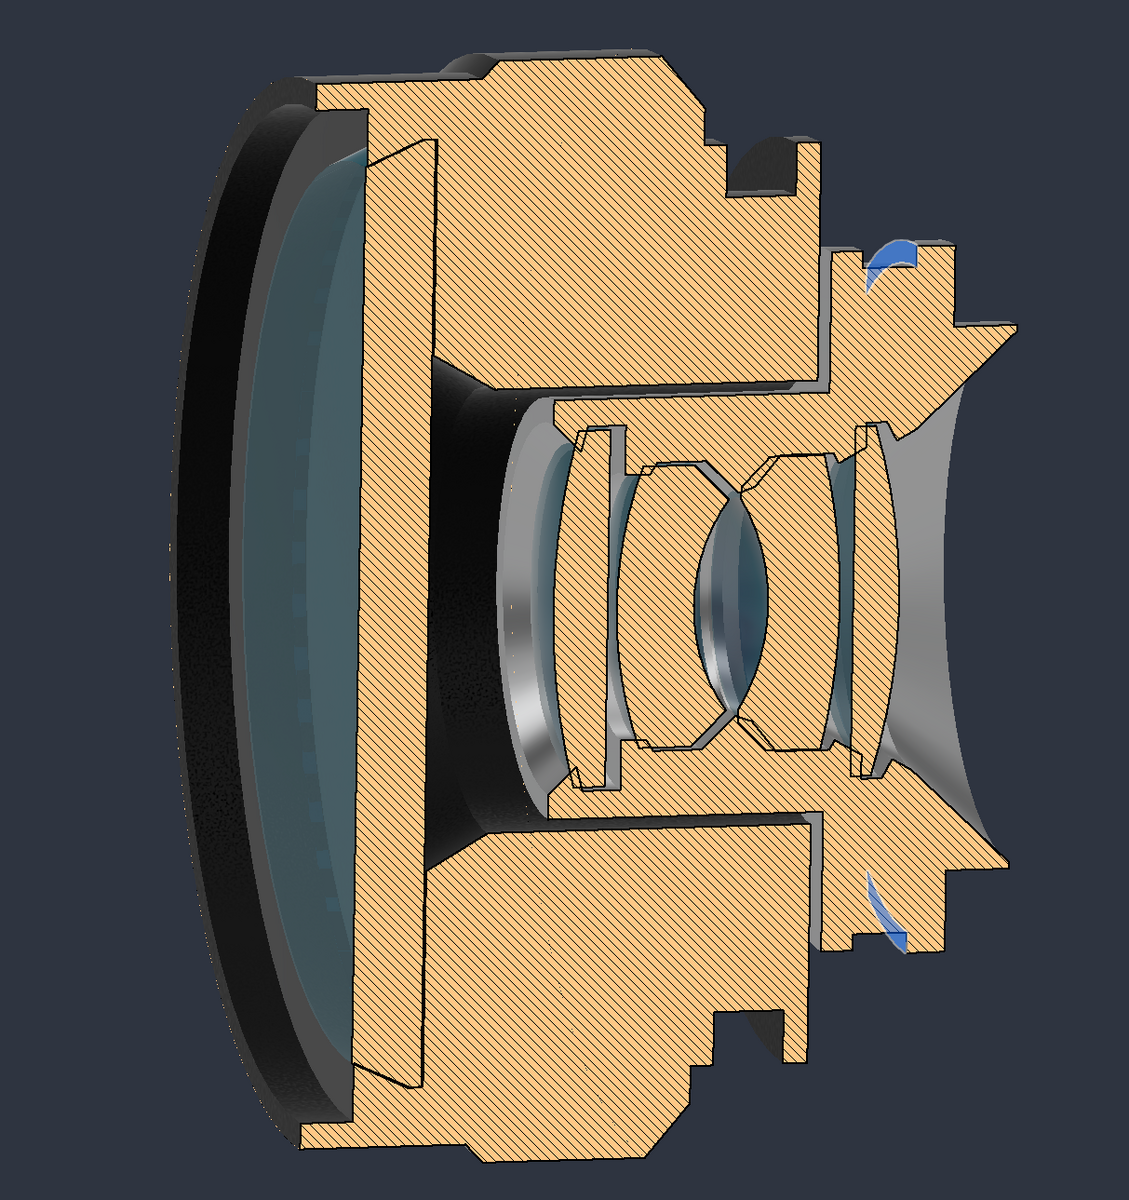
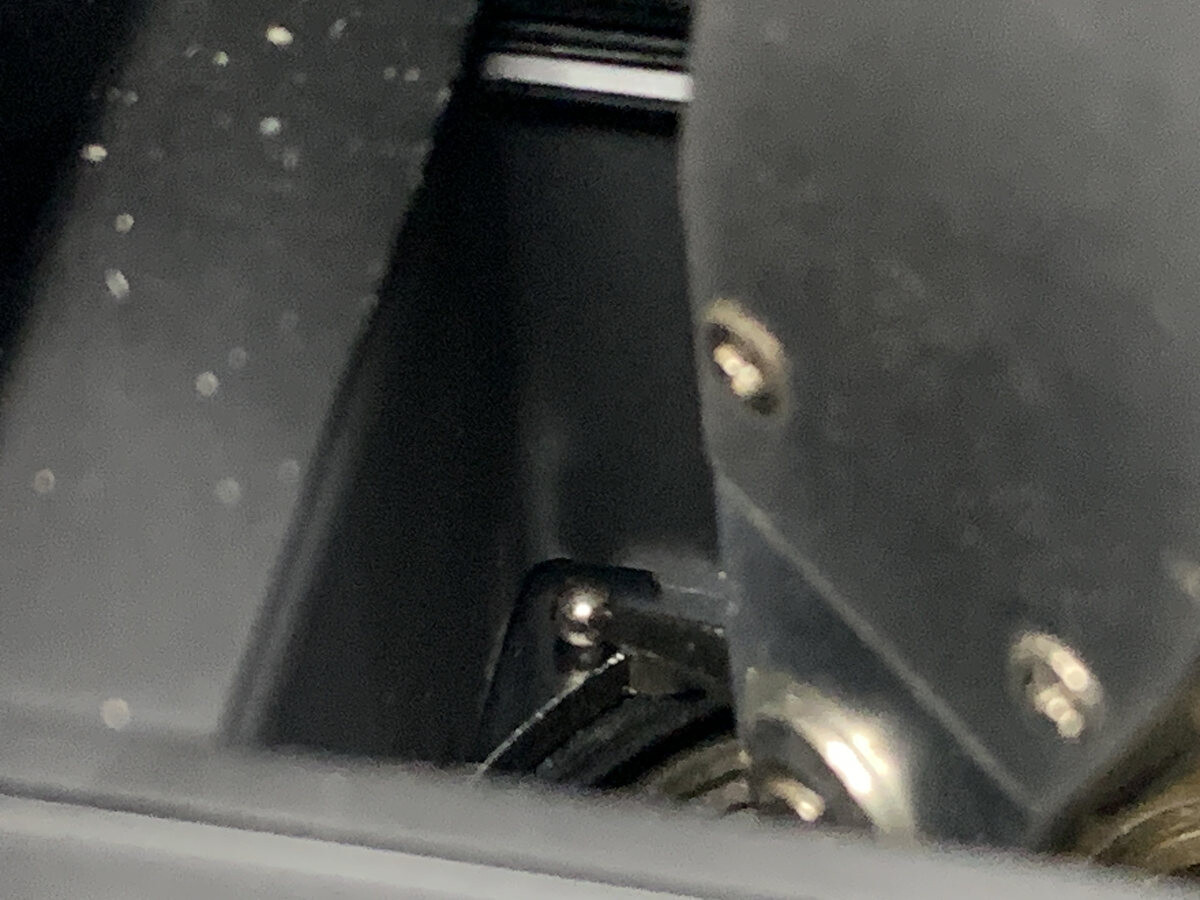
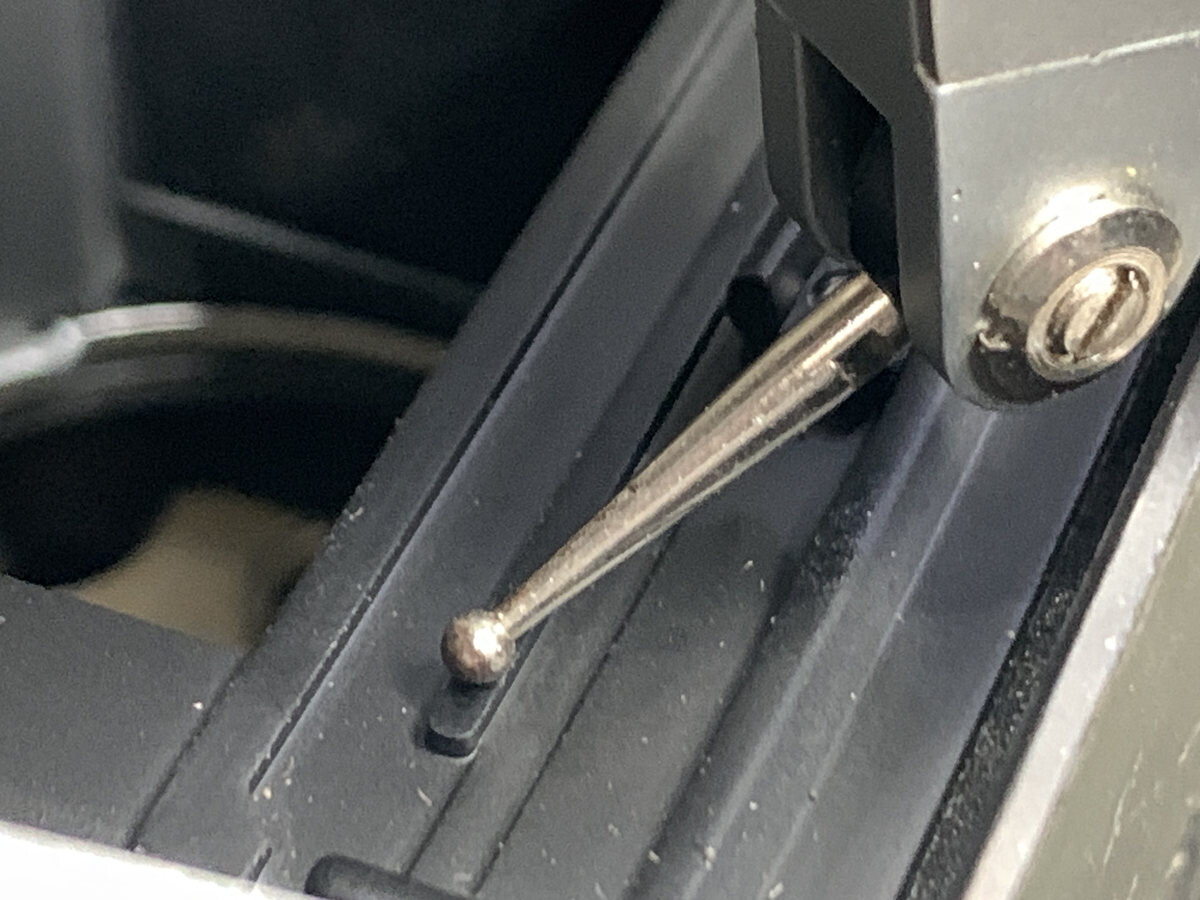
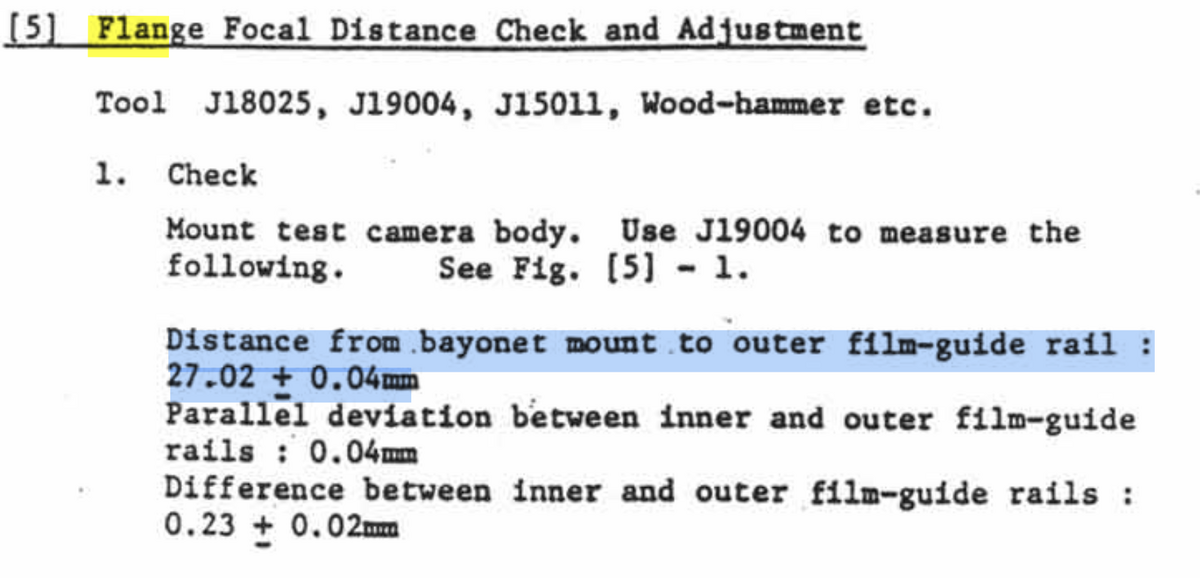
I Cracked It - The Real Nikonos Flange Distance! (It was there all along, though...) Some more precise measurements and some more detective work and we are getting there. Get ready for another ride on the topsy tervy nerdy roller coaster. First, another correction. I stated in an earlier post that the film pressure plate should sit right up against the film plane. This is not true, I just never knew or noticed on any of my older film cameras but in fact the film pressure plate rests on rails that sit higher than the rails for the film creating clearance for the film. These are often referred to as the inner and outer film rails - the inner ones being the ones the film emulsion rests on. This will become important later on. (It also means that my own previous measurements and most everybody elses down through the throat onto the pressure plate are flawed). Anyhow, let's get on with it. I taped the shutter open on an older Nikonos V (in Bulb mode) and sat it on my dirty but fairly accurate CNC: I stuck a dial test indicator on the Z-carriage so I could use the machine as a poor man's CMM (Coordinate Measuring Machine). and yes, I was about to cut some CF plate and didn't bother to remove it for this test but the body was square and level enough;). I decided to measure from the inner film gate rails as that's the real film plane down to the back side of the steel bayonet flange. And I think that's fair as I showed in the previous post that that's really where the locating happens for the inner spring loaded lens block. In other words, I am measuring from the flange that's blue shaded in this rendering and then to the film plane: (I am just not measuring the lens itself but rather the side of the steel flange that would butt up against this blue flange on the lens). On a crappy iphone pic it looks like this - that's the back side of the steel bayonet with the DTI touching off on it: I repeated the measurement three times and got three identical readings of 26.812mm. And then I measured the height difference between the inner and outer rails: And the outer rails sit 0.228mm higher than the inner rails - or 0.228mm further away from the film plane. Which is why I say that all of us who have measured from the front of the cam to the pressure plate should really subtract 0.228mm from our measurements. Now, this is where it gets interesting in a roundabout way. I went to an older Nikonos IV Repair Manual and lo and behold, they state a Flange Distance dimension of 27.02mm (+/- 0.04mm). So, you would think that my 26.812mm is a bit off from that and way out of tolerance but... the repair manual states that the 27.02mm standard is "Distance from bayonet mount to outer film rail". The kicker here being the "outer film rails". In effect, their flange distance standard is not measured to the actual film plane but to the film pressure plate. I speculate because it's easier to check for a technician this way or their tool for doing so was just made that way. Anyhow, it means I didn't follow Nikon protocol when I measured to the inner film rails and I should add the 0.228mm height offset I measured between the inner and outer rails and if we do that we get (26.812mm + 0.228mm) = 27.04mm. Which is 0.02mm from the standard but within tolerance. BUT more importantly, it also means that for anyone wanting to do an adapter, the real number they should try to hit is ~26.8mm from the sensor to that blue shaded flange in the rendering above. And the number was there all along, hidden in the old manuals. Not very clear as they don't show which side of the steel bayonet they measure to and there's that quirk of them not actually measuring the real flange to film plane distance. But they even state the height delta between the inner and outer rails (though again, it's not clear they are talking height). They state 0.23mm (+/- 0.02mm) and I measured 0.228mm so I am definitely within tolerance. Now, if we just use those numbers from the manual, they also back up my measurements as 27.02mm - 0.23mm = 26.79mm and I was at 26.812mm;) If we play around with the stacked tolerances of both those measurements in the manual we get a range for the real flange distance of 26.73mm-26.85mm. The last thing to settle is the exact distance from the film plane to the very front of the alu flange insert. And also how far out the lens block was designed to be pulled out of the lens housing when mounted. For now, I speculate it's nominally 39mm to the very front and that the pull out is 1.0mm (maybe +/- 0.1mm).
-
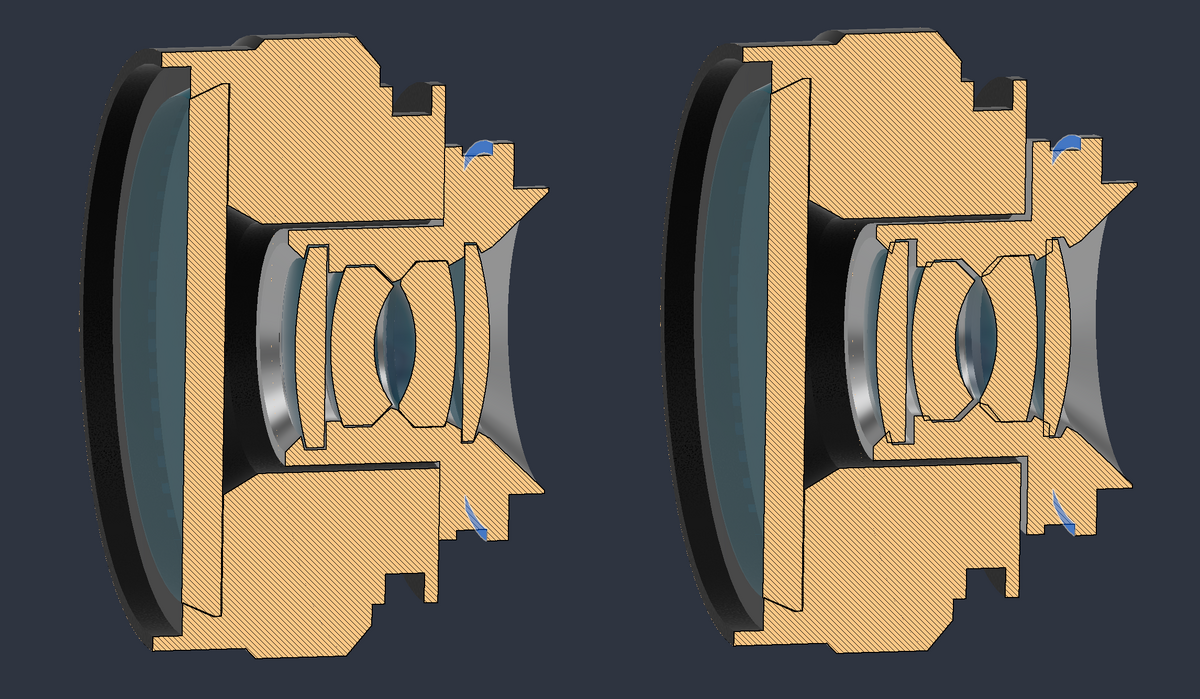
Sorry, I was Part Wrong - More Confusion Ahead... The following is probably only interesting for anyone wanting to make their own adapters or aiming to rehouse these lenses: I always knew the Nikonos bayonet was spring loaded. You can pull on a lens and pull it away from the camera body by a few mm or even see a heavier lens sagging a bit on land. I always assumed that the spring mech was located in the body but just today, I realized it's actually in the lenses. Which kinda messes a bit with trying to settle the "debate" on a flange distance standard, haha. I made a bit of a simplified CAD drawing of a Nik 35mm to show what's at play here: The whole optical block is what's spring loaded and can move in and out. When at rest, when the lens is not mounted, it's pulled tightly against the "front lens body" and it really seems like the lens body is just one piece. But pull on the bayonet flanges of any old manual Nikonos lens and you can pull the optical block a bit out - as illustrated in the second pic above. There are two small steel flanges inside the body which the lens kind grabs a hold off and then pulls itself towards the body by. But I haven't yet been able to measure the offset between those steel flanges and the reference we have all been using so far (the alu flange insert). I have no idea if the optical block is designed to be pulled out by 0.25mm, 0.5mm, 1mm or even more. But it does mean, that the shiny steel flange in the body is probably what we should really try to be our reference. As well as the offset to the front of the alu insert in the body as explained in the previous post. The latter decides how far off the front of the internal lens block the "built in port" sits. Probably not important on the 28/35/80mm which are flat but it may matter on the domes of the 12/15/20mm.
-
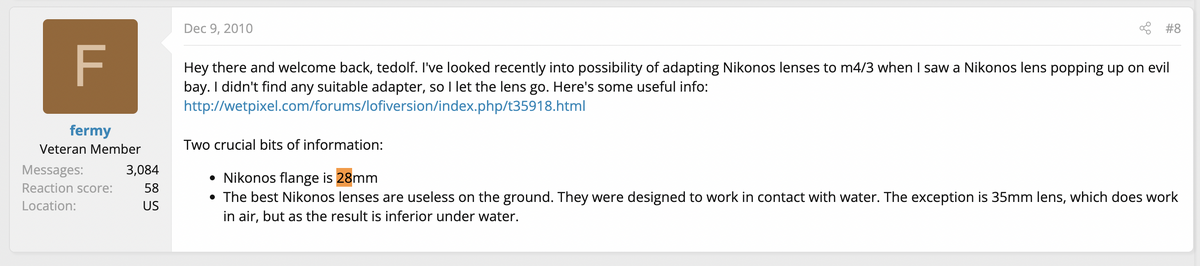
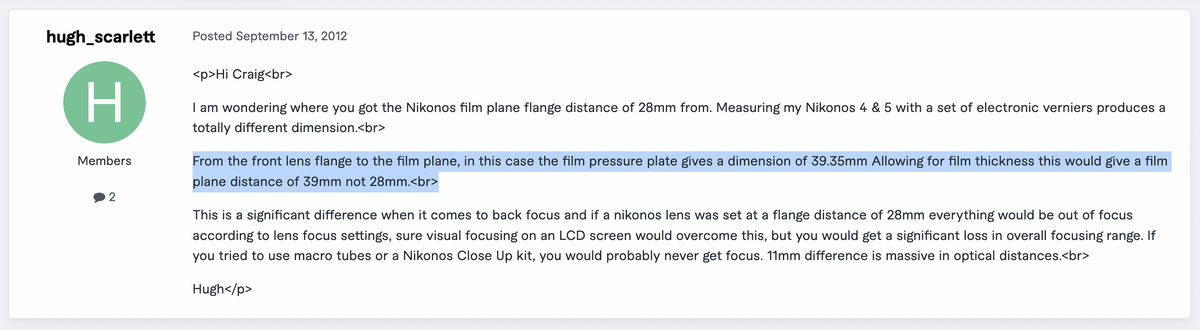
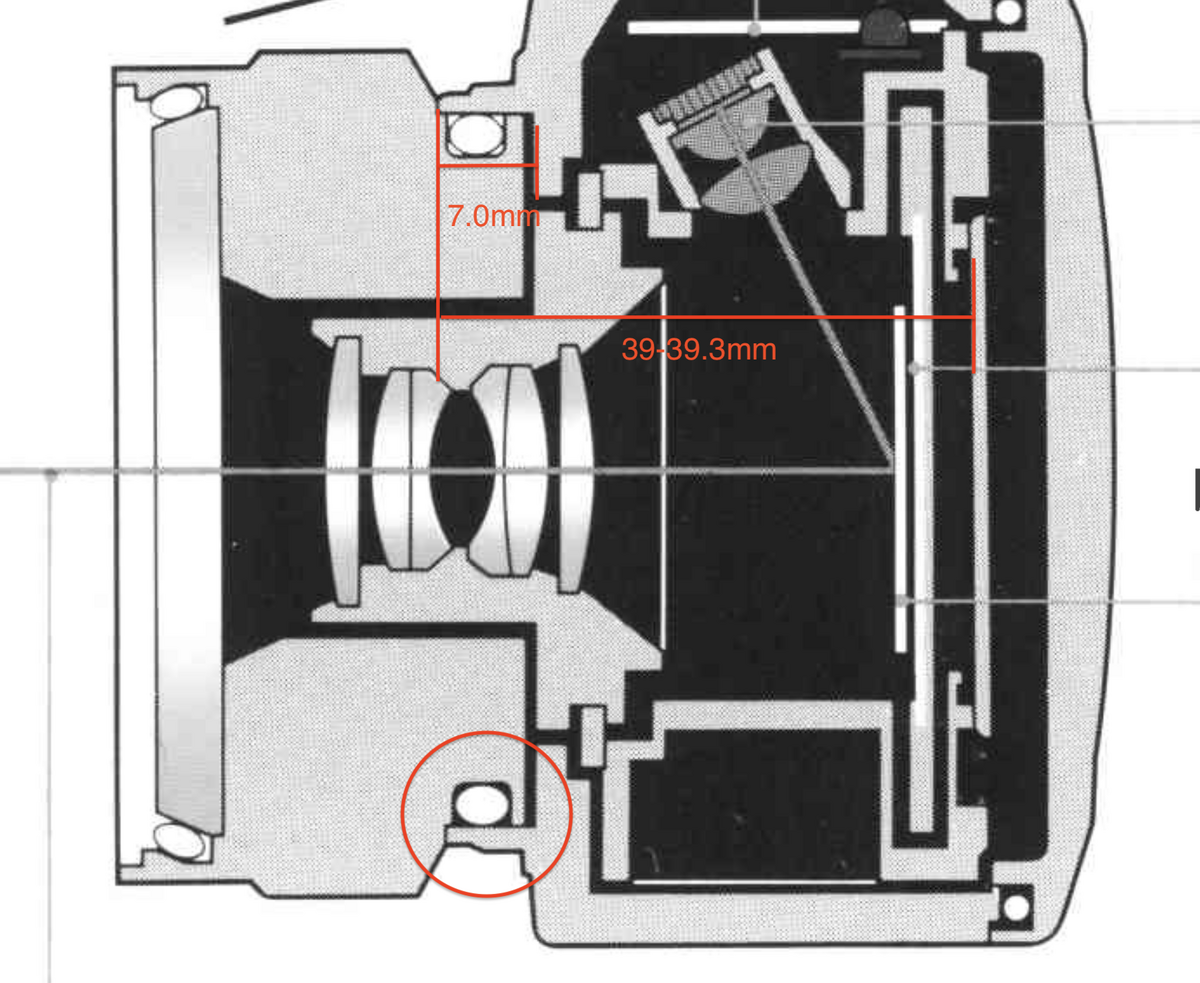
Apologies for beating on an old, dead house but since I am in the research phase on everyhing Nikonos and particularly the Nik 15, I came across this post and wanted to help settle the flange distance debate;) This will get nerdy, hang tight if you're into that kinda stuff;) History... Let's start here: So, @Tobyone quoted the (infamous) 28mm which makes sense as it's been popping up online as far back as 2010, it seems. We may even have an old post on Wetpixels to blame for it, but I can't find it right now. However, I did find a 2010 reference from another forum: No harm done as Toby soon realized that 28mm didn't make sense. So, he checked himself: Furthermore, @Isaac Szabo weighed in with a similar distance: And I just redid Toby's simple caliper measurement on a Nik V of mine. I got readings between 32.3-32.4mm so maybe pressing a bit more on the film pressure plate, but again, we are in the same ball park. (I don't have a proper height gauge but will try again more carefully in a few days). I also found this old post: I don't agree with him accounting for film thickness as without any film loaded, the pressure plate should be sitting right up against the film plane. And if, pretty big if, he was to account for it, the normal number used for film thickness is 0.15mm, not 0.35mm. So, he would be at 32.2mm - for practical purposes identical to Toby's 32.18mm. Anyhow, it's one more data point and if we don't account for film thickness it's one that's almost perfectly in line with mine. (I was at 32.3-32.4mm) So, I think we should call bull on the 28mm and never mention it again;). The real number is indeed 32-32.35mm. (I think...) A New Standard? Now, here's where it gets really nerdy. We may all have been talking about the "wrong" measurement. If we look carefully at this cut through of a Nikonos, we see that the lens doesn't actually rest on that flat face (the one held in place with the three screws) but rather on the slimmer front area of the "walls". In other words, that alu insert that the Nikonos bodies have, we are locating on the very front of it, not the face a bit deeper. You can see there's a gap between that flange face we have all been referencing because the lens actually rests on the front of that "wall". I estimate the gap to be around 0.25mm. So, maybe the real Flange Distance for Nikonos should be called 39-39.35mm and not 32ish mm. Now, that's more a question of definition. You can use which ever reference point you want as long as you don't use 28mm anything;)
-
That's some nice and surprising news. Thanks for sharing:) Whilst the Gen 2 lenses are still very affordable, the Gen 1 tend to be even cheaper. I just bought two Gen 2s (a flooded one to take apart and another in decent shape to actually use) but if I can find a really good deal on a Gen 1, I will grab that one, too as it's even lighter and would be less draggy, too.
-
The only thing I can really add is that for years - for photojournalism on land - I have not cared about mega pixel count, number of AF points or how absurdly many pics per second I can fire off. Since pretty much the first A7 or Canon 5D2, I have only ever wanted more dynamic range and clean high ISO. Then again, my type of needs don't drive sales at all. MP and AI AF features do. But it's welcoming that they are finally getting to it.
-
Amazing! And amazing timing as just yesterday I was trying to search Eric's earlier wiki but I couldn't get into the old threads that way - with this, I can. Thanks so much for the work:)
-
Hi Fotosub, You're the only one I can find that has actually tried both the Gen 1 and Gen 2 of the 15mm lens. So, perhaps you can help settle a "debate" or at least my own curiosity;) On one hand, I know the Gen 1 will need the focus and aperture knobs reduced in size to clear the adapter but on the other, I don't know if the lens design of the Gen 1 leads to image quality issues as Tom speculated here that it would? I had the same assumption as Tom, vividly remembering how utterly disappointed I and a lot of my fellow land photographers were with the early Leica digital M bodies. But since you have both, can you tell us is you see any corner issues using the Gen 1? Could be heavy vignetting or cyan-magenta color shifts.
-
You're welcome:) It was just stuff from my notes, picked up in my research and some probably from here or Wetpixels. As for the adapter working on Gen 1 lenses, Fotosub mentions in the 15mm thread that Gen 1 works but you will have to reduce the diameter of the knobs to make them clear the adapter.
-
@Eric Cheng Thanks SO much for this! Now, maybe not a bug, maybe just not possible but it seems I can't search that deeply. E.g. I am trying to dive into the Nikonos system and particular the 15mm but whilst a general write-up does turn up on a search, none of the foot notes are clickable and I think many of those are old wetpixel threads? Here's where I was taken after my search. But can't get to the real meat in the foot notes https://wetpixel.echeng.com/gear/nikonos-system/#fnref-51
-
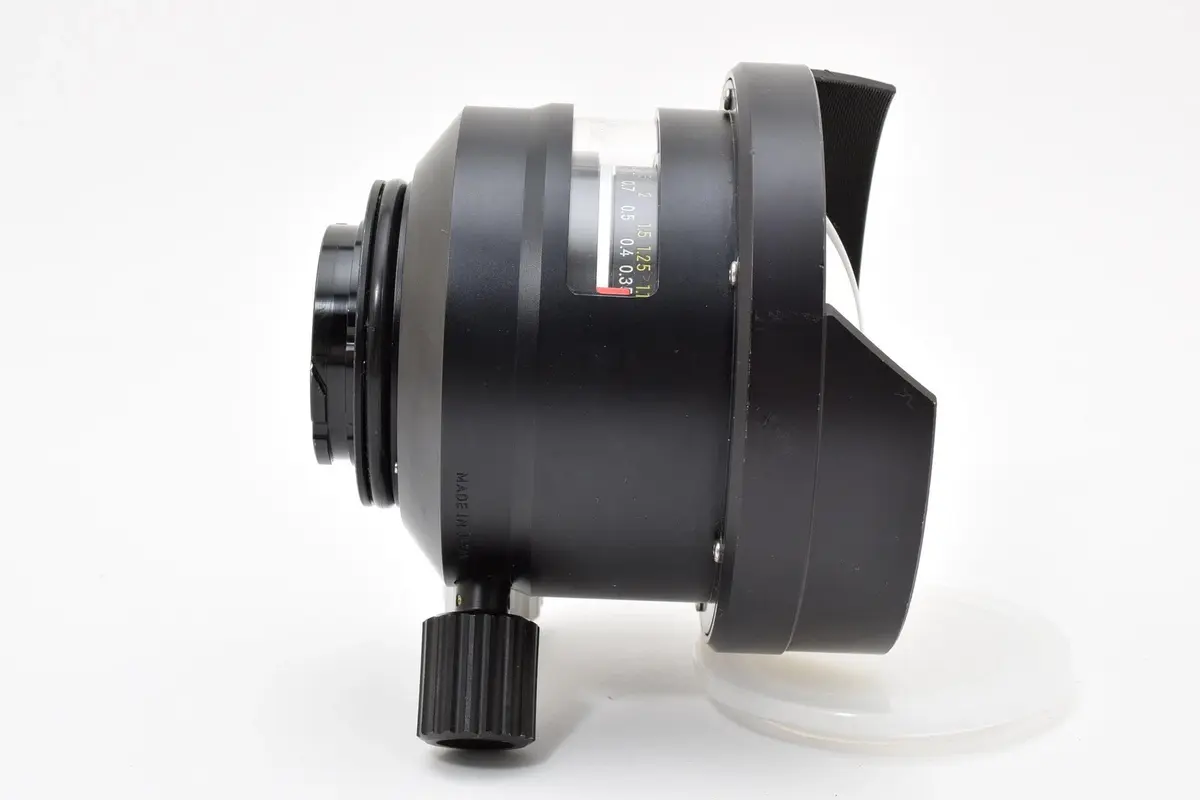
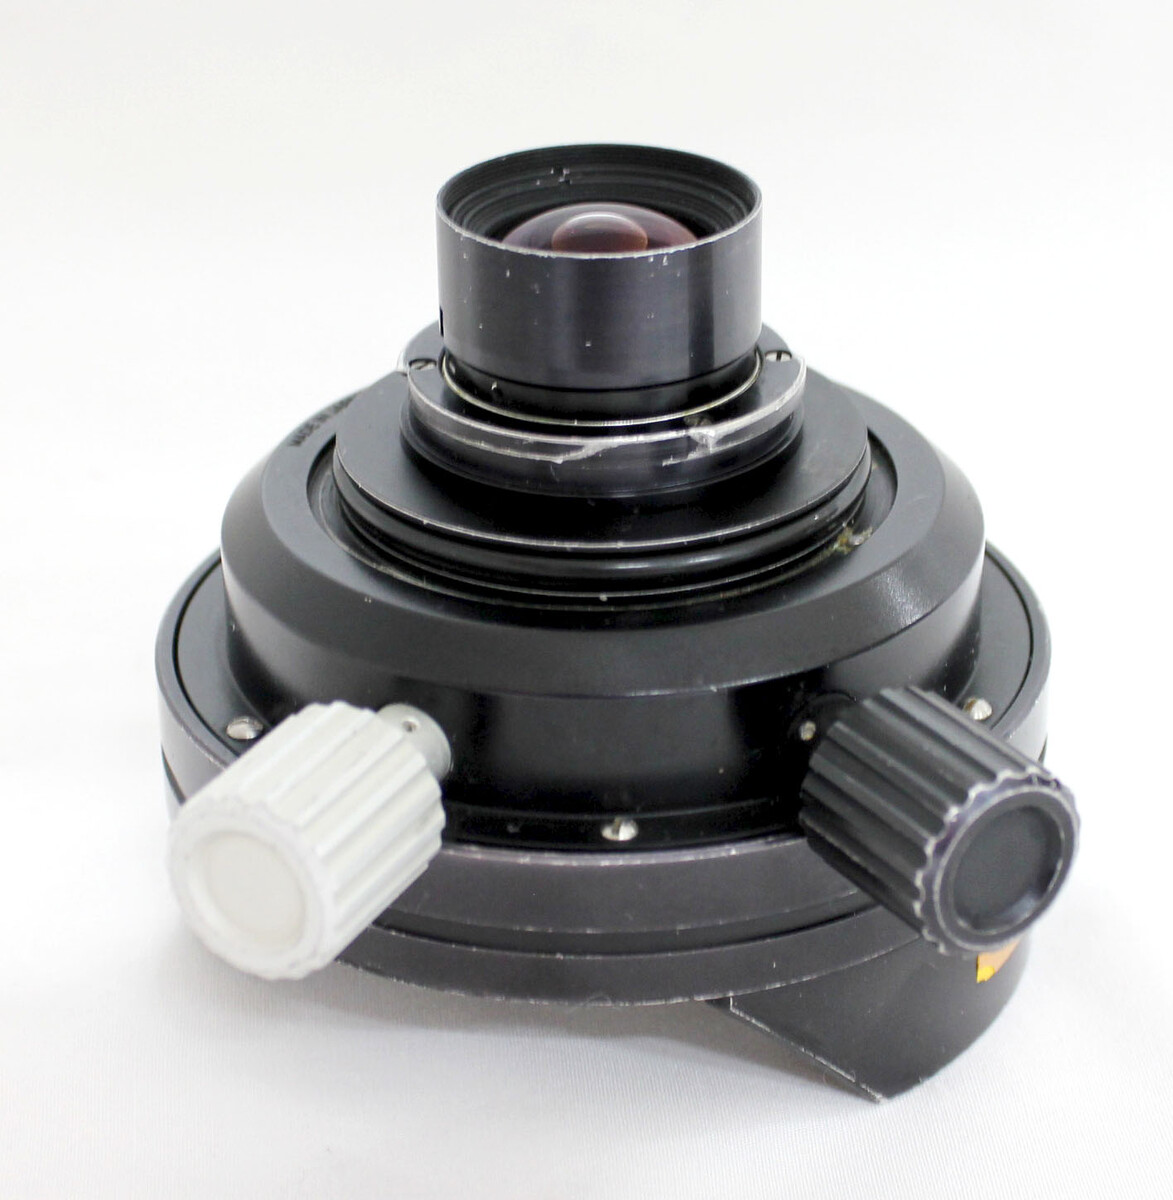
As far as I know and this is just info I have picked up elsewhere: The real telltale is that Gen 1 has lens elements protruding rear of the mounting flange. It's quite substantial. Gen 2 does not. The change was made when Nikon went from the Nikonos III to IV as the latter had TTL and the light reading sensor is pointed back towards the film plane and the Gen 1 lens would block the reading. Here's a Gen 1 lens: Versus a Gen 2 which ends at the bayonet: Also, Gen 2 is supposedly quite a bit heavier. 600-something grams vs. 300-something for the Gen 1. As for serial numbers, anything above 200000 is supposedly Gen 2. In other words, if your serial starts with 1, it's a Gen 1. To me it also seems that Nikon, at some point, may have started fresh at 300000 so perhaps a small Gen 3 upgrade exsist but I haven't found any writing on that, yet. Now, whether the stickout is an issue on modern mirrorless bodies I have not seen a definitive answer on, yet. To me, there are two things at stake here: First, does the lens block the light sensor like it would on a Nikonos IV/V. Not on a Sony A7 series or other modern mirrorless as they use the image sensor itself as the light meter, so there's nothing to block. So, we should be good on that account. The second one is more nerdy. But having the rear element very close to the sensor means the light rays exit at much steeper angles to reach the outside edges/corners of the sensor compared to a lens that sits further from the sensor. Not an issue on film which absorb light even at these angles but digital sensors are really bad at it and you (can) get really bad vignetting and pretty nasty color shifts. This was a huge problem on early digital Leica M bodies. But because Leica has a large back catalog of lenses that also sit "deep", they worked on different fixes - something to do with tilting the microlenses that sit on top of the pixels to better "catch" the light. But it's my understanding that neither Canon nor Sony had to do this. Starting from scratch, they didnt't have lenses needing it and they supposedly optimize modern lenses to have the light rays exit as close to perpenducular as possible. Even for wide angle lenses. All this to say that the real issue with a Gen 1 may be muddy, color shifting corners and multiple stops of vignetting. But it's speculation on my part. OH SHOOT - I thought we were in the 15mm thread. Sorry! @waterpixel if you wanna post over there, I will move my reply, too or perhaps an admin can move these last two posts for us.
-
Oh, that's a real pity. I was considering putting in a low offer and just taking the chance. But if he doesn't accept a lower offer, I don't wanna blow USD45 plus shipping just to have a paper copy of what we already have here...;) Perhaps, @ianmarsh can be pursuaded to see if he has the Gen2 version, too? I already tried to search Eric Cheng's Wetpixel library but either I did it the wrong way as I couldn't get into the older topics only an AI generated write-up on the 15mm subject.
-
Thanks for sharing - it's likely those voids I managed to push epoxy into under fairly high pressure. I can only imagine how much time it took you to get to a working recipe. Took me long enough back when I tried - and I still had to go with the resin. Good luck with the 15mm. I just found a cheap Gen 2 in Asia in decent shape. If I buy it, it means I now have to make the housing for the camera. That's how the universe works...;).
-
I agree the PDF attached above looks to be for the Gen 1 of Nik 15. If any of you are still looking for the newer one, there are two manuals on eBay for USD 45 BUT you'd need the vendor to share a page showing which model it's for as the listing doesn't say. Search for "Nikkor 15mm UW Repair Manual"). Servicing Nikonos BODIES (Just In Case Someone Gets Nostalgic) I have been scouring this forum for Nikonos posts as well as elsewhere and I will jot down some additional info. Sadly, only for the Nik V body, nothing on lenses, yet. Someone "mapped" most of the body o-rings (they are pretty common. I think the 1.9 section size might be a japanese series, but still available). Also, it's almost a full tear down with great step by step pics. There's a downloadable cheat sheet, too. He has a write up on the IV on his site, too. Also, a youtube video to show a bit of servicing of a Nik V body. There's a Facebook forum for Nikonos and Nik Rs that seems to have some knowledgeable folks. There's also a full Nikonos V Repair Manual on Scribd. You can get it for free under a 30 day trial with two free downloads but they still want your credit card number for a subscription. You could just give it to them and block it right after your two free downloads or set up a virtual card and delete it... A note on o-ring sizing. I can't guarentee that the ones in the first link are all correct. What I would do and intend to do myself is to measure both the o-ring groove geometry as well as the old o-rings. That way, you can do some sanity checks as static o-rings are most often designed to have a compression of 20-30%. So, by measuring the depth of a groove you can check it against the supposedly correct cross section of the o-ring and see if it makes sense. And then check the width of the groove, too to make sure there's enough free space for the ring to actually expand into. It's pretty simple math once you start. But both Eriks and Trelleborg make good online calculators for this sort of thing - I have used them both a lot in the past. But let's finish on an example. Without having my Nik V and calipers at hand, if that main rear door o-ring is 3mm in cross section, I would expect to see a groove depth of about 3.00 x 0.75 = 2.25mm for 25% compression. If the o-ring is stretched a fair bit, that thins it out and results in less compression. And then I'd like to see close to 4mm width for a 3mm o-ring to allow it free space to expand. I would do this with all the grooves. And I will, just give me some time, haha. Will get back here with findings once we get there.