
Everything posted by TimG
-
Great to have you with us. A warm welcome to Waterpixels. There would be a lot of interest in how you get on with a Nikon Z8!
-
Have you tried the 1 core with the Retras set to TTL? I don’t use TTL but I’d be intrigued to know how that works with non-613.
-
Hey Bill i was going to suggest option 2. Last time we did this the cable arrived on a huge cardboard drum. if we went with option 2, it be great if you could unpack it and just coil it into a Jiffybag. If you ship it to me, I’ll cut, repack to individuals for shipping in the EU or U.K. For Stiebs, I’d happily ship to Oz, but bear in mind, the consignment would have got hit entering the EU for taxes etc. Postage to Aus would then be added on and, I guess, Aus import duties too on arrival Down Under. It could get very pricey. Unless Bill would be happy to go with his option 1 and ship one batch to EU and one to Aus.
-
The only time I’ve used high frame rates was during a dive where there were multiple dolphin pods shooting around. Totally agree on the “careful framing” but for this dive that was near impossible. But then I didn’t use strobes anyway!
-
I don’t mind organising the distribution in the EU and U.K. I did it last time. But I can’t do anything before the middle of the month. Many thanks to Bill for his offer of help - which he’s done kindly before too. I suggest anyone wanting cable repeats their order now setting out exactly how much they want and the final country for destination. It’s hard to be exact on price until the goods arrive and we know the full costs including taxes, handling etc. Based on the US total cost of about $9 a metre, I’d guess that cable shouldn’t cost more than, say, €20 a metre. But that’s a guesstimate. When the time comes I’d ask people to make payment to either my U.K. or NL bank account. I’ll set out all the costs and calculations.
-
Guys, I’m traveling at the moment and back in about 2 weeks. I’d be happy to sort this out with @bvanant when I’m back but can’t at the moment. If anyone in EU would like to step in, then by all means. Please do bear in mind that with shipping, import duties and, doubtless “handling fees” the final cost could easily be doable the US list cost. If someone has a bit of time, could they research the Asahi FRG office angle?
-
Totally agree with all that, Michael - thanks. Another addition is the an old-fashioned fishbowl mask. Great for showing the model’s eyes. They can be found in some dive shops. Au Vieux Campeur were selling them in Paris.
-
Whenever I’ve asked them a question they’ve just referred me to the costs listed on the website.
-
Argh! At the moment no one else seems to want fibre cable so no plans for a bulk order currently. Sorry, Michael. It seems odd to me that we can’t find it in Europe. Anyone know why?
-
Thanks! We can take a look at this. I think the general idea was on Classifieds so that a seller couldn’t make a sneaky change. But a move to 24 hours seems reasonable to me.
-
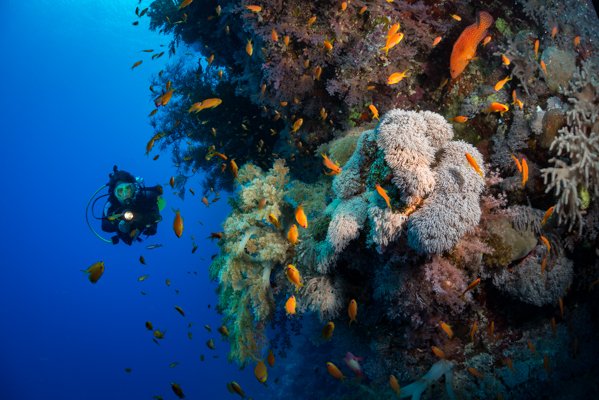
If she’s asking in more general terms as to how to improve images based on this pic, I’d say think a little more about composition and framing. As Chris points out, the hydroid is in the way. So she could have moved to the right, moved a bit closer and maybe gone for a portrait shot rather than landscape. Using the rule of thirds, I’d have been tempted to try and get the eye in the upper third, left intersection - and shoot slightly upwards. The more the shot would be up, the more dramatic the image. If she has a snoot, use that for the lighting.
-
It’s the hope that kills you. Just don’t hold your breath…..
-
Totally agree. Who contacts a specific individual out of the blue with specific gear? Beware!
-
Yay! Nice job! Doncha love those Teams meetings. So productive.
-
I use 12:1. So (36cms minus a little bit for the connectors) x12 Bon courage!
-
Lovely shots, Chris. I really like your lighting style and the shallow depth of field in the frogfish shot.
-
..... who, she tells us, is an avid reader of Waterpixels......🤣 Briliant!!!!
-
.....not to mention how you cut the fibre optic cables..... (Lesson Learned: not scissors!)
-
@ChrisH Chris, would you be prepared to reveal which triggers have failed on you? At the risk of tempting fate, thankfully not something I’ve ever had with a UWT trigger since I got one for a Subal housing in 2017.
-
Wow, cracking image of that jellyfish.
-
Hi Assist91! Welcome to Waterpixels. It's great to have you with us. We hope you like the forum and look forward to seeing some of the work you've done.... do post some samples! Best wishes
-
Wouldn't disagree at all, Diggy. I thought my 1988 Land Rover was wonderful. Then I drove a 2018 Ford Ranger..... Both got me from A to B. 🤣
-
Agreed! I should report though that I needed it with a strobe some years ago that just would not do a firmware upgrade correctly. Oskar and the guys were terrific. We had several WhatsApp calls (a couple on a Sunday) in response to my email outlining the issue. Retra gave me a firmware workaround which kept me going temporarily and asked that I send the strobe back as it proved impossible to fix remotely. The repair was turned around very quickly and sent back to me - problem solved. I was genuinely impressed.
-
Guys, this is all getting a little futile now.... can we just move on?
-
Great to have you with us, Sam. A warm welcome!