Leaderboard
-
TimG
Super Moderators144Points1,621Posts -
.jpg.c5e6bd876847a2be9e8f7ad68dd32d7c.jpg)
Davide DB
Super Moderators66Points1,461Posts -
fruehaufsteher2
Members29Points336Posts -
Giancarlo M.
Members26Points74Posts

Popular Content
Showing content with the highest reputation since 09/11/2023 in Articles
-
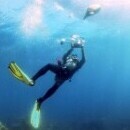
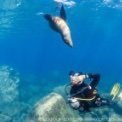
 While I am mostly a wildlife/nature photographer, one of the most interesting books on photography that I have read in a very long time is "Magnum Contacts Sheets" - link below (and no, I don't get a commission if you buy it 🙂) https://www.amazon.com/Magnum-Contact-Sheets-Kristen-Lubben/dp/0500292914 This book shows the contact sheets of the photos taken by various Magnum photographers in trying to get their shot. It provides an absolutely fascinating insight into the mindset and creative process followed by some of the best photographers in the world. One of the biggest take-aways for me was the degree to which these photographers "work" the subject, in terms of exhausting various angles, perspectives and compositions. It took a lot of waiting to get the fusiliers aligned just right While this may not be news to some of the old hands here at Wet/Waterpixels, this is something I have rarely seen divers do in the real world, especially those new to underwater photography. Regardless of whether they are carrying a Go Pro, a TGx or a housed system, most photographers I see will swim up to a subject, spend a few seconds composing the image and adjusting their lights, take the shot and then swim off to the next subject. While this may be good for getting clean documentary shots of the subject, the results are generally lacking a little in artistic value. Yes, I did say "artistic value". As the art of underwater photography evolves, well-exposed, sharp photographs of various marine life (documentation) have become pretty much common-place. So how does a photographer evolve his/her images to make them stand out? The next step up from simple documentation is showing behaviour/action - and while this requires the photographer to be alert and technically proficient, there isn't necessarily a lot of creative input here either: the subject does the heavy lifting in terms of making the image. There wasn't much creative input into this image other than the choice of angles - replace the tiger shark with a less interesting fish and this photo would not be very interesting The highest level of photography (IMO) involves creating images where it is the design and composition that makes the image stand out - not merely "look, here is a cool subject". In wildlife, for example, it is much harder to take a great image of an antelope than a lion - similarly, it is much harder to take a "wow" shot of a coral head or some reef fish underwater than a whale shark or manta. You have to spend time thinking about what to include and exclude in the image, how to compose the frame, how to light it, etc. etc. When it comes to artistic design, your first shot is unlikely to be your best shot - atleast not consistently or unless your name starts with "Henri" and ends with "Cartier-Bresson". It takes time to work through the various compositional aspects in order to find the best image - ie, you need to work the subject. If you do, you can be rewarded with images that go well beyond the obvious. I'd like to illustrate what I mean with an example of how I went about taking one of the shots I really like. To set expectations, I have the natural creative talent of a brick and have to take a very methodical approach to taking images. So this process may seem a little plodding to the creative geniuses out there. For the rest of us, perhaps it may be helpful. This was a coral head I came across on a dive during a trip to Raja Ampat: I found the glass fish sheltering under the coral to be quite interesting and got into position, angled my strobes, set the exposure and fired off a shot, resulting in this: Ok, it's a shot showing the coral and the fish. But there really isn't much else to redeem it. It's lacking colour and pop, and there really is no unifying theme to the image other than "here's a bunch of stuff". And most that stuff is adding nothing to the image (and would not, regardless of how great the corner sharpness was 😜). So I decided to get a little closer and see what I got. It took around 10-15 shots from various angles before I found something that looked promising: Ok, now the image has a little more pop and there are no extraneous elements. But it still seems a little haphazard. Hmm, maybe having the glass fish appear more synchronised would help? This led to a few more shots (well, 60+, actually) trying to get the pesky fish to be aligned the way I wanted. Some of them: There were quite a few other variants of the above, with the fish facing one way or another. All were pretty nice but from a design element, there was something lacking - these images were still not giving me a sense or scale of being on an amazing reef in Raja Ampat. While nicer than the earlier images, these were still simple "look, here's some fish" images. So I decided to go a little wider to see if that would help capture the essence of the underwater world a little better. Ok, now this felt better. The blue water on the other side of the coral balanced the glassfish a little more, and gave a greater sense of the reef, and I was quite pleased with the image. But then I started thinking about how all the visual elements were only on one side of the coral whereas the blue water was completely lacking in any point of interest. Some more shooting and gesturing to my dive guide resulted in this: Bonus points to the coral grouper for a serendipitous appearance This (to my eyes, at least) felt like the best photo of the bunch - a good 100+ exposures after the initial image. I could have stopped after the first few images, I could have stopped after 20-30 images but by spending 30+ minutes in this one location, I found a photo that truly appealed to me. Is it perfect? Of course not. There is perspective distortion with the diver that could have been mitigated by having the diver move away from the edges. I'd have also have liked him to be holding a torch. That's a testimony to the fact that despite the time I spent, I could have always worked the subject more. So what's the takeaway here? Pretty simple: too many divers spend their entire dive swimming around, taking a couple of photos here and a couple of photos there. That's perfectly fine when you are starting out and is a good way to hone your technical skills and build a good foundation of documentary images and also action photos. But as your skills evolve, a good way to improve the quality of your images is by becoming more selective. Try to get a few really great shots as opposed to a large number of average ones. And in order to achieve this, shoot fewer subjects - but the subjects that you do shoot, shoot them really well. By that, I don't mean just blindly fire away and hope for the best. Instead, take a deliberate approach to positioning yourself, your perspective and exposure/lighting. Think about different ways you can compose the image. Then review the results, decide what could improve and repeat. Starting thinking like a photographer who happens to be on scuba - as opposed to a scuba diver who has a camera. Sure, this isn't always easy to do: unless you have your own private guide or are diving with a group of photographers, you rarely have the ability to spend as much time as you prefer on a subject. But if your goal is take the best possible images, you will have to find a workaround to that. Most dive centres are generally very receptive to (and slightly dread!) underwater photographers, and are willing to work with them in terms of guides, groups, etc. Make that extra effort and you will find the quality of your images improves significantly. Footnote: the series of images above is not a statement about how awesome the final image is. I like it a lot (and I shoot to please myself), but I have photographer friends who aren't that impressed by it (which is perfectly fine). The goal is to illustrate the approach to working a scene, and hopefully, this sequence illustrates it well. Sometimes, no matter how much you try, the animals don't cooperate. I spent a lot of time working through various compositions till I found one that appealed to me - all it needed was an appropriate subject swimming through at the right location. Despite waiting for almost 30 minutes, I didnt have any luck better than this.23 points
 -
17 points
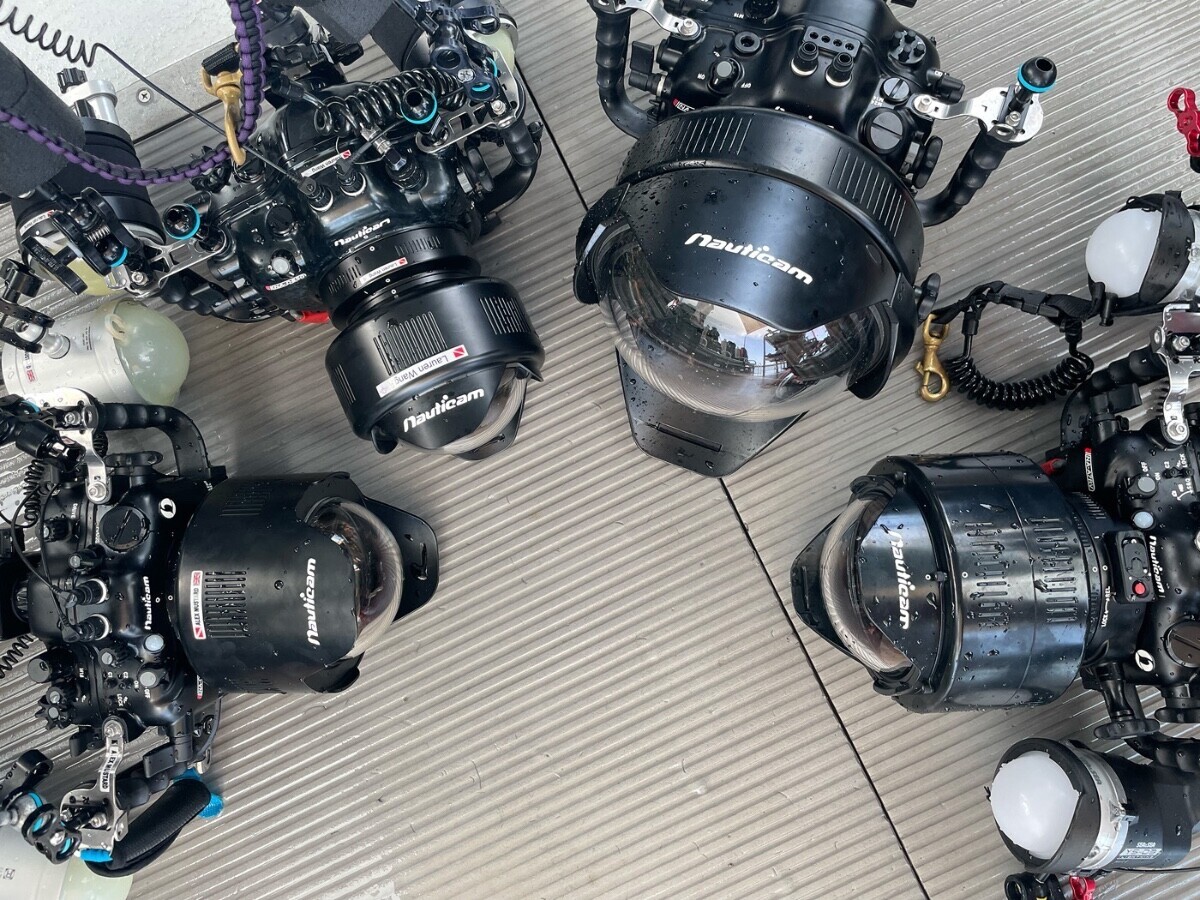 Last year I decided to go big - switching from the tiny RX100 to FF (FullFormat). In my case, it was the A7IV as the best value for money. But having made the decision on the camera model is only one step - lens, housing and port is much more difficult. But with the support of the nice guys here and the old forum, I am now the happy owner of a sleek combination that is tailored to my needs. But how do you know what you need? This article might help. The most common type of camera used by underwater photographers is one that is inserted with lens into a housing and has either a flat (flat port) or curved (dome port) front glass at the port. Even in the days of analogue photography with the Nikonos system, for example, water contact lenses were developed that explicitly take into account the refraction of light at the water-to-glass contact surface. This reduces distortions that would otherwise occur when light hits the port at an angle and cause blurring at the edges. Nauticam has therefore developed some different types of water contact optics that evolved and serve different purposes. FCP (Fisheye Conversion Port) and WACP (Wide Angle Conversion Port) are "dry" optics designed to turn a mid-range zoom lens on the camera into a wide-angle zoom when the combination is taken under the surface. WWL (Wet Wide Lens) is the older version, somewhat less compact and made of more components, wet lens, but otherwise very similar to WACP. EMWL (Extended Macro Wide Lens) takes a different approach: different underwater lenses are placed in front of a macro lens and a flat port in order to be able to adjust on different subjects - from macro to large fish. First and newest: FCP Picture courtesly provided by Alex Mustard A dry lens that is attached directly to the housing with the appropriate (depending on the camera and lens) port extensions. In concrete terms, you can imagine the FCP as an ultra-wide-angle lens for underwater use. A lens such as the Sony 28-60, Canon 24-50 or Nikon 24-50 is attached to the camera and the FCP is mounted on the housing. This achieves a maximum field of view of 175° - a real fisheye. In the zoom position, the field of view is still 85°, i.e. still quite wide-angle, comparable to a 24mm lens over water. Next WACP: Still new, especially the WACP-C The WACP ports with the endings -C for compact, -1 for the "normal" variant and -2 for the maximum variant are not quite as extreme. Also "dry" optics - see above. They are intended to cover a field of view of approx. 70°-130° - i.e. comparable to a lens with a normal focal length (approx. 30mm) to a slight fisheye wide angle (11mm). On the camera, the WACP-C and WACP-1 require similar lenses as for the FCP (for example Sony 28-60, Canon 24-50 or Nikon 24-50), but the largest variant requires a wider-angle lens such as 14-30mm to achieve the same field of view. These water contact lenses are quite bulky and heavy (WACP-C: 2.3kg, WACP-1: 3.9kg, WACP-2: 7.0kg) and offer better sharpness than dome ports, especially at the edges, but above all they provide a wide zoom range under water and focus even directly at the glass. The WACP-C, although labelled as a compact version, also fits some of the full-frame cameras and is the most suitable solution for me personally. WWL-1(B): AFAIK the two WWL ports (WWL-1 and the newer WWL-1B) are the predecessors of the WACP ports. The area of use is the same as with WACP: field of view approx. 70-130°, i.e. wide normal focal length to slightly ultra-wide angle/fisheye when using zoom lenses with a focal length range of approx. 25-60mm. The difference to the WACP solutions is the technical design. With WWL, you have a compact plan port on the housing and the WWL is mounted wet, i.e. with water between the front glass of the port and the WWL lens. Advantage over the WACP solutions: lighter overall, and you can remove the WWL under water and then have a lightweight telephoto lens (...no one ever does...). Disadvantage: The telephoto lens is rarely needed and air bubbles between the port and the WWL can be annoying. EMWL: One size matters fits all The EMWL wants to be and can be an "all in one": The basic here is that an 90 mm macro lens is mounted on the camera and the corresponding port with flat glass at the front (flat port) is mounted on the underwater housing. A close-up lens (e.g. SMC-1) for magnification or the EMWL can be used on a flip port. The EMWL consists of two or three elements: The focusing unit, which is available in variants for Nikon, Canon and Sony, is located directly in front of the macro port An optional extension piece (relay lens) then follows, which turns the image upside down and brings the front glass closer to the subject The actual lens, which is available in 160°, 130°, 100° and 60° angle of view versions, is located at the top. The 130° lens is particularly popular and is ideal for CFWA, but also for large fish or panoramic images. In contrast to FCP and WACP, the EMWL is a wet lens, so there is water between the port glass and the focussing unit, but also between the relay lens and the objective lens. Image quality is high in every direction but bubbles between the parts can be annoying and there have been issues about focus breathing. The main areas of application are thus: FCP: Fisheye wide-angle zoom, medium volume, compact WACP: Wide-angle zoom, medium to large volume depending on version WWL: Comparable to WACP, Lighter and slightly cheaper, but with technical disadvantages EMWL: fixed focal lengths that can be changed under water, somehow bulky, objectionable appearance To show the differences in size and appearance here a pic from Alex Mustard, showing (left to right) FCP (prototype), WACP-C, WACP-2, WACP-1 (Thanks, Alex!) Cost (€)? You have already camera, housing and lens. And focus gear. And port extension. And arms, flashes and so on. Just the port: Rough estimates FCP: EDIT Jan 14th: Now on Nauticam website €6.482,00 (incl. VAT) WACP-C: €2.9k WACP-1: €4.5k WACP-2: €8.2k WWL-1b: €1.9k (with flatport) EMWL: €8.5k (with flatport, 60°, 100°, 130° optics, rely, focusing unit, flip-holder, SMC-1) If I made errors or incorrectness anybody please feel free to add or correct17 points
 -
 We are proud to announce that the winner of the 2025 Australian Geographic Nature Photographer of the Year, Overall category, is our fellow member Ross Gudgeon for his photograph titled "Fractal Forest". Fractal Forest - Macro By Ross Gudgeon, Western Australia From the 2025 Australian Geographic Nature Photographer of the Year announcement: The overall winning shot, Fractal Forest, skews perception and leaves us questioning reality with an inside-out view of a cauliflower soft coral, captured by Western Australian photographer Ross Gudgeon in the Lembeh Strait of North Sulawesi, Indonesia. Our judges remarked that the photograph gives us a unique perspective on coral, with the photographer taking us out of the marine habitat into a whole new world. There’s nothing fake here, but still we ponder, is this nature or a painting? Technical details: Inside-out view of a cauliflower soft coral. Named for its characteristic appearance that resembles a cauliflower, with numerous small, rounded, bump-like polyps that give it a puffy texture. This unique perspective was made possible by the Nauticam EMWL, an underwater version of the probe or insect eye lens. Lembeh Strait, North Sulawesi, Indonesia Sony FE 90mm F2.8 Macro G OSS with Nauticam EMWL wet lens, 1/100, f/9, ISO 400, Sony A7RIV, handheld, 2 x Retra Pro flashes. Here the competition winners announcement: Australian Geographic Nature Photographer of the YearEntries for the 2020 Australian Geographic Nature Photographer of the Year are now closed14 points
 -
14 points
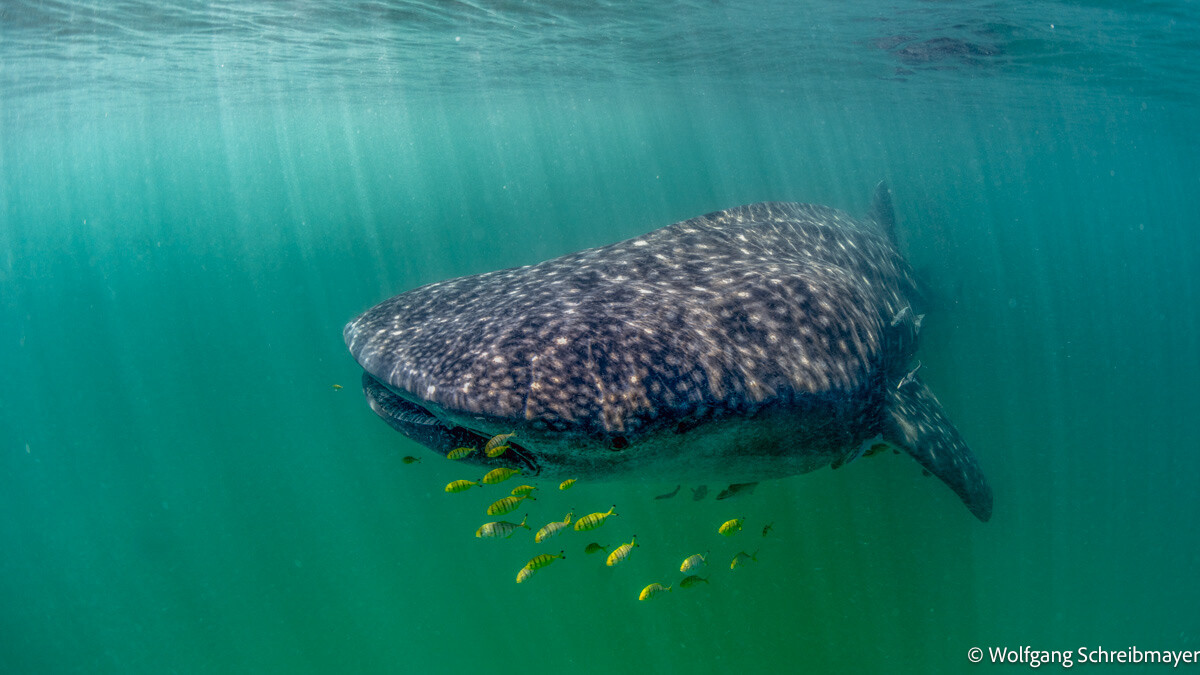 Mafia Island is located in the Indian Ocean, off the East African coast of Tanzania. I learned about Mafia Island from reports of several scubadivers in internet platforms, who consider it an “insider tip”. In November/December 2024 three divers (Lisi, Franz and me) set out towards Mafia in order to experience firsthand the diving and possibilities for UW-photographers. Mafia Island is not difficult to reach via international flights from Vienna/Austria to Dar es Salaam/Tanzania. From there, the travel continues with a short 30’ flight via domestic airline. The airport in Kilindoni, the largest village of the island, is small and, accordingly, the airplanes are small too (the photo shows the main building of the airport and, to the left, the nose of the aircraft that brought us there). By default, only 15kg of luggage, including the cabine luggage, are allowed in the small aircraft. It is very positive to note, that one can book extra luggage in advance by EMail with the domestic “Coastal Airline” (https://coastal.co.tz/), in order to avoid unpleasant surprises when arriving with masses of unannounced luggage. This way, our extensive diving and photo equipment was “nullo problemo” (in order to avoid overload of the aircraft, we had to book an extra seat in advance, that remained empty). There are several resorts located on Mafia Island, but only a single one, “Big Blue Mafia Island Diving Centre” (https://bigblumafia.com/) is perfectly positioned within the Mafia Island Marine Park, where most of the diving spots are located (the marinepark fee, that has to be paid for every single day of the stay once upon entrance, is worth every single cent). This resort is owned and managed by Maura, an Italian, who is the friendly contact person for booking and payment. She is married to a local diving instructor, native to the island, who runs the diving base (their son is working as diving guide, one can say it is a true family enterprise; also the other instructors, guides and employees contributed to a very pleasant stay including safe and wonderful diving). Accommodation is simple, but corresponds to western standards, comprising tasty half (or, when required, full) board and aircondition. Cleaning and freeing the huts from mosquitoes with pesticides is done twice per day. At this point it is appropriate to mention that effective repellants and malaria prophylaxis are strongly recommended by our Austrian tropical medicine specialists. Diving is done using Dhow style boats, that provide plenty of space for the few divers. They are made from heavy tropical woods and are powered by an outboard engine. When winds allow, the boats are also able to sail along silently and swiftly. Chole Bay is the heart of the natural reserve and accordingly most diving spots are located within the bay. Depending on weather, diving spots outside the bay can be dived also. Since the tidal range within Chole Bay is substantial, departure times for the two-tank boat dives are dominated by the tide, are highly variable from day to day and were between 05:00 AM and 14:30 PM during the two weeks of our stay. Despite careful consideration of tidal times, substantial currents are possible. At low tide the visibility within the bay can be pretty modest (as low as 4-5m), but at high tide and also outside the bay it can be remarkably good (up to 30m). Taken together, the diving conditions are certainly not easy for UW-photographers. This is more than compensated by outstanding biodiversity and abundance of species that guarantee the presence of great motifs in high number, rewarding those that take up the challenge. School of common blue-striped snappers (Lutjanus kasmira), outside Chole Bay. Sony A7R5, WACP-C, Sony 28-60mm @28mm, 1/160s, f/10, ISO 100, 2* HF-1 (4500K diffusers): Also inside Chole Bay, the quality of hard coral is good. Sony A7R5, Canon 8-15mm @15mm, 1/100s, f/10, ISO 100, 2* HF-1 (4500K diffusers): Attracted by me, since I was using the macro setup (when I was equipped with the fisheye lens, mating Nembrothas were almost guaranteed), a giant Potato Grouper (Epinephelus tukula) shows up inside the bay. Sony A7R5, Sony 90mm macro, 1/200s, f/9, ISO 100, 2* HF-1 (4500K diffusers): The diving comprises plenty of motifs for wideangle photography, but Chole Bay can be regarded as a true macro destination for UW-photographers as well: Numerous nudibranch species can be encountered around Chole Bay. Noteworthy to state, our stay coincided with the mating season of the Golden Nembrotha (Nembrotha aurea). These seaslugs are hermaphrodites and mating takes place by connecting the sexual organs, located on the right side of the body, with each other in order to transfer the sperm. Sony A7R5, Sony 90mm macro, SMC-1, 1/250s, f/14, ISO 100, 2* HF-1 (4500K diffusers): Blue Pseudoceros flatworm (Pseudoceros bifurcus) moves leisurely over hard coral. Sony A7R5, Sony 90mm macro, SMC-1, 1/200s, f/14, ISO 100, 2* HF-1 (4500K diffusers): Shrimp city is a coral block located inside Chole Bay that is not only populated by countless camel shrimps (Rhynchocinetes durbanensis), but also glassfish, damselfish, anthias, muray eels and groupers. Sony A7R5, Sony 90mm macro, 1/250s, f/13, ISO 100, 2* HF-1 (4500K diffusers): Longnose Hawkfish (Oxycirrhites typus) sitting on black coral. Sony A7R5, Sony 90mm macro, 1/200s, f/13, ISO 100, 2* HF-1 (4500K diffusers): Reef octopus (Octopus cyaneus) peeks out curiously from its shelter. Sony A7R5, Sony 90mm macro, 1/200s, f/18, ISO 100, 2* HF-1 (4500K diffusers): A report about diving at Mafia Island cannot be complete without whale sharks (Rhincodon typus). Outside the marinepark, between the African eastcoast, where the impressive Rufiji river ends up in the Indian Ocean, and the west coast of Mafia Island, the Mafia channel is formed. The high input of biomass from the Rufiji river delta causes plankton to bloom within this strait. This results not only in poor visibility (6-10m; and hence (again) challenging conditions for UW-photography), but, at certain times of the year, whale sharks gather for feeding. Snorkeling excursions by boat are offered and we were able to spot up to 15 different whale sharks on a single day (including a touching encounter with a female shark, closely accompanied by her half-grown up offspring). Whaleshark feeding on krill. Sony A7R5, WACP-C, Sony 28-60mm @31mm, 1/200s, f/7.1, ISO 200: Whaleshark fading away into the blue. Sony A7R5, Canon 8-15mm @15mm, 1/250s, f/6.3, ISO 250: It was an unforgettable diving trip and fond memories will endure. We already have booked flights and resort for another two weeks in November 2025, in order to visit again this little paradise… 😊14 points
 -
14 points
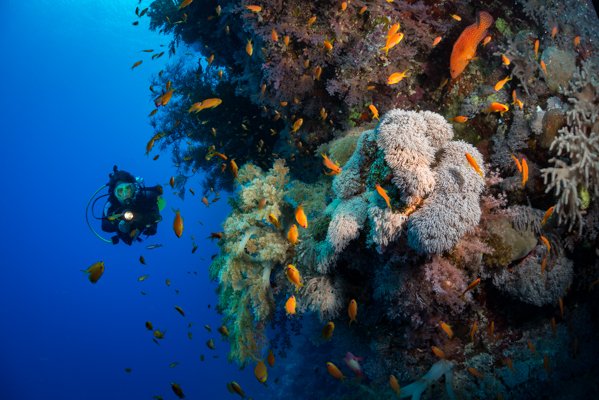
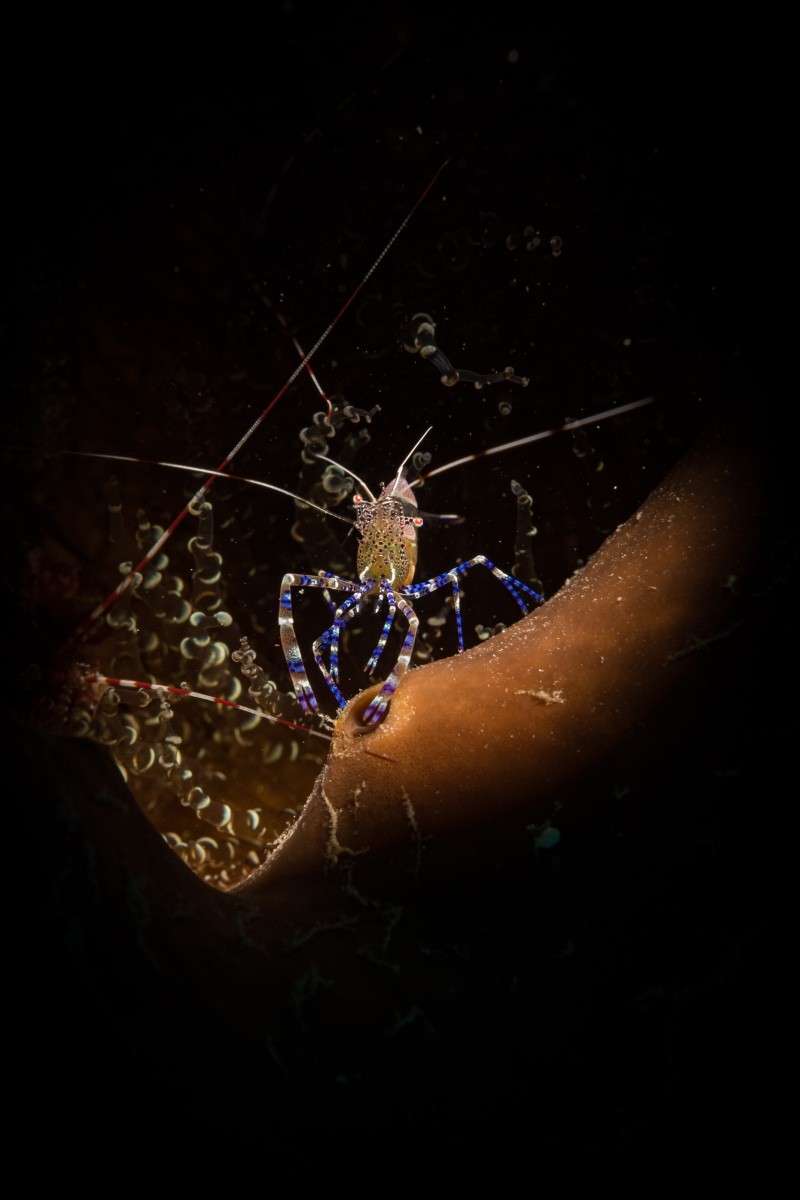 Negative Space The two main tips on starting underwater photography are Get Close and Shoot Upwards. The idea being that the closer you get, the less the water interferes with the image. By shooting upwards there is a better chance of increasing the impact of subject by separating it from a messy background. Those two elements of guidance, especially the latter, can go a long way to improving image-making. But there comes a point for many underwater photographers where images become all a bit routine - yet another fish portrait? A FRESH APPROACH I hit this plateau some years back whilst running a dive resort in the Lembeh Straits. Just how many xxxxfish/seahorse shots could I take? I wanted fresh ideas. A fresh approach. I wanted to create something that wasn’t a fish portrait. A resort guest, a very talented underwater photographer, pointed me in the direction of using “negative space”. What? Negative space is “a term used in art to describe the space surrounding a subject. Also called white space, it is typically empty and lacks details as to simplify an image. Negative space surrounds positive space in a work of art”. “Typically empty” and “lacks details” are the key elements. A blank canvas. So how do you find or create “negative space”? A very simple example: if you shoot upwards, into the blue, you have lots of negative space - the whole ocean. Lighting can be tricky but is manageable. SEARCHING FOR NEGATIVE SPACE How about searching for a piece of coral that produces effectively a blank canvas? Corals can come in all sorts of interesting colours, shapes and sizes: think, for example, of Elephant Ear corals with their vibrant orange colour. A blank, orange canvas. Then see what lives there, what lies there, what might come on to that canvas and create a visually striking image against the negative space. What about a colourless rock? Or one covered in red algae? With this technique, you think about the dive in a different way and new ideas emerge: graphical images, images of perhaps only one or two strong and contrasting colours or shapes. The fish portrait starts to disappear and the image becomes one of lines, colours and contrasts. The subject might become an accessory to a strong visual impression. Try a dive where, instead of going hunting for a subject, you go hunting for a good negative space, a canvas, and see what might be there or, with patience, what might show up. Take some time to weigh-up the canvas: angles, colours, contrasts…. you might end up spending the whole dive in only one or two spots. CREATING NEGATIVE SPACE Inevitably though some dives sites just don’t offer negative space. So create your own. There are several ways. Using the widest aperture setting, so reducing depth of field, can turn a fussy background into a creamy, indistinguishable canvas. This is using the “bokeh” effect beloved of portrait photographers. This works very well if shooting low and upwards. (I can recommend 45-degree viewfinder for this!) and for subjects that are parallel to the camera sensor rather than being at right angles. Or the opposite: a fast shutter speed will reduce the amount of light the camera sees and turn the background into that classic black canvas. Or maybe not quite so fast and get a mid or dark blue canvas. Rather than shoot at, say 1/100, try 1/250 or the fastest your camera can sync with the strobes. High Speed Synchronisation - HSS - equipped strobes and triggers are a major bonus allowing much higher shutter speeds. Or use a snoot. Snoots are a great way of concentrating light onto a subject. A negative space is then created in the shape of a black or unlight canvas for the areas the snoot does not light. SEE THE DIFFERENCE Hunt for negative spaces, play around with these techniques and you may well find a whole new style of diving and a whole new way of image-making. Images which are strong graphically or in their simple and contrasting colours. And if that doesn’t work, you can always go back to fish portraits. A fast shutter speed creates a black canvas A red canvas of algae A wide aperture creates a blurry background Coral creates a canvas for a graphical image Snoots create negative space and highlight subject14 points
 -
14 points
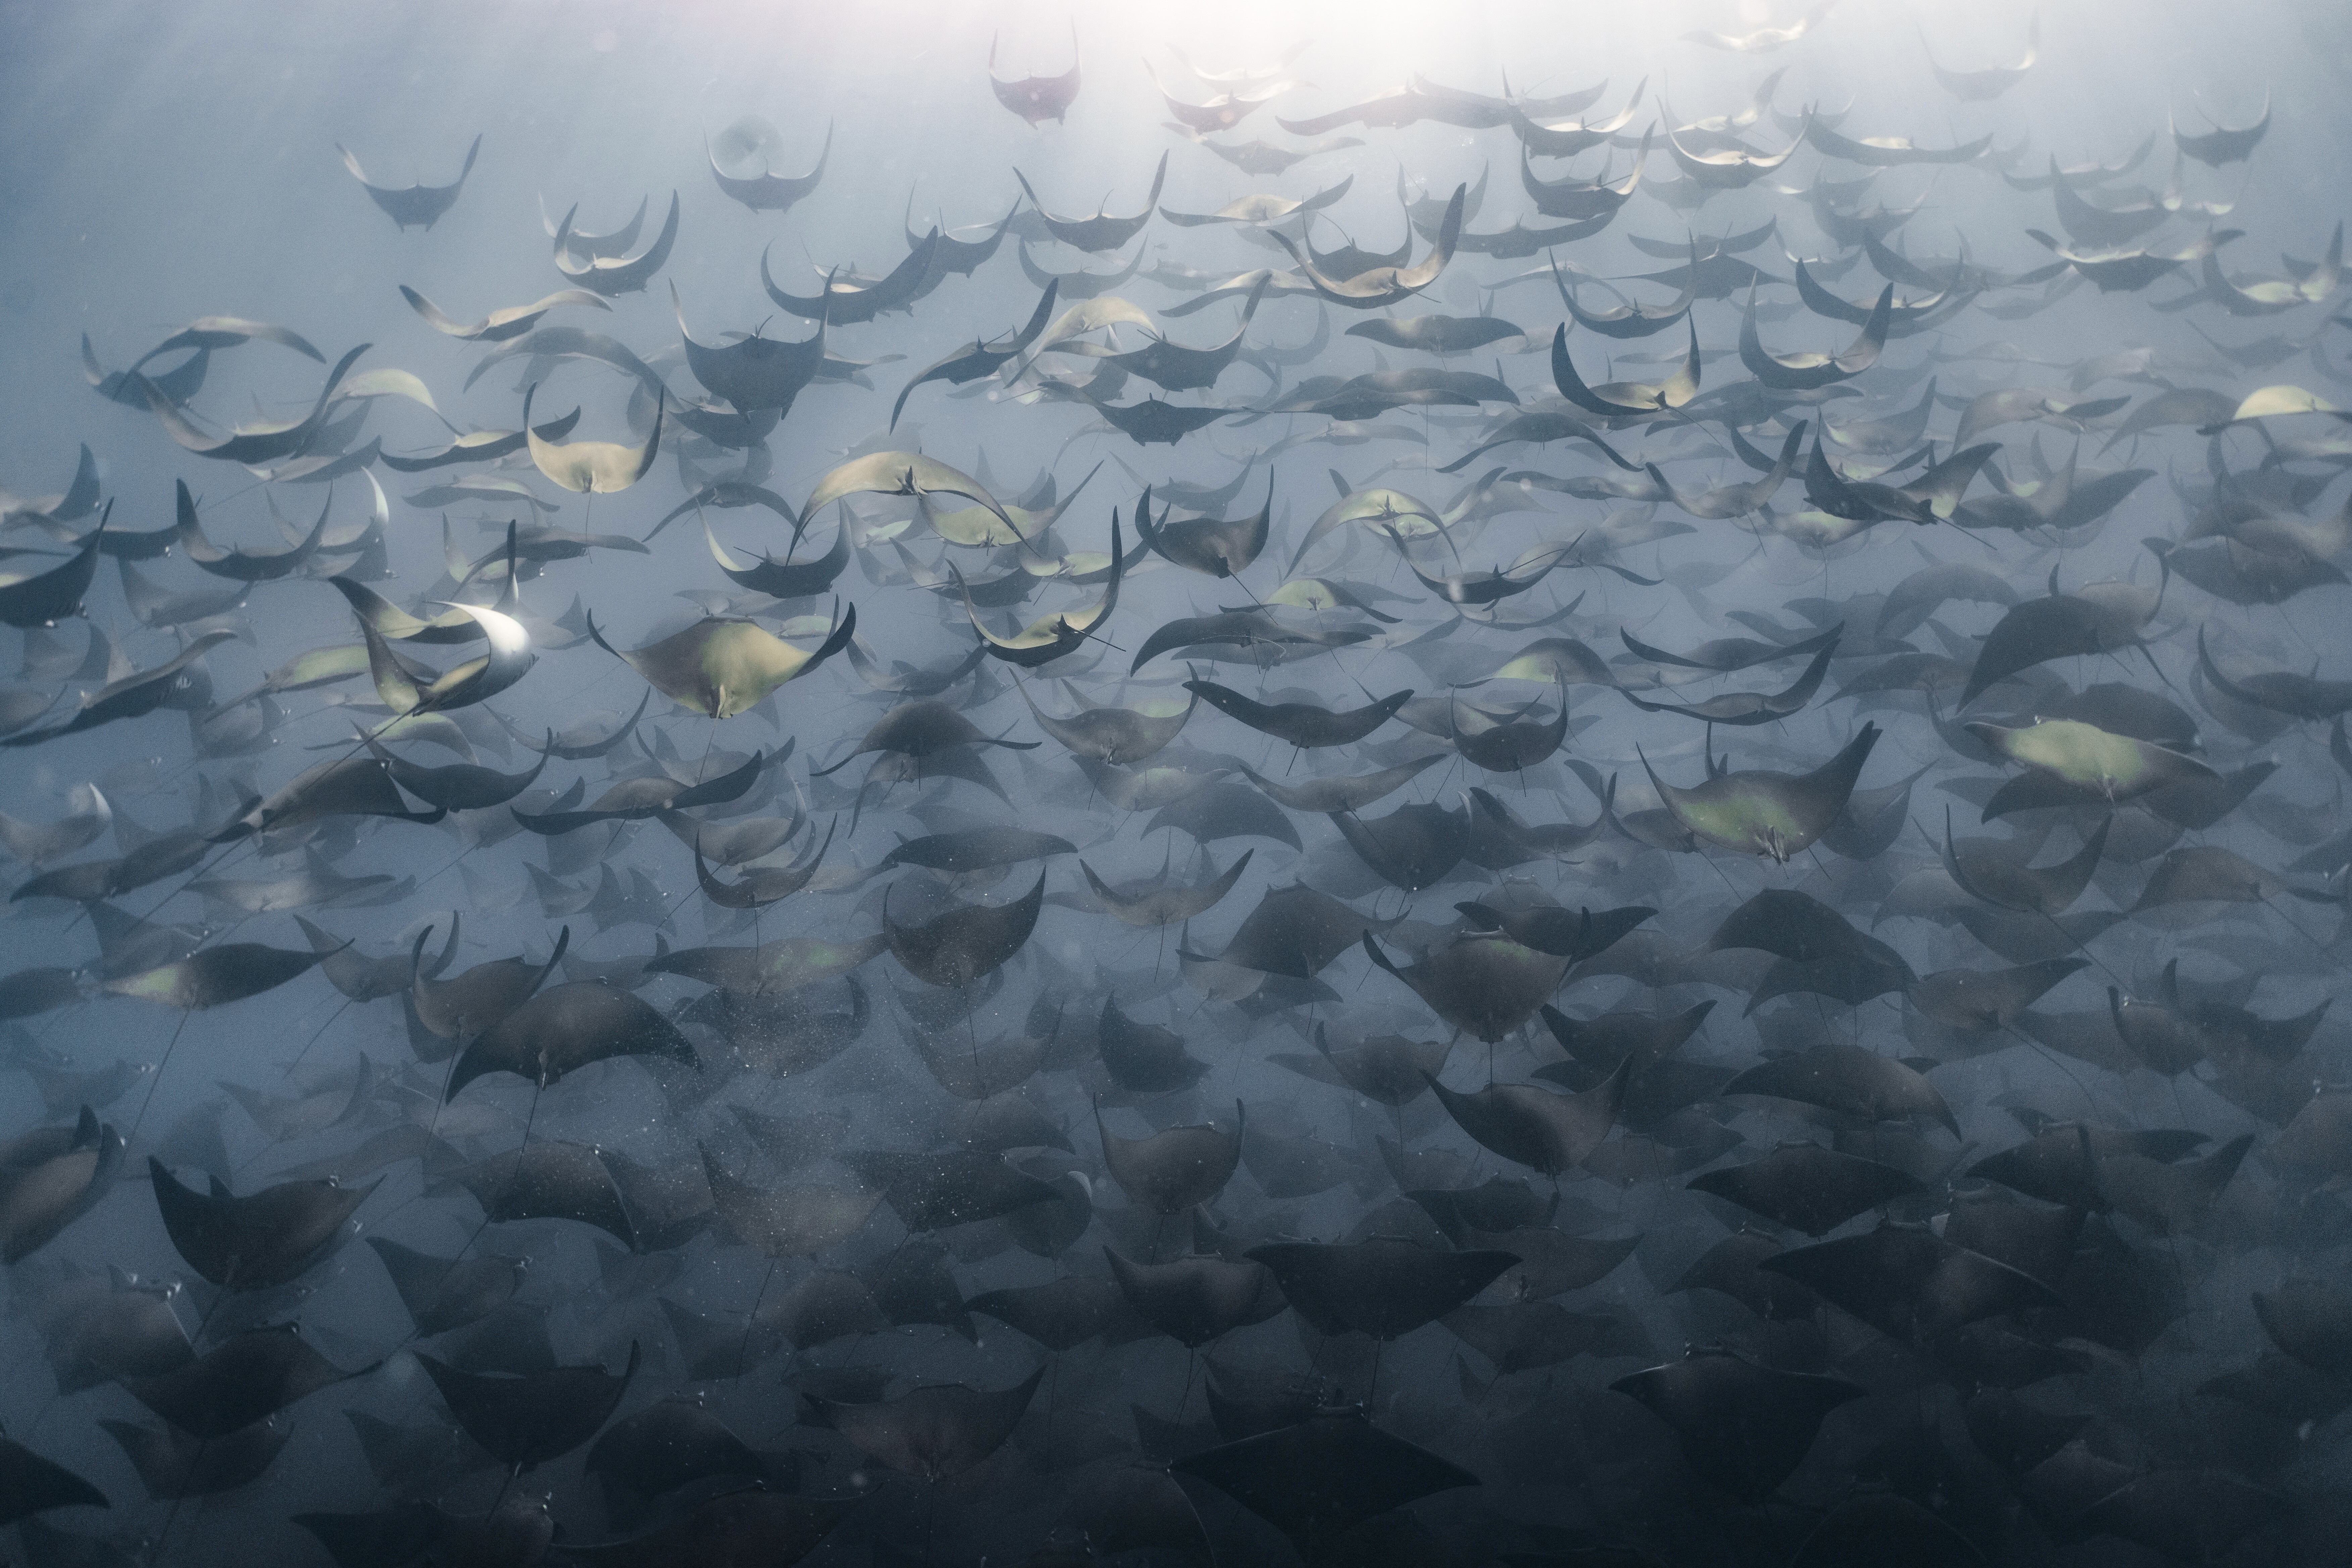
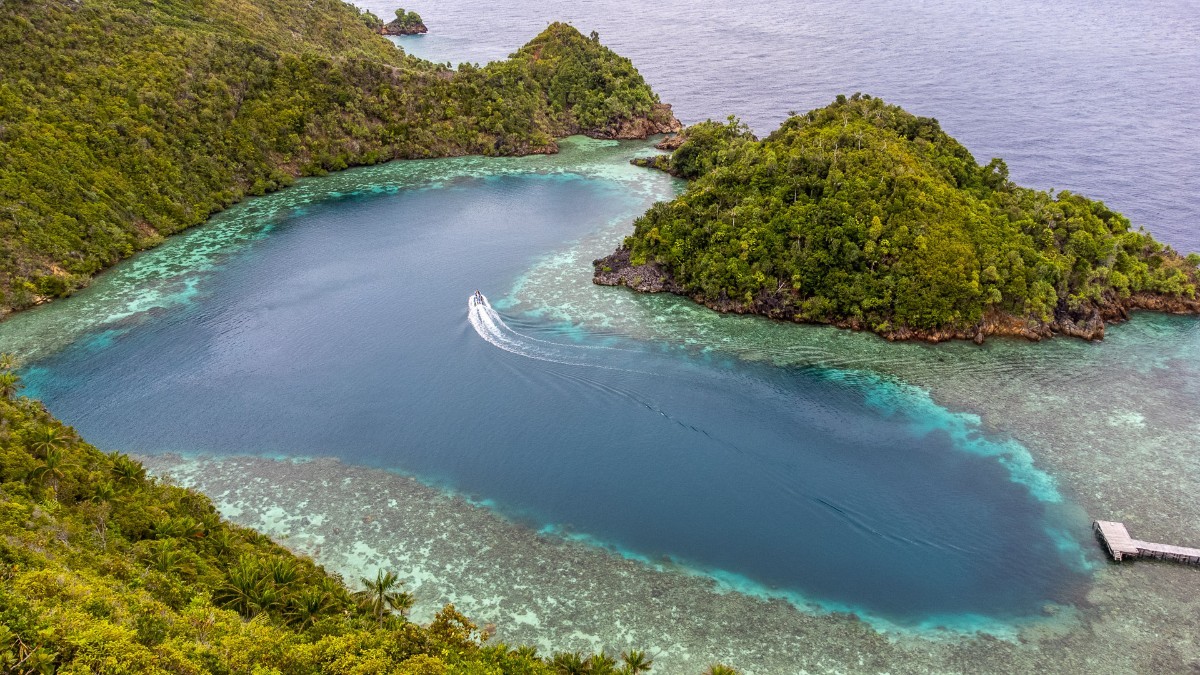 Raja Ampat is universally known as "The Heart of Coral Triangle”, for its unrivaled wealth, including: 540 hard coral species (more than 75% of the world's coral species); 60 types of crayfish; 1,070 types of reef fish; 699 types of mollusks. Also on land, Raja Ampat has incredible diversities: over 874 plant species that 9 are endemic and 6 are protected species, of which 360 species are trees. Also there are 114 species of herpetofauna with 5 species of which are endemic and 5 other species are protected. There are also 47 species of mammals, of which 1 is endemic and 3 is protected. And lastly, there are 274 bird species with 6 species of which are endemic and 8 species are also included in the protected category. This mega-biodiversity and various types of endemic flora and fauna that cannot be found anywhere in the world. For that reason, 66% of Raja Ampat's terrestrial area is a Nature Reserve or Conservation Area, and 5 Regional Water Conservation Areas or KKPDs cover an area of 1,125,940 hectares. The epitome of Raja Ampat's beauty is found in the Misool area, which, due to its distance from the more frequented areas, and the very strict management policy of the marine park, allows marine life to continue to thrive. I’ve visited Raja Ampat 3 times, and every time I go back I feel that, unlike many other places I have visited, the marine life here doesn’t seem to suffer the anthropic pressure, a sign that environmental protection and public awareness are working extensively. The heart-shaped lagoon of KARAWAPOP Geosite The last time I visited Misool, I was on a cruise aboard the Gaia Love vessel, after a long crossing from Ternate (Halmahera), which I have already talked about in a previous article. The first stop in the Misool area was at Pele island. We dove sites as Pele’s Playground, Kaleidosoope and Toblerone, all with wonderful corals and pelagic life. I was amazed by the colors of Kaleidoscope, and I understood why this site was named like that. The Gaia Love at sunset, moored in the Pele area Moving east from Pele, we arrive in the Fiabacet/Warakaraket area, near the Misool eco resort. Here we can find some of the most iconic dive spots in Misool, such as Nudi rock, Magic Mountain, Boo Windows, Four Kings, just to name a few! The abundance of life and color in these areas is absolutely astonishing. We stayed in the area for the rest of the cruise, being able to count on an infinite number of fantastic dive sites in a very short distance. My favorites were, once again, Boo Windows and Four Kings. Between the spectacular cliffs of Boo and the pinnacles of 4 Kings every encounter is possible, even with our beloved winged friends, the Mantas. Here we had the privilege of swimming in very close contact with a majestic oceanic manta that stayed with us for almost the entire dive, making some laps and then coming back to greet us. Finally, after 11 days of fantastic diving, we set sail for our port of disembarkation, Sorong. I must say with a lot of melancholy, since these places enter your soul and you never want to leave them. Conclusions. My experience on this cruise, which started in Ternate and ended in Sorong, touching the most beautiful places in Halmahera and Misool, was absolutely extraordinary. I have to thank all the staff of Gaia Love who made sure that every moment of the crossing was unforgettable, starting from the top-quality food, to the diving guides who were always very attentive and who always made us feel safe and protected. I would also like to thank the officers on board who were always able to manage all the moments of the cruise with the highest professionalism. As for the photographic equipment, for those who are curious, I recommend reading the previous article where I detailed everything. See you next time! Pietro Cremone14 points
 -
14 points
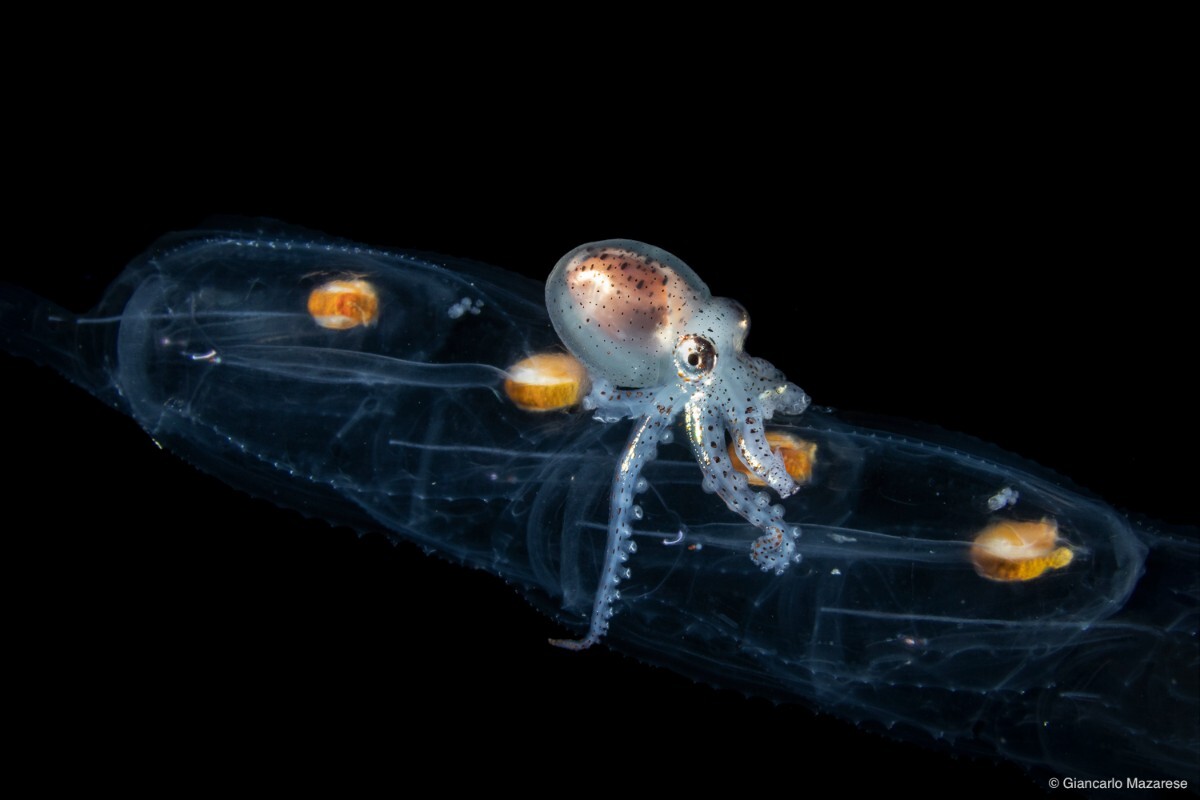 Disclaimer: Thanks to Pietro Cremone, the Italian distributor of Nauticam, I had the opportunity to try out this interesting lens on a recent trip to Anilao for blackwater dives. Blackwater diving is a form of night diving that involves exploring open waters off oceanic coasts. Unlike traditional night dives, which take place near the shore or in shallow waters, blackwater dives occur in deep waters, typically offshore over deep ocean floors. During these dives, divers immerse themselves in dark waters, often with depths exceeding 100 meters. A bright buoy connected to a variable-length line (20-30 meters) is placed in the water, to which very powerful torches will be attached. The lights are used to attract plankton and marine creatures to the surface, offering divers the opportunity to observe these unique creatures up close and appreciate their beauty in a completely different environment. Additionally, the lights serve as an optical reference for divers as they drift with the currents alongside the buoy and line. Blackwater diving can be an extraordinarily fascinating experience, but it requires adequate preparation and some experience with night diving. Divers must have excellent buoyancy control and perfect self-management skills, including with their photographic equipment. In recent years, these dives have become very popular, especially among underwater photographers, who can capture stunning images of animals that normally inhabit oceanic depths and, thanks to currents and the upwelling phenomenon, ascend towards the surface. Among these creatures, one can find zooplankton, larval stages of many fish species, mollusks, shrimp, etc., and even rare encounters with Paper Nautilus or the Blanket Octopus. Locations for this type of diving are scattered around the world, and the most famous ones with dive centers with greater experience can be found in: Anilao in the Philippines, Hawaii in the USA, Palm Beach in the USA, Lembeh in Indonesia, and Cozumel in Mexico. For photographic equipment, it is recommended to use a macro lens with a 1:1 ratio and a good field of view (ideally 50 or 60 mm equivalent full frame), with good AF speed, two strobes, and a focus torch positioned on the housing to assist the AF system of the camera body, and a narrow-beam torch for searching subjects, which can also be positioned on the housing or held by hand. For photographers using Nikon or Olympus, they are fortunate to have two excellent lenses available: the Nikon AF-S 60mm f/2.8 G ED Micro and the Olympus M.Zuiko Digital ED 30mm f/3.5 Macro, which are perfect for Blackwater photography. However, for Canon and Sony photographers, it is unfortunately more complex because the available optics have very slow AF (Sigma 70mm f/2.8 DG Macro Art and Sony FE 50mm f/2.8 Macro), and in Blackwater, it can be frustrating to try to focus as we really have to seize the moment: subjects are free in the water and besides drifting, they move constantly, making it much more difficult to capture correctly. Using more performing lenses like Sony FE 90mm f/2.8 Macro or Canon 100mm f/2.8 L Macro unfortunately becomes more complex, even though they have a good AF speed, due to the narrow field of view. An interesting solution to solve this problem is provided by Nauticam. In recent years, Nauticam has been investing heavily in "wet" optics, such as the WWL and WACP-C series, to name a few. In 2020, Nauticam launched a new system of wet optics on the international market, the EMWL series (Extended Macro Wide Lens). The EMWL is designed to work with various macro lenses and is optimized for both photos and videos. It is a "wet" mount design so that the lens can be attached and removed underwater. This increases the versatility of the entire system. EMWL is a modular system composed of three main parts: the focusing unit, the relay module, and the lens. Plus, an accessory for quick mounting. On the Nauticam website, you can find a detailed description of its features and the modules that compose it. Being a Canon user, I have strong limitations on the lenses to use in BW, and I thought this lens could help solve them. The setup I used is as follows: Canon R7, Canon EF-S 60 macro, Nauticam NA-R7 housing, N100 flat port 74, Reverse Angled Viewfinder 32º, EMWL Focusing Unit #1, and 60° objective lenses. Pre-Dive Considerations It is important to note that the EMWL is a lens designed for underwater use and must be immersed in water to function properly. When testing the flash before the dive, it is necessary to get very close to the object, about 1 cm, to make the camera's autofocus work. If you photograph in the air, the autofocus will not focus on anything; immersion of the lens in water is essential. However, at a distance of 1 cm from the lens, autofocus works and allows testing the flash dry. The EMWL is composed of heavy optics. On the Nauticam website, you will find tables for each part of the EMWL. In my specific configuration, the Focusing Unit weighs 728g, the Objective Lens 60° 378g, the Reverse Viewfinder 700g, and the M77 to BM II 122g, for a total of 1,928 grams to add to the normal configuration without a 45° Viewfinder. In my case, I use the normal 45° Viewfinder and should subtract the weight of mine, which is about 480g. So, compared to my base configuration, I add a weight, out of the water, of 1448g. I emphasize this point because on my first dive, I didn't worry at all about the additional weight, but using the camera with this extra weight was a bit more complicated in normal BW use. I recommend neutralizing this additional weight as much as possible with floats or floating arms. In-Water Use With a 60° field of view, framing subjects becomes significantly easier, which is definitely the strong point of this system. This allowed me to quickly and better frame the subject through the Viewfinder. Locating and focusing on the subject was significantly simpler with this lens, allowing me to track it and get as close as possible. The autofocus was not affected by the additional lenses of the Nauticam EMWL system. The focusing systems, single-point AF or AF tracking, worked perfectly. I did not notice any differences compared to normal use. I only experienced a worsening when using the red color of the focus lights. With subjects more sensitive to white light, such as Squid or Paper Nautilus, I usually use only the red color of the focus lights. However, with the EMWL, changing the color of just one focus light from red to blue or white, the autofocus work perfectly again. The Objective Lens 60° has the ability to adjust the minimum focusing distance in 3 modes; surely the 55mm-infinity adjustment is preferable for blackwater photography. Searching for the minimum focusing distance, especially for smaller subjects, framing becomes more complicated, but I noticed a greater magnification of the subject. Comparing notes with Pietro, he confirmed that the 60° lens can achieve a magnification of 4x at the CFD, and this is another advantage of this system. Obviously, for smaller subjects, it is always more difficult to get a good shot, but with this lens, we could photograph other subjects that we normally give up on because they are too complex or have obtained poor results due to the 1:1 ratio of the lenses used up to now. Another impression I had is that the lens provides a greater depth of field. Reviewing the shots taken of a male Paper Nautilus attached to a tunicate, I noticed that a good part of the tunicate and the Paper Nautilus were well in focus. However, I did not have many similar shots during this test session. The only "negative" feedback I can provide from my experience using it in blackwater is that occasionally, on slightly overexposed shots and with highly reflective subjects, the lens produces a white halo around the subject. In the shots taken, the number of files with this issue was negligible, but I felt it was important to mention it. Final Thoughts I was thrilled to use this system, and I would like to thank once again the Italian distributor of Nauticam (Fotosub-shop.it - Pietro Cremone) for giving me the opportunity to test it in black water. Certainly, this system requires various trials in the water by the user, but once the right balance is found, it can provide incredible images of both typical subjects in blackwater and smaller subjects. The cost of the complete configuration may not be within everyone's reach, but as we know, our hobby is expensive, and we do enjoy expensive toys. If you have the opportunity to purchase it, you could overcome the limitations we have with the lenses used in blackwater. If I have the chance to try it again, I would like to use the 100° lens for larger subjects, such as a Blanket Octopus (if they are easy to find), a beautiful female Paper Nautilus, or a large jellyfish; it could be very interesting, considering also that changing lenses can be done underwater, being very careful not to let it slip, though... I will keep you updated. Hydrozoan Jellyfish - 1/320 F14 ISO 320 Tube anemone larva - 1/320 F14 ISO 320 Flounder larva - 1/250 F16 ISO 320 Mantis shrimp larva - 1/250 F16 ISO 320 Crab larva - 1/250 F16 ISO 320 Unidentified - 1/250 F16 ISO 320 Juvenile benthic octopod on a salp - 1/250 F20 ISO 320 Juvenile benthic octopod on salp - 1/250 F22 ISO 320 Seahorse, Hippocampus sp. - 1/250 F18 ISO 320 Dotterel Filefish - 1/250 F20 ISO 320 Veliger larva - 1/250 F16 ISO 320 Shrimp larva - 1/250 F16 ISO 320 Mantis shrimp Larva - 1/250 F18 ISO 320 Fish larva - 1/250 F16 ISO 32014 points
 -
13 points
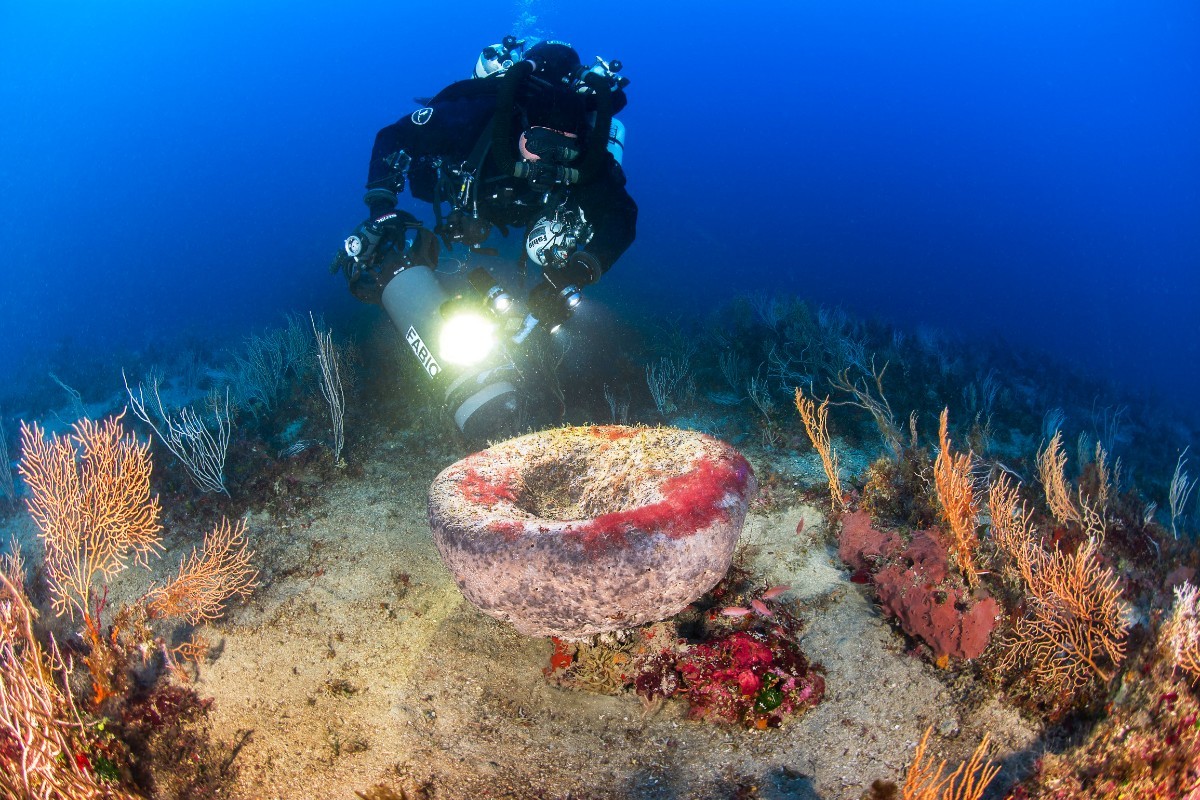 Text and images: Davide De Benedictis - Claudio Valerio Cover photo: Marco Bartolomucci If we told you how long we've been diving, you'd immediately know how old we are. We'd just tell you that we've been diving for a long time and that our passion for the sea has always been a part of us. We've spent most of our time in the Mediterranean, and by diving year-round, we've seen the gradual changes in the sea we love the most. A while back, we observed some novice divers during our decompression stop and wondered what it was like for them exploring the seafloor. Are they aware of the changes they're witnessing, or are they unwitting victims of shifting baseline syndrome? Unfortunately, this is what we've been observing for years in the Mediterranean during the summer: a carpet of mucilage in the first few meters of depth. The video text is based on Greta Thunberg's famous speech at the Youth4Climate event in Milan in 2021. This speech, with its great impact and appealing style, has been used in lots of different contexts. However, to my knowledge, it hasn't been used in relation to the marine world. When we were editing the images, we thought of the old saying "Once it was all countryside here", which makes you think about the past in a nostalgic way. But even the most overused clichés have a grain of truth. To paraphrase the cliché, we could say that "Once it was all sargassum and Cystoseira here". These seaweeds, which are common in the Mediterranean, were an important part of the marine ecosystem. There were large groups of Sargassum and Cystoseira, which alternated with Posidonia oceanica bushes and seafloors covered with calcareous algae (maerl). Some of the algae were the size of a fist. The bottoms were also decorated with white gorgonians, which are typical of these shallow waters. Today, although these species are still present, many of them are difficult to observe and suffer from a thick layer of mucilage covering them. This is now so common during the summer months that only those with long diving experience, or observing the seabed in winter, can tell the difference. When we showed these images to a non-diving audience, even though we had a marine biologist explain them, they were still pretty skeptical until we showed them exactly the same places filmed in winter and spring before temperature rises. Then they finally understood what we were talking about: These two short videos show how challenging it is to communicate the changes taking place in the oceans. The warming waters and human activities are affecting underwater ecosystems just as much as they are affecting land ecosystems. But underwater, the problem is even more pronounced. There's a lack of historical data, which makes it tough to grasp how marine environments are changing (again, it's the shifting baseline syndrome). Plus, our direct experience of the underwater world is limited. Everyone can see the effects of fires in the Amazon rainforest on the news or watch the urban landscape change from the car window. But what's going on underwater? This is why it's so important to communicate the importance of marine ecosystem conservation in a clear and urgent way. This is the challenge we're up against. Given the lack of inspiration in our recreational diving, we've been wondering if there's somewhere where these changes haven't happened yet. It's probably the so-called "mesophotic zone or twilight zone", which is the bathymetric range in the Mediterranean from fifty to one hundred and twenty meters deep. As depth increases in this zone, plant life gradually makes way for animal life due to the decreasing levels of light. Recently, this zone has become really important for studying how climate and human activities are affecting our oceans. It's a completely undiscovered world that could be home to species that could be valuable resources for addressing problems related to global warming and overfishing in the surface marine zone. The trailer on our Underwater Italy channel gives you a sneak peek of the mesophotic seafloor of the Mediterranean. A while back, whenever we talked about our passion for deep diving, the response was always the same: "Why go to the trouble of going deep when there's so much to see here on the surface?" And then, of course, there was the inevitable warning about the dangers of deep diving. How could they be blamed for that? Back then, going beyond the limits of recreational diving was all about deep air and not much else. As it turns out, today in the Mediterranean, we can only observe intact ecosystems through deep diving, and the tools of technical diving allow us to do so in reasonable safety. However, even in these environments, things are changing. For years, we've been seeing signs of suffering in marine animal forests, even in the shallowest parts of the "mesophotic zone". This shows that the effects of climate change are constantly evolving. Here's an example of what's happening to some of the seabed in the Tuscan archipelago, between 50 and 70 meters deep. It seems that the damage is not only proportional to depth, but probably also depends on other factors such as currents and the morphology of the seabed. To get a full understanding of this phenomenon, further scientific studies will be needed. As divers, our role is simply to observe. It's crucial that we keep an eye on these changes in marine ecosystems and keep documentation up to date. Every observation and piece of research helps us to understand our underwater environment better. It's essential that we pay attention and put in the effort to adapt our conservation strategies so that we can meet the challenges that climate change poses. It's an ongoing process, but it's vital to preserve the wonders of the sea for future generations.13 points
 -
12 points
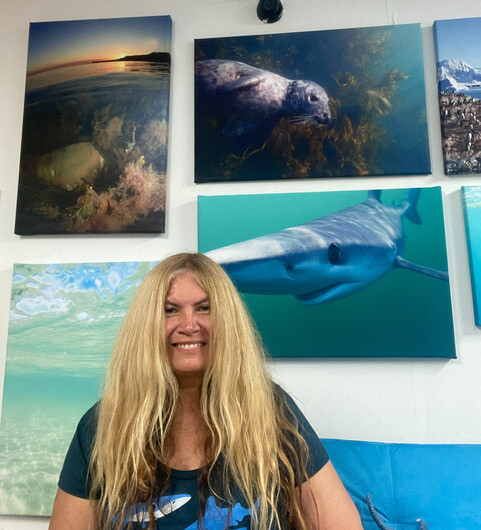 Waterpixels is delighted to announce that Maria Munn has joined the team as our Compact Systems Specialist. For many years Maria has taught and specialised in producing amazing images using compact systems especially the Canon G series. She’s been looking too at action cameras and housed smartphone systems and has posted some really helpful guides and reviews. A more detailed resume for Maria is on our About page. We’re sure members will welcome warmly her knowledge, experience and enthusiasm. Great to have you with us, Maria.12 points
 -
12 points
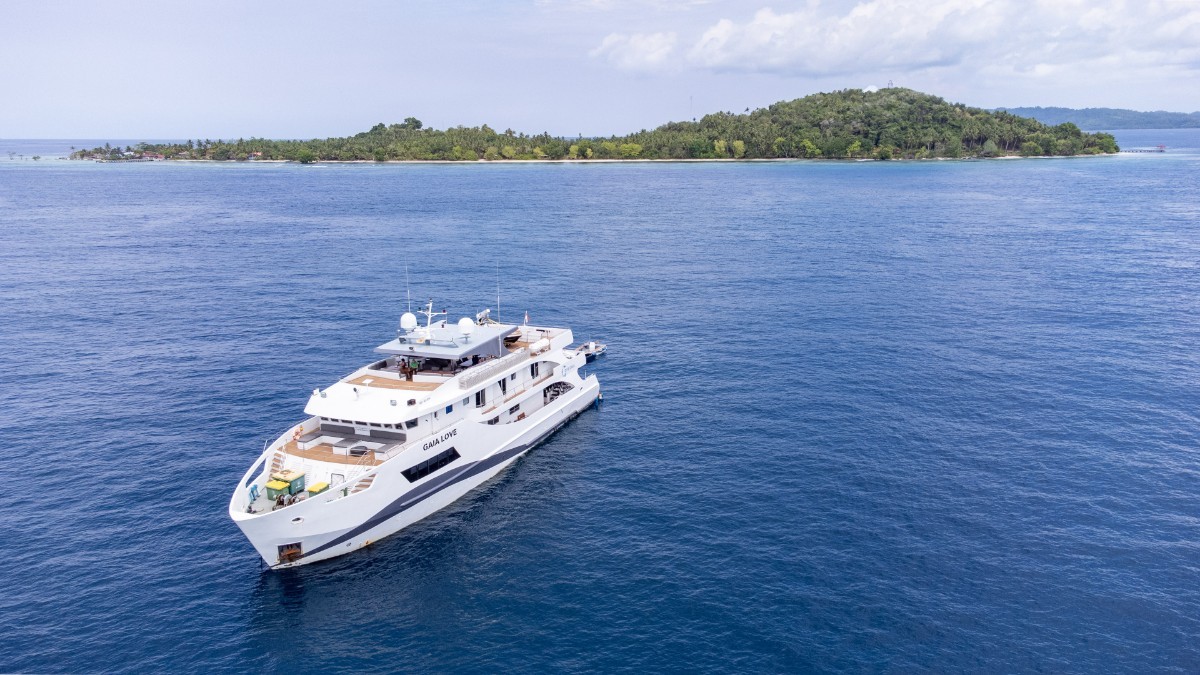 In April 2024, I took a memorable cruise, with the itinerary covering from Halmahera to Sorong, crossing some of the most iconic dive sites in Indonesia. In this article I will cover the first part of the journey, the one from Ternate to Pisang. I will add a second article focusing on the Raja Ampat and Misool area. I was onboard the beautiful GAIA LOVE vessel, a beautiful modern motor yacht, purpose built to explore the far-reach regions of Indonesia. This was the itinerary: The embarkation point was in Ternate, a city steeped in history. Once a major spice trading center, Ternate still exudes a colonial charm. Ternate Island is known for its historical sites and stunning beaches. Ternate, Al-Munawaroh Mosque, also called it “Masjid Terapung”, or "the floating mosque" because the structure was built by the sea, looking like floating on it. The first dives of the trip were in the Halmahera/Jailolo surroundings, and since the first jump I was delighted by the wonderful and pristine reefs of the region. The highlight of this sites are the big sponges, often covered with white sea cucumbers that give the sponges the effect of a decoration. Aerial view of one of the Goraici islands After Jailolo, we headed to the Goraichi islands, where we stay for 2 days and six dives. The small archipelago of Goraichi lies around 50-kilometres southwest. Another small cay of Goraichi's archipelago The locals here have a reputation as environmentalists, and the healthy coral reefs abound with macro marine life, offering fantastic opportunities for photography and night diving. In addition, there are also beautiful coral-covered walls to explore. Left the Goraichi's, we headed to South Halmahera, where we had another day packed with wonderful reefs and the highlight of a night muck dive in Penambuan. A small village in South Halmahera Then, we left Halmahera, crossing to Pisang. Pulau Pisang is located around 70-kilometres southwest of Damar Island, where the Halmahera and Ceram seas meet, making it a common stop for liveaboards as they cross to and from Raja Ampat. The diving here focuses on a series of underwater ridges that connect the main island to several smaller surrounding islands and feature large pinnacles covered with branching corals. I still found wonderful and healty reefs, teeming with life and, apparently, not yet polluted with plastic. During all the trip, we had calm seas and good visibility, that granted me the opportunity to get many good shots. The equipment: For this trip, I used the SONY A7RV, in a Nauticam housing, teamed with the Nikonos RS 13mm, adapted for SONY mirrorless by Isaac Szabo. I am using this fantastic lens since 2014, but with the adaption for Sony, Isaac made a fantastic job, making the lens yet more performing! Lighting was granted by SUPE D-pro strobes, with an even and powerul beam that well couples with the great field of view of the RS 13mm. The Boat: I was onboard the GAIA LOVE, a 40mt. steel motor yacht. The GAIA LOVE in front of Pulau Pisang The Gaia Love offers the guest contemporary settings, plenty of space and comfort, and a wonderful experience. I have tried many liveaboards before, but since when I boarded on Gaia I felt like it is a different level from the other boats! As a photographer, I was amazed by the great spaces that are available for the equipment, starting from the gorgeous and climatised camera room, and ending to the personal rinse tank that you havd on the diving deck, just in front of your personal place. The experience on board was then completed by delicious gourmet food , and a fantastic crew always ready to pamper the guests. The spacious camera room Conclusions: The first leg of the trip, covering the Halmahera region, was a great experience for me. It was the first time I dove these waters and I was really amazed for the richness of the reefs and the absolute sense of wilderness, we found maybe a couple of other liveaboards during the journey, and we always were the sole boat diving in any place! I will cover the second leg of the trip in a next article, please stay tuned.. Cheers! Pietro Cremone12 points
 -
12 points
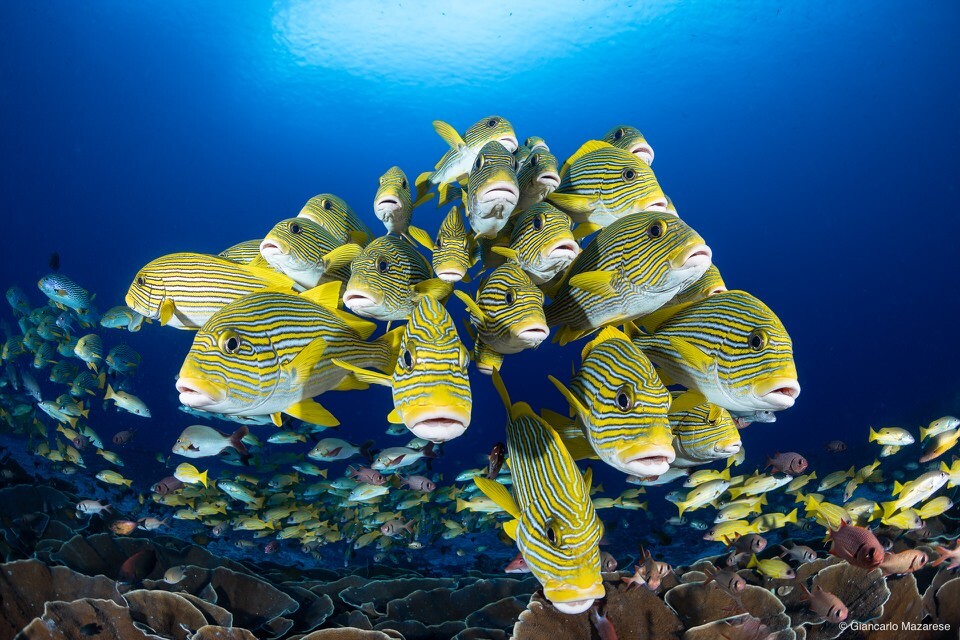 Underwater photography is an incredible experience because it offers enthusiasts the opportunity to discover the underwater world in its most authentic beauty. To capture these extraordinary images it is essential to have the right equipment, and one of the key elements in underwater photography is the strobe. SUPE Scubalamp is a company specialising in the design and production of underwater lighting equipment, including torches, strobes and related accessories. The company, a world market leader for many years, recently launched the new SUPE Scubalamp D-Pro underwater strobe, successor to the glorious D-Max. This product caught the attention of the underwater community due to its exceptional quality, light uniformity and battery life, and these features immediately placed it among the best in the industry. Another distinguishing feature is the high-speed continuous shooting mode, with the strobe supporting 10 frames per second in the first mode, making it much easier to capture shots in quick succession. The D-Pro, with its 4800 degree Kelvin circular lamp with a 160W power output and 150 degree beam angle, ensures an even spread of light over the entire framed area. This means that captured subjects and scenes will appear in natural, vivid colours - in short, your shots will be outstanding. A crucial feature for underwater strobes is battery life. While in the deep sea it is complicated to change batteries easily, so to avoid any kind of problem it is always preferable to do the replacement only at the end of the dives. SUPE Scubalamp D-Pro also excels in this respect, thanks to its 37.8 Wh rechargeable lithium battery (3x 18650), which guarantees from 500 strobes at full power up to 3000 strobes in the first mode. The large battery capacity supports long underwater photo sessions, allowing every moment to be captured without interruption. The strobes also feature a display that shows the battery charge status, allowing you to keep track of the remaining battery life at all times. I have been fascinated by these strobes since their launch and, after hearing feedback from other underwater photographers, I finally had the opportunity to test them first-hand during my recent three-week trip to the breathtaking tropical waters of Raja Ampat, Indonesia. The setup I used for the test consisted of: Canon EOS R5, Canon EF 8-15mm f/4L Fisheye, Nauticam NA-R5 housing, Nauticam 140mm Dome, Nauticam Trigger and Flex-Arm carbon arms. During the first dives I studied the light behaviour of the strobe in order to position it in the best possible way. The circular lamp guarantees excellent uniformity in light distribution and the D-Pro, with its coverage angle of about 150°, provides a considerable amount of light perfectly distributed over the entire frame of the shot. Power adjustment is easy thanks to the power selector. To balance the weight I added a pair of floats, as the strobes tended to be slightly negative. Looking at the shots underwater, previewed on the camera, I was impressed and couldn't wait to review them on my computer once back on land. Upon review I was even more surprised by the quality, quantity and uniformity of the light, everything was simply amazing. While diving, I tried to 'exploit' the strobes to the best of my ability in a variety of situations, and they never let me down; on the contrary, they always provided the best of their light. I was particularly satisfied with the battery life. I always recharged the batteries after 6 dives, with an average of about 100-130 shots per dive, the display allowed me to accurately monitor the remaining charge, eliminating uncertainty about whether I could continue shooting. Recharging the batteries was simple, just remove them from the compartment and plug them into the supplied transformer, waiting for the LED to turn green to indicate a full charge. I'm not sure of the exact hours needed, I always did this before going to sleep, in the morning the batteries were ready, fully charged. As an optional extra Supe supplies a diffuser (D200-Diffuser) for wide angles. It is a hotly debated topic among underwater photographers whether they should be used or not. Not being able to provide scientific measurements with appropriate instruments, I can only give you my personal feelings. I felt good in both cases, with and without, the difference I noticed was only in the type of scene shot. I shot very often without a diffuser, because I had the feeling that the strobe had more penetration and the light was more incident on subjects with a greater distance to the lens. On the other hand, with very close-up shots, I found the shots with the use of the diffuser with a softer and more even light more pleasing. After three weeks of diving I did not experience any problems with their operation, the strobes were always ready to fire. The size and weight did not have a major impact during the dives, I appreciated their ease of use. I personally think that the SUPE Scubalamp D-Pro is currently one of the best underwater strobes available on the market in terms of value for money. However, it is important to emphasise that I have not been able to assess its reliability in the long term; my testing period was, in fact, limited. However, I am also confident in terms of reliability because the quality I found during use was evident. I would like to thank my friend Scipione, who allowed me to test these strobes, and Raymon Bao, owner of SUPE Scubalamp, who was always available to answer my requests for further details about the product. F8 - 1/125 - ISO 100 F11 - 1/160 - ISO 320 F13 - 1/160 - ISO 250 F10 - 1/125 - ISO 250 F8 - 1/160 - ISO 250 F11 - 1/125 - ISO 250 F10 - 1/125 - ISO 200 F8 - 1/125 - ISO 160 F9 - 1/125 - ISO 20012 points
 -
12 points
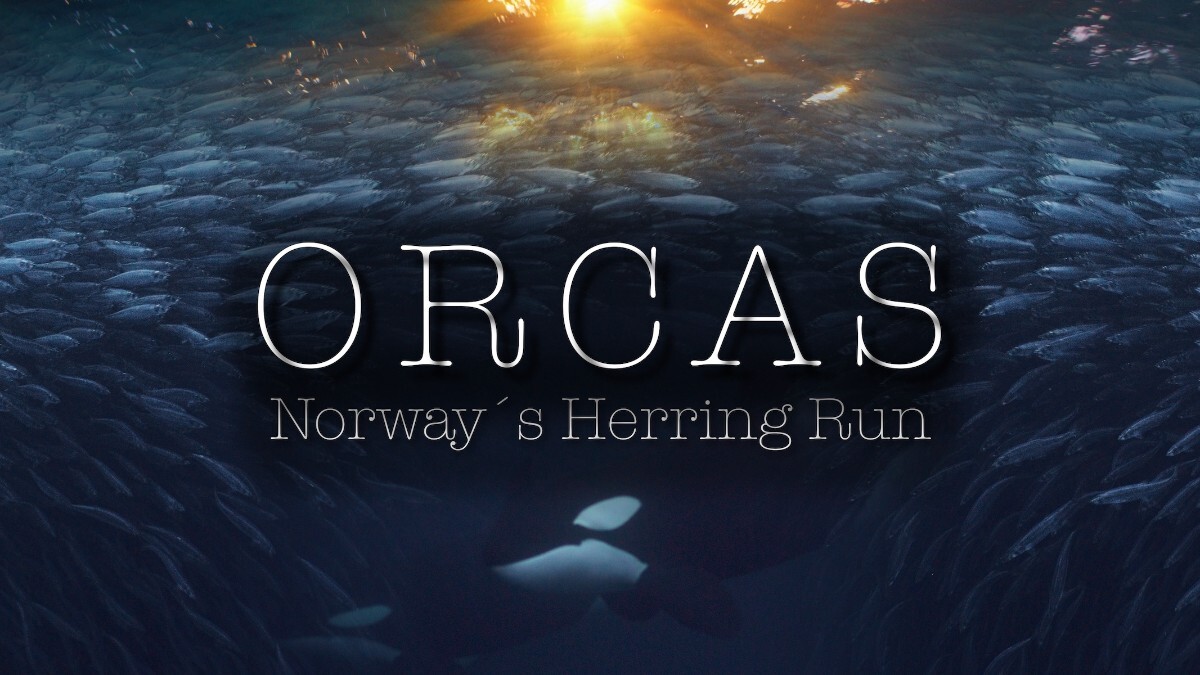 How to I can still remember me sitting in a hotel lobby after a Lake Baikal tour in 2014, reading a dive operator newsletter about “Snorkeling with Orcas in Norway”. I just thought, “ Are they crazy, snorkeling with Orcas?! Definitely not, that’s too dangerous!” Well, the years passed and everyone returned in one piece from these tours. Over all these years the Orca action doesn't seem to be letting up, based on reliable first-hand information, and because I upgraded my camera setup, I decided to travel to Norway too. More specifically, to Northern Norway. I flew in to Tromsö, took the fast ferry on the same day to an island called Skjervoy. The ferry ride is 2 1/2 hours, by car its a 3 ½ hours (250km) drive. World map with Skjervoy Europe map with Skjervoy Skjervoy detail maps What actually happens there During the winter months uncountable tons of herring migrate to the fjords to overwinter and apparently to rest there. Orcas, Humpback-, Finn- and Minke whales follow the herring and eat their fill. Even Sperm whales have been seen there. The fjord of Skjervoy has been a reliable place for this for 8 winters now. Before the action happened around Tromsö, in Andfjord and Senja or Tysfjord. As a result, Orca watching and snorkeling has become a big business in this area. This is a picture from the sonar screen. On the left side of the screen you see the seafloor topography and the depth under the boat with 164m. On the right side you can see, that the sonar measures only 139m. What’s wrong? The herring gathered so tense the sonar didn’t reach the actually seafloor and assumed the herring as the seafloor! The red color on the screen are the fish. The fish start at around 115,5m, probably all the way to the seafloor - around 50 to 60m of fish in the water column. How amazing is that!? In the blue area of the screen, right under the top white line, on the left side, you can see greenish dots - that’s a Finnwhale. Another one is at around 75m on the right side of the screen Liveaboard or landbased There are several large liveaboards that offer short trips of just a few days, up to a week. The large ships have the advantage that they start in Tromsö, can travel long distances in any weather conditions to find Orcas and avoid so the fleet of small boats, which don´t have such a big ranges. But once you've found Orcas, you're sitting on a dingi and are exposed to the cold wind. During my stay it was plus 3 degrees to minus 6 degrees Celsius. I booked with my long trusted tour operator for Nordic regions: Northern Explorers. He put me on a small cabin cruiser boat. In my opinion, sufficient enough for the fjord, protection from the wind, spaces to sit in a normal position, a toilet. What else do you need? Orcas, of course. I booked two trips in a row to have more opportunities to get footage and in case of days lost due bad weather. I have been to such northern regions many times and had, the one and the other, day lost due weather conditions. So I thought two tours are a smart decision. And it was again. 13 days on the water, 3 days without Orcas sightings (due high waves the searching area decreased and even if we have found Orcas it would have been too risky to get in and out of the water), 1 day we found Orcas, but the group was avoiding us, so we didn't get in the water. Freedive equipment Anyone who has ever tried snorkeling in a drysuit knows that's not really possible. I was advised to get a Smoothskin - Open Cell freedive wetsuit. Water temperature was around 5 to 6 degrees Celsius. I decided for a 7mm. Normally wetsuits have a layer of fabric over the neoprene to protect it. Open cell smoothskin apnea suits do not have this linen. Open Cell inside is a porous neoprene layer without any coating. And because it’s porous, the open cells/microscopic bubbles attach to the skin by creating a vacuum and therefore, the suits usually fit like a second skin and keep very warm. Unfortunately, this advantage also makes the wetsuit much more fragile than the nylon lined insider. If you want to put this suit on or off, you definitely need water and soap. Smooth Skin on the outside has also no fabric and dries immediately. In addition is used freedive fins and a weight vest. For the case I wanted to stay longer underwater, like at a bait ball, I used a 7 liter tank on a backplate. I did a test dive in a lake before, to check the approx weights and how to manage the buoyancy without a BCD. Looking for orcas Approaching a pod of orcas Orcas and a small humpback whale in the background Camera gear I used my Red Komodo due the larger sensor size and left the Panasonic GH5 at home. Although the smaller GH5 housing would have been much easier to snorkel and free dive with. I switched between 18-55mm (with IBIS) and 28-70mm (no IBIS) lenses. Behind the WACP1 they give me 123 and 90 degree converted FOV. Filmed in 6K, 17:9, 24fps. For the topside shots I used a DJI Mavic 2Pro and Panasonic GH5 on a gimbal with a 12-60mm and a 100-300mm lens Daily routine At this latitude the sun in November just barely comes over the horizon and days get shorter loosing 12 minutes of daylight every day. Due the low sun the colors in the sky can be unreal and reminded me sometimes on Old Master paintings. Beautiful mood under the water surface. Orcas are missing in this shot We headed in the areas where herring fishing was going on during the night. Apps, like Marine Traffic, are very useful for that. As we headed out we have always been on the outlook for Orcas. We also oriented at the Marine Traffic locations of the liveaboards. It was a good sign, if they didn´t move the vessels. Hints from other boats were also shared. Once we had found an Orca pod, we followed them at their side for a while. If the Orcas seem to accept us, the guide gets the boat in a good position to drop us. Then it was all up to the Orcas. Is it just a quick swim by, a dive down or an interested interaction. Ready to go! Due a hint from a liveaboard guest and Marine Traffic position we headed far north. The weather and the sea forecast was okay, so the long way was doable. We encountered a very relaxed Orca group, swimming back and forth, circling around us several times. Unfortunately we had to finish this interaction too early, it was a long way back, and the night slowly fell, shortly after noon. Two uncut clips from this group below. Clips are not slowed down. This is where we found the group. The farthest point we travelled The main goal is to find Orcas at bait balls. That’s where the action happen! The Orcas rotate and hit the herring with their tail fin. Dazed herrings are eaten then. Bubble feeding is also possible. At my first bait ball I suddenly found myself right in the bubbles. I knew I had to get out of here - immediately! You can't see anything and a Humpback whale can shoot up from the deep at any time. Herring bait ball Trying to find a good position After I found a good position, I let the camera roll and tried a free dive. The free dive was interrupted at 3,6m by heavy oncoming traffic! I saw two white fins coming up from the dark „a Humpback! Keep the camera steady!“ Humpback whale close encounter Humpback whale close encounter Humpback whale close encounter Humpback whale close encounter Conclusion It was a lot of fun and I would do it again! I like the challenge of cold weather, wind and waves, and it were good cardio exercises too. I only wished to get more detailed feeding scenes underwater and by drone the next time. Getting good video footage of Orcas is not easy. I cannot compare it to anything I have ever filmed underwater. Often it is a matter of seconds. If it seemed to be a good boat drop, I visualized the shot, or what might happen under the surface, before jumping in. Planning the shots in the water first, it's way too late. I realized this after a week. You can watch the movie from this trip here. And like always…feel free to share, comment, like, dislike and follow! You can make an old man very happy! See you at the Orcas - cheers, Alex.12 points
 -
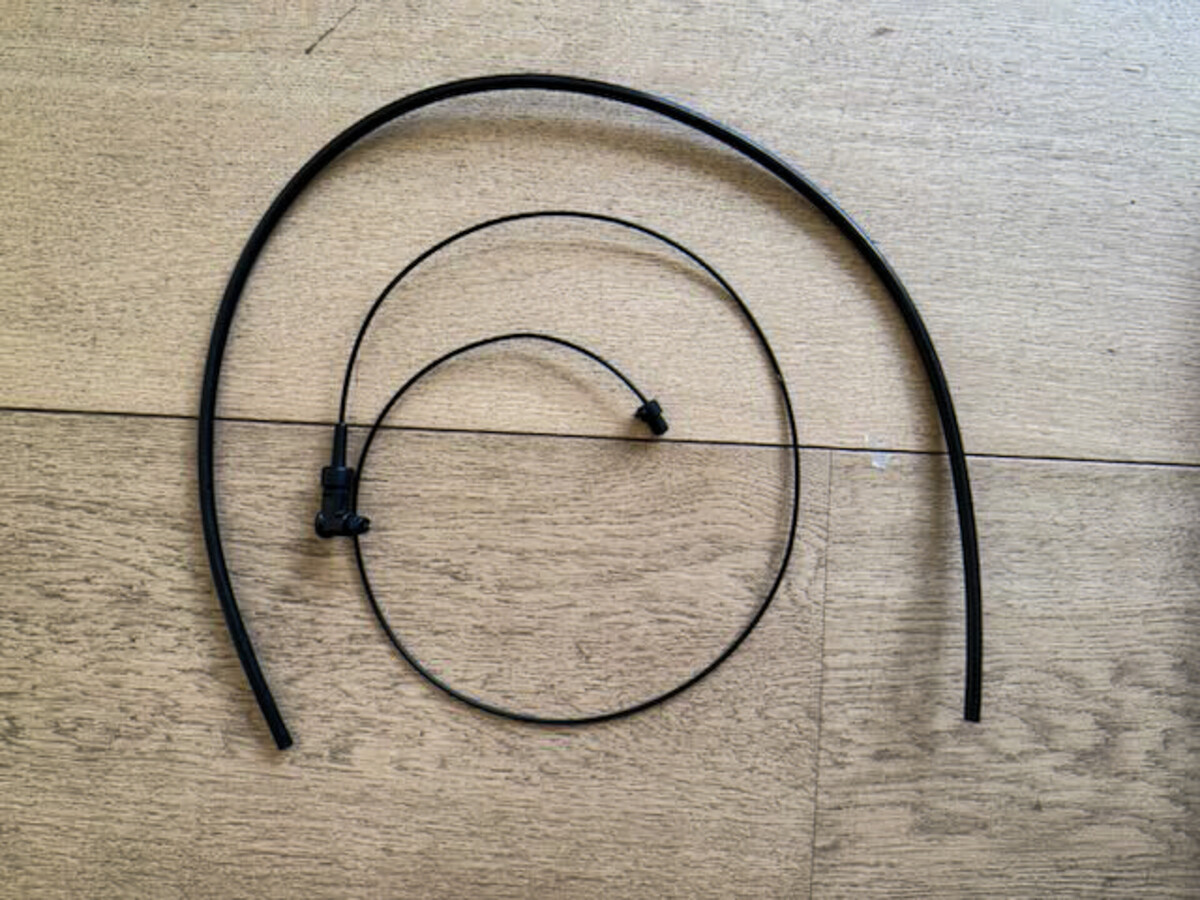 Some time back, I wrote an article about creating your own fibre optic cables: a quick, easy, inexpensive and very satisfying process. In case you missed it it, a link to the piece is here. https://waterpixels.net/articles/articles_technique/diy-fibre-optic-cables-easy-r32/ Now, many months on, a couple of additional suggestions: BURPING On entering the water and descending the plugs at both ends of the cables often need burping. Tiny air bubbles seem to be able to block fibre optic light transmission. Easy to resolve of course: simply remove and replace the plugs at the camera bulkhead and strobe ends of the cable. Worth checking especially before setting up for that crucial, once in a lifetime image. DAMAGING THE CABLES On a recent long dive trip in Raja Ampat, my system was being hauled in and out of RIBs with the strobe arms being moved and folded sometimes by me, sometimes by the boat crew. At some stage one of the fibre optic cables gained a small “crimp” which resulted in the attached strobe not firing consistently. Annoying of course although easy to replace the cable. This got me thinking about a way to protect the cables. For my next trip I used some cheap garden micro-watering system hose tubing to provide a protected route for the cables from the housing bulkheads to the strobes. Cost was a few cents. I found it slightly better to cut the tubing slightly shorter than the fibre cables as this allowed for easier curves at each end. The tubing is held against the float arms using short loops of bungee cord. I found it worked best to push the fibre cables into the strobe plugs only on descent or at depth. This allowed for burping and avoided any strain on the connections whilst handling during entry. In general I’ve found it better not to have fixed connections at both ends of the fibre cable. If one end can pull loose when strained, (best I've found is the strobe end) this avoids breaks and overstrains especially during transportation or in rinse tanks (avoid them at all costs!). If stretched or tugged the cable will simply pop out of the strobe end bush. No damage results and the cable is easy to push back in. The first photograph shows the fibre optic cable and the garden hose tubing; next one with the fibre pushed through the tubing; then "hung" on the strobe arms; and finally the loops to hold the tubing and cable in place.10 points
 -
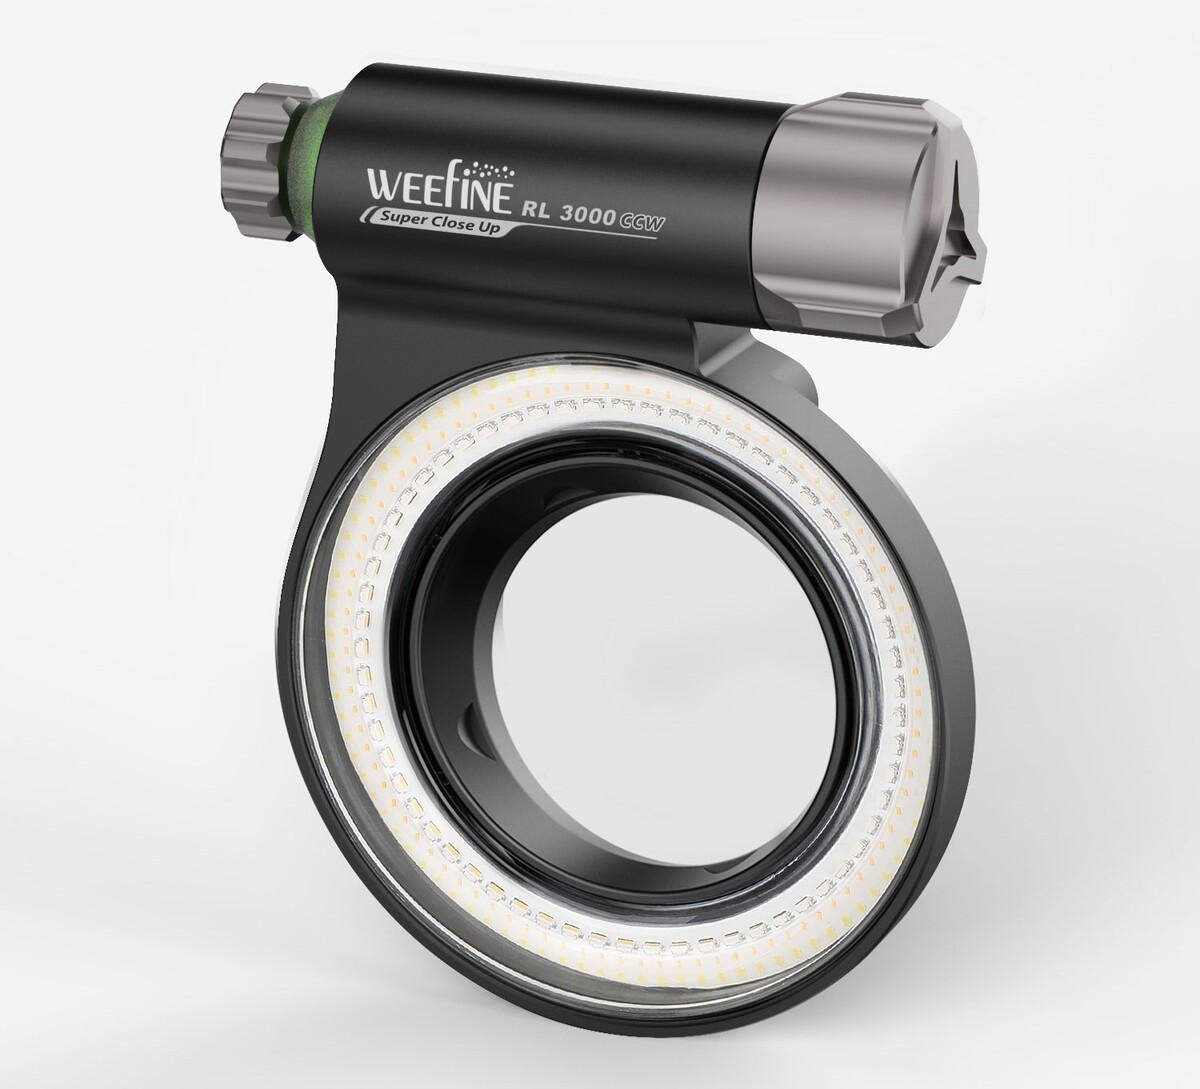 I have long fascinated with shooting ring lights underwater starting with the Inon Quadflash, through the various Athena modifications to Sea and Sea strobe heads, continuing to the Saga fiber optic rings and now to the Weefine 3000. The Weefine 3000 is the latest version of the LED lights made by Kraken and Weefine. The Weefine 3000 CCW Weefine 3000 CCW Ring Light It's similar to the earlier 3000 lumen LED modules but has adjustable color temperature and a 3000-lumen burst (strobe) mode. It also has a super closeup mode that can shoot subjects as close as 25 mm (1 inch) from the strobe. It is powered by a protected, 26650, 5000 mAh Li battery. The battery can be charged via a built-in USB-C port. One very neat thing about the light is that it allows for a very small, compact system underwater. No arms necessary, just the camera/housing/port and a single fiber optic cable. The light is shown below on an AOI housing for the OM-1 camera. AOI housing for the OM-1 camera with the Weefine 3000 CCW Ring Light The ring light can attach to any port with a 67 mm thread and can be rotated for any angle once attached. One nice feature (or bug) is that when you are using the light in the strobe mode, it remains on at low power to act as a focus light. During the day it was not terribly necessary but worked fine at night, although you will also need some kind of dive light to find your way. My wife said it was very easy to find me in or small group, just look for the circular dive light. How well did it work? Better than I had anticipated. Years ago, I had the Kraken version of this light, and it was fine; this version with improved ergonomics (no multiple button pushes) worked great. Here is a nice little clown (Triopha catalinae) from a dive in local Southern California waters before the Raja/Triton Bay trip on the Wellenreng. This was shot at 1/160 sec, f/7.1, ISO 200 using the Olympus 30 macro lens on an OM-1 in an AOI housing. Certainly, enough light to illuminate the subject, I slightly reduced the shot exposure by 0.1 to increase the contrast a bit. For other local subjects, such as this anemone it also worked well. This one was shot at f/5.6, 1/160 sec and ISO 200. I shot with the light quite a bit on our trip to Raja/Triton Bay. Here is a nice little Goniobranchus coi, shot with the Panasonic 45 lens, f/6.3, 1/160 sec, ISO 400. I was very close; you can see the out of focus gills. I love Christmas tree worms, here is one from Triton Bay. Same lens, 1/250, f/7.1. Here is a crinoid shrimp, same settings. I shot a lot of tiny things, but also a bunch of anemone fish. Here is a Clarke in an orange anemone. f/14, 1/250, ISO 400. Overall, the light worked well for the things I was shooting, it of course is completely useless for anything more than 250 mm (10 inches) away. The color temperature is fine but shooting in raw lets me adjust as needed. A friend used the light as a video light for a TG7 with a 52 mm to 67 mm adapter and said that for most nudibranchs the light was much easier to use than independent lights on arms. I wish it had more power, a 6000-lumen burst mode for this type of light would be awesome, but the current version is adequate for micro 4/3 shooters and awesome for the smaller sensor cameras like the TG series.10 points
 -
 During our first stay in the Philippines, just after COVID, we skipped Moalboal. At the time, it was still "complicated" to change islands. For this trip I studied an Anilao – Romblon combo but it seemed relatively complicated to me... I gave up. Good for us with the typhoons, we would have been stuck for a few days. Anyway, we went back to Cebu again, with Moalboal and its sardines as our first stop. For the rest of the season we chose safety by returning to the Thalatta Resort south of Dauin in Negros Oriental. It was also an opportunity to re-test this hotel, following the change of ownership. For the third place, another safe bet, the Island View Beachfront Resort and its Anda Scuba Diving club. Resort at the top of our possibilities with the "real" rates and not the promotional ones we had in 2022. FYI, if you are a "returning guest" there is a small discount... but also by making a "long stay" from 7 or 8 nights. This helped us a lot, without these discounts, we would not have gone back for so long. So if you go, stay at least a week. I tried to minimize the trips but we will have done close to 600 km by car and boat. The route, once again it will be with Singapore Air that we will fly, still departing from Zurich. ZRH -> SIN 12 hours (return more than 13 hours) and a little less than 4 hours from SIN to CEBU. I always enjoy this long night on the plane where you can land, especially since on the way there and back you arrive in the early morning. Some go through Turkey when I look at the schedules, no thanks, especially if it's to earn only a few euros on the flight and then it's a hassle when arriving in Cebu at 2 a.m. For us, it was an arrival in Cebu around 3 p.m., everything went quickly and without the slightest problem. Provided that you have thought carefully before leaving to fill in the online form on the Philippine website in order to obtain a QR code that will be requested on arrival. This form, on the other hand... uh... A real hassle to fill, I had to start over a good dozen times... bugs galore. So avoid doing this at the last minute, you risk having surprises. It's a long journey, especially if you still count the journey to Zurich the day before the flight. 44 hours door-to-door on the outward journey and 56 hours from the departure of Anda for the return. Here we are at the exit of the airport and our driver is waiting to take us to Moalboal at the Cebu Seaview Resort. This will be the most difficult part of the journey. Almost 3 hours of winding roads with part of the night. But we arrive without any problem at the first stage of our journey where we will dive for 4 days. A quick dinner, before assembling the photo and video equipment... tomorrow the dive starts at 8 o'clock. With the 7-hour difference in winter between France and the Philippines, we will have to set the alarm clock... But it will not be useful, only too happy to be back in the warm waters of the Golden Triangle. In the morning, a little check of the papers (certifications and insurance) and of course the small form with liability waiver, in short, classic. Everything is very well organized, the tank are rigged on land by the divers but transported on the bankas by the many crew members and guides/instructors. Once everything is installed on the banka, the signal is given to join the boat. A small staircase to go down and then, depending on the tide, a small walk in the water to reach the access staircase to the banka. I strongly advise to wear booties, if possible with good thick soles, your feet will thank you. Here as in the other places where we dived, pebbles, corals and especially sea urchins can be formidable when accessing the boat. The first dive will be in Pescador, a small island in front of Moalboal, renowned for being surrounded by a teeming life. A few years ago there was a large sardine bar that had taken up residence there... We won't see the slightest of them, just a lot of fish. Nice dive to start our stay. After the dive, it's back to the center, everyone disembarks, there's something to make coffee or tea... but nothing to nibble on while waiting for the 2nd departure. Cebu Seaview being located more or less in the middle of the Moalboal coast we will do the dives less than 15 minutes away from sailing and just a little more for Pescador which we will do 3 times in 4 days. The conditions were not great so we only did the west side but nature is well done, it was different each time. In the afternoon there is a 3rd dive and it is possible to do night dives. We will not do it. On the second day we change guides that we will keep for the remaining 3 days. Not bad... I would say better than the first one who was an employee of the center while Cino was a freelancer. A guide with a bottle... A pleasure to dive with him. We will always leave first and will often, if not always, avoid "traffic jams" and "jacuzzis". It is therefore with him that we will make "the Sardines". Sardines... They migrated for an unknown reason a few dozen meters from the coast. This is where they are visible to divers but also to snorkelers. The number of boats on the surface made me fear the "worst", I could already see myself having to elbow my way underwater, a bit like Hanifaru Bay in the Maldives. Cino jumped us into the water first and "traced" directly to the north... small shock... "But where is he going?" and then magic sardines... sardines everywhere... thousands, sorry millions, impressive. We were the only ones for the first few minutes. Then a few divers joined us but at no time was there a crowd, really great. An experiment to be done at least once... We did it again 2 days later without any regrets. It's not easy to convey the atmosphere in photos, I did the best I could. It's up to you to judge. The dive center is not the "family" type, it's closer to the factory... but very well organized, where it is good to dive. We did 11 dives in 4 days and were happy to go to see something else. The hotel is comfortable, nothing to say, nickel, quiet and the a la carte restaurant is very good. It's not on the level of the next ones but excellent for the price. Very good mention for the bar. The cocktails are very well dosed... (I suspect the bartender reversed the dose of rum with that of orange juice... ) It was really not worth having 2 drinks to sleep well. As is often the case with great encounters during these few days, there are no regrets about having passed through Moalboal... Sardines undoubtedly deserve the destination to be bet on a "ToDo", even if bubble factories are numerous here. After 5 nights it is the departure for the Negros Oriental. The transfer is arranged at my request by the Thalatta Dive Resort. A taxi picks us up at 8 am and after about 2 hours 30 minutes we arrive at a small port where small fast shuttles go back and forth between the islands of Cebu and Negros. The crossing is done in less than 30 minutes. Remember to have Pesos (PHP) in order to pay porters and luggage tax on arrival. The whole thing cost us a few hundred PHP (1 € = +/- 60 PHP). Upon arrival, a driver is waiting for us to take us in less than an hour to the Thalatta. We will arrive in the early afternoon and will be able to sit quietly and enjoy the pool before the return of the divers who spent the day with 3 dives at Apo Island. When we arrived, we met "our" guide Nadi with whom we had dived 2 years ago. He no longer dives. Alex, the new owner of Thalatta Resort, asked Nadi to take over the reins of the diving club. He now manages the entire small team and the maintenance of the diving center. We will dive with Oien during the 7 days. He is now the most experienced guide. He was trained by Nadi. We had already dived with him during Nadi's "day off" in August 2022. He is very good and has gone out of his way to show us as much as possible.... Ouch that's where it starts to get stuck. The season is really not ideal, not too much life, few nudibranchs, shrimps and others. It's nature and you have to accept it. We are "just" a few weeks, even days before the gradual return of the little beasts. Nature... hmmm that includes the weather. Not really at the top of the wind coming from the north-east and some clouds. But overall it was very nice. A little frustrated at having been able to fly very little with the drone. Big frustration on the day of departure with flat seas.... And to think that 2 days before, on the way back from the last dive, my wife, while jumping from the Banka "at the wrong" time, sprained her ankle... It is therefore with a crutch that she will leave the Thalatta. Thanks to the carpenter, who quickly made him something to move around without putting too much strain on his foot. Thanks also to the masseuse who worked a miracle. Our physiotherapists should learn from this... More than an hour of massage to relieve pain and try to unravel problems and restore mobility. Back to diving. After the first day where we did a double dive trip to the south (Basak) and then in the afternoon a House Reef for the two of us, we left for Apo and three dives on the second. The crossing is slightly hectic but it goes well with the very comfortable banka. First dive on the bow of Apo.. hmmm but where have the fish gone? The place is still beautiful with soft corals everywhere, a few turtles but very few fish. The next 2 dives will be the same. Frustration, disappointment and sadness. After a little discussion, it seems that the locals are fishing in the "marine park"... Two days later the 2 bankas are scheduled for Apo... we will have a short day of rest. That's how much we were marked by this first outing in Apo. On the way back from the banka (yes there was only one that went out, the group that had booked the second one cancelled at the last minute ) those who dived there were delighted... obviously there was life... But it was the first time... or we had fallen on a very bad day. We will have to go back to find out for sure. A day doing nothing feels good but it's so long . We will continue by diving on the coast of Dauin to the north and south and for me a little "night dive" on the "House Reef"... and on the last day a single dive on the HR with a very sporty but then very sporty launch and return. The photographic harvest was less, as was the quality and variety of the subjects. It's nature, you have to know how to accept it. A small overview of the result. More here The Thalatta Resort, for those who know it, it's always the same. You feel good there, you should say: always so good. The restaurant is always good, as is the staff of the whole hotel who are very attentive, helpful and smiling. No regrets about coming back. The changes now: Alex, the new owner, obviously has plans not to change anything... i.e. to keep this family atmosphere. Keeping the same concept of what Patrick has built. But there is an important point, he intends to do better... To improve the Thalata little by little, in small steps and I don't doubt for a moment that he will succeed. He started by redoing the inflation installation New compressors, and nitrox per membrane... The best of the best, a very good start. On the hotel side, renovation work is being carried out everywhere. Small things like the restaurant toilets, the new fresco and different layouts tested. Everywhere, gardeners are replanting new plants to further embellish the setting. I like it. At the bar, installation of shade sails so that you can sit there during the day. I'm curious to see how it will evolve in a few months. Anyway, you can go quietly, you won't be disappointed, the Thalatta Resort is a place made for divers. If you stop by the Paris Dive Show, there should be a booth with the Thalatta. Alex should be there with the former owner Patrick. We will go there to say hello to them. There is a difference between Patrick and Alex.... Patrick didn't dive, Alex, yes and he's not a beginner.... I believe that there will be positive surprises in the future on the diving side. Small downside... As a child, the prices of the dives have increased slightly. After 2 stays of 10 and 8 nights I will not hesitate for a moment to go back but at another time when there is more life... why not spend Christmas 2025 there... the whole team is well on its way to make the atmosphere there, with the decoration and a nice "Christmas menu"... I almost placed an order . Let's move on to the 3rd part of our stay. Once again we made the choice to go back where we would be sure not to be disappointed. Yes, yes I know maybe we should go elsewhere to be more adventurous... Of course not. I totally assume this choice to return in order to enjoy even more and a little differently. We appreciate finding what we loved, in order to savor the place once again. If possible, we do a small combination of safe bets with "experimentation". The next trip will again be in this style 2/3 of novelty and to finish 1/3 back... But let's get back to this trip which ends in an hour with our landing in Zurich. Anda in the south-east of the island of Bohol is a remote place, it is the price to pay to find the calm... almost 3 hours drive from Tagbilaran without counting the 2 hour crossing by speedboat from Dumaguete. We will arrive at nightfall... very tired but happy to find the Island View Beachfront Resort that we had found magical the first time. Peter the owner has made small improvements such as terraces on the front of the cabanas bungalows. Sorry for posting all this pictures but it is such a lovely place. The restaurant, the "Old Plantation" is always at the top, the reference in Anda, and guests from other hotels come there to treat themselves. We had a great time... Too much maybe the scale won't like it, I'm afraid. After a visit to the room, we meet at the bar, Hubert the boss of Anda Scuba Diving whom we did not know yet since he was in France during our 1st visit. There is also Olivier who is in his third season here. Zack, with whom we had dived in 2022, has returned to France. Nice contact and appointment for the next day before 8 am for the paperwork and our first dive. After a restful night, we are at the club with "Captain Thomas" still in place, but now there is still Jason, a young Filipino, who takes care of the inflation and supports Thomas in all the preparations on the boat. He looks serious and during our stay he passed his Open Water. Hubert intends to train him to become a guide, and thus expand the team. The boat... It was replaced by a larger one but kept the same flat bottom philosophy in order to be able to sail in a few centimeters of water and be able to approach the beach at low tide. I find it really very good, comfortable, the edge is very wide, you are well seated and equipped with the block, it can be placed stable on it while waiting for the launch. The service is top-notch, and the security system is at the forefront. Only downside, yes I know I'm a born complainer there are only S80s.... But Hubert is well aware that it will be necessary to invest in some S100 in order to make heavy consumers feel comfortable and safe. I managed but I admit that I was a bit frustrated to often stay a little higher, just to keep the hour of diving... on the other hand I never used my reserve on fins which came out regularly with 100 bar... I let her enjoy her dives without playing parasite, attached to the rescue. Underwater, the same as elsewhere, less life and always the same reasons given. Not really the season, and in addition the water being particularly hot it seems to accentuate the phenomenon. In the end, the water lost 1 to 2 °C, going from 30 to sometimes 28 on the last day. There were quite a few turtles 2 years ago... But this year we have moved to a whole new level. There are many more of them and they are less shy. I think we are slowly approaching the "level" of Bunaken. Awesome. Unlike Dauin, we had a very calm sea being protected from the wind by the big island of Bohol. Very well. We enjoyed ourselves even if, as already said, I regret a little lack of life. But the last 2 days, there was starting to be a little more to see. According to Hubert, the high season is fast approaching, More to watch here On the diving side, as well as on the hotel and restaurant side, no regrets about having gone back to dive in Anda and as for the Thalatta I can only recommend the address. If the opportunity arises, we will return without the slightest hesitation. It's a good way to end a stay, with a little more upscale services. Depending on the return flight, it is necessary to leave a day earlier and spend a night not too far from the airport. This was our case. We made it simple by going to the Waterfront right next to the airport. Decent room, big and beautiful pool but on the restaurant side there is better. I regretted not having dinner while having a simple meal in the domestic flight airport lobby right in front of the hotel. In Singapore, the work is now complete. There weren't too many people I found, at least that's my impression. Singapore Air nothing to say, the economy class is not bad and when you see the comfort that those who fly in business class can have... I understand why this company is always so well ranked. Here we are back in Europe and tomorrow work resumes. The 7-hour time difference is really complicated on the way back, on the way there it goes very well. Who knows why Nice little trip of more than 3 weeks including the trips. But small frustrations due to a lack of life, yes, yes I'm jaded, there's no need to remind myself of that. Just like the weather which was not at the top of the best and which could have led to even more serious consequences for my partner's ankle. We were hot on this one. In the end, I dived a little less than expected with only 47 dives distributed like this: Maolboal: 11, Dauin: 16 and Anda: 20 On average, they had 1 hour, a maximum depth of 34m and only 3 dives of more than 30. A hiccup with a 38-minute dive because a member of the group was at 40 bar after 35 minutes of diving Now I'm going to get ready for the next trip which will be soon and to a mythical destination for divers, Raja Ampat with a short week in Lembeh on the way back, a destination just as famous for its Muck Dive. Thanks for reading. I publish the report in french and used the automatic translate module of Microsoft Word. I hope this stay comprehensible and you enjoy my report. Feel free to ask if you have question. Comment are also welcome. Hugues9 points
 -
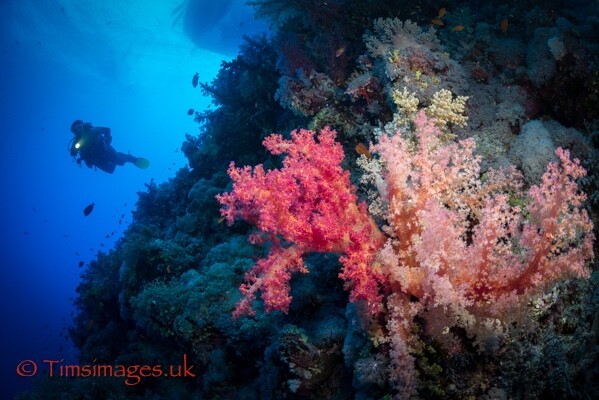 A wide-angle image of a reef, a wreck, a school of fish or pelagic can look pretty spectacular. Adding a diver is even better for that Telling-A-Story type shot The diver often gives an idea of scale, usually confirms the scene is underwater, and makes the picture one to which non-divers can generally relate. The problem can often be, however, “the diver”. Viewed dispassionately, the diver may sometimes actually detract from the image. Legs and fins splayed all over the place, dangling gear, eyes closed, bubbles over the diver’s face, weird positions…. How to get over this? The more underwater photographers develop their skills, the more they realise that time, planning and effort are rewarded with better results. Of course you can go out, shoot away and get lucky. We’ve all been there. But to create a high quality image regularly takes patience and effort. So, the diver in the shot? Same approach: patience and effort. For starters, getting the right diver as a model: comfortable in the water, excellent buoyancy skills, patient, calm…. unflappable, willing to persevere. Sad to say, but generally good-looking and reasonable physique might be considerations too. Then, unless you are shooting radical chic or the 1960s look (love those oval masks!), wetsuits that don’t have holes, gear that looks like it was probably bought in the 21st century. Brief the diver: how you plan to shoot, the type of image you are hoping to achieve and against what background. It helps, of course, if you have dived the site before. Even better if the model has too. Do you want the model as background: just helping put the scene into a context? Perhaps in the background exploring the wreck/reef, pointing a torch to highlight a feature? Or a more close-up portrait-type shot? Agree some basic signals: up, down, left, right, blow bubbles with long, slow exhales, smile (honestly!), repeat, repeat again, stop, slow, go backwards, get close, get further away. I’m sure you can think of others. My partner is excellent at various other signals with which she likes to respond. These normally involve fingers - often a raised middle finger. And so to the water. Buddy check of course. Ripping currents and serious drop-off walls are reasons for extra caution. The safety of you and the model are paramount. So if either of you are struggling or uncomfortable, there’s always another time, another place and another dive. But assuming all is well, find the type of location that you have agreed and let the fun begin. Indicate to your model how you’d like them positioned against the backdrop; the direction of travel; carrying a torch which is switched on; and what point do you want them to stop or is it a swim-by? Which way do you want them to look - at the camera (hmmm, maybe not), at the reef. Maybe though you want to be able to see their eyes which might require some vague contortionist movement. Slow exhaled bubbles add drama and context. No doubt it will take several attempts. Fins in horrible positions, eyes closed, bubbles in front of the mask, pesky fish in front of the eyes, wrong angle…. (see why patience and perseverance come in?). So back off the reef or wreck a little, review what you have with your model, give them a welcome breather - and, probably, do over again. And again. And, probably again. When you get the images home and on screen, you will see just how many are not quuuuuite right. But with luck and effort, you should come home with some images that work. And, fingers crossed, that your model likes too - especially if you want to use their services again. Do give them copies. If it’s been an especially successful or challenging day why not print and frame a copy of a significant image as a thank you? If you’d like to try and sell the images, ask the model if they’d sign a model release which then makes commercial sales feasible. Adding a model to an underwater image helps tell the story of what you are seeing. But it needs careful planning, execution, patience and lots of signals. Even if they are a single middle finger. Top Tips for models: breathe with a slightly tilted head so bubbles move away from the mask straightish legs with one leg slightly bend at the knee. This creates length and elegance. tuck away gear so nothing is dangling big logos/brand names home create intellectual property issues in trying to sell the images de-fog mask exhale slowly - a long bubble stream looks good tuck away long hair to avoid weird ocean-created hair arrangements or hair in front of of the mask9 points
 -
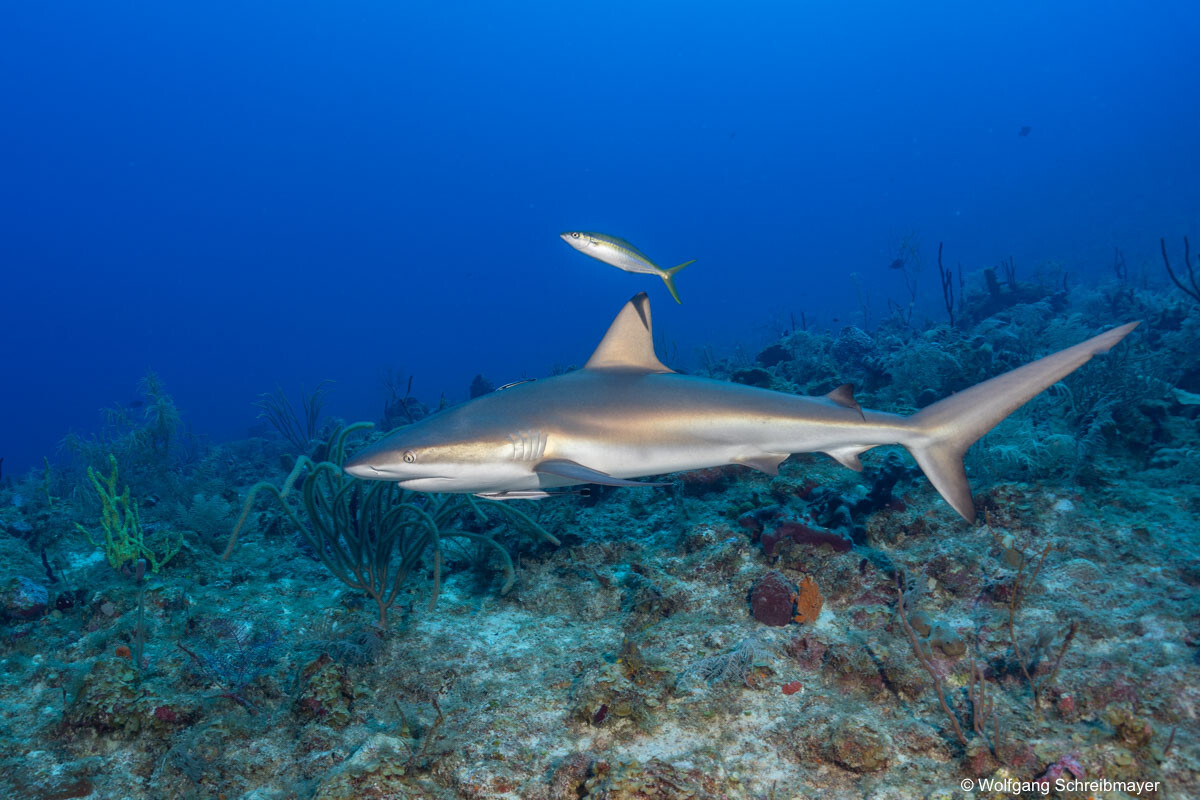 I became aware of Providencia island as a diving destination, when I asked in Scubaboard for a Caribbean diving destination that still offers intact reefs and sealife and is not overrun by tourism (my Caribbean diving experience was, so far, limited to a stay in the early 90ies at Grand Cayman and two stays on the Florida Key Islands around 2000). Instigated by a very positive recommendation, Lisi, me and two friends (Franz and Gerdi) headed towards Providencia Island in March 2024... The tiny island belongs politically to Columbia, but is located in the western Caribbean approx. 150 km off the coast, at the geographical height of Nicaragua. It is located close to another, bigger, island, San Andres and belongs to the San Andres archipelago. Before I start to report about this remarkable diving and UW-photography journey, it is important to state that this is certainly NOT a diving destination for everybody. Do not attempt to undertake this trip, unless you are prepared to deal with the toils listed below, otherwise the trip may become a nightmare: (i) Arrival and departure to and from Providencia is very tedious: For us Austrians this means a flight from Vienna to Paris, followed by a long flight from Paris to Bogota, the capital of Columbia. After arriving at Bogota in the late evening and spending the night in a hotel near the airport, we took a flight from Bogota to San Andres. After spending another night in San Andres, we headed finally to our destination, Providencia. Satena, a small domestic airline, operates the route from San Andres to Providencia with small turboprop aircrafts that remind me at daring bumblebees (especially landing and taking off on the small landing strip on Providencia is an adventure for itself). The check-in luggage is restricted to 15 kg (), but more luggage is allowed upon extra payment, so no problem. The problem was that three suitcases got lost, already on the flight from Paris to Bogota and these delayed suitcases are not automatically transported to the final destination. It took us three days, a lot of efforts and nerves, numerous phonecalls and the dedicated help of Nelson, an employee of a concurrent domestic airline at San Andres, until we had our complete photographic equipment on site (we were three UW-photographers). Departure from Providencia was the same, but in reverse order, but this time there were no problems with luggage. Just count with three days for each direction... (ii) Tourism on Providencia island is simple. There has been once a small, single hotel with enclosed PADI diving base on the island, called "Sirius". The complex had been completely destroyed by Hurrican Iota in 2020. Since then, only very simple accomodation is available in private "Posadas" on bed and breakfast basis. There is no "cold" or "hot" water, it comes just at the temperature as it is available at the container on top of the building. Some apartments have a gas stove for preparing food. In SW-Bay (the biggest beach in Providencia) there was a a single and small restaurant ("Divino Nino") that offered delicious food for little money. For the spoiled ones amongst us, the choice between fish, shrimps or lobster may be a little bit repetitive, howsoever... I can say that the inhabitants of Providencia are very relaxed and exceptionally friendly to foreigners. Spanish is the official language, but they speak Creole amongst them and many know English. Few tourists from Colombia come to spend simple, nature bound, holidays. In addition to the general tourists, there are few divers, mostly from Colombia, but also others from all over the world (Providencia is not a complete insider tip any more). In the two weeks we stayed at Providencia, we met divers from Colombia, Australia, Belgium, Canada, France, Germany and USA. Daniel, the busy and helpful owner of "Sirius Diving" has established a new replacement diving base, located close to the original, but destroyed, one (there are plans to reestablish hotel and original diving base, but the opening day is uncertain...). The small island is located in Caribbean high seas and is surrounded by a massive reef. The diving spots, both on the outside as well as inside the reef, are reached by small boats. Visibility in "Carribbean blue" waters is good, I estimate 20m to 25m. The reefs are typical for the Carribean, with few stone corals, but plenty of horn and fan corals and impressive sponges. They looked completely intact to me, I could not see signs of bleaching or pollution (some hard corals were broken, presumably from the hurricane). Here a facette of the typical reefscape at the outer reef. While I was trying to adjust flashes and camera to make a photo of the reefscape and the three langusts, a juvenile reef shark swam into the frame and destroyed my composition . Sony A7R5, Canon 8-15mm @15mm, 140mm domeport, 1/160s, f/9, ISO 250, 2*Z330. The highlight for UW-photographers on Providencia island is certainly the Caribbean reef shark (Carcharhinus perezi). They live (still) in high numbers around the island. This species appears to be the Caribbean counterpart of the grey reefshark, that lives in the Indopacific (Carcharinhus amblyrynchus). They are "just" reefsharks, but some specimen can grow to quite formidable size (I estimate the individuals that we encountered to measure between 1 m and 2.5 m). The photo shows Gerdi taking a photo of a Carribbean reef shark at the outer reef: Sony A7R5, Sony 28-60mm @28mm, WACP-C, 1/200s, f/9, ISO 250, 2*Z330. These sharks are anything but shy and approach the divers as soon as the divers come close to the drop off at the outer reef (they are not fed or baited by the diving base). From few up to a dozen of these animals would encircle the divers during the entire dive and make outstanding motifs for UW photographers. Reef shark against the reef : Sony A7R5, Sony 20-70mm @20mm, 170mm domeport, 1/160s, f/9, ISO 400, 2*Z330. The Carribbean reefsharks at Providencia island are curious and investigative. Seldom but sometimes, they would come extremely close, almost touching the domeport, in order to check you out. At a few cm distance they would haul off and continue to encircle the divers at greater distance. Only once during the entire period of two weeks, a shark was exerting threatening behaviour against me, i.e. lowering his head and starting jittering with his pectoral fins just in front of me at arms length (I believe that this shark was feeling restricted, as I was positioning myself directly in his swimming direction to get a frontal photo, and Lisi, who was beside me, also taking photos, and the close coral wall dropoff - all contributed to the restriction). After Lisi and me swiftly retracted (better listen, when such an animals wants to tell you something ), the shark continued to swim speedily back and forth along the reef edge, repeatedly and fast opening and closing its mouth. At this point I should say that Carcharhinus perezi is considered harmless to humans, but attacks on humans after neglecting such threatening behaviour have been reported. Reef shark checking me out and hauling off afterwards: Sony A7R5, Sony 28-60mm @60mm, WACP-C, 1/160s, f/9, ISO 400, 2*Z330. A wreck, "El Planchon", is located at the bottom of the coral reefs surrounding Providencia island. Our guide, Carol, told us, that it had been a Colombian ship supporting German submarines with replenishment of all kind during WWII. When the end of the war was close, captain and crew decided that it is time to go home and sunk the ship upon translating their thoughts into action (happy people!). Today the wreck is home to triggerfish, groupers and impressive reefsharks as guardians. Grouper at "El Planchon": Sony A7R5, Sony 28-60mm @60mm, WACP-C, 1/200s, f/11, ISO 200, 2*Z330. The diving at Sirius diving base is typically done with the first dive in the morning at the outer reef and, after sufficient surface interval, the second dive in shallow and sheltered areas within the reef. These areas provide shelter for impressive schools of snappers, grunts and sweetlips, juvenile fish of all kind, puffer fish, nurse sharks and other kind of marine life (we even ecountered a group of friendly purpoises, but they were too far away to take reasonable photos in good quality). Mixed school of bluestriped grunts (Hemulon scirius) and French grunts (Hemulon flavilineatum ) at Tete's place: Sony A7R5, Sony 28-60mm @28mm, WACP-C, 1/160s, f/11, ISO 160, 2*Z330. Mixed swarm of French grunts (Hemulon flavilineatum) and squirrelfish (Holocentrus atcensionis). A school of other fish passes by in the background. Sony A7R5, Canon 8-15mm @15mm, 140mm domeport, 1/160s, f/16, ISO 320, 2*Z330. Closeup of a shool of grey grunts (Haemulon album): Sony A7R5, Sony 20-70mm @70mm, 170mm domeport, 1/200s, f/10, ISO 100, 2*Z330. West Atlantic trumpetfish (Aulostomus maculatus), well camouflaged in a gorgonian octocoral: Sony A7R5, Sony 20-70mm @70mm, 170mm domeport, 1/160s, f/11, ISO 100, 2*Z330. I must admit that I was so impressed by the variety of WA (and fishportrait) motifs (first of all the charismatic Charcharhinus perezi, that were an abundant motif at Providencia and whom I, personally, met the first time in my life), that I did not use my macro setup for even a single dive. Instead I was using WACP-C/Sony 28-60m, Canon 8-15mm and Sony 20-70mm for all dives (in this order). The period of two week diving was too short and it would have been better to stay for another, additional, week to exploit the beautiful macro motifs, including snails and shrimps, that we encountered... As a proof here a Flamingo tongue snail (Cyphoma gibbosus), feeding on gorgonia, taken with the fisheye lens: Sony A7R5, Canon 8-15mm @15mm, 140mm domeport, 1/160s, f/16, ISO 100, 2*Z330. The scubadiving holidays at Providencia island were an exceptional experience for all four of us, with font memories that will endure...9 points
 -
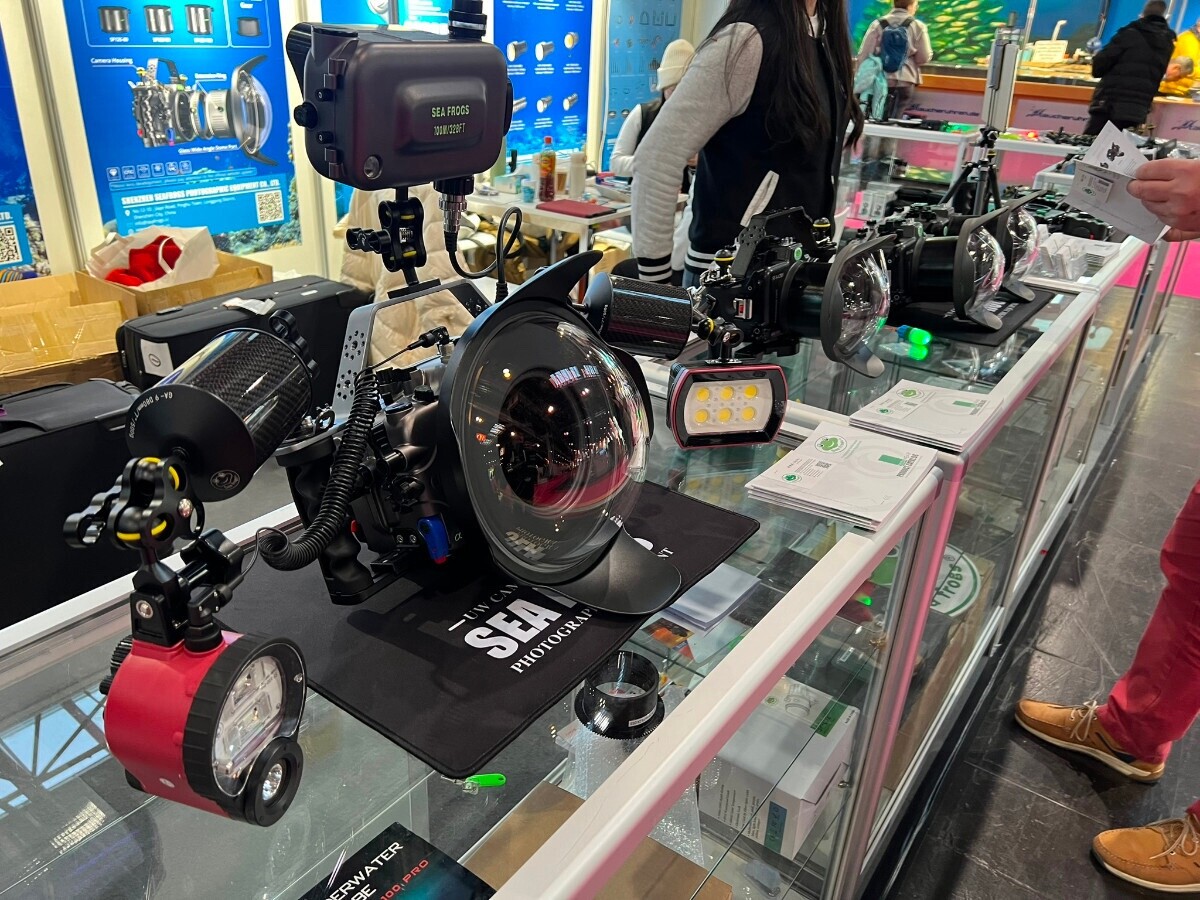 The biggest trade fair for boats, diving (and underwater photography) in Germany traditionally takes place in January every year, BOOT in Düsseldorf. I can report on Nauticam (who shared the stand with PanOcean), Seafrogs, Seacam and GoPro, but of course only individual impressions. There were 3 Nauticam employees on site. One of the three FCPs currently available outside the factory was on display, along with the WACP-1, WACP-C and WWL-1b. I was particularly taken with this comparison. Next to WWL-1b The FCP is noticeably smaller than the WACP-1, but a little bit bigger than the WACP-C. I hardly noticed the difference in weight. What is particularly striking is that the front glass is very curved. Inside you can see what Nauticam claims are highly coated lenses. The FCP comes with an interchangeable port connection (120 and 100) so that no adapters need to be used. The pictures shown at the trade fair by Alex Mustard are, as always, beautiful, and I'm looking forward to seeing the practical experiences of normal people. It was interesting to see the EMWL again in its various configurations. If you want to save yourself the relay, you either need a camera where you can turn the viewfinder image upside down or an inverting viewfinder. Unfortunately, the FCP feels so good that I'm thinking more and more about putting my WACP-C in the "classified" and switching to the FCP. Opposite is the SeaFrogs stand. In addition to the plastic enclosures from the Salted Line series, the new all-aluminium enclosures are also on display here. I may be wrong, but to me they look like a cheeky (but worse) copy of the Nauticam enclosures - and are nevertheless in the same price range. I'd rather stick with Nauticam. Seacam is probably more focussed on cold-water divers and the stand staff were not very interested in walk-in customers. Lots of large dome ports, the Seacam flashes and the familiar housings. After 5 minutes without getting attention, I moved on. The GoPro representative was amusing for me: a small stand, nothing diving-specific. They didn't make any effort. I still found AOI interesting because we also had the discussion here: The UWL-03 looks very high quality, and the bracket still required for the diving housing also makes a stable impression. However, it is also quite small in nature, so I can't imagine that spilt shots would be possible with it. On the other hand, the edge sharpness increases considerably and you can get closer to the objects - according to the stand personnel up to 8cm, whereas without water contact optics at least 50-60cm are necessary. Finally, Divevolk cases for iPhones: It's easy to imagine that the mobile phone is very safe from water ingress and can be taken diving. But I have also been told that a protective glass significantly restricts usability and that you should use a removable protective glass cover for use above water, which can be removed from the Divevolk case for use.9 points
 -
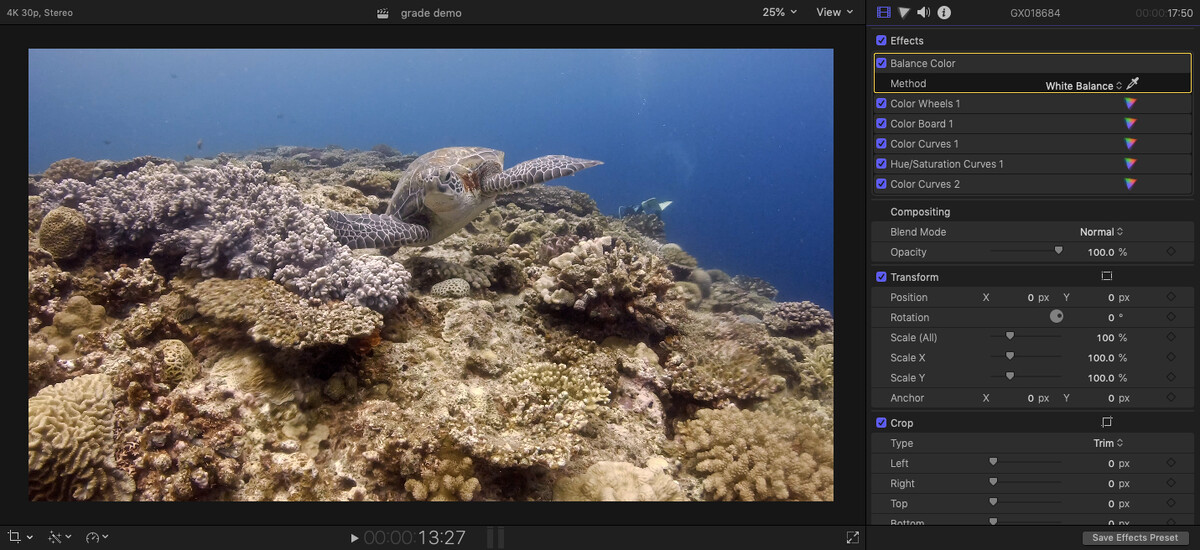 Afterhours Magic: An Ambient Light Video Workflow for Action Cams (and Other WB-Challenged Cameras) INTRODUCTION Getting good colours in underwater footage, especially when shooting in ambient light, has been a challenge since the early days of underwater cinematography, and action cameras are no exception. As divers learn in their certification course, water absorbs light unevenly, with longer wavelengths like reds and oranges fading quickly as depth increases, leaving underwater scenes dominated by blues and greens unless corrected (here's a little video illustrating water's filtration effect at depth). With action cam manufacturers releasing new models every six months, and online talking heads pitching each one as the miracle solution for underwater video, it might seem like the issue has long been solved by 2025. Apps, mods, and camera software all promise one-button perfection: minimal effort, high reward, and content ready for instant sharing. On recent action cameras, the most common approach is to leave white balance and colour corrections to the camera's software, to tweak settings and hope for the best... Examples of typical results for ambient light footage shot at depth with auto-settings on recent action cameras and an iPhone16 : (source) But step off the marketing carousel for a moment and take a look at recent underwater clips, do the colours actually look... Good? Natural? Pleasing? Those are very subjective words, of course, and the devil is in the details. And yet some of us are not entirely convinced by what we’re seeing, despite all the technological advances, and started to question this in-camera, software-driven approach to the underwater colour problem, especially on action cameras, paradoxically the crown jewels of the one-button, auto-settings, shoot-and-forget philosophy. Compare the above to Nick Hope's 2007 (!) almost "prehistoric" tests of underwater manual white-balance with a filter : (note the cast on the auto WB test) (source) This is where this tutorial comes in. It offers a user-based, more manual alternative to letting the camera try to solve the colour issue through automation, which we believe is really beneficial for action cams. What follows is a simple, experience-based workflow for shooting underwater video in ambient light on action cameras – or any camera that struggles with manual white balance at depth. The core idea is to take back control of white balance and colour processing by setting the white balance point manually in post-production, just as you would, at depth, with a camera that allows manual WB adjustment. We believe that this manual approach, when done correctly, usually yields better, more flexible results than current in-camera software solutions, and helps you get the most out of your gear—especially older or less advanced models. Capture from personal footage shot at roughly 10m on the GoPro 4 in a flat profile with a UR-Pro Cyan filter (Richelieu Rock, 2018) Early personal raw clip shot at roughly 15m on a GoPro 4, in flat with a UR-Pro filter, rebalanced in post (2016, Mike's Point, Raja Ampat) Other selected video clip examples shot in flat with a filter on various action cameras are visible here WHO IS THIS WORKFLOW TUTORIAL FOR Let’s be clear: this approach probably isn’t for everyone. That’s not elitism, just practicality, especially given the phone-and-app-based social-media sharing ecosystem underwater video has evolved into. This workflow is best suited for videographers who: Work on their clips in post-production, including colour grading and editing Use video editing software that allows manual white balance adjustment (some phone-based apps may not support this) Shoot with cameras where in-camera processing can be limited or turned off, especially auto white-balance handling and colour corrections THE IDEA BEHIND THIS UNDERWATER SHOOTING WORKFLOW This approach is designed to help you get the best out of your footage by regaining some manual control over colour and white balance, which are set during post-production rather than left to in-camera software. To be clear, this is not a method for getting the best results straight out of camera (SOOC). It is not a software-driven workflow that delivers instantly shareable clips, which is often the focus of many action cam discussions today. However, we believe that when used correctly and in the right conditions, this approach to ambient light video can produce better, more flexible results than in-camera correction, and help you get the most out of your gear. It is especially effective on action cameras, and with older camera models that lack advanced colour correction or built-in underwater modes. WHAT SHOOTING SITUATIONS DOES THIS WORKFLOW APPLY TO This workflow applies to the following underwater video scenarios: Full ambient light video, where you're shooting at depth using sunlight as the only light source. It also applies to mixed lighting setups, where natural sunlight is combined with artificial light that has been filtered to match the colour spectrum of sunlight at depth. This is often referred to as ambient-filtered mixed lighting. Shooting in the ambient light "Goldilocks zone" – not too shallow and not too deep. This is the depth range where there is enough natural light to work with, while the colour loss from seawater remains manageable. The exact range depends on local conditions, but in areas with strong sunlight it generally falls between 5 and 20 metres, with a sweet spot around 8 to 15 metres depth. In some cases it can extend a bit deeper, or be quite shallower. Using a filter on the camera lens also affects this workable range, as you lose 1 to 2.5 stops of light, and compensating with higher ISO has limited effectiveness on action cameras, as it quickly degrades the image and introduces noise. Capture from GoPro7 footage, ambient light at 10m, flat profile with a filter, rebalanced and quickly graded in post (Okinawa, 2025) AMBIENT LIGHT VIDEO SHOOTING WORKFLOW CAMERA SETUP 1. Set your camera to shoot in a “flat” or flat-ish profileThe goal here is actually to limit what the camera does in terms of in-camera white balance and software colour correction. This is an essential step for effectively rebalancing and grading your video footage later. Shooting flat avoids the unnatural hues often introduced by "underwater modes" or automatic white balance settings, which typically boost the red channel in ways that degrade image quality and make post-production white point and colour balancing more difficult. Another common issue is inconsistency in colour treatment within a sequence, especially when the camera is making adjustments on the fly. This isn't a problem for still images, but it is a major issue for video. This will vary with camera brand (GoPro, DJI, Ace360, etc.), but the logic remains the same: limit what your camera does in terms of automatic white balance, colour, contrast and exposure adjustment at depth, and aim for a more neutral - yet information-rich - profile. In our camera settings, rather than trusting the camera, we're aiming to record footage in a neutral, information-rich way, so we have the maximum flexibility for correcting white balance and colours. Flat profiles, log, and similar settings all serve the same purpose: capturing the necessary information in a neutral form, with a wider dynamic range and more information, so you can work efficiently on the footage in post. The idea is similar to shooting RAW in still photography. Be careful with ISO settings - using a filter on the camera lens means losing 1 to 2.5 stops of light - however, it's best to clock the max ISO on action cameras, as image quality typically degrades above 800 to 1600 ISO, depending on models, camera capacities and local conditions. Example of basic GoPro camera settings: Enable Protune Set colour to Flat Set white balance to Native Set max ISO to 800 (or a little higher if your camera can handle it without too much noise) Leave shutter speed on Auto (seems to work better than the 180° rule of shutter on action cams) Typical GoPro 7 "flat" profile settings 2. Use a well-designed filter on the camera lens (if possible) If you can, use a well-designed filter on your camera lens. In blue water, a good filter helps correct the seawater’s colour distortion by cutting excessive cyans and greens while allowing deeper blues through. This warms up the image hitting the sensor, helping the camera handle white balance more effectively -whether manually at depth or during post-production. The goal is to restore a more natural colour balance by compensating for the way sunlight is filtered by the water column. In green water, a different filter is needed, usually with more magenta tones, to account for the different spectral loss. Keldan 7m compensation Spectrum Filter transmission data, blue water filter (left) and green water filter (right) (source) Well-designed filters typically have a fluorofilter-like spectral curve. Examples include the now-discontinued UR-Pro, Keldan Spectrum filters, and Magic Filters, or fluorofilter profiles (see the section below and this thread here for more detailed discussion on filters) Be aware that many so-called "red" filters on the market are poorly engineered. Slapping red plastic on a lens doesn’t magically fix underwater colours. The filter must target specific wavelengths, not just “warm up” the image. LEE 008 Dark Salmon filter gel, next to the UR-Pro Cyan filter on a GoPro SRP adapter If you're using a filter (and you should if possible), make sure to: Compensate for the light loss by adjusting your exposure or EV settings Stay within the filter’s optimal depth range Avoid pushing ISO too high - action cams often get noisy above ISO 800 or 1600 underwater When shooting in a mixed-lighting setup that combines ambient sunlight with artificial lights, make sure to use ambient filters on your lights, not just on your lens. These filters adjust the colour temperature of your artificial light to match the filtered sunlight at depth, helping maintain consistent colour balance in your footage. And let's not forget the most important point of this workflow: shoot in flat, and set your white-balance point manually. Don't let the camera decide! Captures from footage shot on a GoPro12 with a filter, but in auto settings. This illustrates the importance of taking control and rebalancing the footage in post. While it's difficult to predict the exact outcome, the colour palette would likely appear more natural, with fewer “day-glo” hues and a milder cast if shot in flat and WB set in post (source) IN WATER Shoot Within the Ambient Light “Goldilocks Zone” When shooting in ambient light, make sure to stay within the optimal depth range where ambient light still works and colour can be recovered in post. This "Goldilocks zone" is deep enough for water to filter sunlight and create colour loss, but not so deep that the camera struggles to capture usable information. The exact range depends on location and conditions, but in strong sunlight areas like the tropics, it typically begins below 5 metres (shallower than that, there's not enough filtration for the technique to matter) and extends to around 20 metres. In very clear, well-lit water, it may stretch to 25 or even 30 metres. The sweet spot is usually between 8 and 15 metres. Keep in mind that filters reduce light reaching the camera sensor by 1 to 2.5 stops. This is a significant tradeoff, but one that pays off if you stay within the right depth and lighting conditions. Beyond 20 metres, results often begin to deteriorate due to reduced light (causing noise and loss of contrast) and stronger water filtration (reducing the colour information the sensor can capture). Always adjust your shooting depth based on the day’s local light and visibility conditions. (source) IN POST-PRODUCTION 1. Start by resetting the white balance point in your footage The first step with action-cam footage is to reset the white balance during post-production. This mimics what you would do at depth when using a camera that supports manual white balance, and is the most important step in this workflow. If using a filter (you should...) your footage will have a warm cast from the filter, which is actually desirable because it will help rebalance the image. Since you shot with a flat profile and minimal in-camera adjustments, the footage will have little to no colour correction or white balance applied. Which means using a filter and shooting flat on cameras without manual white balance is not a good way to get great results straight out of camera (SOOC). You will need to rebalance the footage (set the white balance point) in post at the very minimum. This differs from cameras that allow manual white balance at depth, where the SOOC result is already balanced and ready to use. With action cams, rebalancing in post is a crucial part of the workflow. The good news is that your footage contains all the colour information needed, usually with a higher dynamic range, and will be far easier to grade than footage with in-camera software corrections baked in. This is where the magic happens—you turn what looks like lead into gold. Most video good editing software lets you set the white balance point either manually or automatically, which sometimes works fine. Some reliable targets for white balance include sand, bleached or dead coral, divers’ tanks, exhaled bubbles, and marine life with clear white or grey areas. Experiment with different targets and methods to see what works best for each clip. Setting the white-balance in Final Cut Pro X (source) 2. Grade and edit your footage to taste You now have a well-balanced base to work with, offering good dynamic range and colour data since you shot with a flat(ish) profile. Play with curves and saturation levels to see how much colour information has actually made it to your sensor. This process will vary based on your editing software and personal preferences, but most major platforms (DaVinci Resolve, Final Cut ProX, Adobe Premiere, Sony Vegas...) can handle it very well. I’ve only worked with older-model action cams, and I’d love to see what data the new 10-bit colour models are capable of capturing! 3. Example of my action-cam post-production workflow, in Final Cut Pro X (FCPX)The following clips were shot in a flat profiles on a GoPro 7 with a filter gel on the lens, in Okinawa (blue water, average visibility, the center-left blur is caused by a water droplet on the wide angle lens) Unbalanced footage shot at 10m depth in flat on the GoPro7, with a cast from the filter (in this case, a Lee fluorofilter gel), as imported The same footage, rebalanced after manually setting the white-balance point with the dropper tool Same footage, after a little colour grading Unbalanced footage shot at 10m depth in flat on the GoPro7, with a cast from the filter (in this case, a Lee fluorofilter gel), as imported The same footage, rebalanced after manually setting the white-balance point with the dropper tool Same footage, after a little colour grading A more saturated grading option (what some would call taking it to 11, to show what we have to work with ˆˆ) Exported video clip example (first grade option) CONCLUSIONTo conclude, letting camera software handle underwater ambient light colour correction is like trying to shoot on land with coloured lighting and expecting the camera to fix everything digitally. On land, beyond setting the colour temperature to match your light source, if your light has a strong colour cast, you’d typically add a lighting gel or change the light itself rather than relying on the camera’s software to correct the cast. This is exactly what a physical filter does underwater in ambient light. Our primary light source - the sun - is filtered by water and has a colour cast. Most modern cameras can handle mild casts near the surface. But when dealing with strong blue, green, or cyan casts, such as at around 10 metres depth, it is still best - even in 2025 - to physically correct the light with a filter and to manually set the white balance point rather than relying on the camera to try do this automatically. In a complex environment like underwater ambient light, it’s still better to manually set the white balance at depth - or, if that’s not possible, shoot in a flat profile and reset it in post-production - rather than relying on camera software to handle it. In both cases, using a well-designed filter on the lens helps rebalance colours by compensating for the colour cast caused by water's filtering effect on ambient light. This approach delivers more workable footage in post and generally better results overall. It can also help you get the most out of your camera, especially if you’re using an older model with limited software capabilities (see for yourself in the examples above what a GoPro 7 is still capable of…) Voilà. Thanks for making it to the end. I hope others find this approach useful, even if it is seen as outdated or old-fashioned. Just try it yourself and do it right. Understand filters, and trust manual white-balance. It works. Cheers, happy bubbles, and most of lovely colours to you all! Ben GOING DEEPER (further discussion) WHY DOES THIS APPROACH WORK When used within the right parameters, this workflow of shooting flat ambient light footage with a filter delivers excellent, workable results. It often outperforms unfiltered, in-camera corrected footage, especially on action cams that cannot manually set white balance at depth. Let’s dig into the reasons why this is the case. 1. The problem with in-camera software-based white-balance and colour correctionWe live in a time when cameras have powerful software corrections capable of amazing things. So why – despite claims that software will solve everything and that filters are a thing of the past – does filtered footage shot in flat profile give end results which generally still look better than in-camera software-corrected footage, especially when it comes to colour balance? And why is filter-use still common in blue-chip professional productions (mostly shot on cinecams) but seen as outdated in amateur and semi-pro circles? Putting aside cameras like those from Canon, which can produce very pleasing (though not always the most accurate) results when performing manual white balance at depth, automatic in-camera white balance and colour correction generally do not work well at typical ambient-light diving depths. And it's important to note that if yo work with in-camera software-corrected footage and attempt to fine-tune white balance or simply grade the footage by setting the white balance point in post on an easy white or grey target (like sand, a diver’s tank, bubbles, or bleached coral), you’ll often end up with odd reds or magenta peaks and strange colour balance. I’ve done this many times. Editing unfiltered, non-flat GoPro footage from colleagues in various locations simply does not work well, or has a very limited reach. Rebalancing white balance causes colour balance to break down, leaving you stuck with limited adjustment options. This happens mainly because the camera software boosts the red channels to compensate for the underwater blue cast on ambient light. This creates two main problems: • The camera artificially boosts red channels, which degrades image quality. • A strong colour cast often remains - usually cyan, green, or blue - and if it doesn’t (for example, in “underwater mode”), the resulting palette tends to look unnatural and unbalanced. When you set white balance at depth or in post, you are telling the software “this area should be gray or white,” which should cancel out the blue and cyan cast. But if the reds have already been over-boosted by the in-camera software, the result becomes unnatural, producing all kinds of strange magenta tones and other colour distortions. A typical example of footage shot with auto-settings on recent action cameras, and colour-corrected in post, showing a residual cast (source) 2. Why shooting flat and using a filter generally works better than auto in ambient light Just to be clear, the most important point in this workflow is to set the white balance manually. This is standard procedure when shooting underwater ambient light video, and shooting in a flat colour profile while adjusting white balance in post is simply a workaround for action cameras that lack crucial manual white balance control at depth. If footage is shot in a flat colour profile, as opposed to in-camera auto-colour correction, the reds are not artificially boosted. This allows for cleaner white balance correction and colour grading without magenta distortions, and also captures a greater dynamic range. These advantages are well understood in still photography, where shooting in RAW mode is standard. A flat or flat-ish profile lets you manually adjust recorded reds and magentas in post without dealing with baked-in colour corrections that vary across frames. Even better, using a well-designed physical warming filter on the camera - such as the UR-Pro or equivalent - acts on ambient light before it reaches the sensor. This means: • The sensor records a warmer image, reducing the need for software correction. • A good filter that lets deep blues pass through (for example, one with a fluorofilter-like spectral profile) results, after white balance reset, in a warmer, more neutral, and more accurately balanced image. Deep blues in the background remain intact while the foreground gains accurate tones, producing a more natural and balanced look. GoPro7 footage shot in flat with a good filter, before and after setting the white-balance point in post Setting underwater white balance is essentially about how much you need to "stretch" colour channels to counter seawater’s filtering of ambient light The more stretching required, the greater the image degradation. Using a physical filter on the lens reduces the amount of stretching needed to rebalance the image. In short, filters physically warm the ambient light before it reaches the sensor, helping to reduce the green/cyan cast. This: • Enables better manual white balance control at depth or in post • Avoids baked-in in-camera software corrections that are difficult to work with in post • Preserves depth in colour by extending the filter’s effect deeper into the scene, resulting in less drastic background colour loss than software correction The main downside is the inevitable loss of stops of light caused by the filter, which can be a dealbreaker in some shooting conditions. In contrast, in-camera software colour correction: • Manipulates individual colour channels, with results that can vary widely • Often produces baked-in artefacts and uneven colour palettes, and does not fully correct the colour cast • Degrades footage, making it difficult to grade in post • Can be unstable and vary within a sequence, which is problematic for consistent grading Understanding action cam limitations: AWB/ Kelvin vs. MWB For action cameras, it’s important to understand a key limitation: current models typically offer only two approaches to white balance underwater. They either rely on Auto White Balance (sometimes with a dedicated underwater profile) or allow the user to lock white balance a fixed Kelvin value. Neither of these option is equivalent to a true Manual White Balance performed at depth. Auto White Balance constantly shifts based on exposure and scene changes, which leads to inconsistencies and boosts the red channels, which typically leads to unbalanced colour palette, with uncorrected colour casts at depth. Meanwhile, locking a Kelvin value only adjusts colour temperature along the blue–orange axis. It does not meaningfully correct the green–magenta tint, and generates a strong blue-green / cyan colour cast. A true Manual White Balance, on the other hand applies a full three-channel (RGB) correction based on a sampled reference target, and corrects tint (magenta/green). This type of correction is essential for balanced colour rendering of underwater footage Ideally, cameras would allow locking the result of an auto WB calculation at a certain depth (effectively turning it into a manual balance…), but most action cams do not. This limitation also explains why mixed-lighting approaches such as ambient filters on video lights often produce rather poor results with action cameras shooting in AWB, as the process relies on setting and locking an accurate manual white balance to ambient light at depth. And this is also why the workflow described in this article works: locking the white balance at depth and later applying a proper manual white balance correction in post-production typically yields better and more balanced colours than relying on an action cam’s Auto WB (underwater-mode included) or worse, a fixed Kelvin value alone. GoPro7 Supersuit housing with AOI wide lens adapter and a fluorofilter gel 3. Limits of manual white-balance setting (at depth or in post-production) and of filter use As mentioned earlier, the following limitations will happen, even when using a good filter: • In clear, well-lit waters like the tropics, a filter’s effect typically breaks down beyond 20 to 30 metres depth in good conditions. • You can still set white balance, but the colour cast becomes too strong and the image balance collapses. You would need a stronger filter, but then you lose too much ambient light, which itself becomes scarce with depth - a true catch-22 situation. • After a certain point, ambient light is insufficient and seawater’s filtering effect becomes too strong. Setting white balance in these conditions, whether at depth or in post, stretches colour channels too much, causing distortion similar to shooting without a filter. In these situations, it’s best to accept the colour cast or rely on artificial light. • In shallow water, such as snorkeling depths, the filtering effect on sunlight is mild. Working on filtered footage here means you are actually cancelling out the filter’s effects to set white balance. It’s possible, but there is little reason to use a filter in shallows since the required hue corrections degrade image quality. • Available ambient light is crucial. Using a filter means losing stops of light. In some sea conditions, there simply isn’t enough ambient light to use a filter effectively. Like at depth, it’s best to accept the colour cast or use artificial lighting. As previously mentioned, boosting ISOs can only go so far on action cameras. • Filter design versus seawater qualities / conditions. Most filters are made for blue or cyan water - which is ideal for ambient light shooting - but not for greener waters. Cyan-cutting filters reduce green tones, which can result in unnatural colours and poor balance compared to filters designed specifically for green water. The UR-Pro and Keldan brands, for example, offer, or offered, green water filters (which are typically magenta) These require experimentation, but since greener waters are usually darker, the light-related limits mentioned above often apply. Depth limits: ribbontail ray swimming at 25m (seafloor is + 40m plus), GoPro7 footage capture, flat profile with a filter A WORD ON FILTERSAs previously mentioned, not all lens / camera filters are well designed or adequate for our purposes. Unfortunately, many commercially available filters are really not designed by people having looked into filtering characteristics and are just very bad (<cough> PolarPro...</cough> ), and also used by people not shooting in flat and rebalancing the footage in post, but using auto-settings instead, which tended to give filters a bad-name because of strange hues this generated... Yet as explained above, to get good consistent results when using a filter, it is always best to shoot in a flat profile and set the white balance point manually, either at depth if the camera allows it, or in post, on cameras like action cams. A filter like the beloved, proven UR-Pro, or others with a similar profile and a good warming effect really works best for this approach, especially on action cams, which are still quite limited in their handling of underwater white balance issues, despite all the marketing hype. Historically, the UR-Pro company developped, in the 1980s, a very efficient filter for shooting at depth in blue water. This filter works very well on cameras ranging from cinecams (Gates sold UR-Pro filters for their housings...) to DSLRs, mirroless and, until a few years back, action cameras. Unfortunately, the company no longer exists, and UR-Pro filters are now very difficult to find. The UR-Pro hold a special place for me as I've started using them on GoPro4 action cams, and kept at it because it just works really well. And recent gear addition such as wide angle conversion lenses for action cameras (by AOI / Backscatter / Inon) sent me on a quest to retro-engineer my beloved UR-Pro filter, which you can read about here: https://waterpixels.net/forums/topic/1414-ur-pro-filters-info I came up with the following recreation of the UR-Pro Cyan's spectrum transmission curve: Recreation of the UR-Pro Cyan spectrum transmission curve For other cameras, high quality alternatives exist, primarily Dr. Mustard's Magic Filters (primarily designed for ambient still photography, first marketed in 2006) and especially Keldan's Spectrum Filters. It's best for you to experiment with what works best for you with your camera setup. On my Lumix LX10 compact, I actually prefer the Keldan Spectrum -1.5 filter gel (ambient light test reel here), which is not as strong as the UR-Pro Cyan and more accurate, but got good results with UR-Pro, Magic Filters and Keldan. On the GoPro however, the Keldan and Magic don't work as well, as this type of camera seems to require a slightly stronger filter to get good results in post. Warming isn't everything, but based on tests, the UR-Pro Cyan offers the strongest warming effect (around 3000–3100 K at –1.6 EV), more than the Original Magic (≈ 2400 K) and the Keldan SF-1.5 (≈ 2350 K) As an example, here is a side-by-side, flat and unbalanced, then lightly graded comparison of UR-Pro and Magic filters on Gopro7 action cameras, highlighting the marked differences between the two filters on action cameras. This quick test was done on breath-hold in east Bali (Jemeluk), with the AOI wide lens on one camera. GoPro7, Magic Filter and UR-Pro Cy filter, unbalanced, flat footage GoPro7, Magic Filter and UR-Pro Cy filter, rebalanced in post and lightly graded But as this test example show, even a weaker filter like the Magic Filter gel is still workeable on action cameras, but the spectrum is slightly different. When rebalancing, only the Magic filter requires boosting magenta in white balance, while UR-Pro and Keldan require reducing it, which is a significant difference. The main idea to take home from research on the UR-Pro cyan filter spectrum profile is that is basically that of a fluorofilter (aka fluorescent filter). Fluorofilters were a type of filter designed to "Convert U.S. Cool White or Daylight type fluorescent lamps to 3200K photographic tungsten and remove the excess green." to quote filter maker Rosco, ie. to convert a light source that is overly green and cool, such as fluorescent lighting. A fluorofilter profile like the Rosco 3310's is very close to the UR-Pro's original profile, in fact almost identical. UR-Pro spectral transmission curve, vs. Rosco 3310 Fluorofilter gel curve The issue these days is that fluorescent lights have been phased out by LED lights, rendering fluorofilters obsolete in the lighting world, and thus also very hard to find! Despite the difficulties, there are interesting commercially available alternatives in lighting gels—it is mostly a matter of matching similar spectrum transmission curves. The Lee 166 Pale Red and the Lee 08 Dark Salmon (LDS) are both good practical alternatives for example. Unfortunately, the Lee Pale Red has also been discontinued, and also had a general light transmission that was a little too low for action cams, resulting in an ISO boost. Which leaves us with the Lee Dark Salmon (LDS). The LDS was actually already tested in water and works fine, but with some caveats: As I wrote in the UR-Pro thread after the side by side comparison, it is stronger / darker (and a bit warmer) than the UR-Pro - meaning a little more loss of light / ev, and also a slightly deeper tint in the reds - this is visible when looking at the camera's ISO sensor data, with a higher ISO on the LDS, and also the resulting SOOC footage: GoPro7, UR-Pro Cy filter and LDS, unbalanced, flat footage GoPro7, UR-Pro Cy filter and LDS, results rebalanced in post and lightly graded Yet what this also means is that, as expected, the Lee gel actually works somewhat better than the UR-Pro when going deeper, but this is really give and take, as it means a greater loss of light - which could be fine in the tropics, less so elsewhere. Handling of the blues is also a little different, as seen in the curves. There are probably other fluorofilter-type gels still available somewhere, as well as others with similar profiles. The key is to find one with a curve as close as possible to that of the UR-Pro cyan filter's fluorofilter style curve. The logic is straightforward: seawater filters sunlight and creates a cooling effect, adding green/cyan. A fluorofilter is specifically designed to counter this. But as you can also see on the UR-Pro spectrum graph - and this is where a fluorofilter differs from a simple green-cutting filter - it still lets deeper blues through (resulting in a pleasing seawater blue). This characteristic is harder to find in standard lighting gels. Possible UR-Pro cyan alternatives in the Lee range It would also be interesting to test Keldan's stronger spectrum filter gel on action cameras, as I only tested the SF-1.5 gel. The hunt is on! MIXED LIGHTING SCENARIOSRegarding the complex but fascinating issue of mixed-lighting scenarios, which combine ambient light with filtered artificial light, Swiss manufacturer and concept pioneer has published and collaborated on good introductory videos on the subject: The Keldan Ambient Filter Concept Understanding the Ambient Filter BTM - Filters for Underwater Videography (Red Filter, Magenta Filter, Ambient Light Filter) Recent Keldan light models include integrated LED-based ambient filtering, eliminating the need for an actual physical filter on the lights. When it comes to empirical research on ambient filter creation and filter matching, I'd strongly recommend looking into the following thread by fellow Waterpixeler Dreifish https://waterpixels.net/forums/topic/1413-red-filters-and-blue-ambient-light-filters-for-mixed-light-shooting/ as well as Interceptor121's similar but more ancient research here: https://interceptor121.com/2019/11/25/matching-filters-techniques/ Mixed lighting shooting scenario, filter on the cameras lens and on the video lights (source) FURTHER READING / LINKS Related threads https://waterpixels.net/forums/topic/1380-shooting-action-cams-with-a-red-filter-in-flat-profile-and-manually-white-balancing-in-post-production/ https://waterpixels.net/forums/topic/1414-ur-pro-filters-info https://waterpixels.net/forums/topic/1413-red-filters-and-blue-ambient-light-filters-for-mixed-light-shooting/ Camera lens filters and white balance https://waterpixels.net/forums/topic/1414-ur-pro-filters-info https://www.youtube.com/watch?v=Zn4NRQgl2tw https://www.youtube.com/watch?v=COxalutbD38 https://wetpixel.com/articles/ur-pro-shallow-water-filter-review https://www.bubblevision.com/underwater-video/white-balance.htm https://interceptor121.com/2013/01/13/underwater-video-tips-polar-pro-red-filter-for-gopro/ https://xray-mag.com/pdfs/articles/Photography_UsingFilters_15.pdf https://wetpixel.com/articles/filters-and-ambient-light-photography/ http://www.magic-filters.com/download/UWP26a.pdf https://wetpixel.com/articles/complementary-filters-and-wide-angle-underwater-photography http://web.archive.org/web/20191209011451/http://www.urprofilters.com/content.do?region=FilterInstructions#tips https://wetpixel.com/articles/ur-pro-shallow-water-filter-review https://www.youtube.com/watch?v=8mMb-FcWQz8 https://wetpixel.com/forums/index.php?/topic/16970-expodisc-white-balance-filter/ https://www.cambridgeincolour.com/tutorials/white-balance.htm Mixed-lighting / ambient filters https://waterpixels.net/forums/topic/1413-red-filters-and-blue-ambient-light-filters-for-mixed-light-shooting/ https://wetpixel.com/forums/index.php?/topic/69260-solving-the-mixed-light-problem/ https://www.youtube.com/watch?v=yKk9VBponz0 https://www.youtube.com/watch?v=COxalutbD38 https://www.youtube.com/watch?v=Zn4NRQgl2tw https://interceptor121.com/2019/11/25/matching-filters-techniques/ https://interceptor121.com/2019/08/03/getting-the-best-colors-in-your-underwater-video-with-the-panasonic-gh5/8 points
 -
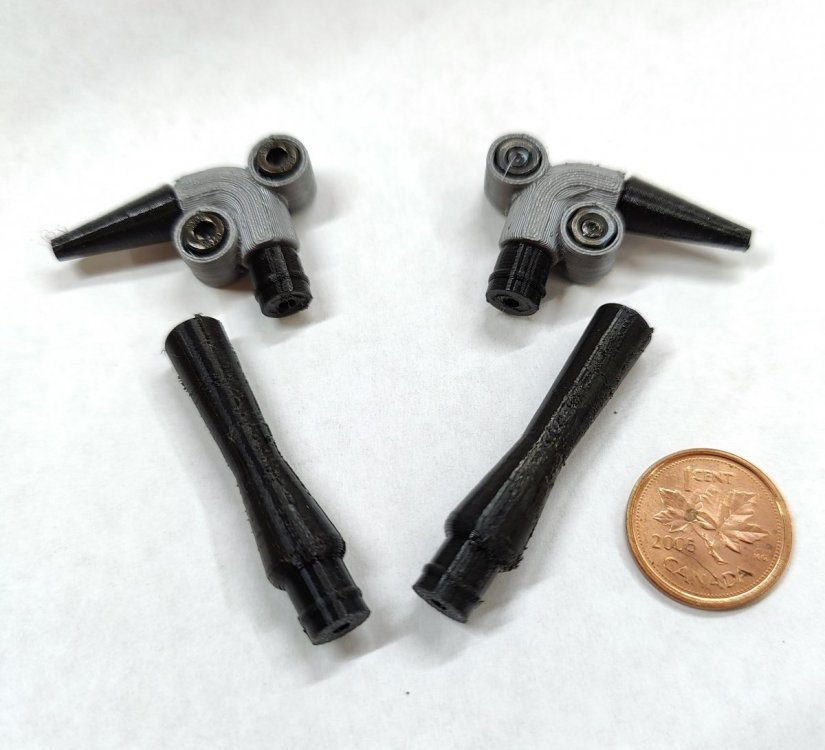 As a DIY Fiber Cable article was just posted, this seems like a good time to share this article on 3-D printing connectors for your DIY cables. The Connectors are really the heart of the cable, as the fiber is simply a manufactured item bought from a supplier. One of weak points of most of these DIY's is getting the right connectors. The solutions range from buying connectors (at about $10 a pop or $20 per cable), re-using connectors from old cables (which may require drilling them out and gluing fiber) to using random bits of off the shelf hardware which may have poor fit and finish. I've tried all of these solutions. Early in 2023, I bought my first 3D Printer and have been making a bunch of Scuba/Camera related parts. One of my early projects was a set of custom designed connectors for Optical fiber strobe cables. I think these are at least as good as the OEM cables I've seen from Nauticam, Inon, etc. And it had the added benefit of being really fun to design, print, test, and refine. I've been actively diving these connectors all year as have friends I gave cables to. Collectively we have done a couple of hundred dives with good results. If you have a 3D printer with some TPU and PETG or PLA material, you can print these out at a very low unit cost. You will need some M3x6mm nuts and bolts and 2mm thick fiber optic to complete. I suggest either 1-meter or 1.5-meter cables depending on your strobe arm configuration. I've just uploaded the design and STL print templates to the public sharing site Thingiverse: https://www.thingiverse.com/thing:6134211 Thingiverse Details: Inon Style Optical Fiber Cable Connectors https://www.thingiverse.com/thing:6134211 Make your own optical fiber cables using these connectors paired with 2mm fiber. I used both 613 multi-core fiber cables and cheap TosLink cables. The design assumes 2.2mm OD for the cables. This design contains two styles of connectors: A 90deg elbow and 180deg straight connectors. The elbow part is printed with PETG. PLA will work but may not stand up as well to the elements. The actual connector parts are printed with TPU. These parts must be soft rubber, so no material substitutes are possible. The 90deg Elbow part snaps together and is secured with two M3x6mm nuts/bolts. These nuts & bolts can be purchased from many sources like Amazon and are very low cost. (A set of M3 bolts with ~40 sets in several lengths is $10) The TPU connector and strain relief parts fit in the groves of the elbow. Thread the optical fiber through the TPU parts and align them into the elbow before screwing them together. The TPU parts should be snug enough to hold the cable secure with no adhesive. If it is not secure, you can apply a small amount of silicone-based glue to the cable as you thread it into the TPU parts. Using glue may make it difficult to reuse the connectors should a cable get damaged. Use the connectors in combinations that work for your camera rig. I like a 90deg connector on the top of my Nauticam housing and a 180deg connector on an Inon or Backscatter strobe. With a Retra strobe a 90deg connector will work better. I have found these connectors to work well with a firm connection that is installed or removed with appropriate resistance.8 points
 -
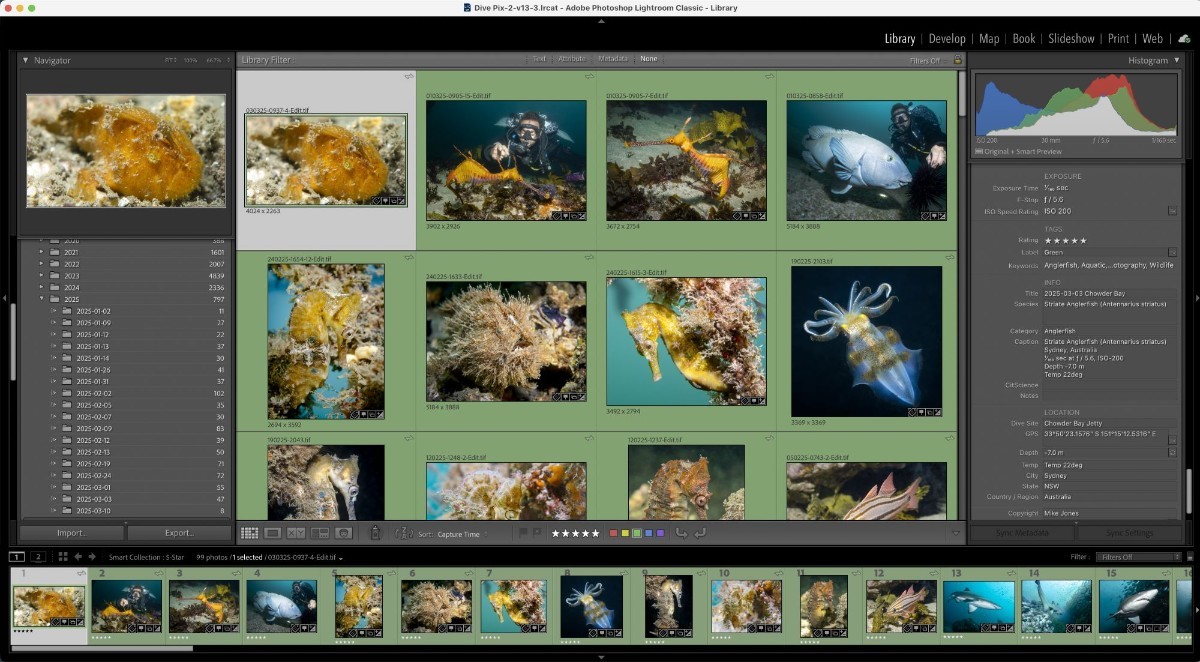 Managing underwater photography collections can be overwhelming, but with Adobe Lightroom's robust metadata features, organization becomes seamless. On his blog, Mike Jones outlines a systematic approach to metadata management, emphasizing the importance of consistent practices to enhance searchability and gain deeper insights into marine environments. Key steps include: Rating: Assigning ratings to evaluate image quality. Keywords: Applying terms to describe the environment and subjects. Title: Using a consistent format for easy grouping. Species: Recording both common and scientific names. Category: Grouping similar species under broader classifications. GPS: Adding precise coordinates to document the exact location of each shot. Implementing these practices transforms your photo library into a valuable dataset, capturing snapshots of time, place, biodiversity, and behavior. For a comprehensive guide, visit Mike Jones's blog: https://mikejonesdive.com/lightroom-metadata8 points
 -
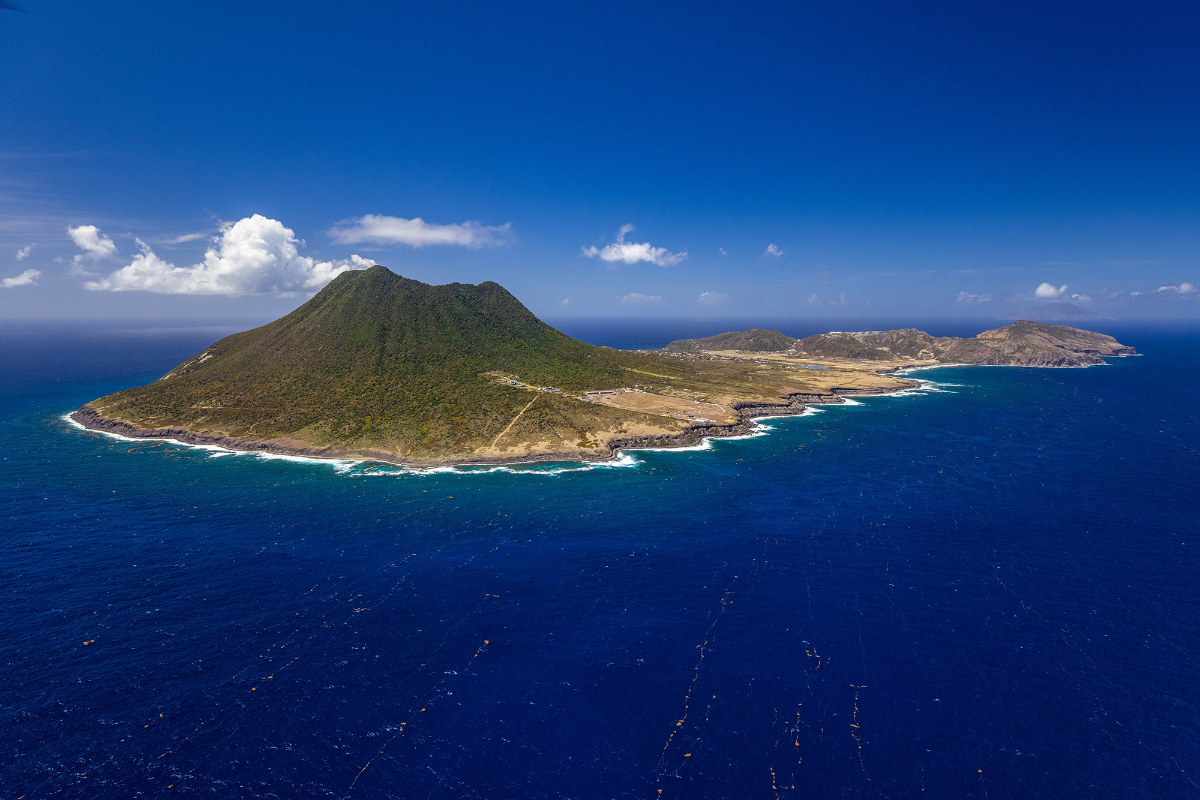 St. Eustatius, locally known as Statia, is located in the northeastern Caribbean at a stone’s throw from St. Maarten. While its neighboring island Saba is a well-known diving destination, Statia is often overlooked. I have lived on Statia on and off for the past 14 years and have spent a good 6 years of my life on the island. I’ve worked at the local dive center and have organized numerous underwater archaeological projects and exploration dives all around the island. As a result, I know Statia’s marine environment very well. I have also dived on nearly every island between Anguilla and Grenada, so I have plenty of comparative insights. Statia is one of those islands where time has largely stood still. It is not a resort destination. There are no casino’s, clubs, or shopping malls on the island. It’s a very laidback place, 8 square miles in size with a population of about 3,500 people. Everyone waves at each other on the street, people leave their homes unlocked when they leave, and cows, goats, and donkeys roam the streets freely. It’s quirky and not for everyone. If you’re after white sandy beaches and vibrant nightlife, don’t go to Statia. If you’re a nature lover and want to experience diverse diving, beautiful hiking on the dormant Quill volcano, and soak up some fascinating Caribbean history, this is the destination for you. Getting to Statia is fairly straightforward. You have to fly into St. Maarten first, and from there you either take a ferry or an 18-minute flight with Winair on one of their Twin Otters. There are several accommodation options on the island. If you want to be close to the water and right next to the dive center, I recommend the Old Gin House Hotel. If you don’t mind being further away from the water (a 10-minute drive), I recommend Quill Gardens, a Bed & Breakfast with a beautiful view that’s managed by a lovely Dutch couple who make some of the best food on the island. There are two dive centers on the island. The one I can recommend is Scubaqua (www.scubaqua.com). It is managed by a Dutch couple, Mike and Marieke, who have been on the island for 15 years. They are very passionate about the island and just really nice people. They train their staff very well and it’s a very good and safe operation. Check out their website and TripAdvisor reviews. As for the diving, it is very diverse, accessible, and uncrowded. All dive sites can be reached within 15 minutes from the dock. Most dive sites have moorings, but some are drift dives. The island’s main reefs are coral-encrusted lava flows situated on a flat sandy bottom, typically between 50 and 60 feet deep. There’s lots of life on these, typical Caribbean reef life with the odd reef shark and eagle ray passing by. These are very good beginner sites, but also great for photographers. My favorite site is one that I discovered several years ago with a ranger from the local marine park. It’s an elongated lava flow named Lost Anchors, after the five historic anchors that were lost on this reef in the colonial period. They are beautifully overgrown and add some history to the dive. Reef sharks are a regular appearance on the site, and you’re usually surrounded by several dozen big barracudas. It’s a more advanced site as it’s a free descent down to 80 feet and located quite far offshore where it can be choppy. Along the southern part of the island, bordering the dormant volcano, topography gets more dramatic. Here you’ll find steep drop-offs without a bottom, where it’s possible for anything to swim by. This is the most dramatic diving on the island, but not for beginners. Sites like Grand Canyon and Drop-off are not to be missed. If conditions are calm, the northern tip of the island offers some fun dives as well. Here you dive along boulder slides that end in a sandy bottom. Lots of life hides between the boulders, and around the rock called Gibraltar you have a very good place to see sharks as well. This is where great hammerheads sometimes make an appearance (far from guaranteed of course). There are several wrecks around the island as well. Two modern ones you shouldn’t miss: a 330 ft / 100-meter-long cable layer called the Charles Brown and the Chien Tong, a Taiwanese fishing vessel. Both were purposely sunk. The Charles Brown is home to a large school of horse-eyed jacks and provides lots of good photographic opportunities. Some parts are covered in lots of black coral. The Chien Tong is a fun dive during the day, but I recommend diving it at night, when it becomes a turtle hotel. Turtles from the surrounding area use the wreck as a place to sleep, and it is not uncommon to see 10 or more turtles on a dive. In addition to the turtles, there are lots of other critters that make an appearance. I’ve seen sharks, eagle rays, mating turtles, big stingrays, and every crustacean you can imagine on that wreck at night. You can even dive historical wreck sites on Statia. At sites such as Double Wreck and Triple Wreck, you can dive among historical artifacts from the colonial period. The wooden ships these artifacts were once part of have disintegrated due to teredo worms, but all the non-organic parts of the vessels are still there. I have conducted many years of archaeological research on these sites, and have learned a lot about them over the years. At these sites, you always see lots of southern stingrays in the sand, and there’s a good chance for turtles as well. These sites are also great for smaller critters such as sea horses and frogfish. Statia is great for non-divers as well. As I mentioned above, there is great hiking and many historical sites on the island. The black sand beaches are small but uncrowded. Snorkeling is fun, but a bit limited. Very special is to snorkel among the submerged ruins of the 18th-century port district. Throughout the day, there’s lots of life here, and at dusk, you can spot lemon sharks in this area. Statia is a very diverse diving destination. While the island (and the Eastern Caribbean in general) doesn’t have the vibrant reefs of the Coral Triangle, the big animals of the Eastern Tropical Pacific, or the fascinating shipwrecks of Truk or the Solomon Islands, it is one of the most varied diving destinations in the Eastern Caribbean. As a photographer or videographer, you have plenty of great opportunities to get interesting shots in a location that is not overcrowded like some sites on Cozumel or Bonaire. Having said all of that, we also have to be realistic and look at the not so bright side. The island is changing rapidly. There is now a big development on the eastern side of the island, where a large resort has recently opened. Stony Coral Tissue Loss Disease is wreaking havoc throughout the Caribbean, and Statia’s reefs are not immune to it. Moreover, the island experiences the effects of hurricanes, which can cause difficulties getting to the island and can change the marine environment dramatically. Eastern Caribbean reefs are not pristine environments anymore, far from it. There’s a general lack of top predators on the reefs, acropora corals have been decimated, and many species are heavily overfished. But within this context, there is still fun diving on Statia. Here you can get away from the crowds and experience the Caribbean like it was on other islands 50 years ago. Therefore I recommend it for anyone wanting to take a trip to the Eastern Caribbean and go off the beaten path. Bring a fisheye lens to capture expansive reef scenes A frogfish at Double Wreck An 18th-century anchor at the Lost Anchors site Snorkeling among the submerged 18th-century warehouse ruins just offshore The island has a lot to offer topside as well, such as hiking the 2,000-foot-high Quill volcano. You can even hike down into the crater.8 points
 -
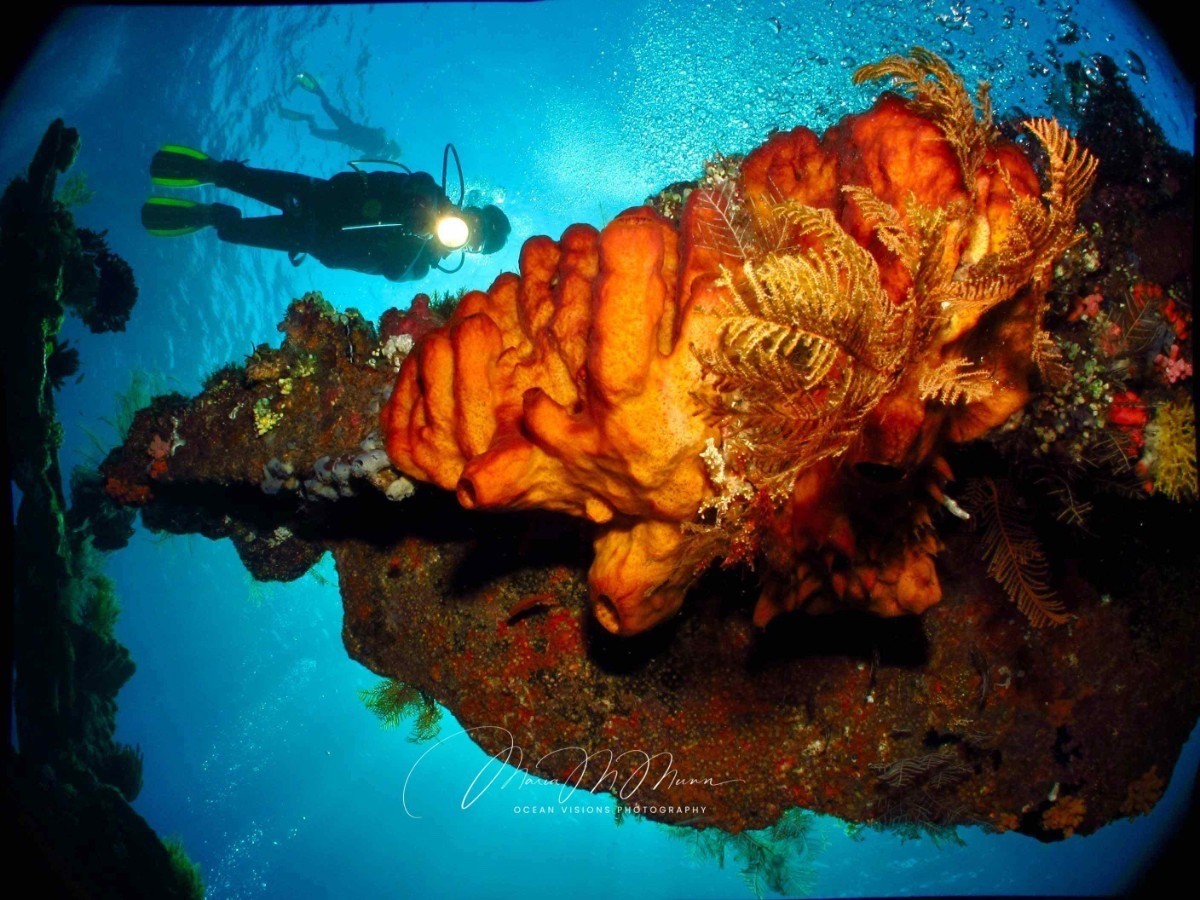 Underwater Photography conjures up a vast array of subjects to capture, from the tiniest animals on the planet measuring just the size of a grain of rice to the largest creatures which have ever lived in our incredible blue planet. But starting out as a complete beginner with such a huge choice of different compact camera systems to choose from and accessories, where on earth do you start to ensure that you come back from your trip of a lifetime with fabulous eye-catching images. Compact cameras have evolved hugely from when I pioneered the first ever dedicated courses for them back in 2005, but the essentials I always ask on the forums I participate in are: What are your dream images to photograph? Where are you going? How much do you want to change your settings? What is your budget? It’s honestly that simple to make sure that you choose the right equipment. I remember seeing on one forum that a lady going to Fiji was recommended an Olympus TG6 for it’s macro capabilities. Being the passionate shark stalker and wide-angle reef scene passionate that I am, I just had to butt on in and suggest that a wide-angle lens was an absolute must to capture those jaw dropping reef scenes that Fiji is so famous for, as well as those sharks. Yes the macro life is absolutely incredible too, but it’s so important to KNOW your destination, RESEARCH the subjects which you are going to have the opportunity to capture and have a budget in mind to start with. How can you go to such an incredible, jaw-dropping, life changing destination and NOT come home with all of the incredible images that both you and your camera deserve? Then there’s the question, do you need a camera with full manual controls or not? Again, it all depends on what you want to achieve, but I’ll never forget my course guest Daniel Norwood, now Editor of DivePhotoGuide winning the British Society of Underwater Photographer’s Best Beginner Competition with a compact camera which had NO manual controls. The Runner-Up (27 points behind) was the then Chairman with a d-SLR system. It just goes to prove that it honestly is all about how YOU drive the camera, how YOU create an image, and that you CAN still create award-winning, breathtaking imagery with older compact cameras too. I have a huge variety of all kinds of images taken during my 20 year career gracing the walls of my gallery here in the UK. And guess what, no-one can tell the difference as to which one was taken with a d-SLR, Mirrorless, Compact, Go Pro or my Phone. So let’s dive on in and look at some answers to common questions I often see to get you started on your own journey. Do You Need the Latest Model of Compact Camera? Absolutely not, I loved shooting with my Olympus TG4 before upgrading to a TG6 model. If an older model will give you more “bang for your buck” and enable you to purchase additional lights or lenses so that you can achieve your dream images, then it’s totally cool to go down this route. Which is the Best Compact Camera for a Beginner? All of them! Yes honestly! It all depends what you are looking for and how much effort you want to put into changing different settings when you are underwater. I even absolutely loved using my Sealife DC-2000 camera and in the right scenarios would deliver incredibly sharp, punchy images even here in the UK with minimum effort and fuss. So do you need full manual controls to take incredible images when starting out? Absolutely not! Yes, full manual controls allow you to get more creative, but they are not the be all to creating fabulous images that you will fall in love with. I love the Olympus TG range for simplicity and for the jaw-dropping close-up images which it creates from the tiniest creatures by just using it’s “Microscope Mode.” It doesn’t have full manual mode, but you can still achieve black backgrounds to your close-up subjects by adjusting some in-camera settings. You can add-on wide-angle lenses, lights or even use a torch to start your creative journey. Can I Really Capture Great Stills Using a Go Pro? Holy moly, yes, yes, yes! I’ve fallen in love with my Go Pro this summer and all the additional lenses and accessories which you can add to it. From Backscatter’s MacroMate Mini which neatly fits on the front of a Go Pro housing to achieve razor sharp macro images to their incredible (how much am I in love with this lens) Action Cam Sharp Wide Lens Pro which gives a whopping 140 degree field-of-view. It also allows the Go Pro to focus much closer to your subject to give you real nice close-focus wide-angle images. Simply add on some small video lights to bring extra lushness, colour and depth to your imagery, I love my MARES EOS 10LRW Video Light Set-Up for lightness, compactness and brilliant results, and you are set to go. What About Using My Phone Underwater? Can you guess what I’m going to say? Yep I absolutely ADORE using my phone underwater as well. It also will give you excellent results, and it really is all about what you want to achieve our of your underwater imagery. For me, what sets it apart from the rest is that your images are there as soon as you finish your dive, ready to upload to the world without the need to download them first. I have been using a Sealife Housing and I love being able to change different settings via the Sealife App such as ISOs, Exposure Values and I can even shoot in RAW. Being able to change my exposure value was crucial to achieve these reflections at Ginnie Springs in Florida. Finally what about Insta 360? Insta 360 is definitely all the rage at the moment, and definitely so for a very good reason. You will not have seen anything quite like it anywhere and the results will leave you spellbound. That is as long as you are using it in settings which actually suit it’s capabilities, such as huge wrecks, large reef scenes and giant cave systems. Oh and make sure you have heaps of ambient light around you to get the best results. Trust me it really is awesome, but you will need to take extra care with the lens as it scratches easily. Sadly you can’t add any extra lights onto it due to the way that it has been designed, but trust me, it is jawsome. I could honestly write about all of them forever, but thought it best to stop here so that you can go grab a coffee. At the end of the day, they all take superb images, but you need to make sure that you are in the best possible conditions to make the most out of each device. I’ll write more to explain each set-up individually very soon. Until then, feel free to reach out and ask me any questions. Helping is my middle name so just reach out if you’d like some help. Look forward to seeing you all very soon. Maria7 points
 -
7 points
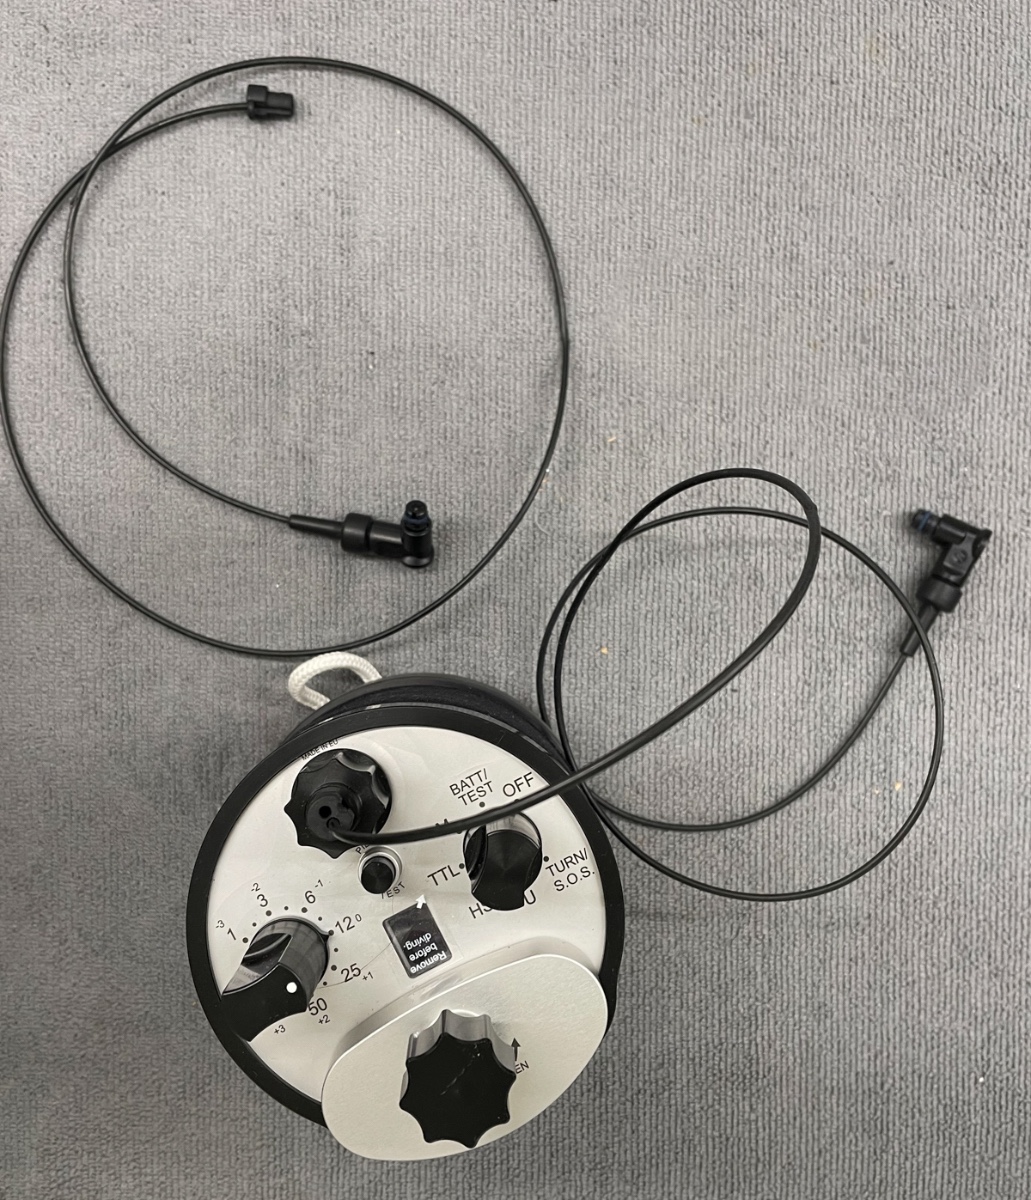 DIY Fibre Optic cables Like most members, when I bought my first system that used fibre optic cables, I paid for the ones that the dealers sell. Reading various articles about fibre optics, I realised later that they were relatively easy to make and that DIY cables could cost a fraction of shop-bought. I gave it a go. I thought it worth a write-up here on Waterpixels. And yes, they are really easy to make and are cheap. The Cable The best fibre I have found for strobe cables is called 613-core Fused Multi-core Simplex Cable, Polyethylene Jacket- MCQ-1000. Bit of a mouthful! A meter will cost about $7.50 and that should make at least two cables. A couple of years ago we coordinated an order between a group of forum members and bought 86 metres (!) from Industrial Fiber Optics in Tempe, Arizona. It was a bit of a shock when it arrived on a huge cable drum! Cutting The 613-core fibre is easy to cut using a sharp, box cutter-style blade (a Stanley knife to we Brits). Don’t be tempted (as I did to start with) to use a pair of scissors as that is likely to result in not quite a clean 90-degree angle. Although this will probably work fine for Manual initiation, TTL needs more accuracy and a scissor-cut can impact on the cable’s transmission quality for TTL purposes. You can buy purpose-built fibre optic cable cutters but unless you are going into mass production, they are not really necessary. Curling If you really insist on having curly cables, cut to length and then curl the cable on a pencil and dip in hot water for a while. I found though that my shop-bought curly ones were a pain and lead to strained and tugged cables. Go with straight and feed them through the strobe arms. Fittings Various plugs (or “bushes”) are available for either or both ends of the cable. Inon make a double hole plug - available from Divervision for $1.95. Howshot make an “Adapter L bush” for the massive cost of $3.95. I use an Inon plug at the strobe end and a Howshot at the housing end. None of these fittings need any complicated assembly, glue, heat, soldering or magic. Simply push the cable into a hole. In the case of the Howshots, poke, bend and tighten a screw. Truly not rocket science. In conclusion I made a bunch of cables, they have done hundreds of dives and work like a charm. One of the really neat things about DIY cables is that you can have any length you want - including creating an extra long one for off-housing work. If by chance they break, just recut at the break - or just cut a new one. The cost of a complete cable, less than $10. The sense of achievement, priceless. Give it a go!7 points
 -
7 points
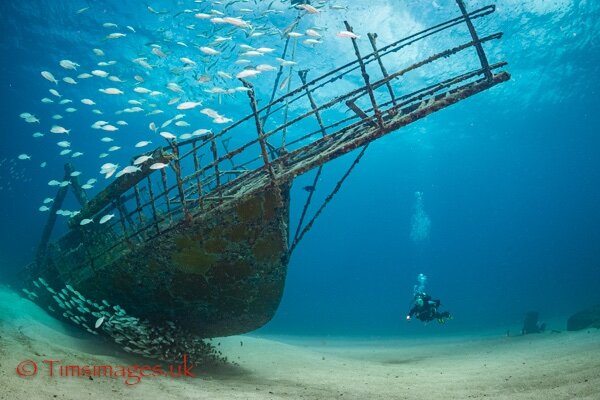 I’ve been to Bonaire 7 times over the years and logged 235 dives there. I like it for the shore diving and, generally, for the macro critters. I love the laid-back feeling. But, for me, the reefs are not what they were and marine life now seems a bit limited: reef fish, shrimp and arrowcrabs. Slight exaggeration I know but no big things (yeah, the odd tarpon, some turtles) and even the macro life now seems to take some hunting. Very little, if any, schooling fish. Yes, I know it usually wins all the prizes for diving in the Caribbean. But, frankly, I had to admit to myself I was getting bored diving there. By the happiest turn of fates my partner, bless her, was seconded to a job in Sint Maarten and I felt obliged to join her (NB: British irony). Almost three very happy years followed and 436 dives. Sint Maarten is another of those curious Dutch outposts in the Caribbean. Although not part of the Netherlands (Bonaire is actually a city in the Netherlands), Sint Maarten (or SXM as it’s known) is in the Kingdom of the Netherlands so similar in status to, say, Jersey or Bermuda. It has a significant international airport and is a stone’s throw from the British hold-out of Anguilla. I read that Anguilla to Sint Maarten is the world’s shortest international flight. In addition, the northern part of the island is actually an area of metropolitan France and as such part of the EU. One island, two cultures. Best part: two cuisines – the Dutch part slightly more American plus Heineken; the French part, oh la la, French. Think top quality pain au raisin or croissant for breakfast, patisserie for afternoon tea. Excellent inexpensive wines, good restaurants, great supermarkets and entrecôte…… Unlike Bonaire, Sint Maarten is hardly known as a dive destination. But if you are into macro, there are all sorts of shrimps; you can trip over arrowcrabs; lots of reef sharks, turtles, gobies looking out of crevices, loads of morays, SCHOOLS and I mean serious schools of grunts, blackbar soldierfish, snappers…. I was teaching the West Atlantic REEF fish identification course there and the place is a Caribbean fish spotter’s dream. Plenty of wrecks covered in marine life and schools of fish….. and some intriguing coral mazes which are playgrounds for divers. Yes, you must boat dive which means, probably, a max of 3 dives a day. Shore diving is, sadly, minimal verging on the negligible. If I don’t get bored after 436 dives this place has to be good, right? So if you dive in the Caribbean and you fancy a change from Bonaire, check out Sint Maarten. Pack your camera, charge your GoPro, pack your snoot. You won’t regret it. I can recommend diving with Ocean Explorers ([email protected]) run by a super Brazilian couple, Lu and Jef. Jef knows the reefs there like the back of his hand and he and Lu have been running Ocean Explorers for decades.7 points
 -
6 points
 The team at Waterpixels are delighted to announce that our 1000th member, @Grega joined the Waterpixels community on 15 March. An especially warm welcome to Grega! Thanks to all those who have signed up since we started in Dec 2023. We reached our 500th member in February 2024 and have seen a continuous stream of people signing up since then. We'd like to thank members for continuing to engage so positively and in a great spirit of willingness to share and be helpful. We're especially delighted that unpleasant exchanges continue to be few and far between, sadly a rarity on an online forum. It's the contributions to the forum from members and their willingness to share experiences, ideas and advice that has allowed the site to continue growing so positively. We look forward to everyone's ongoing contributions and to many new members coming onboard. Great to have you all with us!6 points
 -
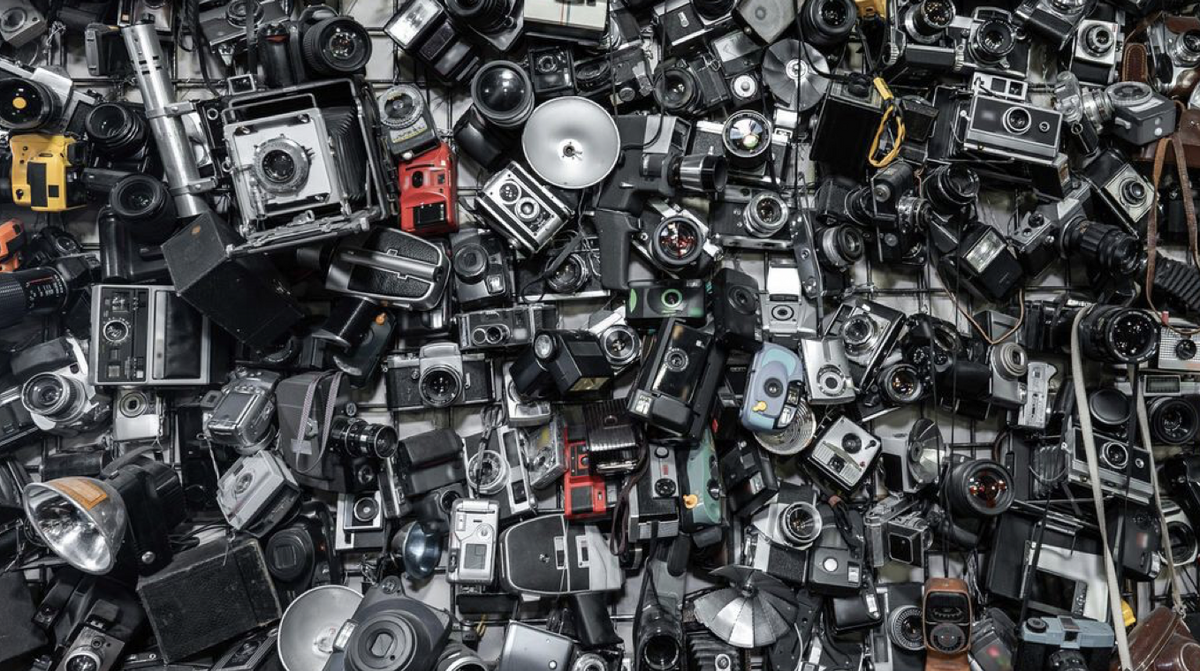 I came across the following article by By David Clapp, published on 31 July 2025 in Digital Camera World. Worth a read, I thought! "It’s getting near that time again - as September means a new iPhone. Then there’s a new Android. Then it’s the turn Fujifilm / Canon / Nikon / Sony / Panasonic etc - all of them use tried and tested strategies stretching back as far as the 1930s to make you, the consumer, feel dissatisfied with the equipment you own. Let’s be frank, you are a subliminal and anonymous target for consumer capitalism and those at the top do this for one simple reason - they stay in business by selling you new products. Simple. Most media-based products like cameras, computers, musical equipment and many others, have a central strategy, to put you into a constant state of dissatisfaction. The subject-focused camera you yearn for will never be released, so they include firmware / software / shiny updates to keep you on board. You learn and adapt your championed model, but it only gives around 75% of what you need it to do. Slowly, we become desensitized, used to dissatisfaction and slowly the wheel turns. The industry fuel is acquisition and consumption. The beauty of this strategy is that we the consumer believe it is a direct path to creative happiness and that in monetary terms it is. The areas where this is most prevalent is in two places in our modern age — advertising in all its forms (YouTube / influencers / social media) and text-based discussion forums - which cultivates and accelerates our desire to purchase. We consume, reflect, and then complete the financial circle of moving our money back into the machine. What creates the anxiety to purchase can be covered in a number of fundamentals. Does the item look attractive to us? Look at any high-end digital cameras and the form factor is enough to pull us into their tractor beam. Then there is functionality. People are obsessed with technical specs, the online media in particular thriving with clickbait controversy. Then there is photo-social class - does the product elevate us to a level of satisfactory peer acceptance? Do we then feel connected to a new economic group, or a sense that we could finally achieve creative altitude like never before? It’s all a grand illusion. After the initial wonder, hard research, handling, contemplation, and purchase phases subside, the brain returns to a base level (look up Look at any high-end digital cameras and the form factor is enough to pull us into their tractor beam. Then there is functionality. People are obsessed with technical specs, the online media in particular thriving with clickbait controversy. Then there is photo-social class - does the product elevate us to a level of satisfactory peer acceptance? Do we then feel connected to a new economic group, or a sense that we could finally achieve creative altitude like never before? It’s all a grand illusion. After the initial wonder, hard research, handling, contemplation, and purchase phases subside, the brain returns to a base level (look up ‘hedonic adaptation’) and it is here where the forums like Canon Rumors start the cycle once more. The idle mind starts to speculate about imaginary cameras, features and from here the tribalism leads to threads full of conflict and antagonism, that could potentially be extinguished with a gear purchase. My rule is simple - upgrade when features arrive you cannot live without. In the last 20 years this has been Live View, weather sealing, GPS, WiFi, and recently (for me) 4K video. "5 points
 -
 Sea Frogs has officially released its new Z6-III aluminum alloy housing, designed specifically for Nikon’s latest Z6 III full-frame mirrorless camera. Continuing Sea Frogs’ tradition of precision craftsmanship and technological innovation, this new housing offers reliable underwater photography support for both professional photographers and diving enthusiasts—further pushing the boundaries of creative exploration. Key Features: Professional Protection and User-Friendly Design Aviation-Grade Aluminum Alloy Construction The Z6-III housing is built from high-strength aluminum alloy, striking a balance between lightweight design and exceptional compressive strength. It performs reliably in demanding environments, supporting underwater use at depths of up to 100 meters. Its excellent corrosion resistance makes it ideal for use in seawater, freshwater, and extreme outdoor conditions. Optimized Button Layout Tailored to match the Nikon Z6 III’s control logic, all buttons and dials are engineered with specialized technology to ensure seamless operation underwater—just like on land. Modular Expansion Interface Includes a top-mounted M28 interface reserved for external monitor connectivity. Optical-Grade Glass Ports and Safety Design Equipped with ultra-clear, optical-grade dome and flat ports designed to minimize distortion and chromatic aberration, ensuring maximum image sharpness and color fidelity underwater. The O-ring sealing system and pressure balance valve effectively prevent deformation due to leakage or pressure differentials, ensuring long-term durability and performance.5 points
 -
5 points
 Retra have announced the launch of the new Retra Flash Pro Max II, which they describe as their most advanced professional strobe to date. "Built on five generations of innovation and field-proven performance, the Pro Max II redefines what’s possible in underwater lighting—delivering Li-ion-level performance using safe and widely available NiMh batteries." "With an impressive 190Ws of flash power, the Pro Max II produces 65% more actual light output compared to its predecessor—all while maintaining the same compact size and weight. This significant leap in brightness is achieved through a redesigned reflector, optimized power handling, and an improved triggering system that channels more energy into light rather than heat. Whether you're shooting fast-paced action or intricate macro scenes, you’ll appreciate the 25% faster recycle times and the ability to shoot up to 2000 flashes at 25% power using the 8×AA configuration. It even supports continuous shooting up to 60 frames per second on low power settings." Full details can be found here: Retra UWTRetra Flash Pro Max IIThe Retra Flash Pro Max II is our fifth-generation professional underwater strobe, engineered to push the boundaries of lighting performance. Delivering 65% more light output, 25% faster recycle ti...5 points
 -
 Waterpixels is delighted to report that Emperor Divers have joined our growing lists of industry supporters. Since 1992 Emperor Divers have shared their experience of scuba diving in the Red Sea, Maldives and Indonesia and have looked after thousands of happy divers – a great many of whom keeping coming back to us year after year. Emperor's focus has always been on providing safe and sustainable diving holidays for everyone. Liveaboards, Resort Diving and PADI Courses are what they do. They cite ‘Must-do’ dive itineraries to include ‘Best of Maldives’ , ‘Red Sea Reefs & Wrecks’ and Indonesia’s ‘Komodo’, ‘Banda Sea’ and ‘Raja Ampat’. Having dived with Emperor many times over several decades, I can heartily recommend them.5 points
 -
5 points
 The annual German "Boot" show took place on 18-26 January. I visited on 25 January to see what might be new in the dive and underwater photography world and met up with other Waterpixelers. I was also tasked with tracking down the new unicorn of the underwater photography world, the Inon Z-xxx Boot is a massive show spread over 13 exhibition halls. It wouldn't be hard to spend a few million euros there - assuming you had them in the first place. Diving was maybe one and a half a halls with displays of wetsuits (lots of weird camouflage suits - what is that all about?) and posters showing muscled combat scuba divers, fast-roping from helicopters carrying waterproofed weapons. I'm yet to see one of one of my dive trips but who knows. Quite a few rebreather stands around as well plus the usual suspects, Scubapro, Cressi, SSI, PADI. Lots of resorts: Raja Ampat, Lembeh, Egypt etc etc. And, as always, a few sellers of the critical doo-dads that we all need: clips, hooks, fancy tags etc etc. Slightly disappointingly there wasn't so much to see from an u/w photo perspective: Nauticam, Seacam, Easydive and Divevolk either had a small stand or shared one with a distributor but that was pretty much it. Nauticam had their housing for the Nikon Z6III which, I thought , surprisingly big for such a small camera body. But, no, sorry, not a sniff of an Inon Z-xxx. It was very good though to meet up with three other members, Maria, Hans and Chris. One thing I did notice which might be of interest was the growing number of dive propulsion vehicles (DPVs) including some very cool tiny ones. I'm off to the Dutch dive show next Saturday and will report back from there too.5 points
 -
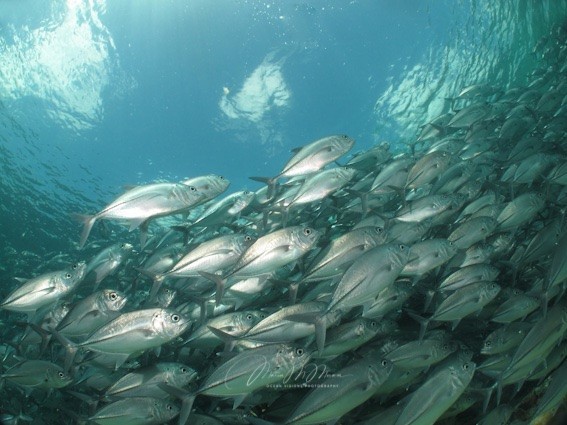 Without a doubt the Olympus TG Tough range have revolutionised the world of underwater photography for both snorkelers and divers in recent years, making incredible results achievable for the beginner as well as giving a vast variety of options to expand creativity. But with so many options for accessory lenses and makes available, what should you be looking for if you want to start adding a creative wider angle to your images. This festive period I was super busy helping answer some of the popular questions that I see on other forums so I've put this together in the hope that it might help someone else too. So let’s start as a snorkeller. Is a housing really needed? Personally I’d always suggest one, even if it’s just to have that extra security measure and of course remember that you will need one to add on extra wide angle lenses at a later date. Not only have I seen them flood in the water for no apparent reason but it’s all too easy in the excitement of getting in the water to accidentally not close the battery door or overlook a tiny pesky hair trapped in the seal. When you’re travelling to unique, once in a lifetime destinations, it’s always better to be safe. Then there’s the option for snorkelers to add on an Olympus FCON-TO2 (which is also waterproof) directly to the Olympus TG range via an adaptor, CLA-TO1, with just one easy click. This will give you a wider field-of-view than the camera’s own 25 mm one and is great if you are using the camera above water too for wide landscape images. It’s great for small reef scenes, but for larger subjects such as this seal above, a wider field-of-view is needed to fit more of it in. It also struggles with above and below shots. But if you use an Ikelite Housing with a dome port for your Olympus TG, you can simply just pop the camera and the FCON-TO2 lens into the housing, giving it a much wider field of view so you CAN capture much wider scenes, achieve split-level shots too and create a perfect snells window effect when framing a subject above you. The Pros are:- the edges of the image are sharp and there’s no vignetting the system stays light (just over 1 lb for the whole unit) compared to adding on a wide-angle lens directly to the front of a different housing which can make the housing tip forwards and downwards, even with a tray to help balance it. The Drawbacks are: keep an eye out for black corners to your image as the dome shade may interfere with the overall result and if this happens, simply remove it. Did you know that with this set-up you can actually zoom through the lens to achieve sharp close-up images too? Check out Ikelite’s website or direct link here to see how it performs underwater: https://www.ikelite.com/products/dome-port-for-olympus-fcon-t02-lens-and-adapter-kit?pr_prod_strat=pinned&pr_rec_id=ec369bea4&pr_rec_pid=3943133118533&pr_ref_pid=11527790933&pr_seq=uniform So let’s look at other wide-angle lens choices. A super popular choice with many starting out is Backscatter’s M52 Air Lens or AOI’s Underwater 0.75x Wide-Angle Air Lens (weighing 20 grams underwater/160 gms on land) which give an 81 degree angle of coverage, sharp corners, is light and easily screws into a 52 mm threaded mount. It works perfectly to restore the camera’s topside field-of-view underwater and at the same time will restore your image’s colour, sharpness and clarity by reducing the water column, therefore allowing you to get closer to your subject. It has an Anti-Reflection Coating too. You can also zoom through this lens to take full advantage of the TG’s Microscope Mode. An extra super useful touch is that you can attach the lens to your housing via a lanyard (a very thoughtful touch which is included with your purchase) which will keep your lens safe when you are underwater. It’s a great lens for turtles, large fish like groupers, divers and small reefscapes. I loved using this lens when I had the chance to photograph blue sharks off the coast of Cornwall with my Olympus TG-6 It produced detailed results as you can see here, but I really needed a wider field-of-view to be able to capture the whole body of the shark to be able to have a sharp result throughout the image. So do you really need to go any wider and why? For all those cave, wreck and super wide reefscape scenes with or without a modelling diver, this is where a wider angled wet lens really shines to capture both dramatic and creative images. There are a few makes to choose from such as Kraken, Weefine, INON, AOI and of course Backscatter! Let’s look firstly at Backscatter’s M52 120 degree Wide Angle Lens Backscatter have done a sterling job to design and innovate wide-angle lenses especially designed for the Olympus TG series and this lens is fabulous for those dreaming of capturing those captivating wider angled scenes. Like the Air Lens, it delivers sharp corners, there’s no vignetting (where little black areas appear in the corners of your image), has an Anti-Reflection Coating and you can zoom through the lens for those all important close-up shots, making it perfect for capturing Close Focus Wide Angle Images. Want to go Ultra Wide to capture even more of those wreck, pier or scenic cave shots? Weefine has designed a super wide conversion lens (depth rated to 60 ms) which offers an incredible 150 degrees at 24 mm and easily screws into an Olympus TG housing’s 52 mm thread mount. It also comes with an adaptor for 67 mm thread mounts. Just be careful as the weight of the lens is heavier than the others (690 gms in the air/255 gms underwater). It has a multi-layer BBAR coating for anti-reflection and optical clarity. It has an optical grade polycarbonate dome which is easy to repair if needed. Again you can zoom through this lens if needed. A super wide lens is incredible useful for close-focus wide angle images, allowing me to get much closer to my subject and with the use of just one strobe placed over the middle of my housing, I could illuminate the above subject. Kraken has also its own KRL-02 52 mm Wide Wet Lens which offers a 145 degree at 24 mm. It has also been designed with a 52 mm thread, also has a multi-layer BBAR coating for anti-reflection and optical clarity purposes. It also has the capability to zoom through the lens for a tighter frame. Just be aware that vignetting (black edges to the corners of your image) may still occur with different housings and lens combinations. If you notice this, just simply zoom slightly until the effect disappears. So there you have it, an introduction to the wonderful world of wide-angle creativity. Wide-angle has been my calling in the world of underwater photography and there's nothing more that excites me than creating a unique scene which captures guests' attention and creates a conversation to encourage them to explore our underwater world too. Warm Seas, Maria5 points
 -
5 points
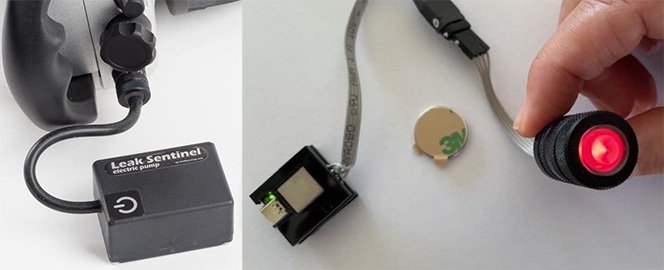 I installed my first Leak Sentinel vacuum valve, a V3, in my Subal ND800 housing in 2014. Over 700 dives, changes of camera housing and upgrades to the Sentinel system, I’ve moved through V4, V5 and now the newly available V6. As the slogan goes, I’d never leave home without it. Why? The Sentinel provides a unique extra level of security and reassurance to an underwater camera and has saved me from my own stupidity a couple of times…… So what is it? The Leak Sentinel is a small valve which screws into a spare bulkhead on an underwater camera housing to monitor for leaks even before the housing goes into water. A small hand-pump of the type used in the Vacuvin wine bottle corks then draws the air through the valve and out of the housing. (A small battery-operated pump is also available). This creates a vacuum indicated on the Sentinel by a green, “Good to Go”, blinking LED light. If the housing has not sealed properly because of a fault or, more likely user-error, the valve warning light will flash green/red or red indicating a problem. Vacuum valves are great devices particularly to help avoid user-errors and, more importantly, warn of an issue before the housing gets wet. It is this feature which makes them even more valuable than a housing leak detector which only works when water is already in the housing. Given the cost of the housing and its contents, installing one of these handy leak warning devices is money extremely well spent. I would argue it is one of the two best investments I’ve made in my system. (the other being a 45-degree viewfinder!) The Leak Sentinel system is simple to install. The valve is screwed into an empty bulkhead on the housing so that the blinking warning light is visible when diving. In earlier models (V1 to V4) the battery was part of the Sentinel’s valve assembly. In the V5 “XB” model the battery was fitted on a printed circuit board fitted inside the housing with a wire connection to the valve. This avoided the need to disassemble the valve to change battery. The V6 has just been released. Like the V5, the battery fits inside the housing. However, the cable is now fitted permanently to the battery circuit board and a connector has been added (see photo) linking the battery to the valve assembly. This is a big improvement as removing the V5 required disconnecting the wires at the printed circuit board – which could be problematic. In addition, gone is the square of Velcro which was supplied to hold the printed circuit board to the top of the housing. Now there’s a magnet! This should make battery changes even easier. Like the V4 and V5, once a vacuum is established and the LED stays green for a reasonable length of time (I usually wait an hour), the Sentinel can be switched off by pressing the LED and left until dive time. This saves battery life. Switch it back on pre-dive and the green, Good-To-Go LED should reappear and blink steadily. The Sentinel electronics allow for an element of temperature variation. It will cope for example if the camera is setup in the housing in an air-conditioned room – and then moved into a higher ambient temperature before diving. The system uses an easily available and inexpensive CR2032 battery. Battery life is certainly into the dozens of dives and many hours. On the very rare occasion when I’ve had a question, the Leak Sentinel’s producer, Miso Milivojevic of Vividhousings, has being unfailingly helpful at finding a solution in response to my emails. So, easy to install, easy to maintain and relatively inexpensive…. is it worth installing one on your system? No question. Who doesn’t want to reduce the risks of a flood and enjoy the additional reassurance a vacuum valve provides. Never leave home without one.5 points
 -
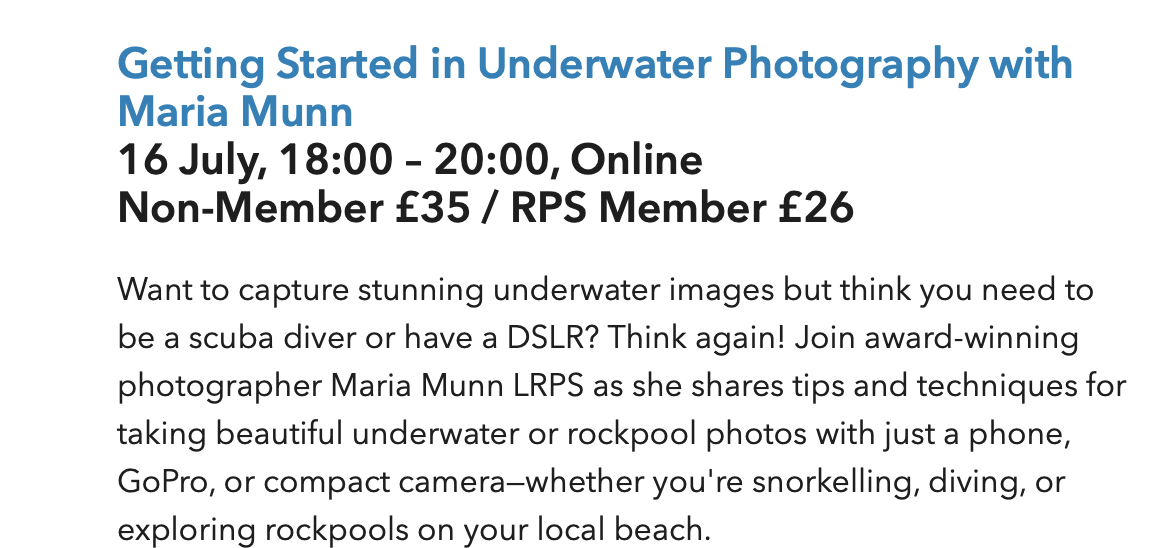 Maria , our very own Compact Camera Specialist, will be hosting an online “Getting Started in Underwater Photography” event with the Royal Photographic Society on Wednesday 16 July from 1800 hrs to 2000 hrs. Maria will be sharing her experience over the past three years of shooting exclusively with smartphones, compact cameras, Insta 360s and Go Pros and promises to help inspire beginners capture their own vision to create award-winning content. Her presentation will delve into the many different options of accessory lenses and lights from various manufacturers with the aim of helping people choose the best system for their needs. Tickets are £35 for Non-Members or £26 for RPS Members which includes a free copy of Maria’s eBook “Getting Started in Underwater Photography” and free online ongoing support via Zoom or at her studio in Swanage. Details are on the Royal Photographic Society’s website at https://events.rps.org/en/4LrdQ66/rps-getting-started-in-underwater-photography-with-maria-munn-jul-2025-5a2NN29HgnF/overview4 points
 -
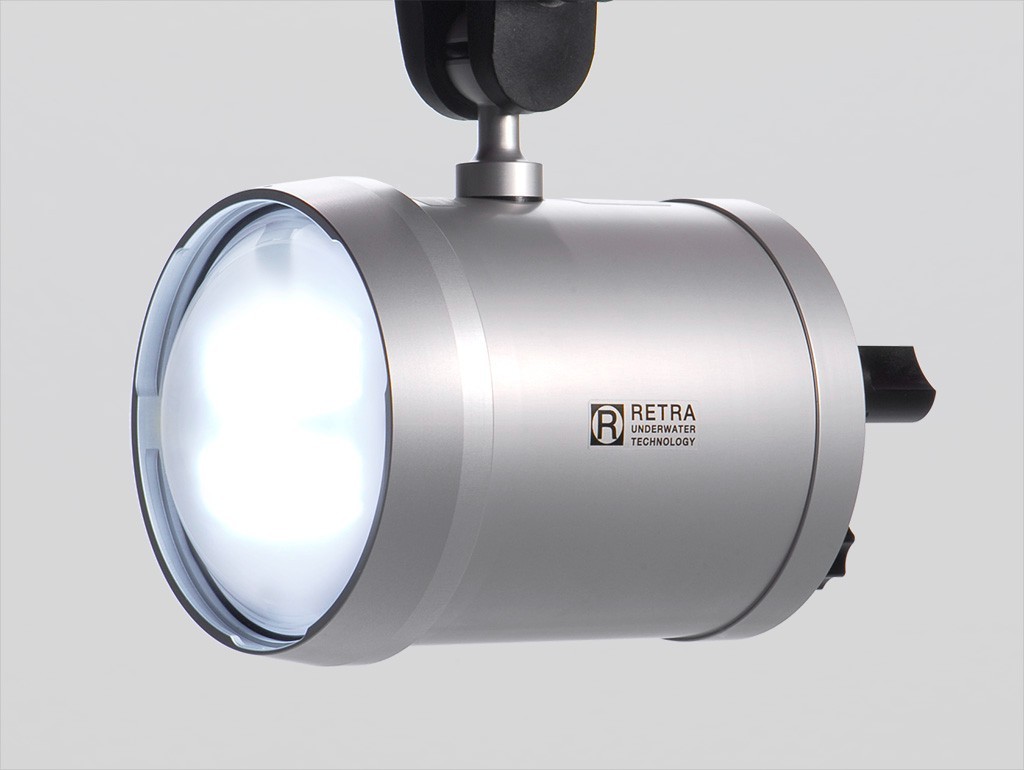 Introducing the Retra Maxi: The Ultimate Underwater Strobe and Video Light Combo The Retra Maxi sets a new standard in underwater photography, combining a GN46 strobe with an optional 6000 lumen ultra-wide video light. Perfect for both stills and video, it offers unmatched performance for photographers and videographers looking to elevate their work. Incredible Strobe Power and Performance The Retra Maxi features a GN46 strobe, providing excellent light output for distant subjects. With its 110º beam and 5800K color temperature, it delivers precise and balanced light. The optional wide-angle diffuser expands the beam to 160º and reduces the color temperature to 4500K, perfect for wider scenes. Unmatched Speed and Efficiency With sub-2-second recycle times and over 550 full-power shots, the Retra Maxi ensures you won’t miss a moment. It also provides up to 1 hour of full-power video light output, giving you exceptional endurance for long dives. Customization and Compatibility at Your Fingertips Customize settings via the Retra UWT app, including HSS, TTL, and manual modes. The Retra Maxi is also fully compatible with all Retra Flash accessories, such as diffusers, macro rings, and the LSD Optical Snoot, allowing for flexible setups. Durability and Design for the Toughest Conditions The Retra Maxi features dual O-ring seals and a sealed battery compartment for protection against water damage. The LED-illuminated back panel ensures easy readability during night dives, and the strobe is powered by two 21700, 6000mAh batteries for long-lasting performance. Pre-Order Now and Secure Your Retra Maxi Pre-order the Retra Maxi now at $799 (excluding local taxes) before the December 4th deadline. Shipping is expected in early 2025, with more details coming in end of December 2024. Don’t miss your chance to secure the Retra Maxi and revolutionise your underwater lighting setup! https://www.retra-uwt.com/products/retra-maxi4 points
 -
 It's worth a read of the link to Dive Magazine's article on the UK's Marine Accident Investigation Branch report on Red Sea liveaboard incidents. The report makes for sobering reading: 16 boats lost in 5 years. https://divemagazine.com/wp-content/uploads/2025-SB1-RedSeaDiveBoats.pdf4 points
 -
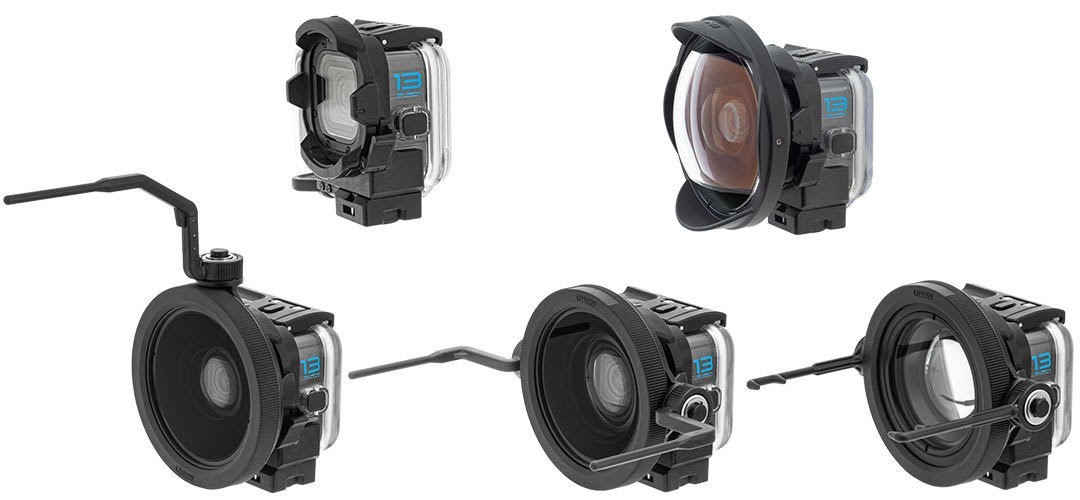 INON is pleased to announce that existing INON accessories for HERO12 Black are confirmed compatible with HERO13 Black when housed in its genuine dive housing (Protective Housing). Existing INON lenses including UFL-G140SD, UCL-G165II SD, UCL-G100 SD, UCL-G55 SD are usable for HERO13 Black as well at the same condition for HERO12 Black. INON Action Camera Wet Lenses Usage Tips INON " SD Front Mask for HERO9 " or " M67 Filter Adapter for HERO9 " doesn't create vignetting underwater even using 8:7 aspect ratio or HyperView which delivers footage in 16:9 aspect ratio by using the full 8:7 sensor (vignetting will be observed on land.). When using INON " UFL-G140 SD " " UCL-G165II SD " " UCL-G100 SD " " UCL-G55 SD ", shoot in 4:3 or 16:9 aspect ratio as vignetting will occur in 8:7 or HyperView mode. When using INON UFL-G140 SD lens on HERO13 Black and shooting in 4K 9:16 or 1080p 9:16, the lens hood appears in a clip. Remove the lens hood or use 4:3 or 16:9 shooting mode. Always set camera's Field of View (FOV)/Digital Lenses to [WIDE]. Using [Linear] or [Narrow] won't bring optimal performance of this lens. When using with HERO11 Black/HERO12 Black/HERO13 Black, shoot in 4:3 or 16:9 aspect ratio as vignetting will occur in 8:7 or HyperView mode. When shooting 4K 9:16 or 1080p 9:16 with HERO12/HERO13, the lens hood tips will appear in a clip. Remove the lens hood or use 4:3 or 16:9 shooting mode. [SuperView™] mode is not recommended. The SuperView™ mode stretches both ends of the image inside the camera to fit into a 16:9 aspect ratio from originally obtained 4:3 aspect ratio image by the camera sensor. Since the edges of the frame are stretched horizontally, attaching a wide-angle lens further stretches the edges of the frame, resulting in an unnatural image. Set the camera's image stabilization (HyperSmooth) to [Standard], [High], or [On]. Setting to [Off] will cause vignetting in image corners, and [Boost] will crop the image significantly. The FOV/Digital Lenses setting [Wide] in Photo mode causes vignetting in image corners. Since this lens provides ultra wide angle of view, it is recommended to set Spot Meter to [ON] when using external lighting source (LED flashlight etc.). Setting Spot Meter to [OFF] may have washout if the external lighting device aims center of the frame.4 points
 -
4 points
 Traveling 12,000 miles (19,600km); flying for 24 hours, followed by a 2-1/2 hour drive, and then a 1 hour boat ride, all to get to the Poor Knights Islands in New Zealand. Mon Dieu! OK, I hate to admit it, but he was right, it is one of the world’s top 10 diving destinations. Created by volcanic eruptions about 10 million years ago, they’ve become home to a myriad of marine life. There are over 50 different dive sites around the islands, such as the Northern Arch, Blue Maomao Arch, the Magic Wall, and the Rikoriko Cave (one of the world’s largest sea caves), each with its own amazing experience. From the macro to the micro, it’s all here. Pods of Orca patrol the area looking for their favorite Kiwi dish, the rays. Both stingrays and eagle rays visit the islands. Clouds of fish school through the kelp forests keeping a watchful eye for other predators like sharks that frequent the Poor Knights. At the same time, I’ve never experienced marine life so fearless of human beings. I would even say they are downright friendly! Some of them are even a bit of a pain, such as the incredibly curious Sandager’s Wrasse. On the other end of the scale, small creatures inhabit every nook and cranny along with urchins, anemones, sponges and gorgonian corals. They’re so plentiful it’s hard to imagine. Many of the subtropical fish living in the Poor Knights are not found anywhere else in New Zealand. They include species such as the spotted Black Grouper, Mosaic Moray, and Lord Howe Coralfish. And lest we not forget the nudibranchs. Unquestionably, some of the most colorful and unusual nudibranchs I have ever seen are in the Poor Knights. Every color and shape imaginable including New Zealand’s “lovliest nudibranch”, the Gem Doris (or Gem Nudibranch). They too are everywhere to be found. At the Northern Arch, squadrons of Short-Tailed Stingrays can be seen cruising the waters of the archway in the summer months. It’s the only gathering of its kind that has been documented for this species; come winter and it’s a “ghost-town”. Nobody knows exactly where the stingrays go during the winter. However, recent research seems to indicate that the stingrays actually stay within 30km of the Arch. The Blue Maomao Arch is (not surprisingly) named for its aggregation of the Blue Maomao fish Scorpis violacea. Massive schools of the fish congregate in the huge natural archway, which is flooded with rays of light from the top and sides. Layers upon layers of fish migrate through the arch, so much so that sometimes you cannot see the other end of the archway, even in clear water. It’s an awe-inspiring experience. And while I wouldn’t think of besmirching one of New Zealand’s most famous dive sites, my favorite fish is actually the Blue Demoiselle (sorry Blue Maomao fans). They say that the “ends justifies the means”, and in the case of the Poor Knights Islands, it’s a good thing that it’s true. Getting there will definitely try your patience (and backside). But in the end (pun intended), it’s absolutely worth it. Many thanks to Darryl Lowndes and Johnny Zhao for help with the videos.4 points
 -
 INTRODUCTION - JAPAN AS A DIVING DESTINATION The key word for Japanese diving is probably variety, as it is rare for a single country to offer so much underwater diversity. Looking at maps of Japan offers insights into why this might be the case: the Japanese islands have a unique profile and geographical position, spanning over 3,000 km across extreme latitudes, with conditions ranging from the subarctic in the north to the strongly subtropical in the far south. Map of the Japanese islands and submarine contours – Image source: Ryuichi Shinjo researchgate.net As an island nation made up of almost 7,000 islands, Japan has nearly 34,000 km of coastline exposed to key warm and cold-water currents and a wide seasonal temperature range, which contributes to giving Japanese waters their remarkable biodiversity. Each area has its own unique underwater fauna, flora and coastal ecosystems, offering rich and varied diving environments and opportunities. Japan’s diving highlights include coral reefs, wrecks, remote islands, volcanic topography, caves and lakes, and a few specialist activities such as chummed shark dives, ice diving, black-water diving, not to mention world-class macro subjects, schooling hammerheads, marine mammals and a remarkable overall biodiversity, endemism, and more… School of hammerhead sharks in Mikoto, Izu Peninsula. Image source: Dive-in-japan.com / Mikomoto Hammers No point in the country is more than 150 km from the sea, and over 2000 dive spots are listed across the archipelago. These include numerous shore-diving options - the most commonly found form of local diving on the rocky shores of the main islands - but also some good lake diving options as well as boat diving, ranging from comfortable, dedicated dive boats to very basic converted fishing vessels. And yet Japan’s reputation as a diving destination has been, so far, largely restricted to a domestic clientele of Japanese divers and foreigners living in Japan. This is first and foremost because of Japan’s many other strengths as a tourism destination – with so much to see and do on dry land, most visitors – even keen divers – tend to concentrate their efforts (at least on their first visits...) on Japan’s rich land-based culture and highlights. Mount Fuji, as seen from Fujiyoshida, Yamanashi Prefecture - Image source: Wikipedia Practically, Japanese is a temperate country, and diving activities are seasonal, with most if not all locations having a definite off-season in the winter months, and in season regular cyclonic storms (typhoons) sweep across some of the archipelago’s most popular southern diving areas, which can seriously disrupt plans for a few days... Diving, while not extraordinarily expensive, is also not particularly cheap compared to major Asian diving destinations and some of Japan’s best diving spots are quite spread out across the country (including more distant areas and remote islands), access to which can be further complicated by the scarce availability of English-language information, especially for areas a little off the beaten track. However, from the mid-2010s onwards, the Japanese government redefined its approach to international tourism, with a deliberate drive to expand the industry, reaching out to neighbouring Asian countries for more “regional” tourism and also well as promoting a broader range of tourism options, including sports and outdoors activities. Out of this drive, came the idea of “opening up” Japan to dive tourism which – with the exception of the subtropical Okinawa region and the Japanese domestic diver circuit – was still very much off the radar. Screenshot of the Japanese National Tourism Organization webpage on diving - Image source: Japan.travel While initial efforts were aimed at promoting resort-based tourism and introductory level diving in Okinawa, the Japanese archipelago as a whole is now promoted as a solid, world-class diving destination, under a more inclusive and sustainable angle. Scuba-diving is a surprisingly popular activity in Japan, where a thriving, distinct and somewhat self-sufficient dive-culture has evolved over the years, with its own codes, specific interests, publications, equipment brands, and so much more… Indeed, things are often done a little differently in Japan, and dive culture is no exception. One of the most outstanding examples of Japanese diving culture can be found in the remarkable role of the dive-guide, who will normally be guiding in a way local professionals often refer to (not without a hint of pride) as Japanese-style, which we’ll now take a closer look at. Shore diving on Miyako Island (Okinawa Prefecture). Image source: Japan-guide.com DIVING "JAPANESE STYLE" ? On the domestic market, you'll sometimes hear Japanese guides, operators and divers refer to a Japanese style of diving, supposedly distinct from diving experiences offered elsewhere. This concept has even made it into mainstream Japanese diving publications such as Marine Diving magazine, where articles discuss what is special about Japanese diving, and particularly the Japanese way of guiding divers underwater. In Japan, picking out differences - whether real or imagined - is something of a national pastime, with books and TV shows dedicated to the subject. While this tendency can be traced back to the once popular theories of Japanese-ness (Nihonjin-ron) or even to earlier historical nativist schools of thought, it is true that Japanese culture often reshapes its objects into forms rarely encountered elsewhere... Cover of Diver Magazine N.332 featuring actor/diver Taiyo Sugiura in full Japanese-branded dive gear Image source: Fujisan / Diver Magazine This process is often amplified by a relative linguistic isolation (a limited dialogue with and exposure to non-Japanese sources), and social aspects (such as hierarchical relationships) which can make things slightly more resistant to change, along with a general fondness for a Japanese way of doing things, often seen improved or a little more advanced than elsewhere... When it comes to scuba-diving culture, this concerns the role of dive guides and services offered (which, as a non Japanese-speaking diver, you might not experience while diving in Japan, as service will most likely be adapted to your perceived preferences and needs) along with specific interests like endemic species and localism. Guide lighting up a clownfish while showing his slate. Image source: hirasawa-mc As a rule, Japanese tourism highly values “local highlights”. Underwater, while Japanese divers enjoy the big stuff or macro subjects as much as any other diver, this also translates to an enthusiasm for underwater species which might be more of a specialist interest elsewhere (such as smaller reef fish), and also in variations in colours, patterns or shapes of the local fauna and flora. It’s also difficult to mention Japanese underwater interests without mentioning the highly popular gobies and blennies, as well as a fondness for “cute” species, ranging from charming, small-sized subjects and juveniles to critters with exaggerated features, ie slightly grotesque-looking fish. Because of these commonly shared interests, Japanese dive guides will generally have a much deeper, specialist knowledge of all local and endemic species and provide solid information on juvenile forms and the growth/life cycle of the species, as well as behavioural tips on how to approach sometimes-elusive specimens. Screenshot of a Bali-based Japanese dive center's blogpost on damselfish in Menjangan / Bali Imge source: Facebook post - Actual blogpost: Oceanlifebali And after diving, most Japanese dive centres will provide a time dedicated to working on logbooks and/or photo with one’s dive guide, which can range from quite formal to informal sessions, and is also where Japanese dive guides’ extensive knowledge of local marine life can really shine. While this is not exclusive to Japanese diving (worldwide, logbooking/ fish and photo ID’íng expectations are usually quite high in macro-focused destinations for instance, resorts or liveaboards might offer the services of a live-in marine biologist), it is true that outside Japan the practice of collective logging is often linked to some form of dive training, whereas this is more of a standard and expected service in Japan. As a side note, many Japanese divers are also very creative with their logbooks, with approaches ranging from cute cartoons to high-end naturalistic fish art - examples of such high level logging can be seen in this Oceana.co.jp post or a Google photo search on the subject. Logbook page with drawings. Image source: Instagram / Diving logbook artist Nosekana JAPANESE DIVE GUIDES AND GUIDED DIVING Local ambassadors, naturalists and hosts To make a broad generalisation, Japanese dive guides are often quite remarkable. Not so much for diving or safety skills, but for the type service they strive to offer to divers, and also for the local naturalistic knowledge they are required to possess, in order to meet the expectations of the most demanding divers they might be guiding and act as representatives of their local area. This does not mean that all Japanese dive guides are highly trained marine-biology experts, but they often do have more extensive knowledge about local species and their local environment than most of their non-Japanese counterparts (though there are notable exceptions), which is required and expected in a Japanese diving context. Dive guides in action:“This snake eel’s head is protruding from the sand” Highlighting differences between a Blackfin dartfish and a Fire goby – Image source: 4travel.jp It's quite common for guides to do their professional training directly where they will be working, as a form of internship, and dive pros generally stay much longer in one area than their non-Japanese counterparts. Dive-guide training emphasizes a naturalist approach, with a wealth of knowledge transmission on the local environment, species, marine life cycles and behavioural patterns for instance, aspects which are often lest at the discretion of the dive guide’s personal interests elsewhere. There are exceptions, of course, but in the global diving industry, it’s common for diving instructors somehow “outrank” dive guides, and in some contexts instructors will mostly be foreigners with language skills while dive guides are experienced locals, with a varying degree of formal training. This is less common in the Japanese dive industry, where almost all dive guides are instructors themselves, but choose to focus on guiding rather than teaching, as guiding is a highly valued, specialised activity. In Japan, there is a high respect for what is known as veteran (= highly experienced) dive guides, as specialists of the local area, and also for dive shops who have established themselves as a local authority over time (such operations are called shinise , an important concept extending way beyond the diving industry). It is a form of official recognition for guides to be employed by well-established dive centres, as is working under / training with / learning from famous dive guides. WTP's SORA magazine, Dive Guide Special Issue features interview-profiles of renowned dive guides Image source: WTP Official blog / personal archives In a Japanese diving context as elsewhere, dive guides are expected to offer a good tour of local highlights, actively spotting marine life for the divers (often less inclined to try to find stuff on their own) but also to ID marine life in real time, as we will see, engaging in active, entertaining underwater communication by writing on a slate, and also to lead comprehensive log-book sessions after diving. Dive professionals’ passion for diving also blends nicely with a sense of local pride, which is something that you’ll encounter quite frequently in Japan – people are proud of local specificities, whether natural or man-made, and keen to share them with visitors. In this sense, we could say that Japanese dive centres and guides act as true ambassadors of the environment they operate in, and do their best to help visiting divers experience its uniqueness, often with a heart-warming passion and dedication rarely found elsewhere. Customer service expectations are also generally quite high in the Japanese dive-industry. Most dive operations will have some kind of dive blog, usually quite thorough and updated daily. And on the social side, operators and guides are generally excellent hosts, and customers are usually offered the chance to socialise later in the day or in the evening, over drinks and/dinner. A somewhat formalised “closing celebration”, known are uchi-age in Japanese, is also quite commonly offered to guests at the end of a diving session -especially multiple-day ones, and can be expected as a service from most dive operations. One thing is certain: Japan has a great after-dive culture and despite minor challenges, the shared experience of diving in a Japanese context can serve as a gateway to a more intimate Japan than what most non-diving tourists typically encounter... Charisma-guides Ad for a trip led by Kaorita-san, famous "charisma guide", primarily based in the Maldives Screenshot source: Divenavi Facebook post In the Japanese context, experienced guides, who have been around for a long time or pioneered a diving area, are highly regarded and sought-after by guests, and sometimes referred to, in publications, as “charisma-guides”, in other words, acknowledged as charismatic figures of the diving industry. This is somewhat unique. It’s not so much that there are no examples of charismatic dive guides in non-Japanese contexts – dive-guide legends such as Larry Smith immediately come to mind, as do other explorers turned trip leader or operator, divers who pioneered diving in new areas such as Burt Jones and Maurine Shimlock or Edi Frommenwiler, Max Ammer and many others, as do specialists/researchers offering trips or cruises dedicated to specific marine life (such as sharks, whales or manta rays…) Yet there’s something a little different about the Japanese concept, which is often blended with a strong sense of localism, and good-natured pride in being experts and ambassadors of a given area. Another interesting aspect is the existence of an official Japanese dive guides’ association, the Guide-Kai or Japanese Scuba Diving Guide Association, which includes many of Japan’s charismatic and respected guides (most of them dive-shop owners themselves), which is not something common elsewhere. Screenshot of the Dive Kai's English-language homepage - Screenshot source: Guide-kai.com As an example of such cultural specificities, in Japan, you might encounter a Marine Diving magazine article where active dive guides are asked to recommend… other dive guides, while duly mentioning each guide’s “lineage” or filiation, i.e. who they worked for in the past. Another curiosity would the existence of actual rankings of dive professionals. Hierarchy does play an important role in Japanese society, and with it comes a certain fascination for rankings (Edo-period visitor guidebooks already ranked local highlights such as soba noodle shops and more..) While this is something of a commercial gimmick (also found in non-Japanese publications such as PADI’s Undersea Journal’s, or Scuba Diving Magazine's survey-based rankings of diving areas and operators), in Japanese diving publications, rankings extend to slightly more unusual categories, such as: most popular dive guides in Japan most popular Japanese dive guides working abroad most popular diving instructors Screenshot of the Marine Diving 2021 Awards page, Dive Guide category winner for the Okinawa area Screenshot source: Marine Diving 2021 Awards Photography specialists Another important aspect of Japanese-style guiding is underwater photography. Japan is still one of the world’s photography hotspot for both topside and underwater images, and the vast majority of cameras to this day - including the world-leading brands such as Canon, Nikon, Sony, Panasonic or Olympus / OM Digital Solutions - are still produced by Japanese makers. Underwater, Japan is also well placed on the light and strobe market, with brands like Inon, Sea&Sea as well as RGBlue or Fix, and the ubiquitous Olympus TG series has successfully led a small revolution in making macro photography much more accessible. Underwater photo guide services offered by Okunoerabujima's MugaMuga dive center Screenshot source: Mugamuga.com Many Japanese dive guides are also underwater photography specialists. Some are photographers themselves, and guide photographers according to their specific interests and local highlights, while providing technical tips in informal to informal master-classes. Others guides are simply highly experienced with working with photographers, and can of course efficiently spot subjects, but also offer high-level tips for shooting specific animals, covering behavioural aspects and positioning, timing, water conditions and ambient light, and more... The level of photography-specific service offered by guides is rarely found outside specialist macro destinations, where dedicated macro spotter / photographer guides can spot critters but also assist with shooting (snooting for instance), or are actual acclaimed photographers themselves. Underwater slate use in guiding Dive guide, ready to dive - Image source: Diver-online Underwater writing slates are nothing new, yet if there’s one aspect that really stands out and symbolizes the so-called Japanese-style of guiding, it would be the rather systematic use of underwater slates by dive guides, which has developed into what could now be called a distinct cultural tradition. Since the beginning of scuba diving, while the main underwater communication method remains basic and conventional diving hand-signals, slates / written communication has been around as an alternative means of communication, as an easy and rather fool-proof way of efficiently conveying more complex information underwater (with the notable exception of audio coms systems used in commercial diving). Diving instructors will often have agency-provided / self-designed training slates, used as memory backups and to keep track of progress for courses, and underwater slates are also commonly used while conducting research in scientific diving. Guides and fun-divers will often have a small pencil or magnetic slate tucked inside a pocket somewhere, just in case something happens that calls for clear and rapid communication of more complex and unplanned-for ideas. Technical divers, while making use of an extended range of signals (including touch codes for instance) often rely on some form of written medium as a complement to advanced signalling and also as personal memos – having clear, visual check-lists, dive plans, run-times, gas switches is a basic requirement, which makes sense, given the level of exposure, conditions and complexity of the dives undertaken. Underwater slate use in action - Image source: Marineartcenter Something else… the big slate Japanese dive guides almost exclusively use magnetic slates, which can be erased in one swipe, and allowing for more fluid communication, and outside areas with strong currents or rougher conditions, the slates used are generally quite large, since the guide will be showing his writing to all of the divers she or he is guiding. The most commonly used slates are large plastic contraptions, designed for children use, the most commonly used model being a large magnetic slate called Sensei by the toy-brand Toby, very sturdy and with an easily recognisable design. Recently smaller magnetic slate models, including purposely designed slates, are also gaining in popularity. The Toby Sensei slate, very commonly used by guides underwater Image sources: diveoneroad.com / oceana.ne.jp / facebook.com/sora-iro / sotoasobi.net / oceana.ne.jp In the average recreational diving context, outside of teaching scenarios, slate use will usually be limited to “emergency” communications, as a back-up or extension of hand signals, which are accepted as the primary mode of underwater communication. However, this is often a little different in Japanese guided diving, where underwater slate mirrors a specific approach to guiding and underwater interactions. Broadly speaking, the dive-guide is expected to communicate actively during the dive, in writing, with the divers she or he is guiding. From personal discussions with operators and guides themselves, this is justified by safety considerations (which is debatable), but also primarily as a form of underwater customer service. Active underwater slate use / communication by the dive guide is perceived as offering guided divers a superior - and now standard and expected - experience during the dive. In a guided situation, hand-signal use seems somewhat less common in Japan than elsewhere, where written communication is now becoming the norm. All divers learn fundamental diving hand signals during their training, but Japanese guides will often – if conditions allow - write things down, including full sentences covering basic dive leading indications in situations where non-Japanese guides would use scuba diving’s universal hand signals. It is not rare to see a guide write indications that would normally be conveyed by a couple of hands signals, sometimes complete sentences such as “Let’s end the dive now, and go to the safety stop”, which will be written on the slate, and shown to all the divers in the group. Leading the dive... in writing The other main purpose of the big slate use is (Japanese-style) fish identification. This is not only found in Japan – Indonesian guides in Lembeh and elsewhere also carry slates, and can write, for reference, both the common and Latin scientific name of the rare critters have spotted while photographers shoot away – an approach this Lembeh Resort post explains quite well. And let’s face it, slates are indeed great for fish ID, as there’s only so much you can do with fish hand-signals, which are not standardized and mostly suitable for basic fish ID’ing / communication purposes, and slates allow guides to share a lot more information. Systematic underwater slate use is not only the norm when guiding in Japan, it is also a necessity, because Japanese divers, on the other hand, rarely learn fish ID sign – and why should they, since guides use magnetic slates to give the Japanese name (which, by convention, is always written in katakana script) of species encountered. “It’s going to lay its eggs in the cracks of the rock...“ - Image source: personal archives And beyond actual dive leading indications and fish ID, there’s all the rest… It’s undeniable, having a slate underwater opens up a whole world of underwater possibilities… Small jokes, comments or even anecdotes, and everything a guide is now able to tell guests underwater but couldn’t be without a slate (which does beg the question, should you?)… Over the years, we’ve seen pretty amazing things written on our Japanese colleagues’ slates, ranging from comment such as “this fish looks delicious!” , “the current is a little tiring, don’t you think?” “I’ve never seen so many here!” , "It’s super cute” or even “Manta poop. (Pink)” (which does make you smile when you happen upon this at 6 am, on a slate your boss left lying around…), along with riddles, advice on camera angles, comments... Some guides will even draw underwater! As an example of underwater slate communication, the three slates above read: "Super cute! Bluestriped fangblennies always have a smile on their face ^o^" - Source: oceana.ne.jp "Divers are being swept away by the current" - Image source: personal archives "It’s super warm – it’s like being in a bath!" - Image source: sunslog.blog42.fc2.com Thanks to the magnetic slate, Japanese dive guides can communicate (even politely) and share knowledge directly underwater rather than after surfacing, and also generally entertain guests underwater. This type underwater customer service is becoming part of the job, along with safety and orientation. On a slightly critical note, one could say that this type of approach, when pushed to the extreme, profoundly changes the approach to a dive, which tends to become a more passive experience, and reinforces reliance on the dive guide, which is not ideal for safety. Overall, underwater slate-use is all about communication, and in Japan, this takes place at different level from what is encountered and expected in guided diving elsewhere in the world. This decision to favour the use of underwater slates (which mostly came from Honshu’s Izu Peninsula, an area combining forgiving diving conditions and a wide range of endemic or rare critters) and the type of extended verbal underwater communication they allow is probably the key factors behind the development of a so-called Japanese-style of guiding and, ultimately, of diving. Unfortunately, non-Japanese-speaking guests will rarely get to experience the big slate use as such, unless diving in a mixed Japanese/non-Japanese group led by a Japanese guide. This is not seen as useful or necessary for non-Japanese style divers (which are happy with seeing octopus and moray eels, as a slightly contemptuous - yet often repeated and sometimes printed - comment goes...). And interestingly enough, many Japanese guides seem quite happy to do away with the big slate whenever they’re not guiding Japanese divers… “Manta poop (pink)“ - Image source: personal archives REFERENCES Japanese diving publications and online resources In the world of print, Marine Diving is, by far, the largest, most influential and oldest diving publication in Japan. Its network includes a main monthly magazine publication, which is now over half a century old, special guidebooks and also a women-oriented dive publication, LaScuba, “a travel magazine for women in love with the ocean and the islands”… Marine Diving also organises one of Japan’s biggest dive expos, the Marine Diving Fair. Covers of Marine Diving's 50th anniversary edition and of a LaScuba magazine Japan’s other major publication is the more recent (first edition dates back to 1980), and slightly more lifestyle-focused Diver Magazine and Diver Online. Oceana is currently one of the most active Japanese-language blogging / info platforms on diving related activities and the sea is covering diving of course, but also the “blue economy”, environmental issues and many more. English-language resources For English-language information, we would strongly recommend the Japan National Tourism Association (JNTO)’s JAPAN DIVING website, a fantastic and official resource aimed at promoting diving in Japan with a very extensive guide, as well as the NPO Japan Diving Experience’s Dive In Japan’s website, one of the most extensive references on Japanese diving, and offering support to help non Japanese-speakers organise dive trips in Japan. For a slightly different approach, we recommend our own non-profit reference site, Bluejapan.org, which also offers many other links to English-language and Japanese resources on this reference page. Lost in translation? Image source: noris-okayama.jp Japanese photographers and videographers While this is a broad generalisation - as there are plenty of active photographers and personal styles in Japan - it's hard to avoid noticing that to be something of a budding Japanese aesthetic in underwater photography, especially with the use of vivid colours, vibrant close-ups and blurring (bokeh was born in Japan after all…), almost a form of underwater expressionism or abstraction... That said, a similar photographic trend is perhaps also catching-on worlwide, as illustrated by the growing use of motion blur techniques and coloured filters, for instance. Image source: amazon.co.jp sample page for Sunday Morning – A Day-Off With Nudibranches, by Yasuaki Kagii Some examples of publications by well-known Japanese underwater photographers: 辺野古ー海と森がつなぐ命 by Takuya Nakamura 美ら海 きらめく by Ikuo Nakamura unknown (未知の海) – 不思議の国の海 – 夢色の海 and 海中散歩 by Yasuaki Kagii Here is a short and non-exhaustive list of active Japanese professional photographers and videographers (in alphabetical order): Hideki ABE official site Kazushige HORIGUCHI official site Kyu HURUMI official site / Youtube channel Yasuaki KAGII official site Keigo KAWAMURA official site Sachi MURAI official site Ikuo NAKAMURA official site Takuya NAKAMURA official site Takaji OCHI official site Tamaki OZAKI official site Kirin SEKITO official site / Youtube channel Yuta SHIGENO official site /Youtube channel Jun SHIMIZU official site Hiroyuki TOMURA official site In addition, Nauticam also has a dedicated crew of Japanese ambassadors active the domestic market. Edo Period artist’s rendition of hammerhead sharks - Image source: dl.ndl.go.jp4 points
 -
3 points
 Please note: a further update to the firmware files was released on 31 July. Pro Max firmware is now v2.17 - the version from the previous day was 2.15. Retra have announced updates to firmware on a number of their strobes. Pro Max II to v3.1 Pro Max to v2.17 Prime+ to v2.4 Pure to v2.4 The updates include bug fixes and performance improvements. Full details are set out in the usual App Store update pages.3 points
 -
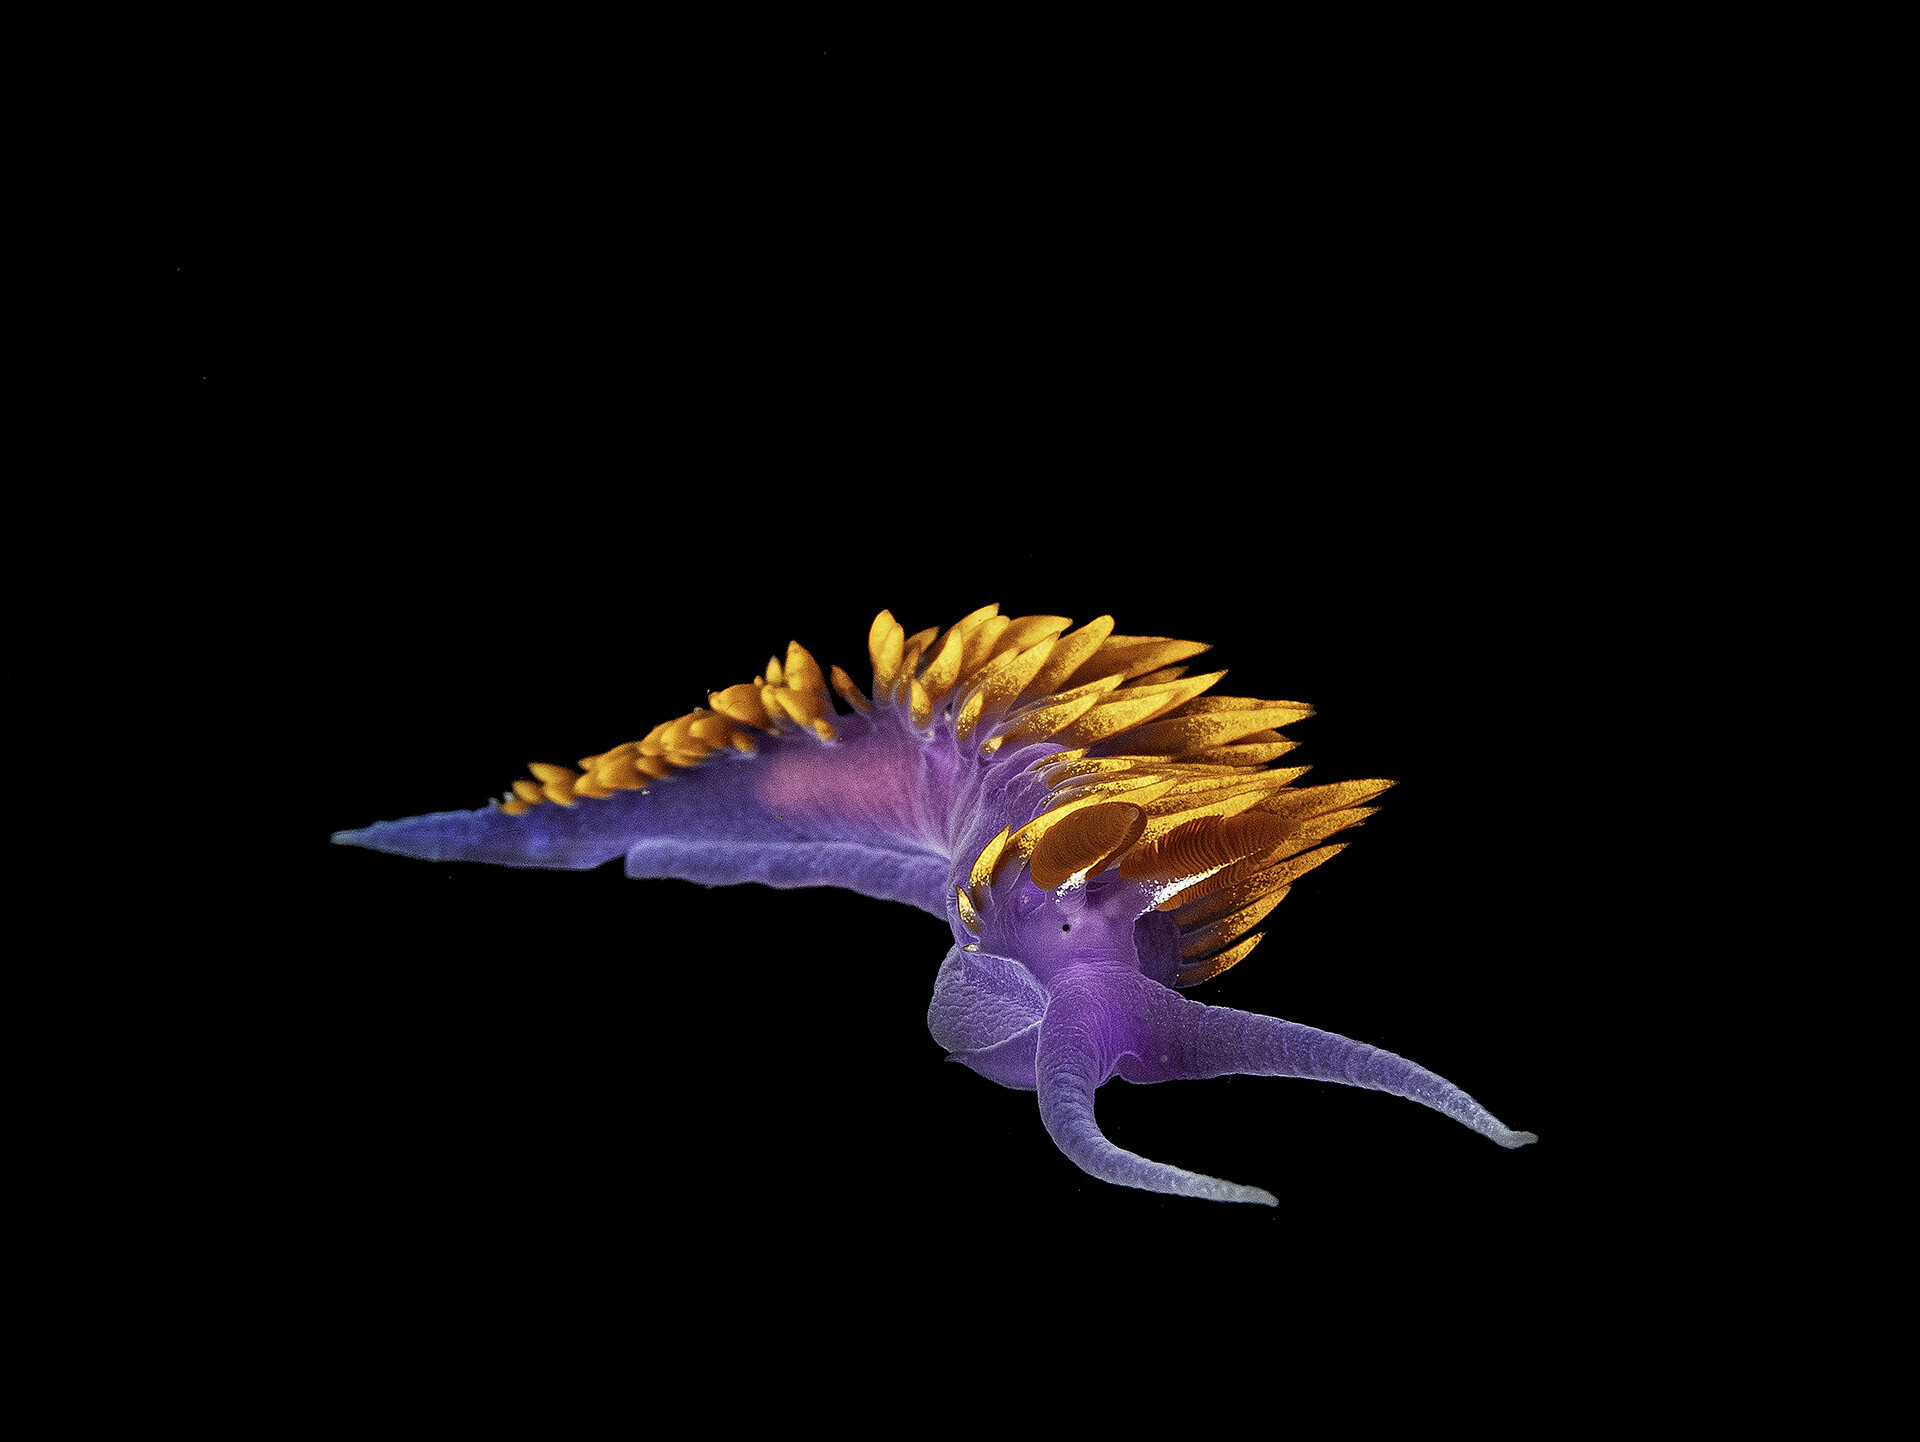 A few months ago in November, Scubalamp showed a new "small strobe". I like small strobes and wanted one, but they have never appeared on the Scubalamp website. However there is a Fotocore GTM (the same ones in the Scubalamp posts that are available. I bought two of them, and last Saturday, I got to try them out here in Los Angeles. The strobe is a bit larger than the AOI RC strobes, and a bit smaller than the YS D3 Duo. The strobe is machined aluminum and appears to be very solidly built if a bit heavy (815 g without the 2 x 18650 batteries). The strobe has 7 power levels that are shown on a nice little LED screen on the back. The key advantage to the GTM is that it has beautiful light since it uses a circular flashtube. One peculiarity of the strobe is that it uses only flattop 18650 batteries that are both hard to find and expensive. I have boxes of 18650 button tops, but no joy in these strobes. To test them out, we went out diving to our local favorite spot off of Palos Verdes not far from LAX. I was shooting an OM-1 camera in an AOI housing with the 2 GTM strobes an a Leica/Panasonic 45 mm macro lens. The AOI has a built in LED trigger that never missed a shot with the strobes, I was using home-made fiber cables using the 613 core fibers. The Balonophyllia is a solitary stony cup coral, its main claim to fame is that in the colder months (it is always cold at PV, typically 50F, 10C) it can in fact sequester dissolved organic carbon from the seawater directly. Hopefully it can teach its warm water cousins the same trick. If California had a state nudibranchs it would likely be the Spanish Shawl These guy are everywhere and are quite beautiful. Interestingly the orange/blue/red and purple colors are all from the same molecule but with different arrangements of some elements. Black eye gobies are always curious, coming by to see what you are doing and smiling at you Two similar nudies are Porters and MacFarland; you tell them apart by the number of stripes. Porters has 2 syllables and 2 stripes, MacFarland has three of each. And finally there are clowns. Overall, I am very pleased with the performance of the GTM strobes. I didn't have a chance to see how they would be for wide angle (mostly the visibility was 2 meters or so) but at least in the studio they seem as powerful as the YSD3. If you are looking for strobes for macro shooting with some occasional wide angle take a look at these. Bill3 points
 -
3 points
 https://xray-mag.com/magazines/134 https://xray-mag.com/magazines/1343 points
 -
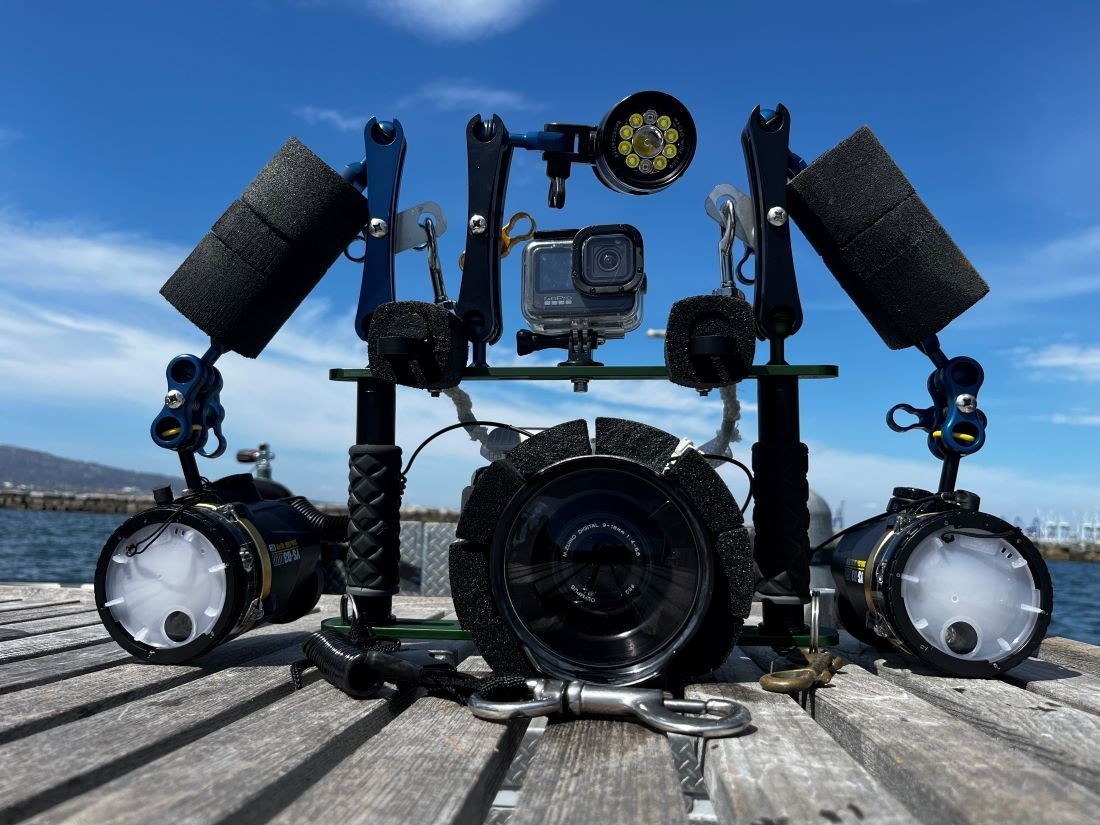 Like most things, some attention to maintenance is usually a good idea. Underwater camera and cinematography accessories are no different, especially with the use and abuse most of it gets in unforgiving environments. Naturally, the better something is taken care of, the longer it will last, and even though Ultralight Camera Solutions products are virtually indestructible, treating them with respect will keep them in good working order. For the underwater photographer, after every dive, the best thing to do is thoroughly rinse everything in freshwater, inspect and service it if needed so it is ready to go when needed. For most of us, it's easy to forget and overlook these things that will bite us in the butt later, especially when we decide at the last minute to go diving. Being proactive is always better than being reactive. To learn more about caring for and maintaining your underwater photography accessories, we have put together some information and videos that you can view at the link.3 points
 -
3 points
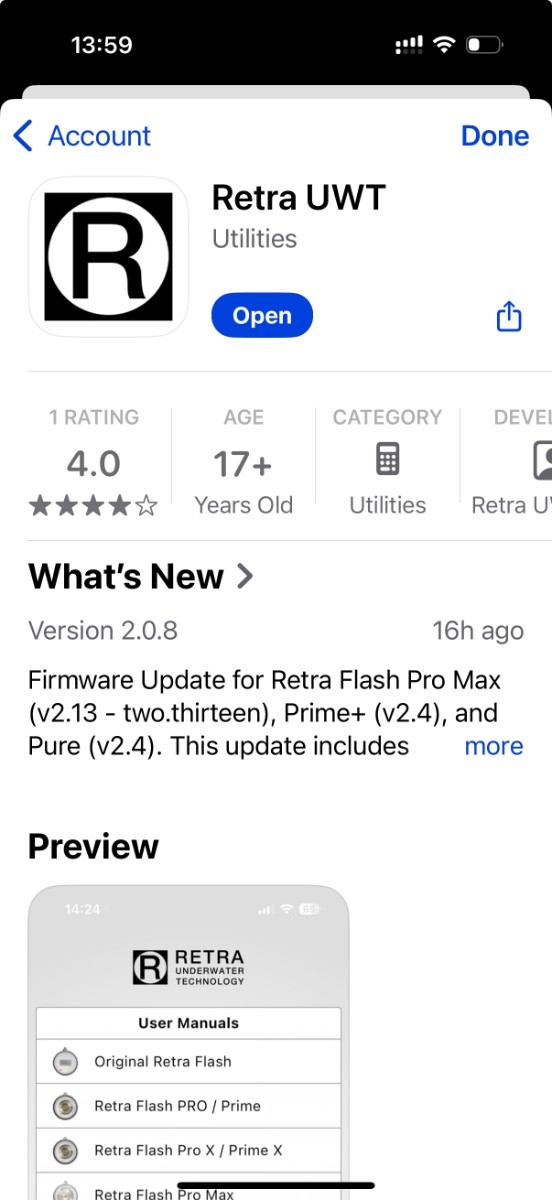 Retra have announced a firmware update for the Retra Flash Pro Max (to v2.13), Prime+ (to v2.4) and Pure (to v2.4). The update includes bug fixes and a number of performance improvements. The update is available through the usual app download systems.3 points
 -
3 points
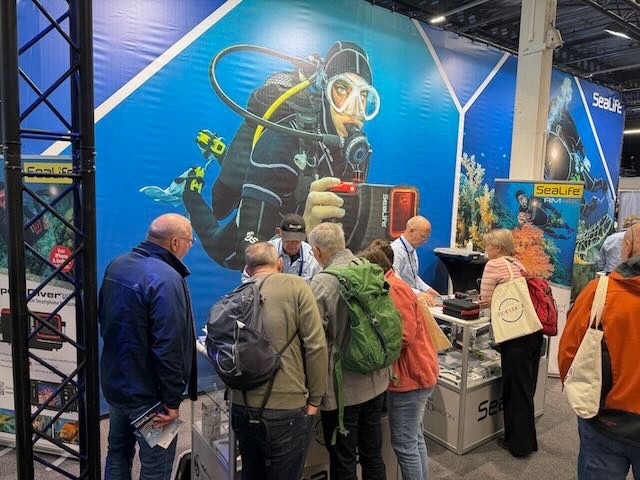 The Dutch dive show, Duikvaker, was held in Houten on 1-2 February. The German boat show which includes diving, Boot, is massive in comparison, but Duikvaker being purely diving is, as a result, very manageable. Many of the dive companies who exhibited at Boot were at Duikvaker so a large array of equipment was there both from distributors and dealers to poke, prod, try on and lust over. I was very tempted by the heated vests from Venture Heat! PADI ran its annual Member Forum and explained that they had increased their commitment to Duikvaker and intended to continue with that. A good number of photographic equipment manufacturers, distributors and dealers attended including Sea and Sea, Seacam, Anchor Dive Lights, Onderwaterhuis and SeaLife. Sorry, still no sign of that underwater unicorn, the Inon Z-xxx If Houten, which is just south of Utrecht, is easier for you to reach than Dusseldorf, Duikvaker is worth a look for future years. More information about the show is here: https://www.duikvaker.nl/en/3 points
 -
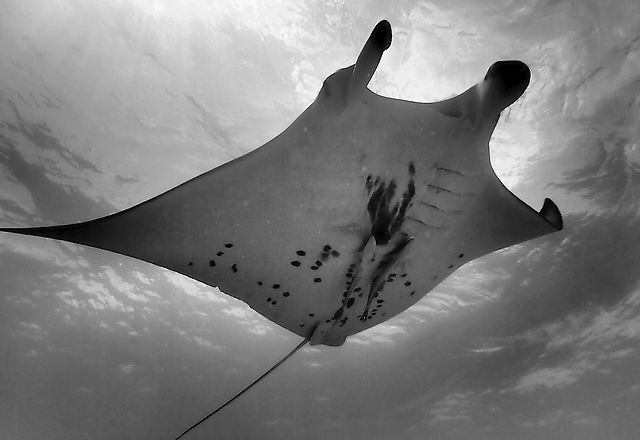 The San Diego Undersea Film Festival has released the screening schedule of films in competition for 2024. The screenings will be held at Qualcomm Hall (5775 Morehouse Drive) Friday, October 4th (7pm) & Saturday, October 5th (5:30pm) 2024. Moreover, many of the competition videos will be available for viewing online on October 7. https://www.sdufex.com/2024-festival-schedule3 points
 -
3 points
 Issue 140 of the excellent Underwater photography Magazine, UWP, is now available. https://www.uwpmag.com/3 points
 -
 Edition 136 of the excellent UWP Magazine is now available https://www.uwpmag.com/?download=1363 points
 -
3 points
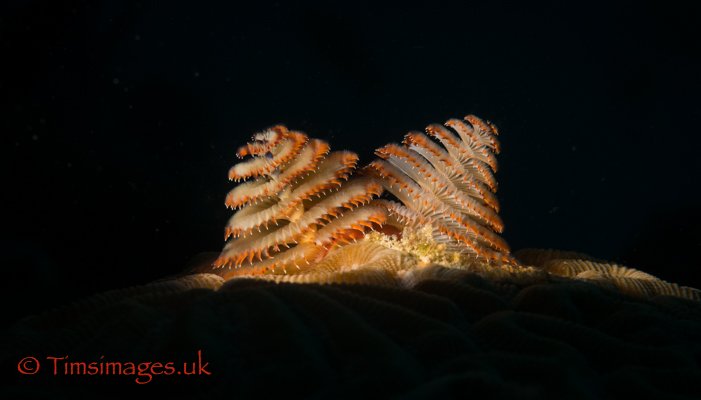 Shooting a Snoot Underwater photography is an absorbing form of photography. For some, it’s a technical issue of capturing fish portraits. For others an art form about capturing the beauty and mystery of the underwater world. Whichever you aim for, it presents unique challenges. Everything moves: you, the water, and the subject. Photography is all about capturing and controlling light. In the underwater world lighting and highlighting the subject is often impacted by either a too-busy background or particulate in the water. One way of tackling these two issues is by using a snoot. What is a Snoot? A snoot is a specialized photographic accessory to control and direct the light. Look upon it as a spotlight. In underwater photography, a snoot is particularly valuable for focusing light on a specific subject and can create dramatic and captivating images. How Does a Snoot Work? A snoot essentially acts as a funnel for light. It fits over a strobe or flash, and, depending on the design, its opening can be adjusted to control the width of the beam of light emitted. By narrowing the beam, a snoot allows you to highlight specific areas or subjects in your underwater scene while leaving the surroundings in relative darkness. Sounds simple? Keep reading…… Advantages of Using a Snoot Selective Illumination: one of the primary benefits of using a snoot is the ability to illuminate a subject selectively. This can draw attention to specific details, textures, or creatures in your underwater composition – and avoid a distracting background or elements. In effect it helps create “neutral space” so that the subject is either enhanced by its background – or a distracting background can be made to disappear. Reduced Backscatter: backscatter, caused by suspended particles in the water, is a common issue in underwater photography. By concentrating light with a snoot, you can minimize the spread of light and subsequently reduce backscatter, resulting in clearer and more vibrant images. A snoot makes an ideal companion when photographing in water with poor visibility. Creative Lighting Effects: Snoots enable the photographer to experiment with unique and artistic lighting effects. By controlling the shape and intensity of the light beam, you can create striking shadows, highlights, and even produce silhouettes for a more dramatic visual impact. Down or back lighting with a snoot can produce amazing images. Enhanced Macro Photography: in macro photography, precision and control over lighting are paramount. A snoot is particularly useful for highlighting intricate details in small subjects like nudibranchs, seahorses, or tiny crustaceans. Build Your Own Snoot Because it seems such a simple device, many of us experiment by making a snoot using plumbing piping. Sadly this seldom works and, when it does, tends to be more through good luck than judgment. The main problem derives from the difficulty of ensuring the output from the snoot really is lighting the required area. If your strobe has a focussing light you can try having this switched on and see if the light beam will travel down the home-made snoot and illuminate the subject. If it does, great, but this does not guarantee that when the strobe is fired it will illuminate the same space. Odd though it may seem, the positioning of the strobe tube(s) in relation to the focussing light can have quite an impact on snoot accuracy. Home-made snoots, whilst a fun construction project, can be incredibly frustrating in use. Buying a Snoot When the balance of a homemade snoot tips from being fun to intensely annoying, it could be time to invest in a manufactured one. There are a good few on the market ranging from the simple (about $90), to the complex and expensive (about $500). A current (Oct 2023) Google search reveals a number of options: · 10Bar Snoot · DivePro M10 SuperMacro Snoot Light and MP30 Snoot Light · Inon Snoot Set (possibly the simplest) · Kraken Sports Hydra Optical Snoot · Marelux SOFT (possibly the most sophisticated) · Retra LSD · Reefnet Fibre Optic Snoot · Sea&Sea Snoot Many of them have the means to alter the snoot’s “aperture” – so narrowing the light beam to a smaller and smaller diameter. The Marelux SOFT uses a sophisticated variable aperture system; the Retra LSD uses a simple mask system which slots into the snoot. But the Problem is Not Quite Solved As I set out earlier, the shape and positioning of the strobe flash tubes in relation to the aiming light can result in the two light sources not necessarily illuminating the same area. This can remain the case even with a factory-built snoot. Generally, the best results come from a strobe with a circular flash tube (rather than straight tubes) with the aiming light in the middle. From my own experience, a combination of an Inon Z240 and the Retra LSD had maybe a 20% success rate. Switching to a Retra Pro strobe with its circular flash tube and central aiming light and the LSD had me well into the 90%. Setup If your housing is setup – as most are – with the main controls and shutter release on your right hand, attach the snoot to the strobe on the left ideally with two strobe arms to maximize flexibility. Once in the water and preparing to shoot, slacken off slightly the clamps so that the strobe/snoot can be moved easily with your left hand but is not floppy. A snoot will affect exposure and usually requires more strobe light than perhaps you might expect. The narrower the beam, the more light you need to illuminate the subject. I’d suggest 1-2 stops. If you are getting lots of black images, try boosting the exposure either by increasing the strobe output or by increasing the ISO. Assuming there is little movement in the subject, with my DX-based D500 and a 60mm or 105mm lens I usually shoot at about 1/125, f16 and ISO 200. If that doesn’t work, do check that your strobe/snoot is actually lighting the subject! Tips for Using a Snoot in Underwater Photography Learning to use a snoot takes time and patience – not unusual for any aspect of underwater photography. 1. Practice in Controlled Environments: Before venturing into the open water, spend time experimenting with your snoot in a pool or controlled underwater setting. This will help you become familiar with its operation and understand how it affects your shots. 2. Master Beam Control: Learn how to adjust the snoot's opening to control the size and shape of the light beam. This skill is crucial for achieving the desired lighting effects. 3. Positioning is Key: Proper placement of the snoot relative to your subject is essential. Experiment with different angles and distances to find the optimal position for highlighting your subject. 4. Combine with Other Lighting Techniques: Don't rely solely on the snoot. Combine it with other lighting techniques, such as ambient light, to create dynamic and visually engaging compositions. 5. Be Patient and Persistent: Achieving the perfect shot with a snoot may require time and persistence. Take multiple shots, adjusting the snoot's settings as needed, until you capture the desired result. Finally Incorporating a snoot into your underwater photography toolkit can have a dramatic effect on your images, allowing you to control and manipulate light creatively and with impact. With practice and experimentation, you'll unlock a new realm of artistic possibilities beneath the waves. Happy snooting!3 points